How To Groom Hair And Fur In Houdini 19
With each new version, Houdini‘s procedural techniques for generating geometry and building models become better and better. Houdini 19 with new tools design will definitely make your scene creation process easier and more efficient. In this article, we’ll go through how to groom fur and hair in Houdini 19.
Skin Setup
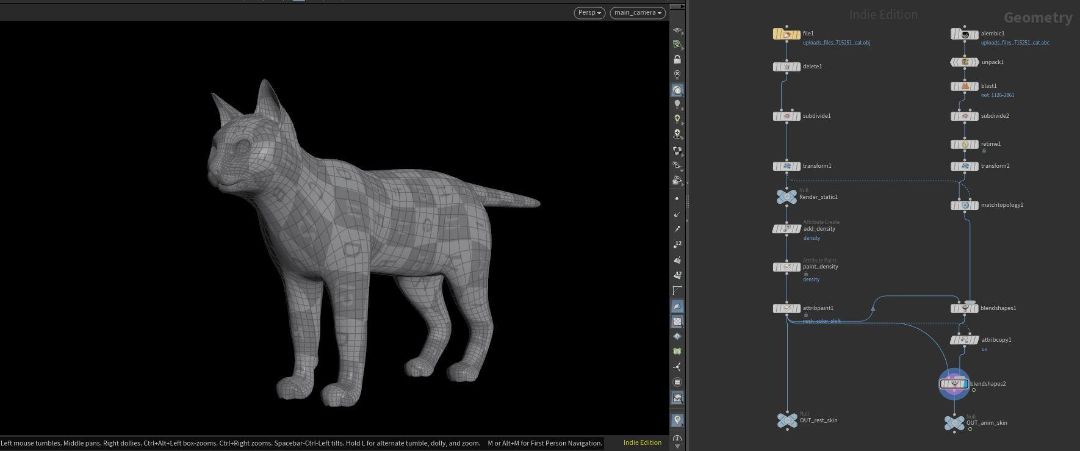
Skin setup is the step to prepare for grooming. Let’s to a look at steps to prepare geometry. Firstly, checking and correcting the scale and orientation of the mesh to match the native Houdini environment and isolating the required parts of the given mesh, as well as the subdivision of the mesh to ensure that enough resolution is provided for the various processes involved in the grooming workflow.
Secondly, building in geometry correctives such as matching the topology to ensure that the point order is the same across the animated and non-animated meshes and operations to transfer attributes such as normals across the two active meshes.
Attribute Painting
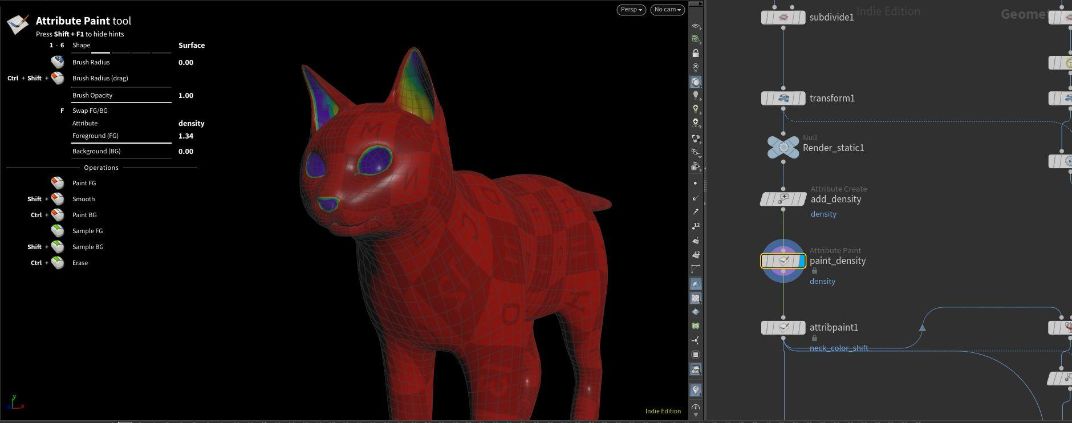
After setting up the skin, we go to Attribute Paint Tool to use, create, and paint attributes that can have an effect on various aspects of the groom. These attribute masks play an important role of the grooming process to keep the system as procedural as possible.
Reference Analysis
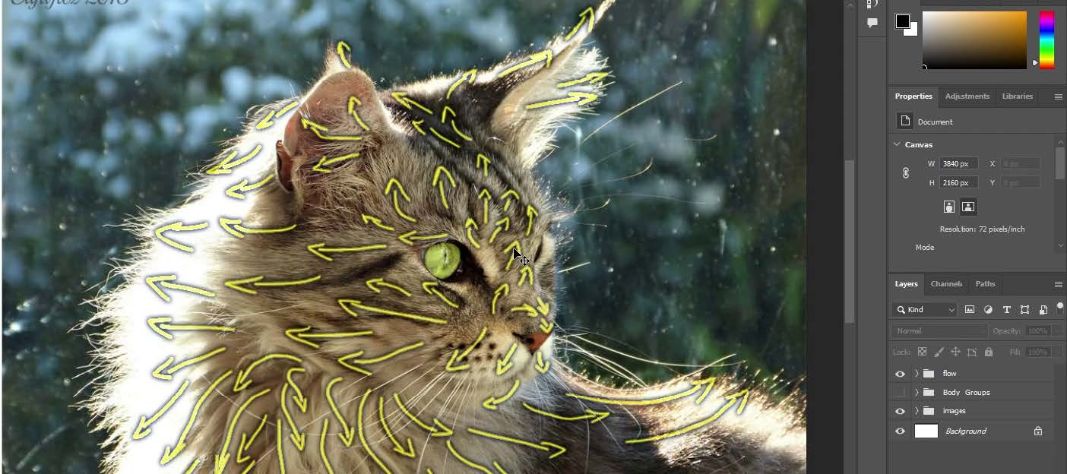
After creating paint attributes, you should analyze flow, clumping structure, and grouping. This will allow for a better informed approach to the grooming procedure, as well as identification of some of the most prevalent elements of a creature groom and successful strategies to apply when attempting to groom them.
Guide Grooming Process
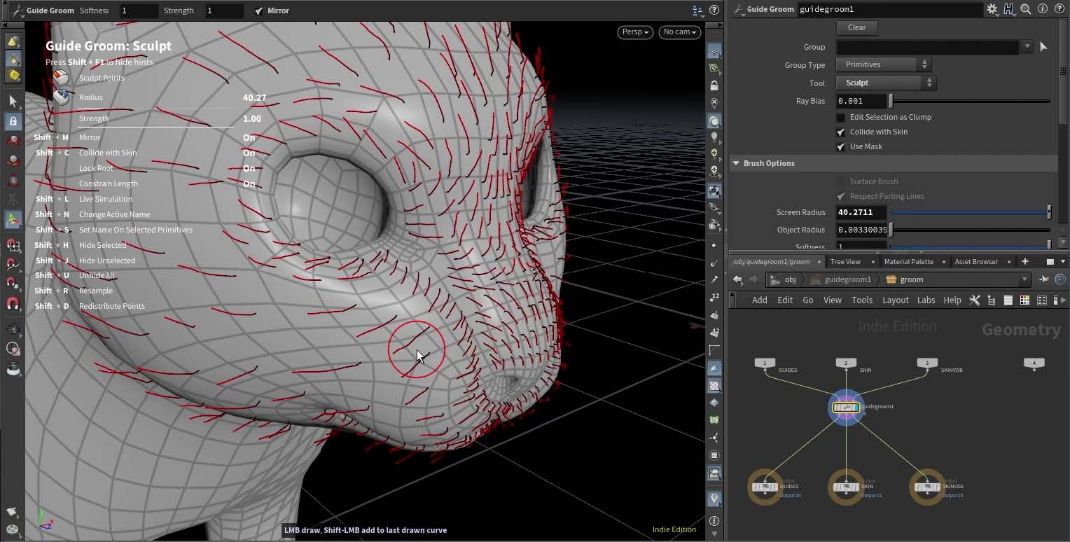
There are three levels of the guide grooming phase. The initial level is viewed as anchors or tentpole guidelines that will support the rest of the structure in the future. They determine the principal flow and direction, as well as the beginning length for the remainder of the groom.
After finishing the first level, you select the Plant tool and change the mode to Single, then start filling in areas of the current groom element that would require more resolution, sculpt and shape this level to get the final profile of the desired groom.
The density of the guides is set at level 3. Place an equal density of guides inside the borders generated in level 2 using the plant tool on scatter or single.
This approach allows you to swiftly and efficiently arrange and groom any creature of character that meets the usual grooming requirements.
Hair Generation
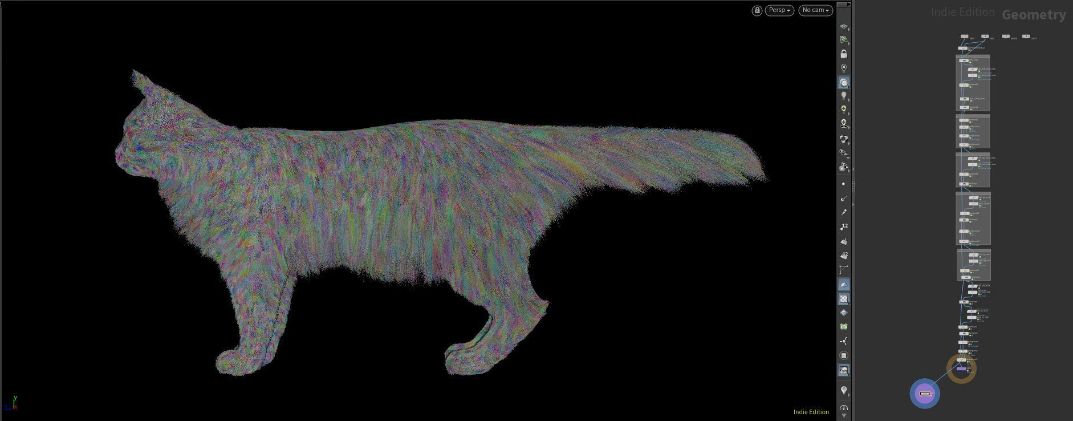
Following the completion of the guide grooming procedure in Houdini 19, we will go through the hair creation part of the grooming workflow. We will break down the HairGen node and go through the many parameters of the node in depth, as well as the techniques of using attributes to impact the various components of hair growth.
We’ll next utilize clumping and different guiding processes to produce a realistic hair groom in which I’ll show how to employ skins attribute overrides as well as how to make curve attribute masks to help with the grooming process.
For the purpose of simplicity, the entire groom will be included in one master hair generator in this example, rather than breaking the system down into groups. However, provide the approaches you may use if you wanted to approach the grooming process in that manner.
Shading and Rendering
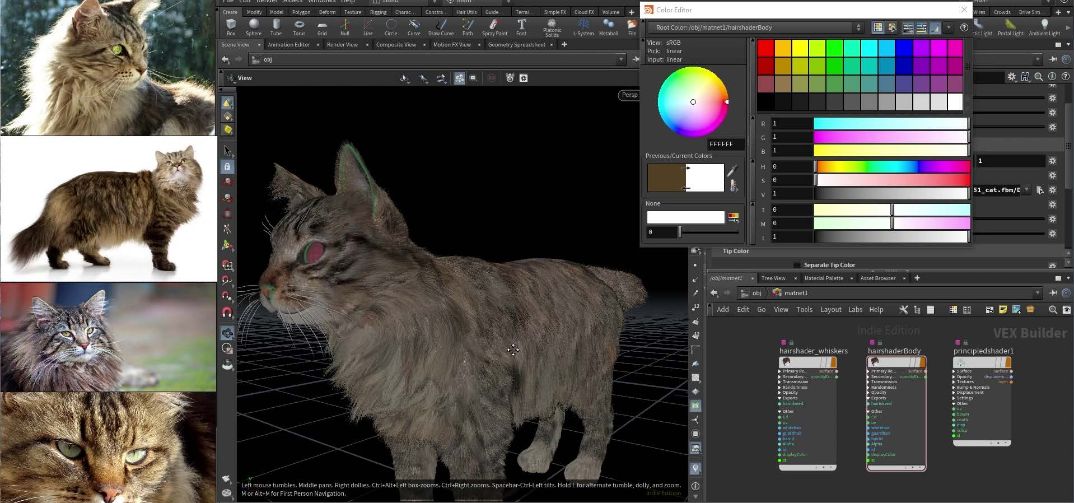
When it comes to shading the character’s fur, we’ll go through the basic hair shader for Houdini 19‘s native render engine mantra in depth.
You should utilize a texture map to drive the color of the fur, as well as how to alter said shading using attribute to the point where, if no texture map is available, you’ll be able to shade the character fully with attribute if necessary.
You also go through the different render parameters to create clean and soft-looking fur in mantra while keeping render times to a minimum.
Deformation and Simulation
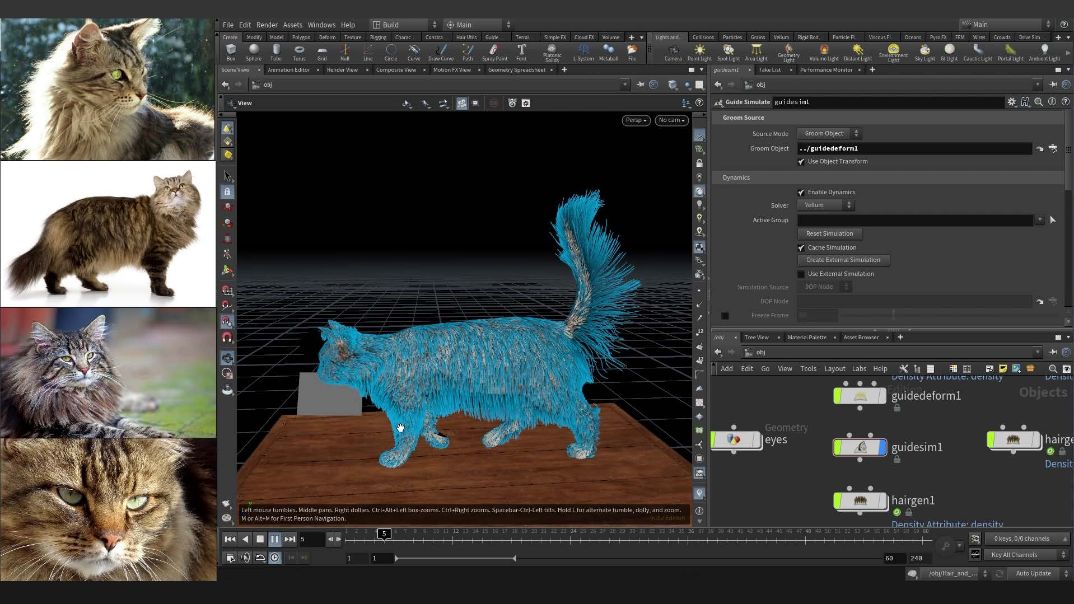
You utilize the Guide Deform and Guide Simulate nodes for deformation and simulation.
For the guide deform, we go through several typical difficulties that can arise from improper mesh preparation, as well as how to troubleshoot and diagnose those issues.
For the guide simulation, we will go through the simulation’s fundamental parameters as well as how to assess and iterate on the outcomes of a conventional vellum simulation.
iRender - The Best Cloud Rendering Service for Houdini
If you’re a fan of Houdini 19 who wants to learn and use the latest features, but your computer configuration is still limited, don’t worry; iRender will provide you with a solution that will completely address your problem. iRender offers a choice of server packages ranging from single GPU to multi GPU RTX 3090, allowing you to pick the best server package for your renderer.


If you’re a fan of Houdini who wants to learn and use the latest features, but your computer configuration is still limited, don’t worry; iRender will provide you with a solution that will completely address your problem. iRender offers a choice of server packages ranging from single GPU to multi GPU RTX 3090, allowing you to pick the best server package for your renderer.
iRender makes rendering enjoyable and quick. A unique feature is that you will connect to the iRender server and utilize it as your own computer, with total control over setup and capacity. Our server supports any applications; you may install the program you need only once, and everything will be kept for future use. If you’re concerned about security, be assured that the safety and security of your data is our first priority. No one, including iRender, will have access to any of your data. The privacy policy of iRender may be found here. To understand more clearly about our servers’ performance with Houdini, you can see the following videos:

iRender is committed to providing you with a rendering experience unlike any other. iRender, in particular, is running a fantastic deal for you: new clients will receive a 20% bonus on their first purchase within 24 hours of enrolling.To learn and enjoy more, please create an account here.
iRender – Happy Rendering!
Source: sidefx.com
Related Posts
The latest creative news from Houdini Cloud Rendering , Octane Cloud Rendering, Redshift Cloud Rendering , Octane Cloud rendering, Cinema 4D Cloud rendering, 3D VFX Plugins & Cloud Rendering.