How to import V-Ray scene in Cinema 4D
V-Ray for Cinema 4D is one of the best rendering plugins with many high-end and industrial-quality features. Chaos, with a long time in the industry, always provides the best for its render engine. In the article, let’s see how to import V-Ray scene in Cinema 4D with iRender, to improve your scene with rendering geometry, lights, cameras, volumetrics, and materials.
3 import types
Native Objects (WIP)
You can import a V-Ray Scene as Native Objects (WIP) only if you import through the VRaySceneImport window. This Import Type imports the scene elements separately and allows each element to be edited individually after import. This is suitable if you are finishing a scene that was started on a different machine or was created on a different V-Ray-supported platform. You can edit individual lights, geometry, materials, and more to complete the scene without needing to re-create everything from scratch.
Black Box Objects
Black box objects are imported completely, but they are closed for editing – the user cannot tweak their contents. Black Box Objects are displayed with the ![]() icon.
icon.
V-Ray Scene Reference
The V-Ray Scene Reference Import Type imports the V-Ray Scene file as a proxy – its components cannot be individually edited, but the proxy can be edited as a whole. This Import Type is more compact and saves processing power. If no further edits need to be made to the scene, we recommend using this method for transferring V-Ray scenes.
You can convert a Scene Reference into a Native Objects (WIP) after importing.
How to import V-Ray scene in Cinema 4D
To import a V-Ray scene in Cinema 4D, you have 5 ways:
Drag-n-drop
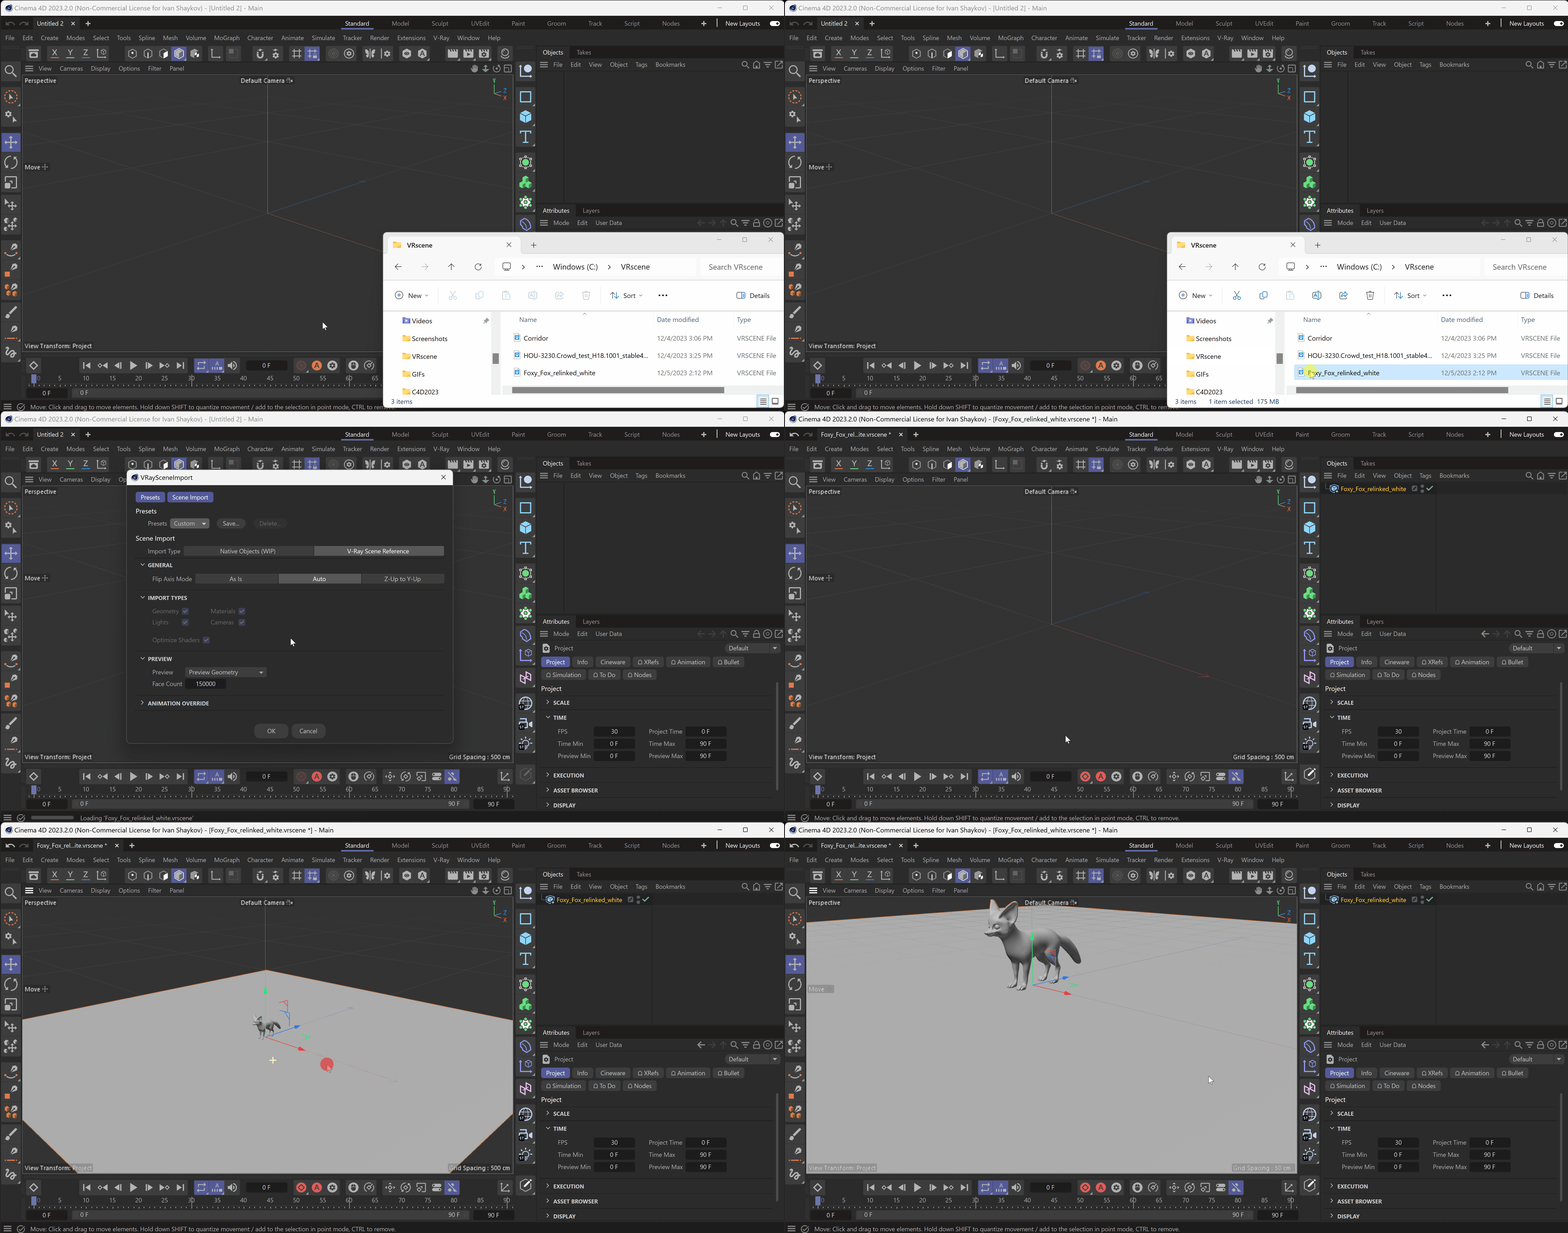
To import a vrscene file, you can use the drag-and-drop functionality.
The VRaySceneImport window will appear and prompt you to choose how to import the file in Cinema 4D.
Click File then Open Project
You can go to File > Open Project and select a .vrscene file. The VRaySceneImport window will appear and prompt you to choose how to import the file in Cinema 4D.
You can also merge a V-Ray Scene into your current scene by loading it from the File > Merge Project option.
V-Ray Toolbar
You can go to the V-Ray menu > Tools > V-Ray Toolbar. The V-Ray Toolbar is a palette that can be docked anywhere in the interface.
Select V-Ray Scene (![]() ) and select a .vrscene file. The file is imported as a V-Ray Scene Reference.
) and select a .vrscene file. The file is imported as a V-Ray Scene Reference.
Through V-Ray menu
You can import a .vrscene file using the V-Ray menu. Select Geometry > V-Ray Scene.
From Attributes, go to the General tab of the V-Ray Scene. From File Path, select the .vrscene file. It loads in the 0,0,0 coordinates in Cinema 4D. The file is imported as a V-Ray Scene Reference.
VRmat material import
If you only want to import the materials from a .vrscene file, you can use the VRmat material or material node to do so. Create a VRmat material or material node and attach your .vrscene file in the Material File field. You can then select a specific material from the file using the Material Name dropdown menu.
How to Export a V-Ray Scene
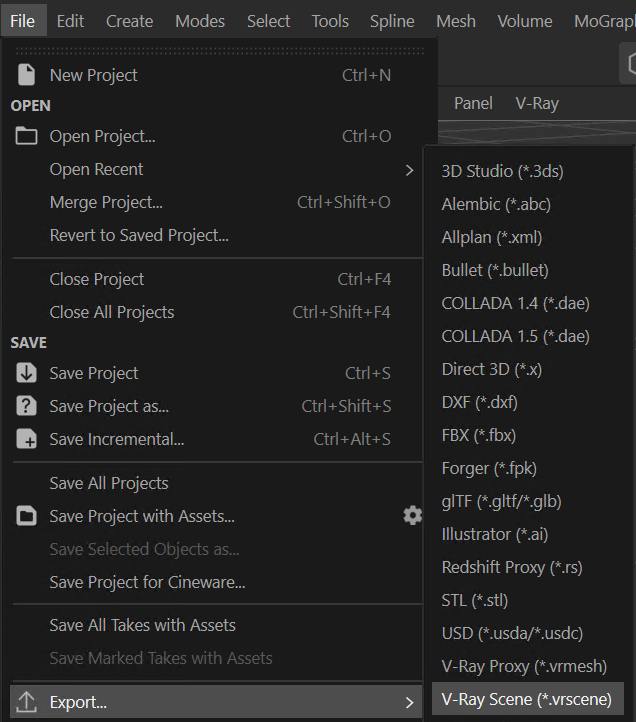
To export a .vrscene file from Cinema 4D, go to File > Export… and select the V-Ray Scene option.
Does iRender support V-Ray with Cinema 4D rendering?
iRender provides you a high-performance and configurable server system for 3D rendering, AI Training, VR & AR, simulation, etc. We believe that design and creative activities are private and personal that only you artists will know what you want with your animation.
You can create a remote machine with pre-installed Cinema 4D, then install V-Ray and start to work with your project like how you always work on your local machine.
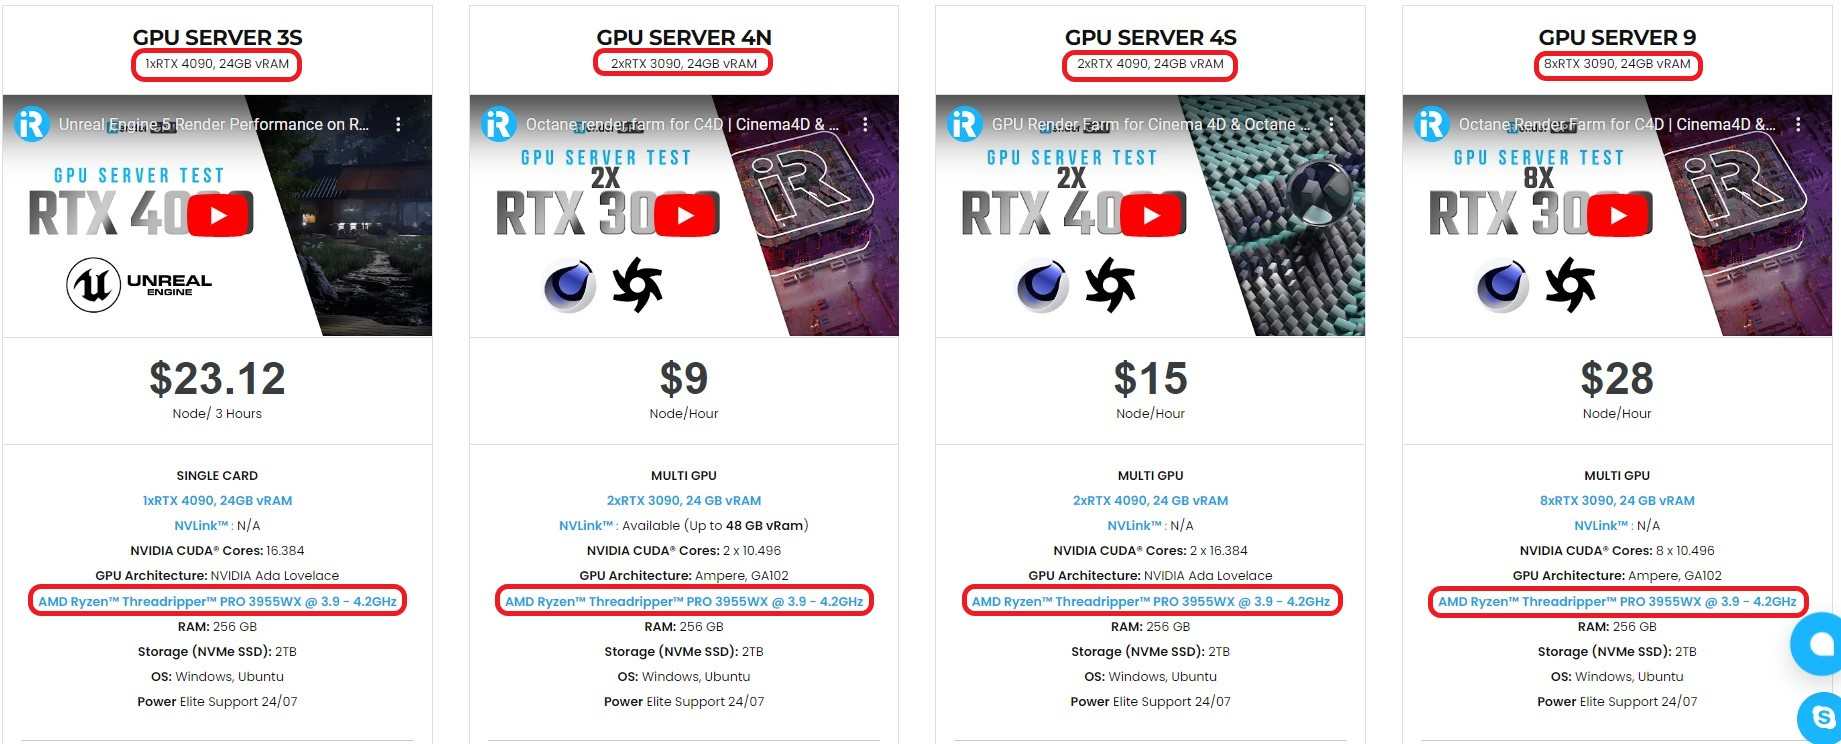
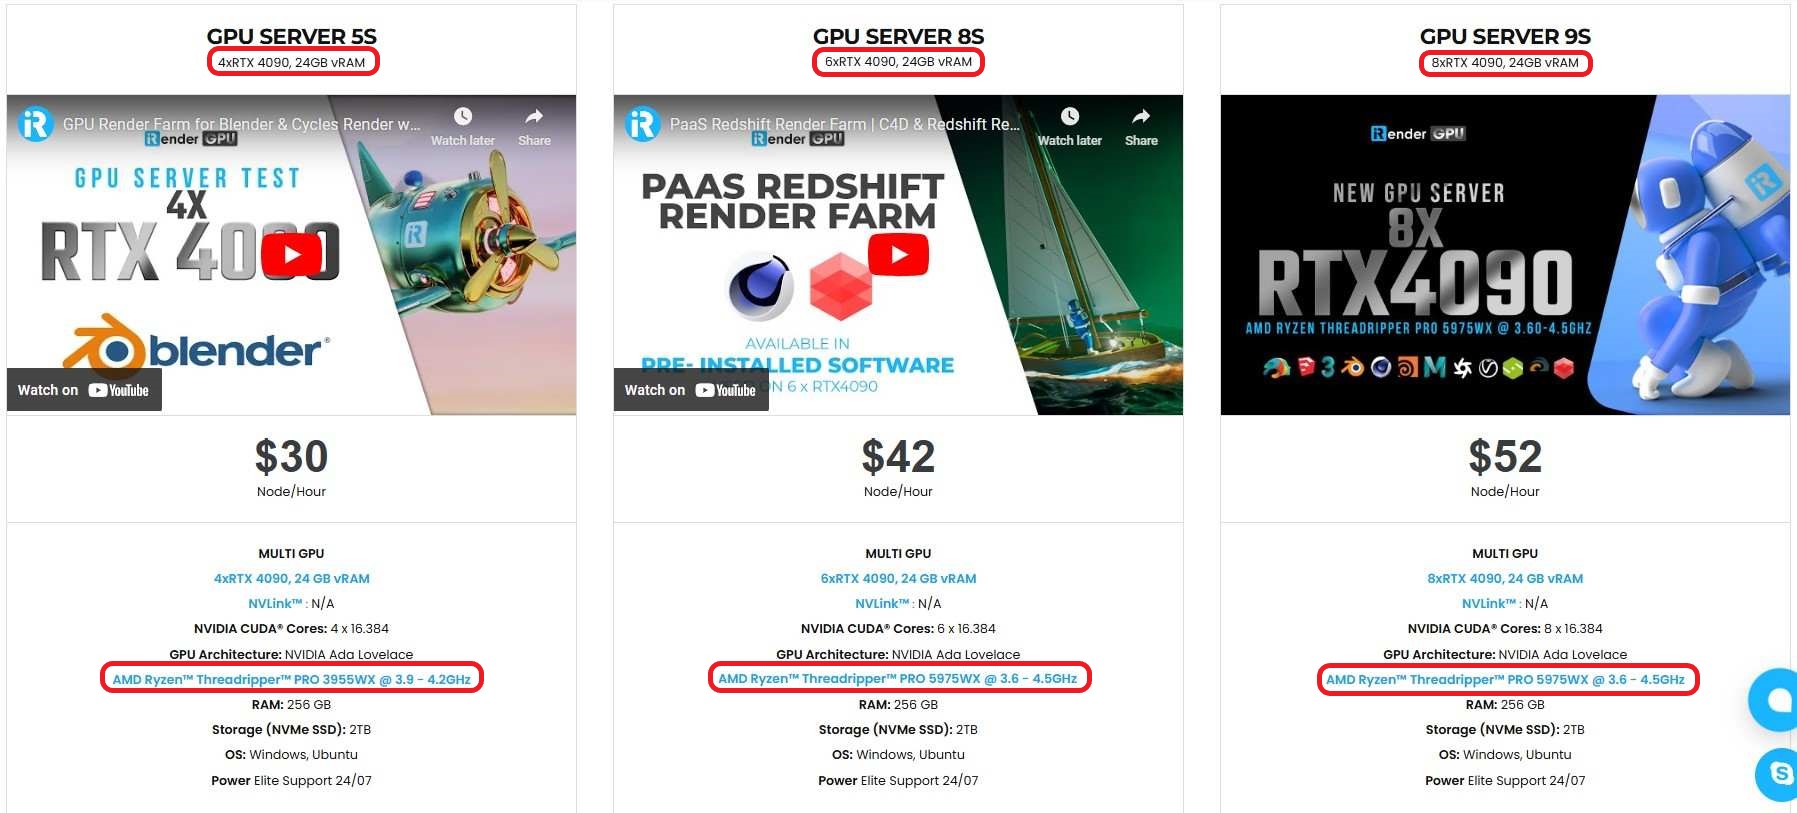
For V-Ray for Cinema 4D, we suggest our multiple RTX4090 and RTX3090.
V-Ray can utilize GPU rendering power, we choose to provide RTX 3090 and RTX 4090. You can refer to this article to see how V-Ray performs on these graphics card, especially RTX 4090 being the fastest when it comes to V-Ray rendering.
iRender powerful RTX4090 for V-Ray rendering
Top GPU for Redshift, Octane and V-Ray in 2023
Compare RTX 4090 vs RTX 6000 Ada vs RTX A6000 for content creation
If you have more GPUs, the render time will reduce more. However, don’t expect a perfectly linear reduction.
Let’s see our test with Cinema 4D and V-Ray on our package 6 x RT4090s:
Not only those powerful configurations, iRender also provides you more services. Free transferring tool named iRender drive for macOS or Linux users. For Windows users, we recommend using our all-in-one application iRender GPU to work, and you don’t need to come to our website. Our price is flexible with hourly rental which has a pay-as-you-go basis, daily/ weekly/ monthly subscription with discount from 10-20%. Plus, you have 24/7 support service via livechat with real humans who will support you whenever you encounter an issue.
Especially, if you use Cinema 4D, now you can access our remote servers without having to install the software. We have an option to choose pre-installed Cinema 4D, and provide you one license free. For V-Ray, kindly install and use your own license.
Register an account today to experience our service and enjoy a very big promotion 100% bonus for new user. Or contact us via WhatsApp: (+84) 916806116 for advice and support.
Thank you & Happy Rendering!
Source and images: chaos.com
Related Posts
The latest creative news from Cinema 4D Cloud Rendering , V-Ray Cloud Rendering


