
How to install OctaneRender for Maya
OctaneRender and Maya are two popular tools for 3D animation, advertising, etc. We have helped you to figure out which hardware you should have to run them. In this article, let’s find out how to install OctaneRender for Maya. You can follow this instruction on your personal computer, or on our remote server. Let’s get started.
1. Requirements
You will need to prepare some of the following:
-
-
-
-
- Octane Standalone Edition: you will need V3 license for the Standalone Edition. Please purchase it or upgrade it if you have one already.
- OctaneRender for Maya plugin
- Maya application
- Hardware– NVIDIA graphics card that supports CUDA 10.1 with the latest drivers. You can find the download links for Windows here.
-
-
-
2. Installation
Step 1) You download OctaneRender Standalone Edition and install it on your PC or on our remote server. If your PC has it activated, you can skip this step.
Note: You should make sure that your PC or our remote server does not run the Maya host application in the background while you are installing the plugin.
Step 2) You start to download the software from the Latest Additions to OctaneRender article and run the plugin installer.
Note: You will need to be admin to do that.
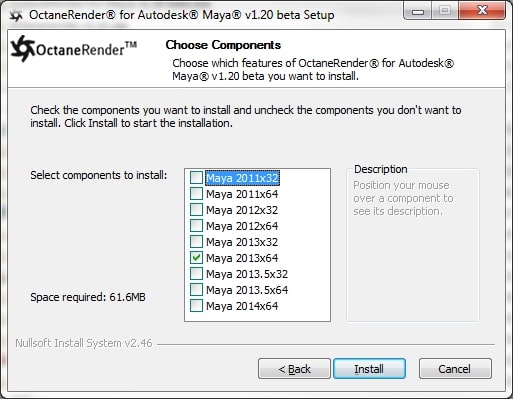
Step 3) Now it will prompt you to select the appropriate Maya version to install in your PC or our remote server.
Now you set the plugin into Maya
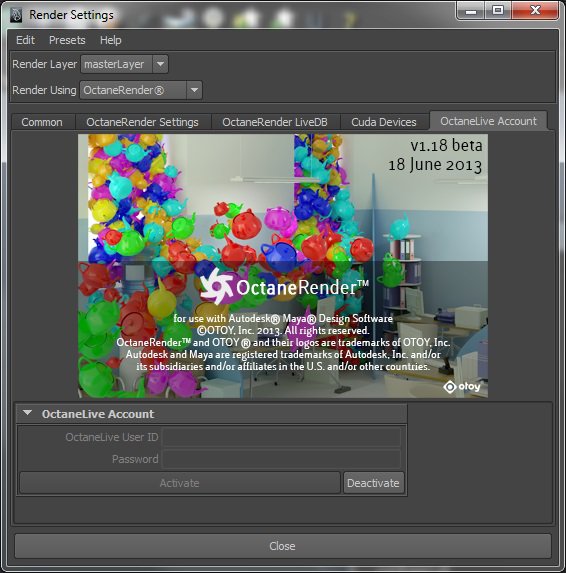
Step 4) Open Maya and it will prompt you to enter your OctaneRender account and Password if you haven’t activated your standalone license.
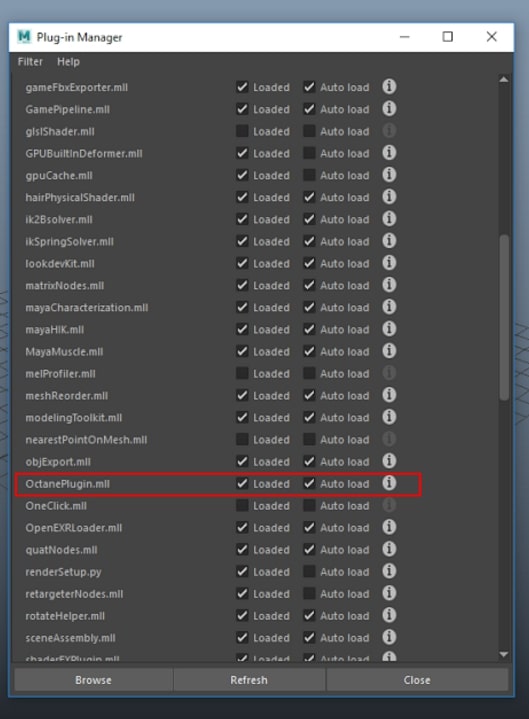
Step 5) To open the Plug-in Manager and check the auto load option, you can do to the Windows Tab -> Settings/Preferences -> Plugin Manager. You can select which plug-in you want to load and load automatically each time you open Maya there.
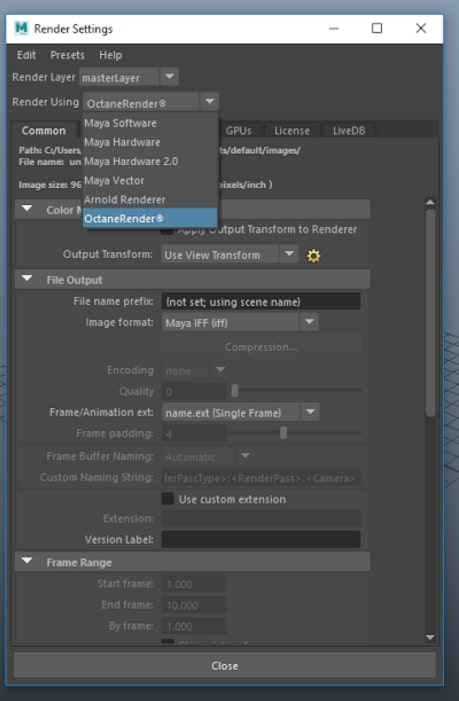
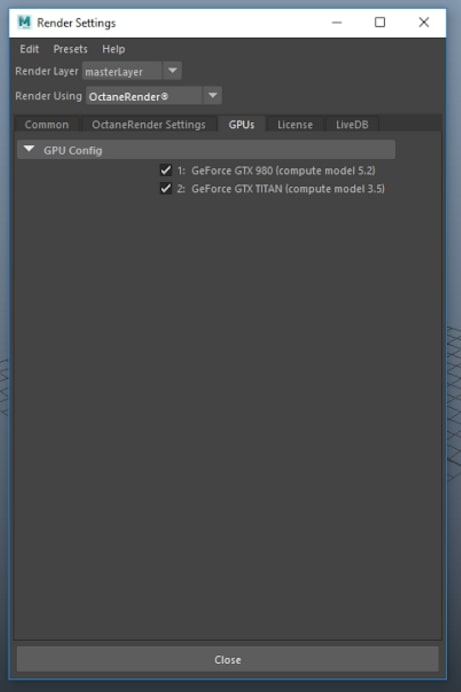
Step 6) Now you should go back to Window tab and select Rendering Editors -> Render Settings to select OctaneRender.
If you use more than one GPU on your PC (or on our remote server which is multi-GPUs), you can select which one to use for your render. To do this, please select Render Setting > GPUs tab like below and tick which one you will be using for the render.
Now you have succeeded in installing the OctaneRender for Maya plugin and can start using it.
3. Start your Octane and Maya project now with iRender
Octane is said to be the first and fastest unbiased GPU render engine. Combined with Maya, they become a couple which have been used a lot in 3D animation. If you use Maya and Octane and want to deliver quality and speed, don’t hesitate to check out iRender – the best cloud rendering for Maya and Octane, where you can use the fastest RTX3090 card.
You can refer to this article (Faster rendering with Octane and Maya on iRender) to know how our servers are compatible with Octane and Maya. We have many servers from single to multiple GPUs to serve your needs.
Moreover, iRender has other beneficial features. We have NVlink available if you want to test (contact for more details), and free transferring tool GPUhub sync. You can also work with our Octane license if becoming our prime customer. Let’s see some of iRender’s tests with Octane:


Related Posts
The latest creative news from Maya Cloud Rendering, Octane Cloud Rendering, V-Ray Cloud Rendering , 3D VFX Plugins & Cloud Rendering.


