How to set up automotive studio lighting in Unreal Engine (Part 2)
In the previous post, we have learned about Exterior Rendering in the automotive studio lighting in Unreal Engine. We have gained how to set up levels, set up lighting, and other helpful tips.
As promised, today we will explore the rest, Interior Lights.
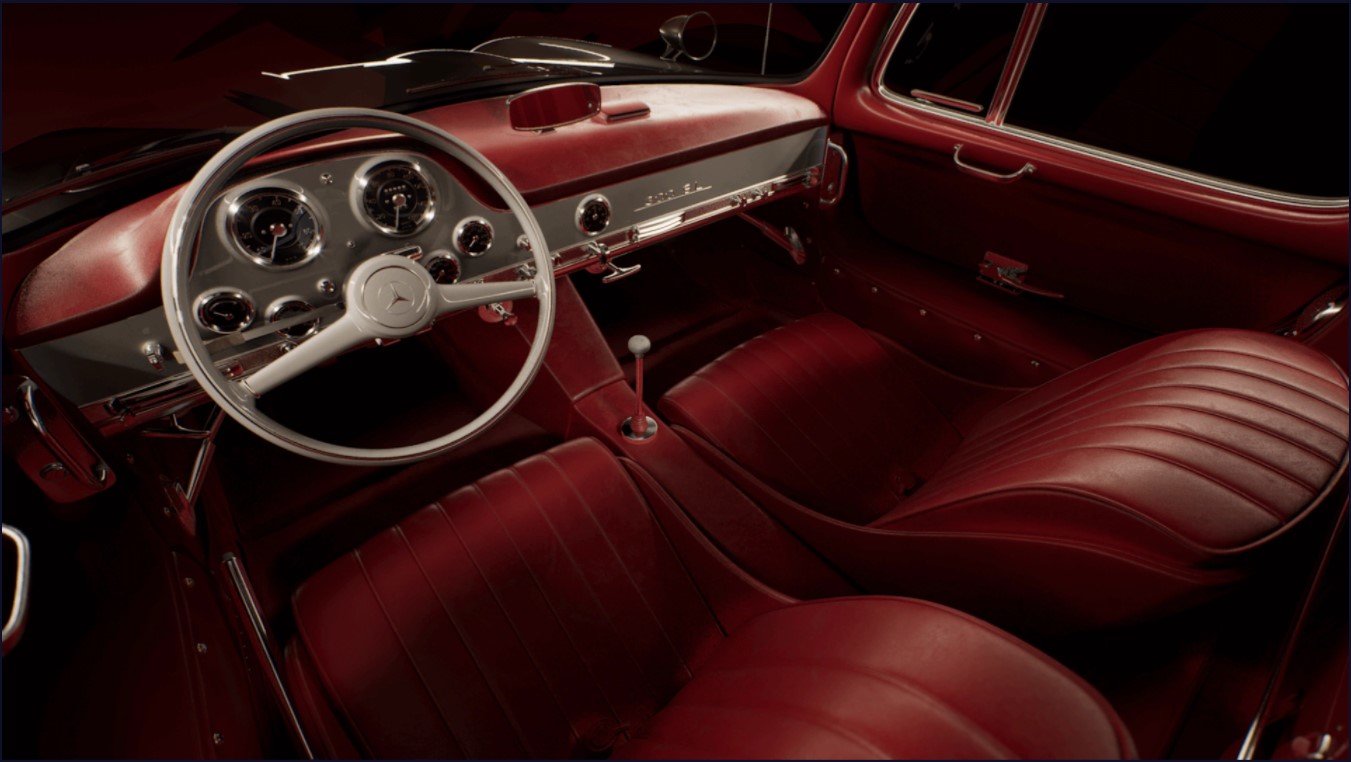
Interior lights
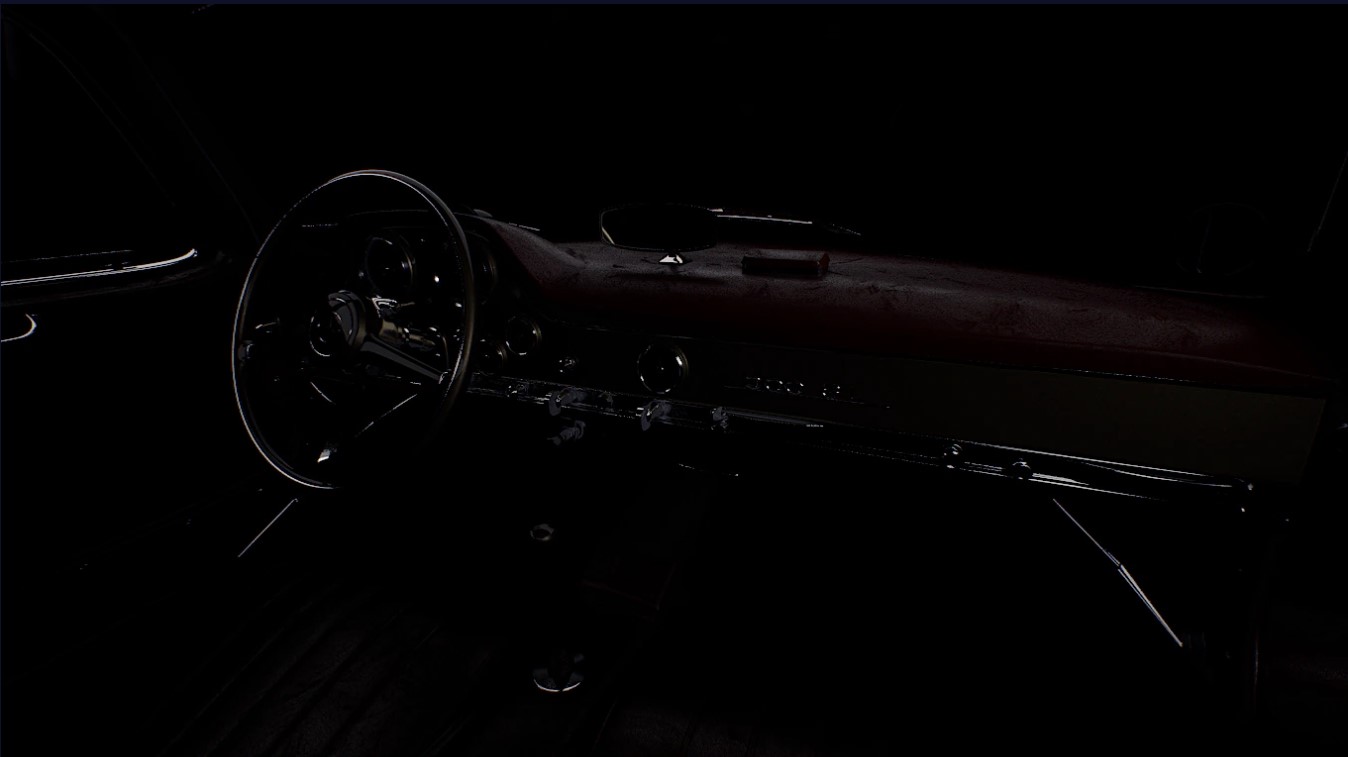
Check for leaks in the exterior lighting
As far as possible, make sure the car’s exterior lighting does not disrupt the interior, particularly the console regions. Interior lights, in particular, brighten the seats.
To determine if the external lights affect the interior, turn off the BP lights. If they do, lower the brightness of the outdoor lights or use the light channel to disconnect the light linkages.
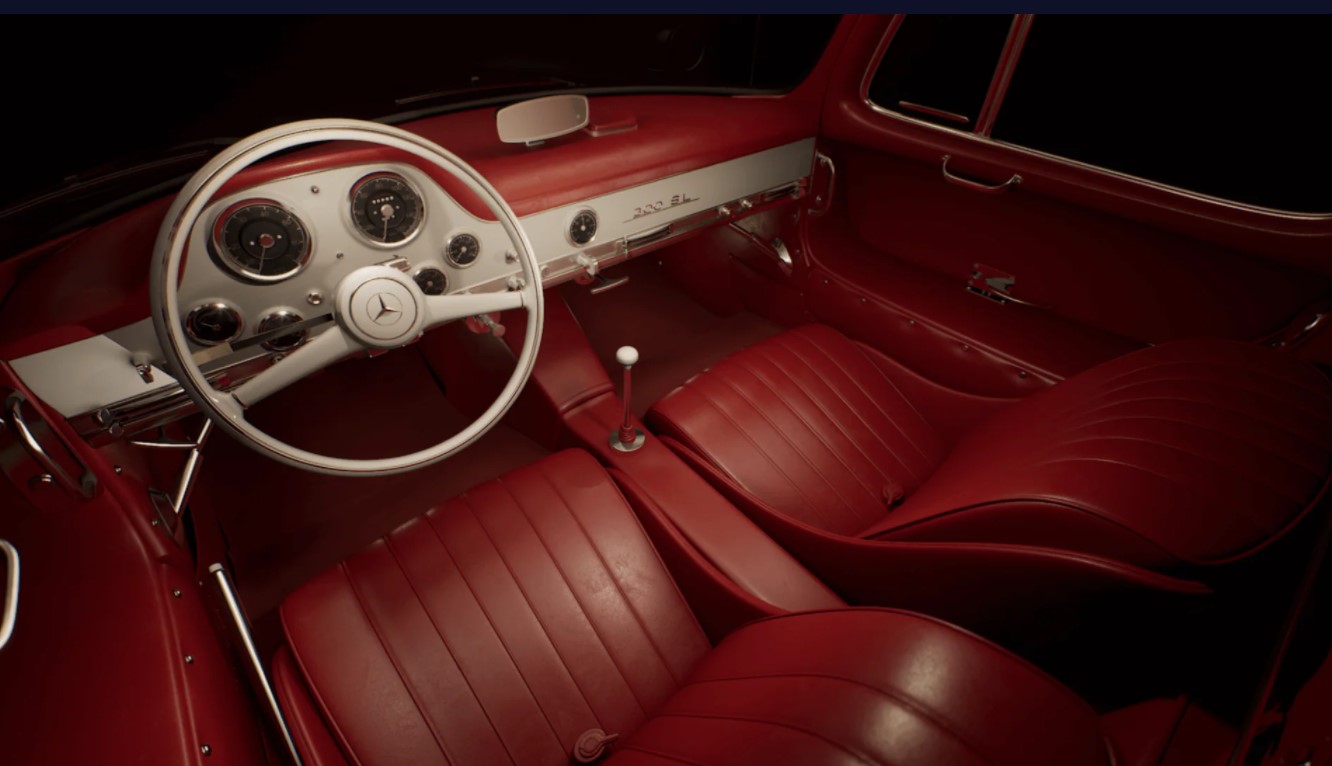
Ambient lighting
Since we don’t need the skylight to aid to the interior lighting as the area is modest.
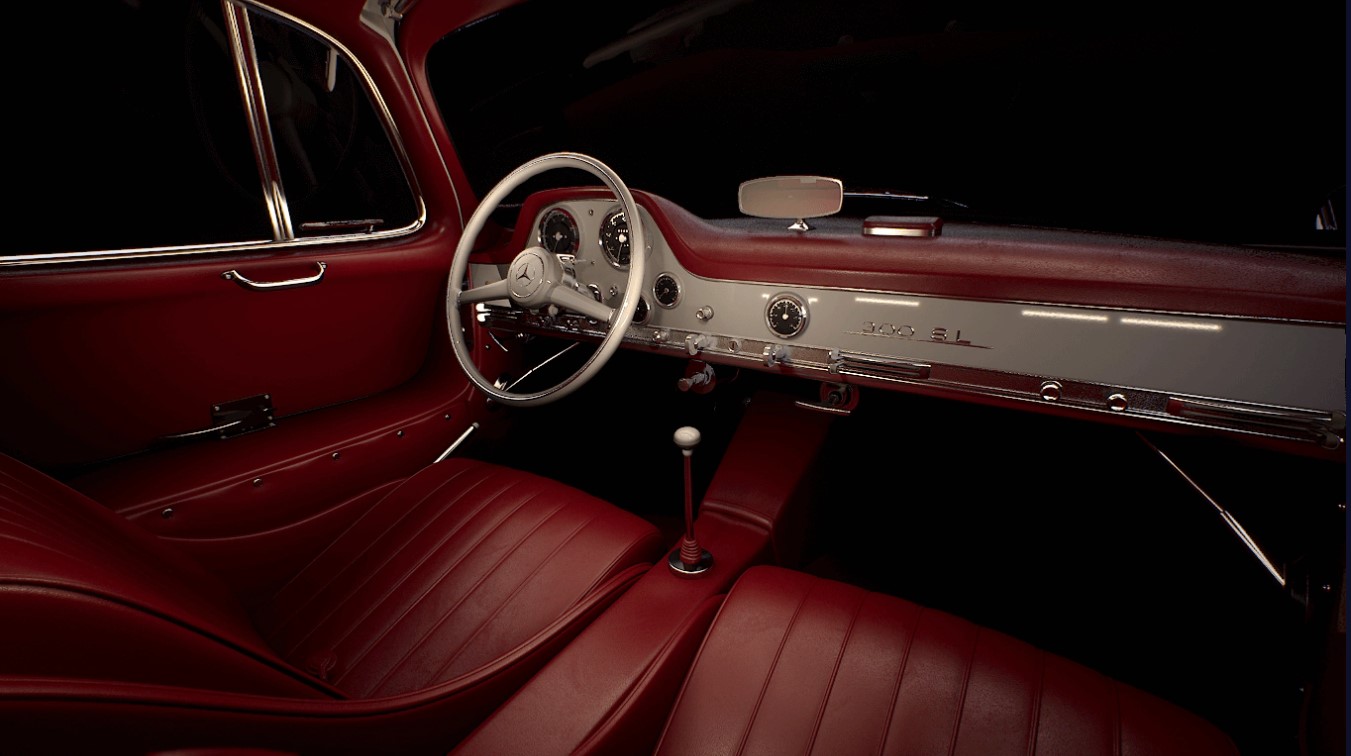
We want more detailed interior lighting with better contrast than the exterior while enabling the skylight’s raytraced shadows. It serves as a nice starting point for the interior lighting in Unreal Engine.
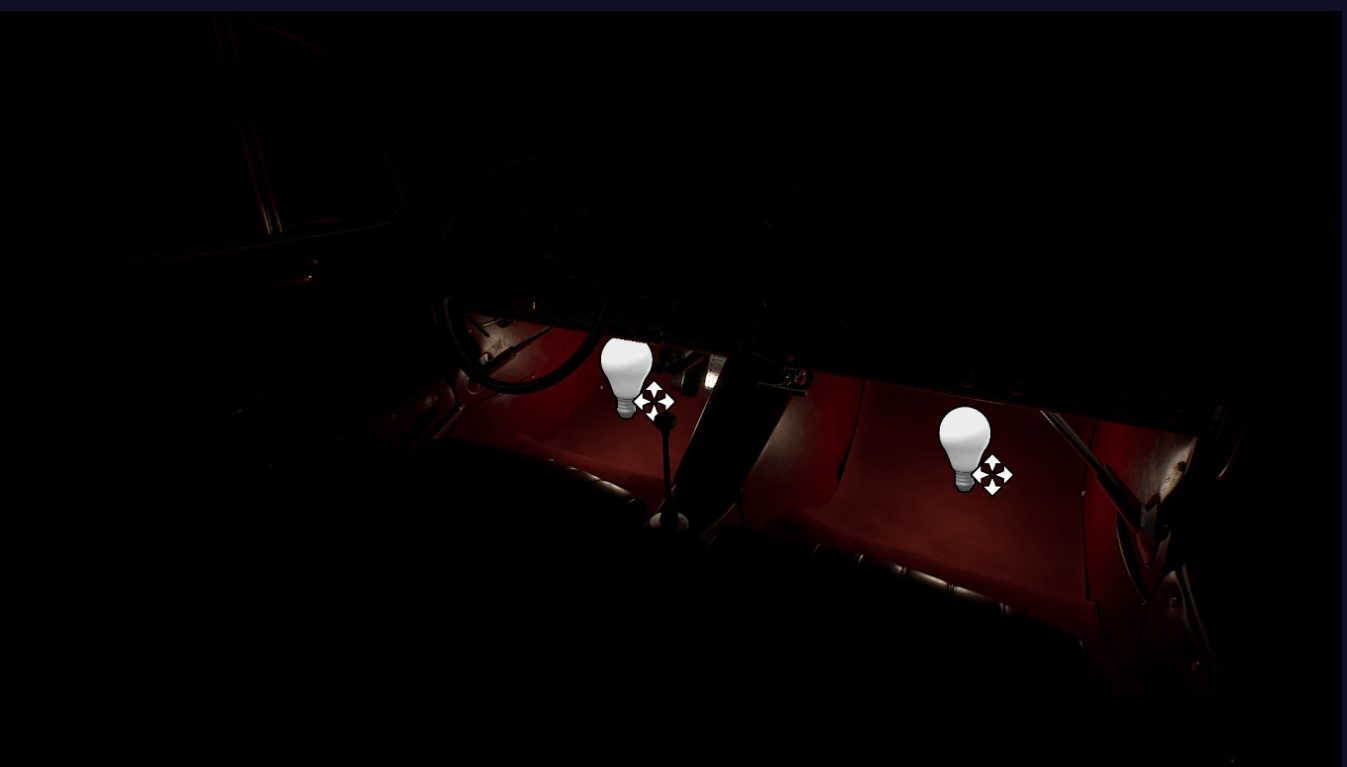
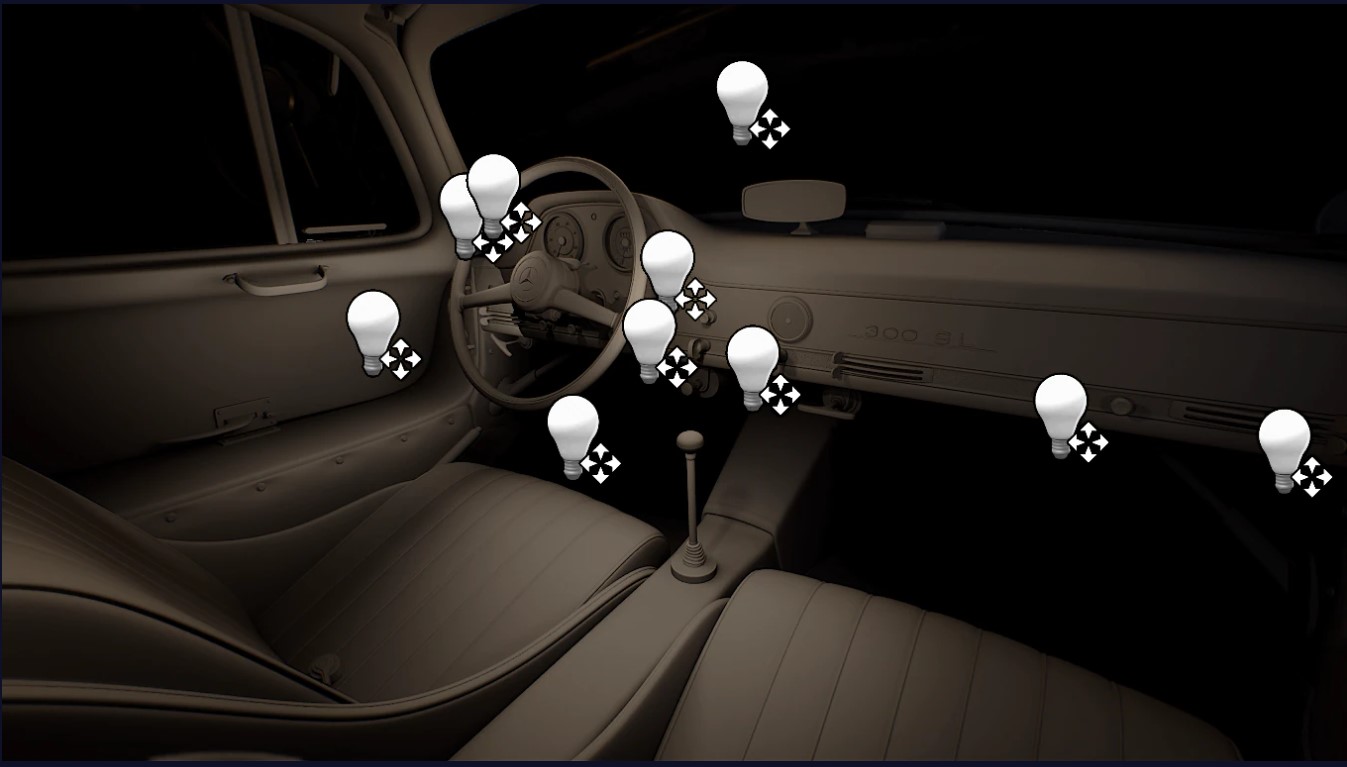
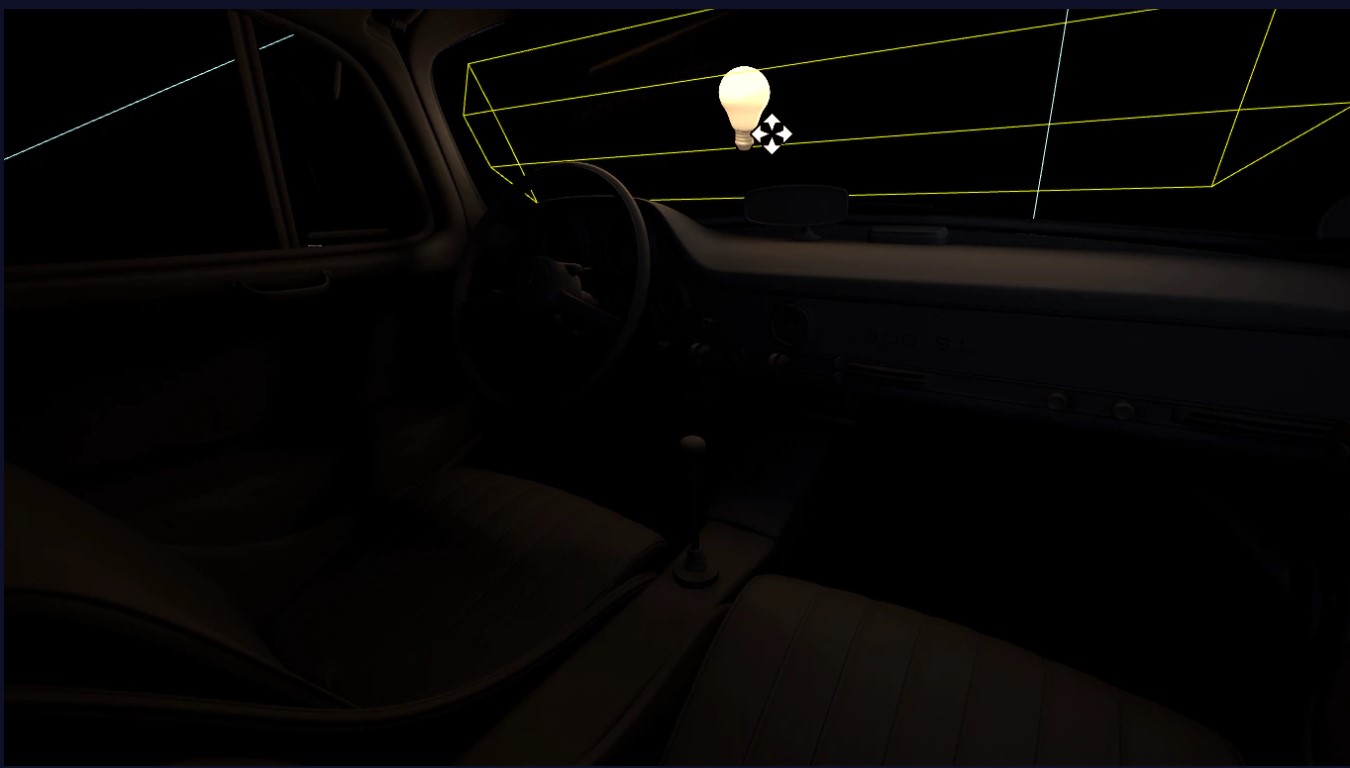
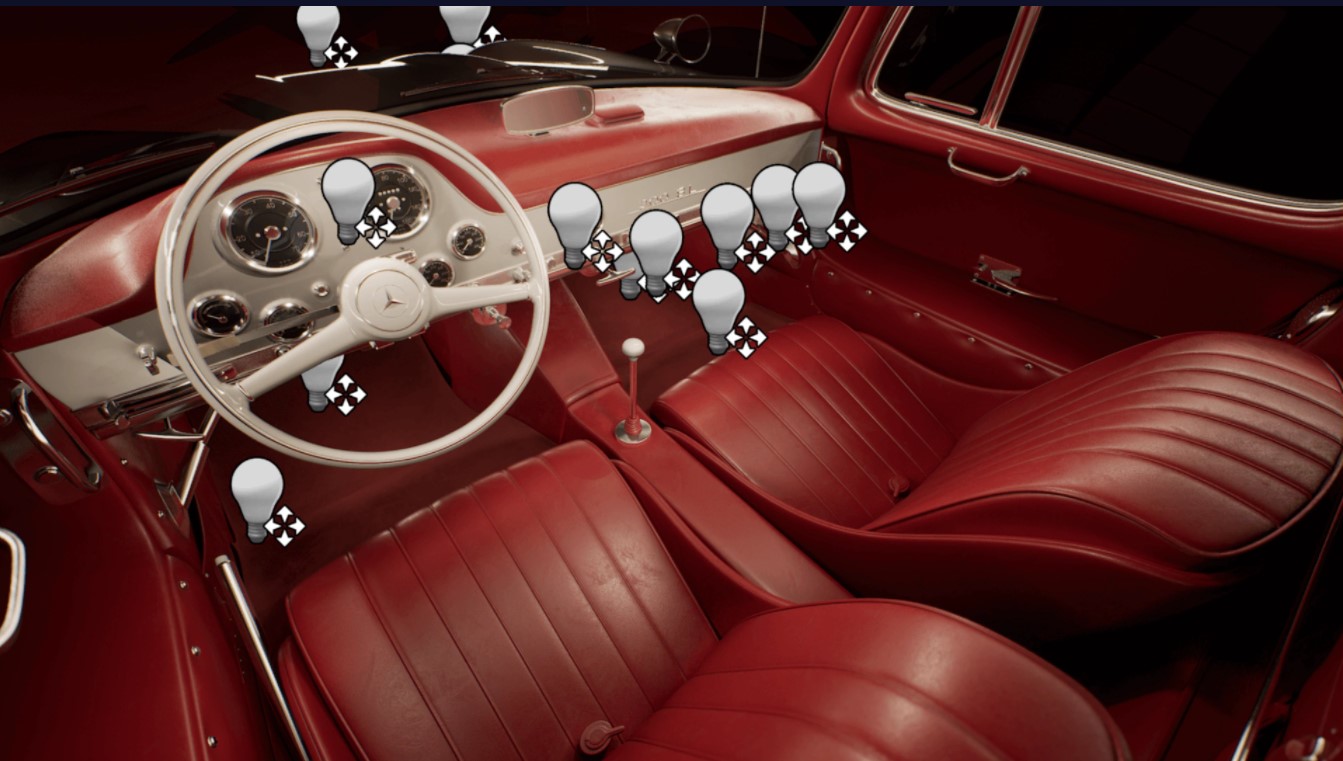
Adding extra lights
To bring light inside, place some rect lights on the windshield, ceiling, and side windows, and resize and rotate the lights as desired. By searching for “specular” and reducing it in the rect light’s detail panel, you can select to minimize or erase the reflection cast from specific light.
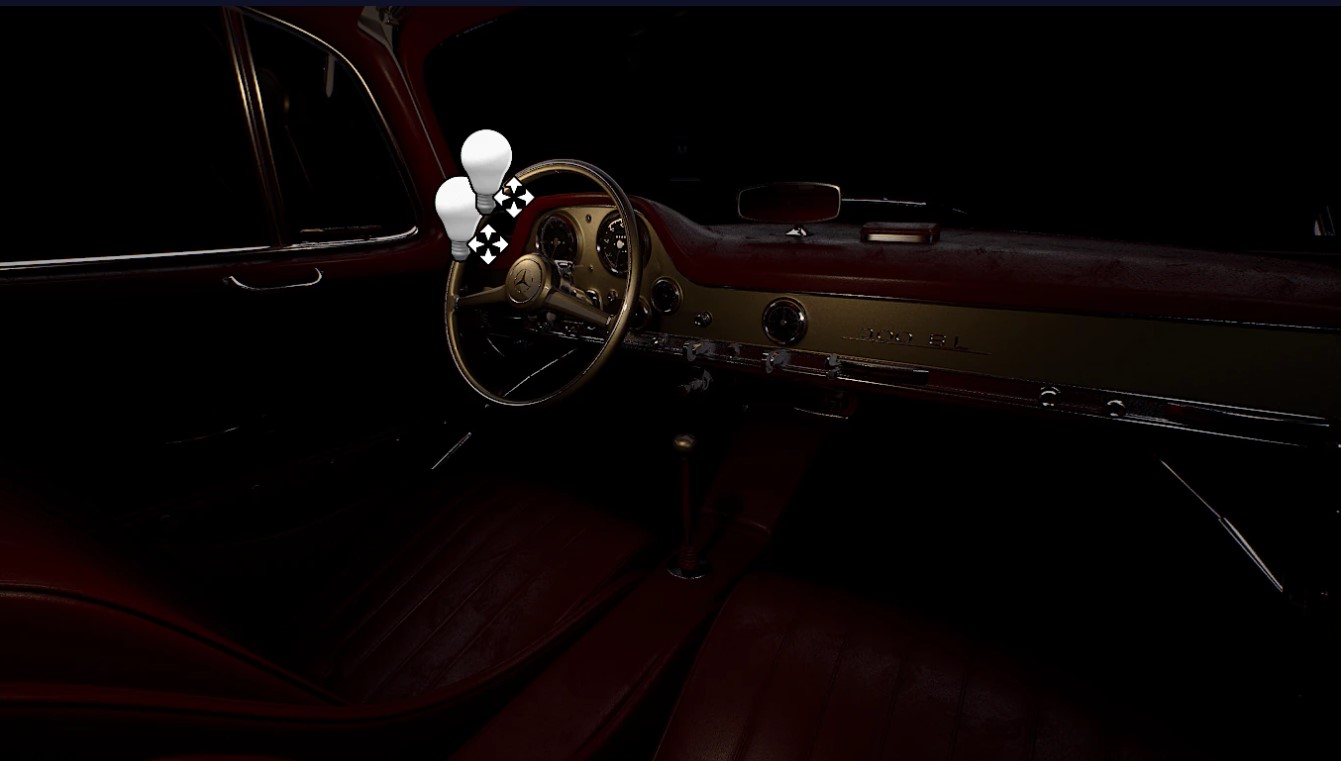
You can use point and spot lights to draw attention to certain places such as the steering wheel, console, and seats.
Light channel
Because the internal structure is narrower and more intricate than the exterior, users may occasionally find issues with over-lit or unwelcome light in particular locations. Light channels are a simple and effective technique to add and break light links for specified objects.
Ray-traced ambient occlusion is a big advantage since it casts soft shadows with depth and contrast to the interior while also increasing the per-pixel sample to reduce noise. By modifying the ambient radius in the post volume and cine camera panels, you can make the raytraced AO adaptable to the interior.
Global illumination
Because GI disrupts the equilibrium of light and shadow, brightening and flattening the interior illumination, it was not employed. Ray tracing GI within interior rendering might cause light leaks in rare instances.
Post effects and final rendering
Finally, choose all rect lights and search “sample” to boost the values for rendering for high quality, which you can also do for reflection and AO within the post volume. However, a higher percentage of samples will have a negative impact on performance. So it’s best to set them up wisely based on the size and complexity of your scene.
For the final output, you can use the High Resolution Screenshot to take a rapid screen shot with the screen percentage set to 150 or above, or you can use the Movie Render Queue to set up a rendering for superior anti-aliasing and denoising.
Conclusion
Using Unreal’s real-time approaches, all of the steps above help create high-quality studio rendering in a timely manner for both automobile interiors and exteriors. As you can see, users may edit BP light cards as the backbone of ambient lighting and reflections, as well as other lights that you can add to the template scene to create an appealing studio render that feels fully intuitive, by using the capabilities of ray tracing in real-time. This saves you time when it comes to making an offline render. Furthermore, this lesson does not necessitate the use of any other resources. All consumers have to do now is download Unreal Engine and try it out!
Boost up automotive studio rendering in Unreal Engine with iRender

Currently, Unreal Engine utilizes the video card solely to display the graphics on the screen. At iRender, we built servers with 1 RTX 3090 GPU to serve the Unreal Engine.

iRender provides high-performance servers for GPU-based engine rendering through the Remote Desktop application.
It only takes a few simple steps to get started, and you will have complete control over remote servers at iRender. Using the remote server is the same as using any other computer you have used before. We are really proud of our outstanding support staff. They can solve any problem at any moment you need them to, and they don’t make you wait long.

It’s time to concentrate on high-quality projects and use your rendering time for the iRender server by CREATING AN ACCOUNT. To acquire a free trial voucher, contact Joy – Customer Support Associate at iRender – by Whatsapp: +84326243106 or Email: [email protected].
iRender – Happy Rendering!
The Reference: unrealengine.com
Related Posts
The latest creative news from UE4 Cloud Rendering, Enscape Cloud Rendering, Lumion Cloud rendering, V-Ray Cloud Rendering , Twinmotion Cloud Rendering , 3D VFX Plugins & Cloud Rendering.