How to set up automotive studio lighting in Unreal Engine (Part 1)
Is automotive studio lighting important?
The automotive industry has undergone a lot of changes over the years.
For a long time, car configurators have been a typical business tool for automakers. Customers want to be able to explore numerous alternatives before putting their money down, whether they’re personalizing a new buy in the dealership or trying out different styles online.
Leading brands like Pagani, Audi, BMW, McLaren, and Mercedes have elevated this component of the sales process to an art form, employing advanced rendering techniques like ray tracing to create configurators that are increasingly lifelike and interactive.
So, how do these interactive digital showrooms come together? The Automotive Configurator is a free real-time configurator sample created with Unreal Engine, a 3D production tool.
Let’s dive into this post to explore how to set up automotive studio lighting in Unreal Engine.
Setting up automotive studio lighting in Unreal Engine
This instruction’s goal is to assist automotive users in creating high-quality studio renderings by utilizing the fundamentals of the Unreal Engine automotive template. You will be able to follow along as the project progresses and improve your lighting, ray tracing, and environment rendering. It provides a fully dynamic rendering scenario, allowing you to work in real-time.

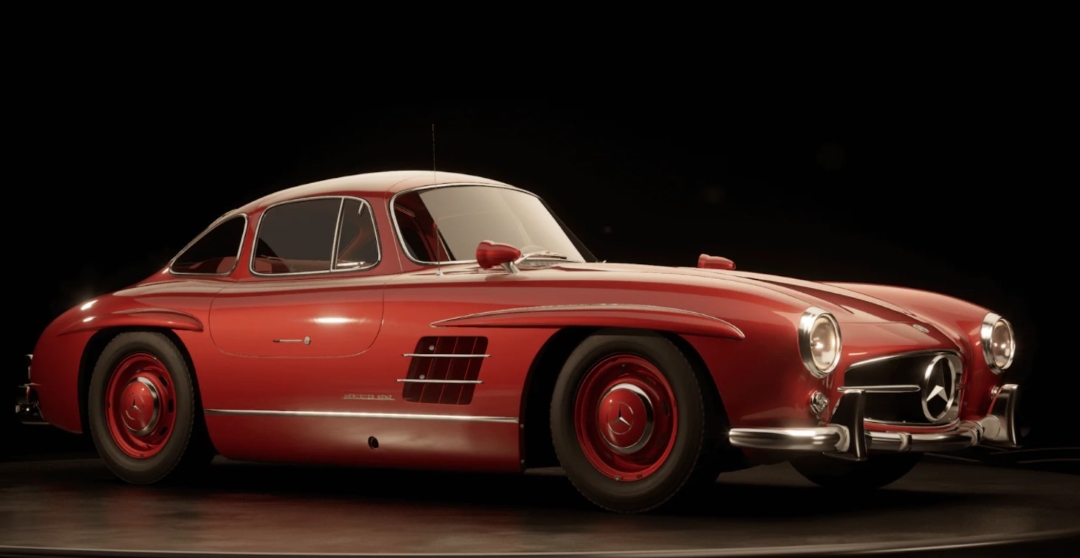
The instruction shows how to studio render an automobile in Unreal using manual lighting and HDRI textures with no external illumination.
Image-based lighting normally generates complicated reflections/colors from an HDRI image, but it won’t work here because the purpose of this post is to perform true CG-based lighting instead of just using IBL rendering with an HDRI map. This also provides a more adaptable way to display the car’s original design while maintaining an elegant rendering environment.
The instruction is divided into two sections: one for external rendering and the other for inside rendering. Today, we’ll learn external rendering first, and then the other one will be learned in the remaining part. You will learn step by step through the process of changing the model, establishing lighting and materials, and sharing some suggestions on how to achieve the desired rendering results.
Exterior rendering
Setting up the level of automotive studio lighting in Ureal Engine
Most rendering theories adhere to the principle of “less is more,” which indicates that the scene should be as simple as possible. Studio rendering does not require a complex environment with millions of polygons and a large number of textures.
You will concentrate on characteristics that contribute to a pleasing real-time render, such as lighting, reflection, composition, and so on.
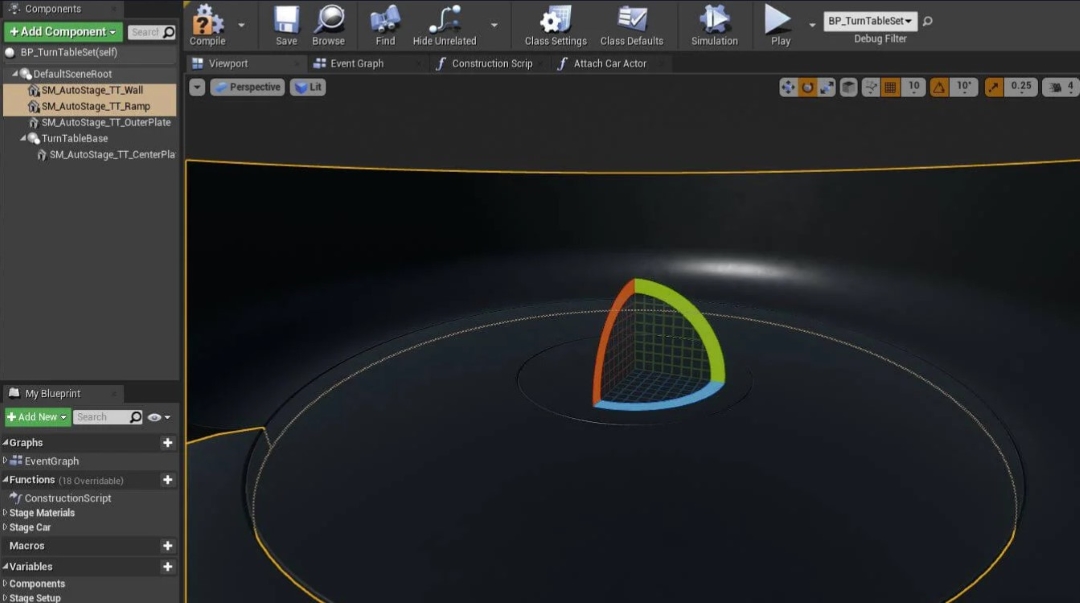
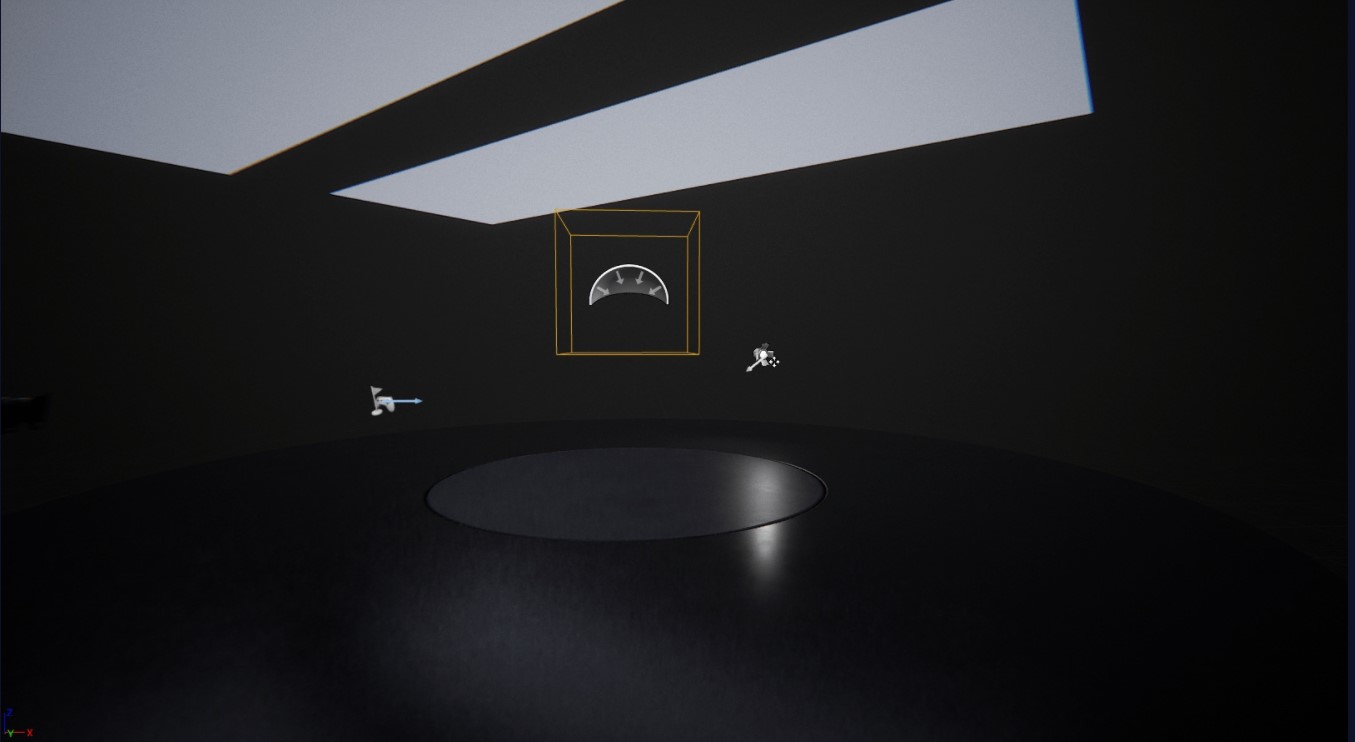
To begin, create a new automobile project and then open the automotive template’s cinematic level, as seen below. Before generating the lighting for the area, you will clean up the scene a bit by eliminating the default car with the notes from the level. It’s a fantastic idea to make lights on a different level so you can quickly add and alter the lights surrounding cars on any of the levels.
After you’ve imported your automobile model with all of its material assignments, you will need to tweak the template scene a little. Because of the distracting reflections/specularity, the backplate is not beneficial in this scenario. This problem can be solved by hiding or removing the backplate mesh.
Setting up the lighting
BP light cards for ambient lighting
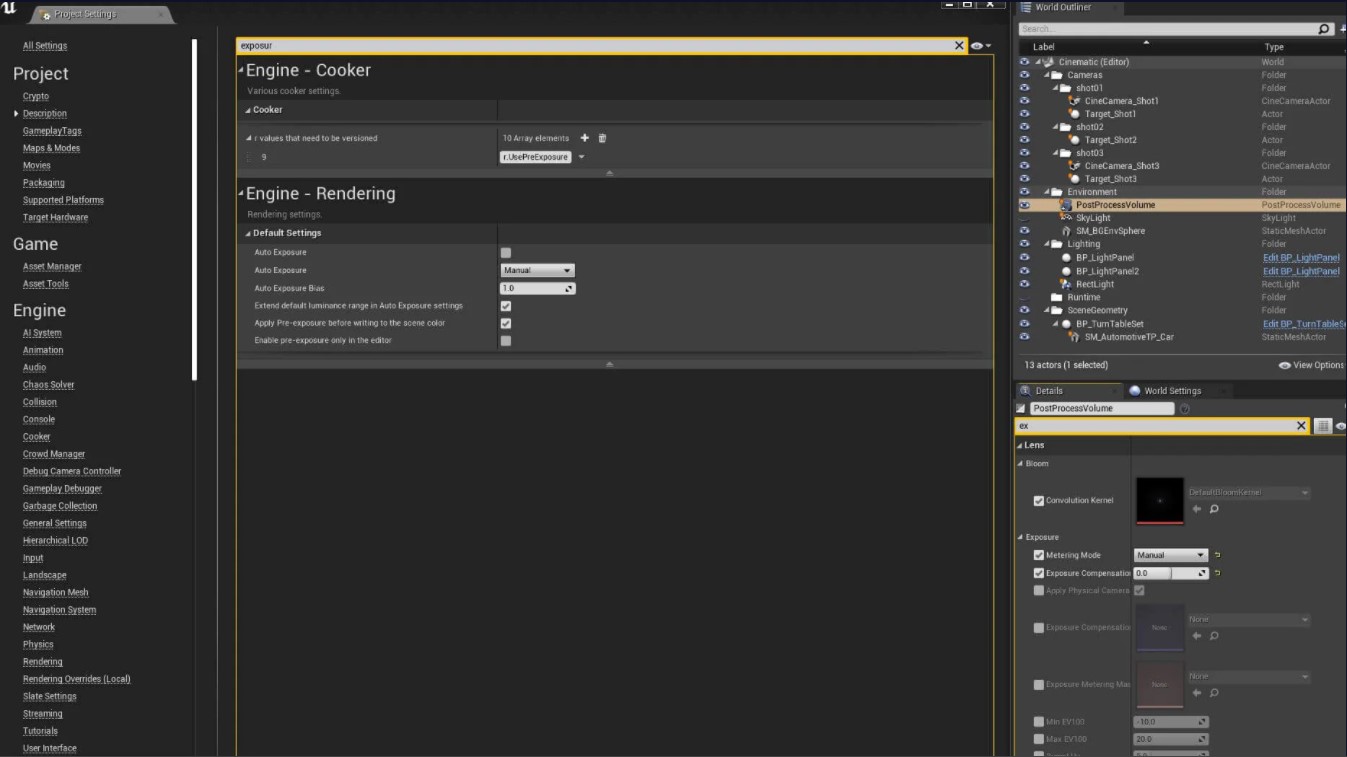
First, in the project settings and post volume, adjust the exposure technique to manual.
Next, to generate more detailed color and reflections on the car’s paint and windshield glass, apply an HDR map to the color of the BP lights.
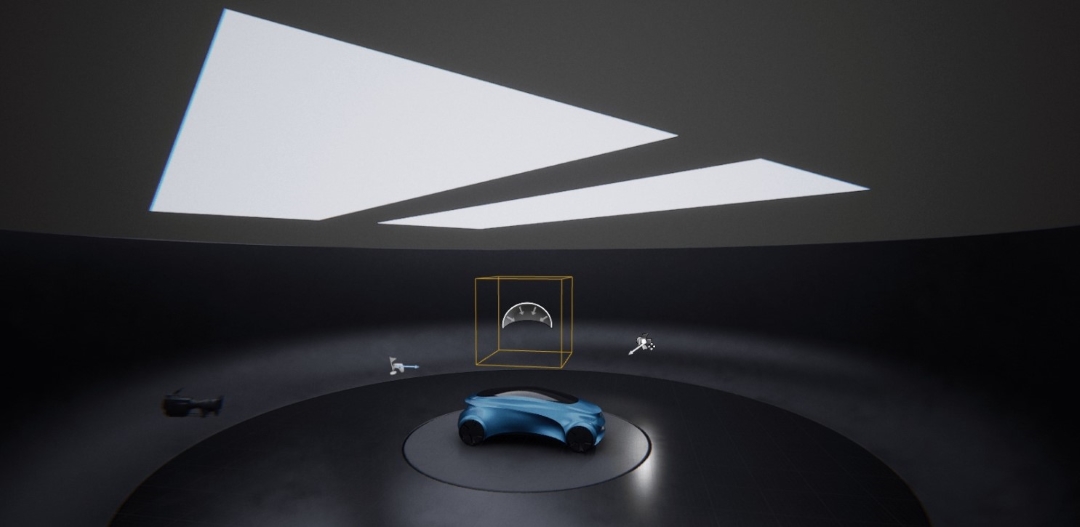
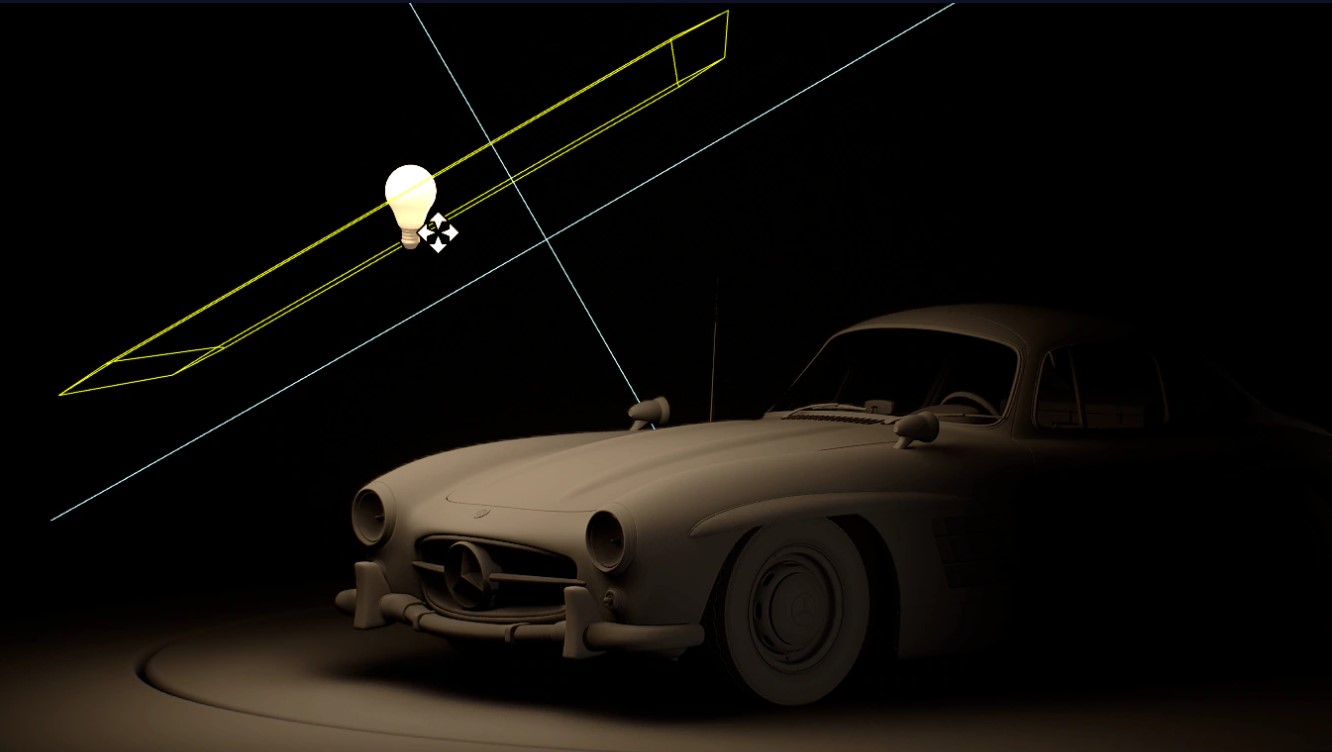
Second, you can use two BP light cards to quickly provide base lighting and reflection for the automobile. The ambient lighting for the entire scene is likewise defined by the BP light cards.
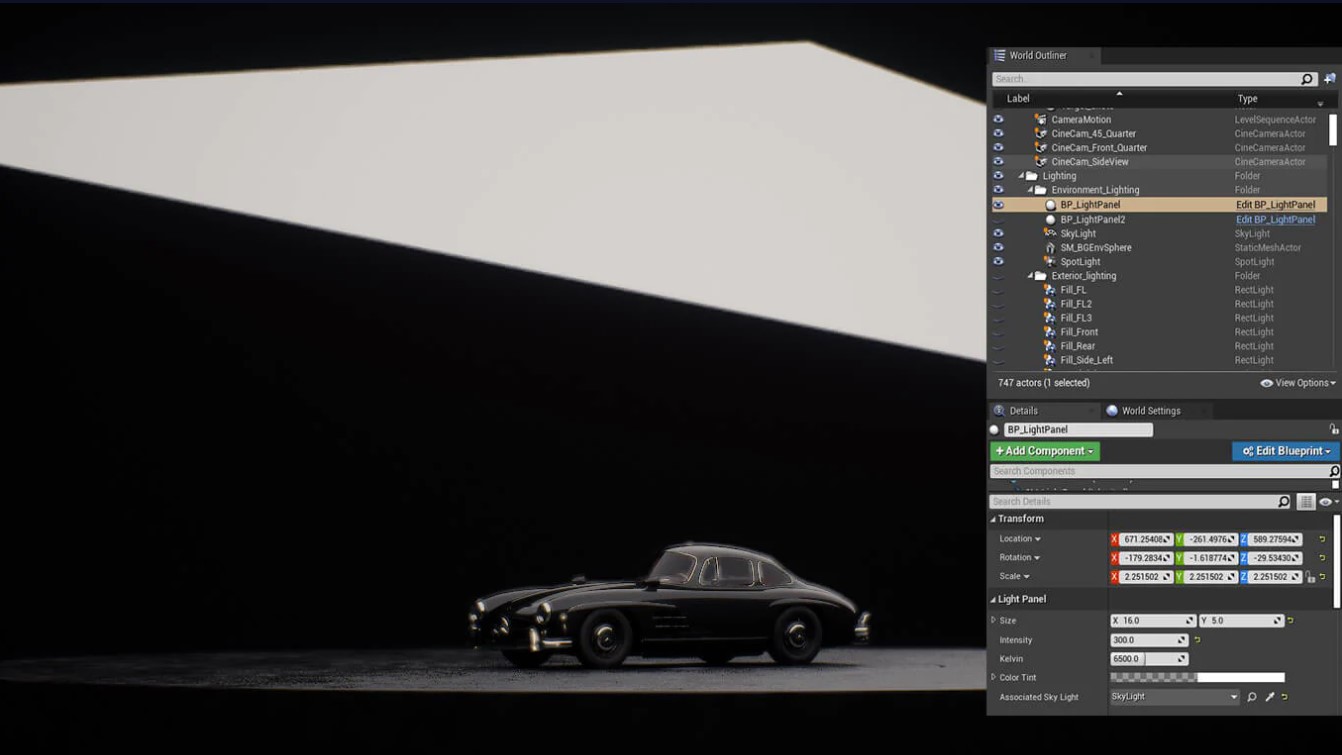
Because the BP light cards are actually attached to a skylight, a high rating for the intensity of the BP lights could overexpose the scene.
By adjusting the intensity and kelvin on the BP light panel, you can lower the light intensity and vary the color temperature. This type of softer ambient lighting fits the mood you want to create in the scenario and offers the car’s paint and windows a clean reflection.
Add your light
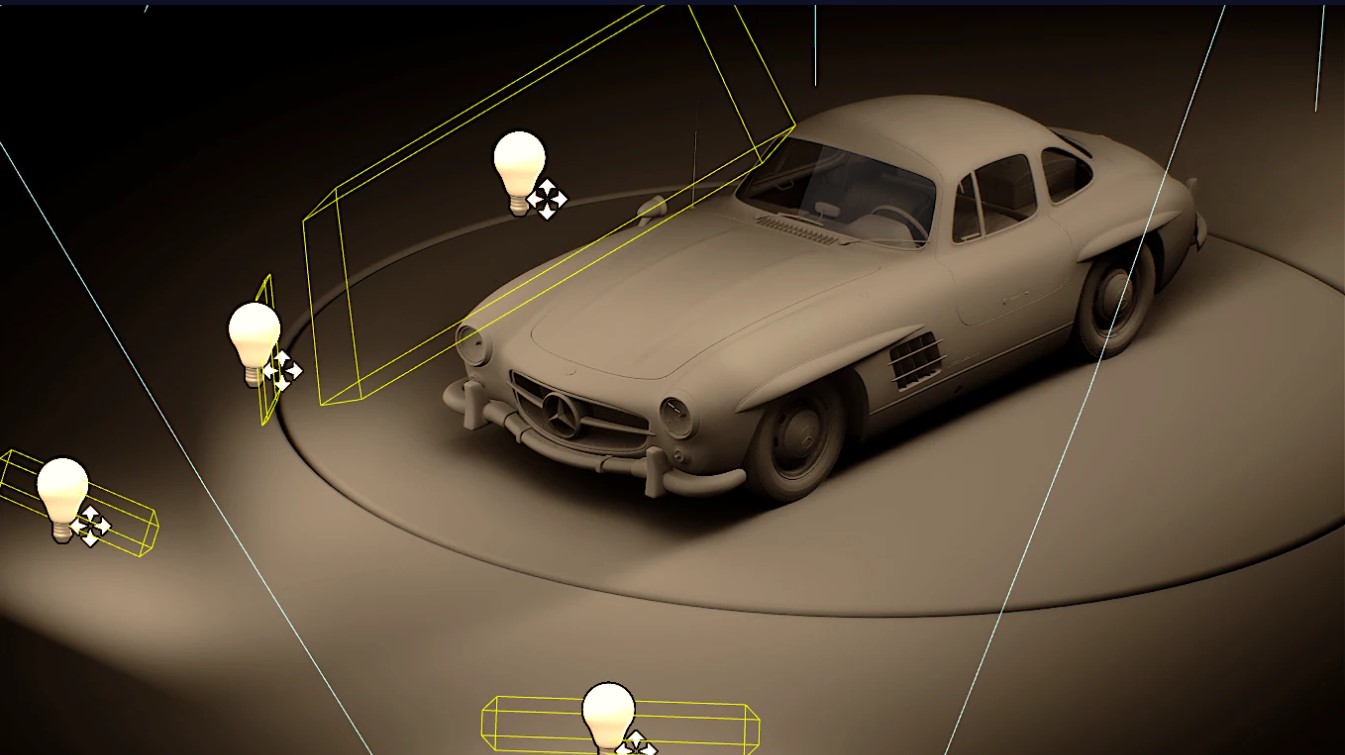
As needed, place a couple of lights to fill in certain dark places. Use rect lights as key lights to illuminate some of the car’s larger surfaces, and spotlights to illuminate areas that may be obscured by darkness. Point lights can be utilized to aid in revealing the car’s shape. With BP lighting cards, these three types of lights help provide direct lighting and reflections while also providing ambient lighting and base reflections.
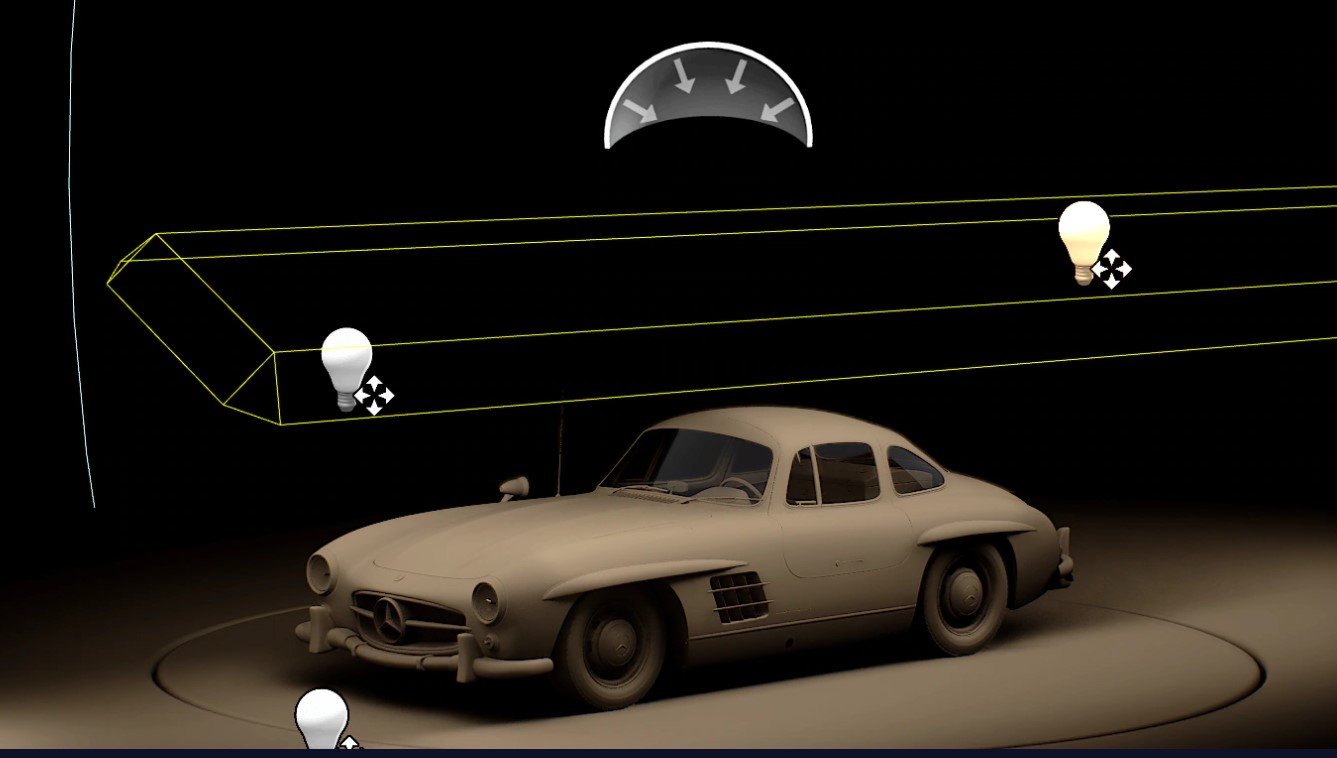
Always keep in mind that the lighting should appear as clean as possible. Before adding new lights to the scene, make sure that all of the lights you add are moveable so that you may tune the lights around the automobile to get the proper lighting and reflection. This allows you to quickly adjust the position, orientation, and size of each light to achieve the desired illumination and reflection.
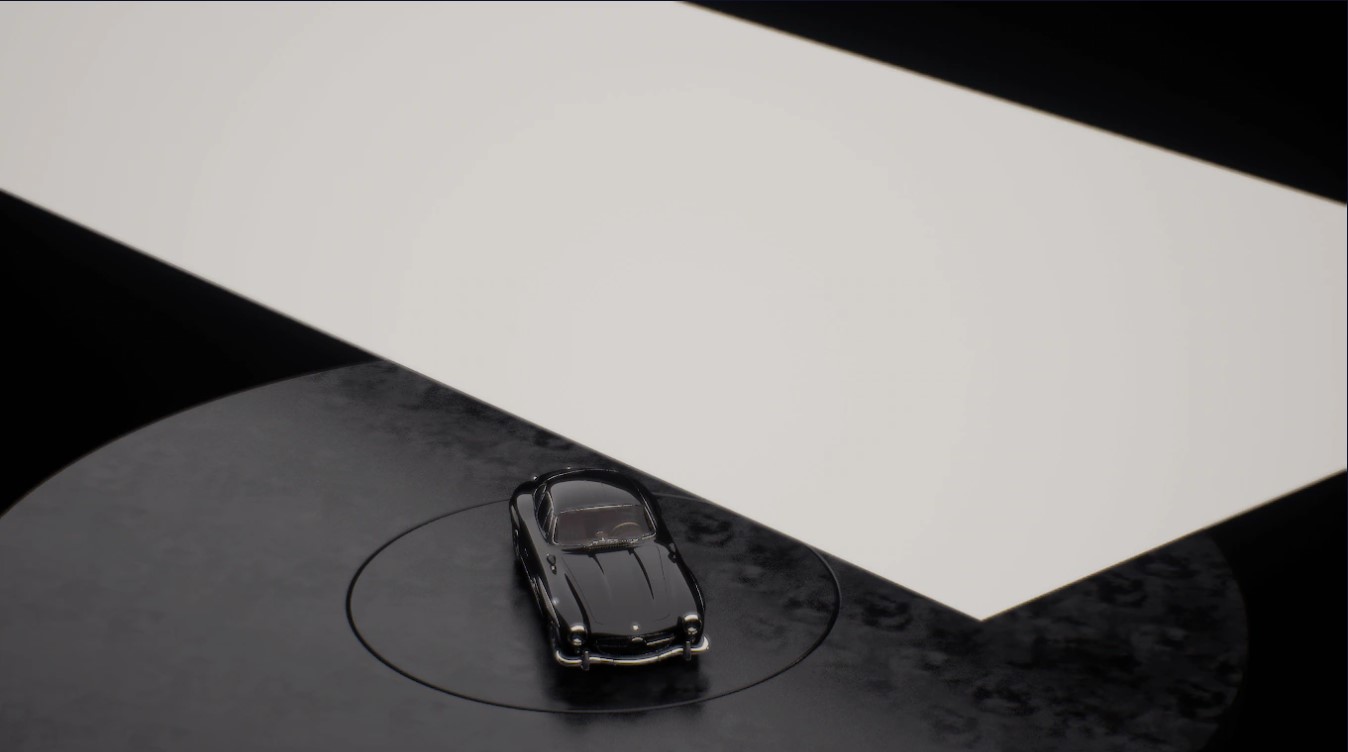
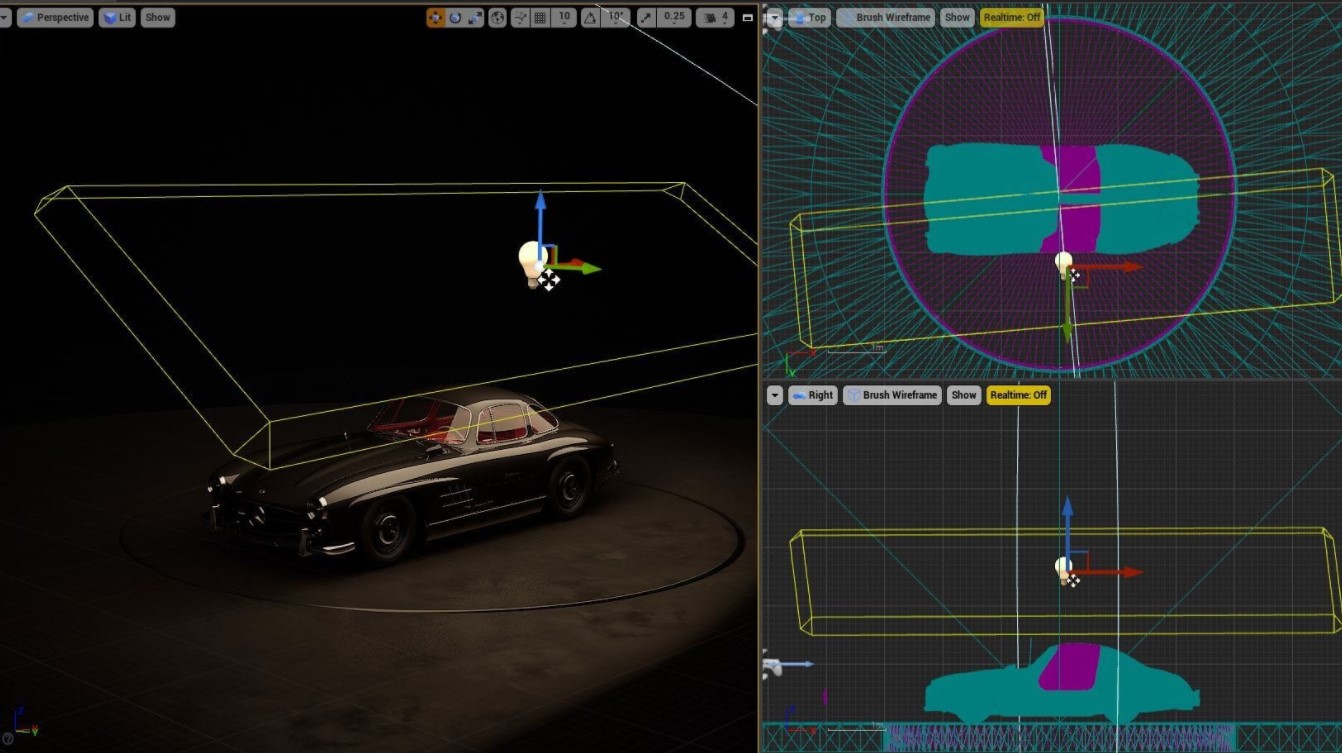
Rect lights produce more physically correct lighting in specific regions, which might result in a pleasing reflection on the car’s side. It looks well on both curving and angular vehicle bodies.
The diffuse/specular nature of rectangular lights has a significant impact on the car’s final appearance. Make sure there aren’t too many large rect lights in the area, as this will flatten the lighting and impair the car’s reflection. It’s best to simply adjust the size, position, or orientation of the rect light until it’s working properly. The specular can look bad at times, but it all depends on your viewing point.
There are several techniques you might want to do to try to improve your reflection:
- You can use a white-black ramp texture to soften the edge of the light reflected onto the surface.
- If the specular appears to be too bright or off-putting, you can lower it or even turn it off.
Spotlights can assist in lighting the model’s more intricate structures, such as the headlights. They can also be utilized to make particular areas more specular. For example, to brighten the dark side of the logo, a point light was positioned in front of the car as a fill light.
Spotlights are used to illuminate dark regions such as the intake, wheels, or the car’s outline. Also, from afar, spotlights can create a highly dramatic ground shadow for the car, with falloff on the shadow edge. The contribution of the spot can be nicely blended with the current illumination by decreasing the cone of the light with a softened cone edge.
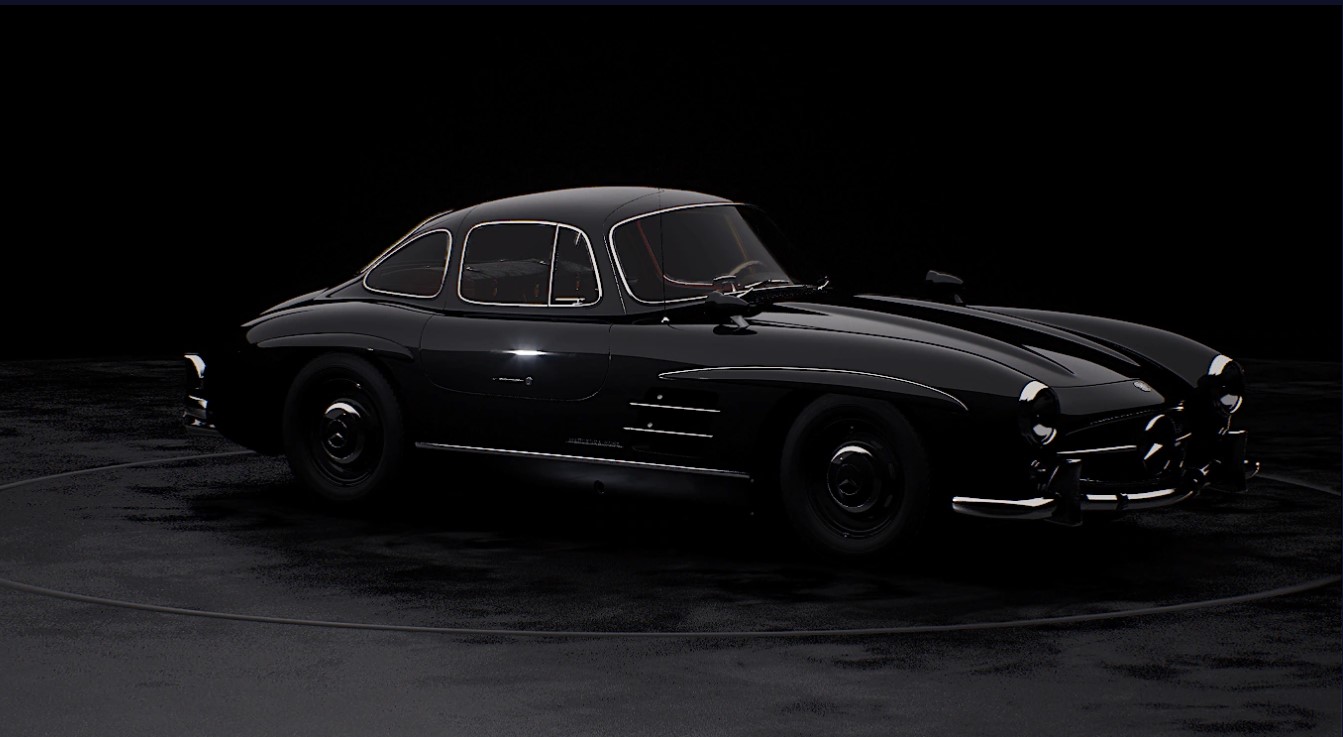
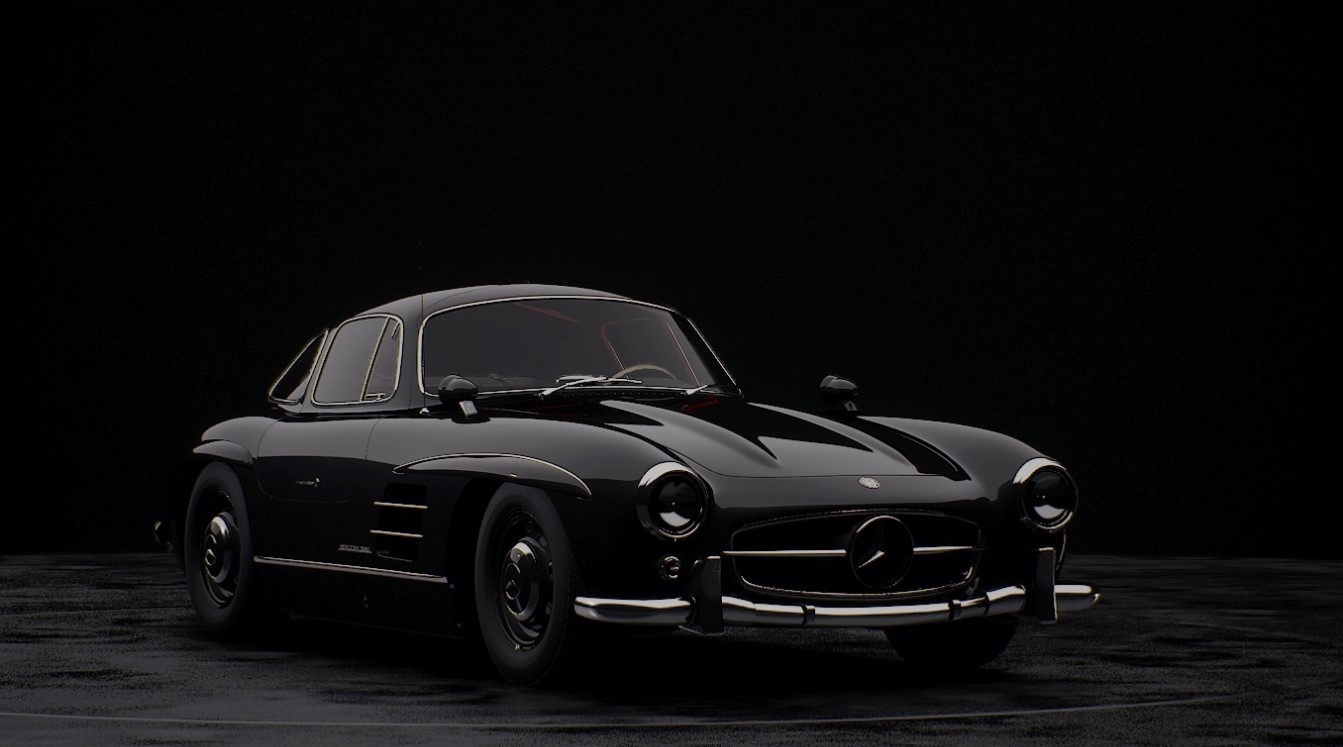
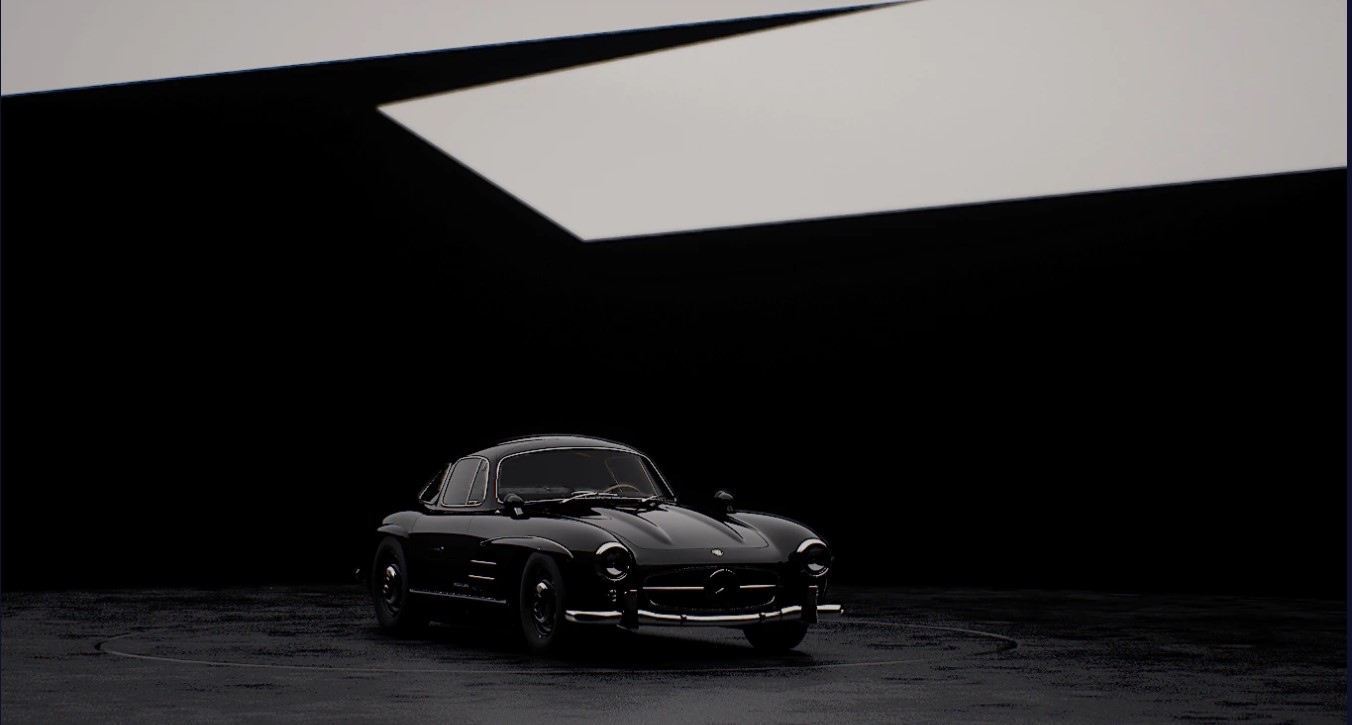
The final stage in completing exterior lighting is to install two rect lights on both sides of the vehicle, as seen below. This helps to fill in the dark spots on the car’s sides and creates a wonderful reflection across the shoulder line.
Boost up Exterior rendering in Unreal Engine with iRender

iRender provides high-performance servers for GPU-based engine rendering through the Remote Desktop application.
It only takes a few simple steps to get started, and you will have complete control over remote servers at iRender. Using the remote server is the same as using any other computer you have used before. We are really proud of our outstanding support staff. They can solve any problem at any moment you need them to, and they don’t make you wait long.

Currently, Unreal Engine utilizes the video card solely to display the graphics on the screen. At iRender, we built servers with 1 RTX 3090 GPU to serve the Unreal Engine.
It’s time to concentrate on high-quality projects and use your rendering time for the iRender server by CREATING AN ACCOUNT. To acquire a free trial voucher, contact Joy – Customer Support Associate at iRender – by Whatsapp: +84326243106 or Email: [email protected].


iRender – Happy Rendering!
Reference source: unrealengine.com
Related Posts
The latest creative news from Unreal Engine Cloud rendering.