How to set up AWS Thinkbox Deadline
Are you wondering why your render engine isn’t utilizing your hardware to its full potential? Thinkbox Deadline might be the solution you need. Let’s explore how to use it.
What is Thinkbox deadline?
Thinkbox Deadline is a powerful administration and compute management toolkit designed for render farms running on Windows, Linux, and macOS. It enables studios to distribute rendering tasks efficiently across multiple machines, whether locally or in the cloud. With Deadline, you can maximize the performance of your hardware and even leverage additional machines to accelerate rendering.
Compatible with nearly all 3D software and render engines, Thinkbox Deadline optimally distributes workloads across CPUs and GPUs, ensuring efficient resource utilization. Additionally, users can monitor and manage the rendering process through the Deadline Monitor.
Three main components of the Thinkbox Deadline System:
- Deadline Database – Stores jobs, settings, and worker configurations.
- Deadline Repository – Contains plugins, scripts, logs, and auxiliary files (such as scene files) submitted with jobs.
- Deadline Clients – Responsible for submitting, rendering, and monitoring jobs.
Key Terms to Know for Using Thinkbox Deadline
1. Worker (Previously Known as Slave Node)
A Worker Node is a computer assigned to process render jobs sent from Deadline Monitor. It handles rendering frames, simulations, or other computational tasks assigned by the render manager.
2. Job
A Job refers to a 3D project—such as a scene or video—that is submitted to Thinkbox Deadline for rendering. Deadline manages and controls the entire rendering process.
3. Task
A Job is divided into multiple Tasks, each of which is assigned to a specific Worker application for rendering. A Task can consist of a single frame or a sequence of frames. For example, when rendering an animation in 3ds Max where each frame requires hours to complete, each frame can be processed as an individual Task to speed up the workflow.
4. Job Scheduling
This is the process of distributing and managing render jobs across available Worker Nodes based on priority, resources, and specific rules. Once a job is submitted, the Job Scheduler determines:
- Which Worker Nodes will handle the job
- The number of frames or tasks assigned to each node
- The processing order of multiple jobs
- How CPU and GPU resources are allocated for optimal performance
How to install Thinkbox Deadline?
To install Thinkbox Deadline, first log into your AWS account, navigate to the Thinkbox Deadline section, and select the desired version and operating system. Download the installation file onto your centralized server and render nodes, then extract the ZIP file to prepare for installation.
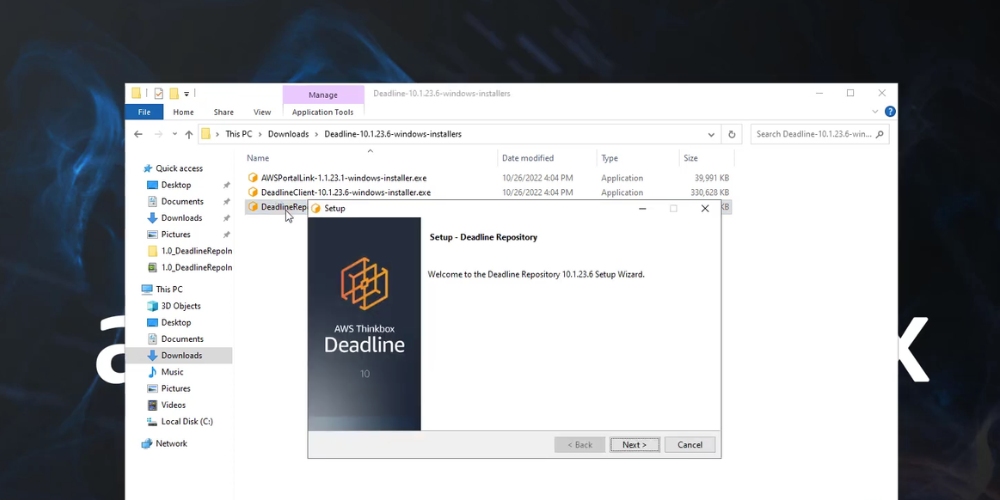
Step 1: Installing the Deadline Repository
The Deadline Repository only needs to be installed on a single machine (ideally a server) to store job-related data. If the repository machine and render nodes are on different networks, you must use a VPN or Port Forwarding to allow access. Alternatively, you can host the Repository on a cloud server accessible to all client nodes.
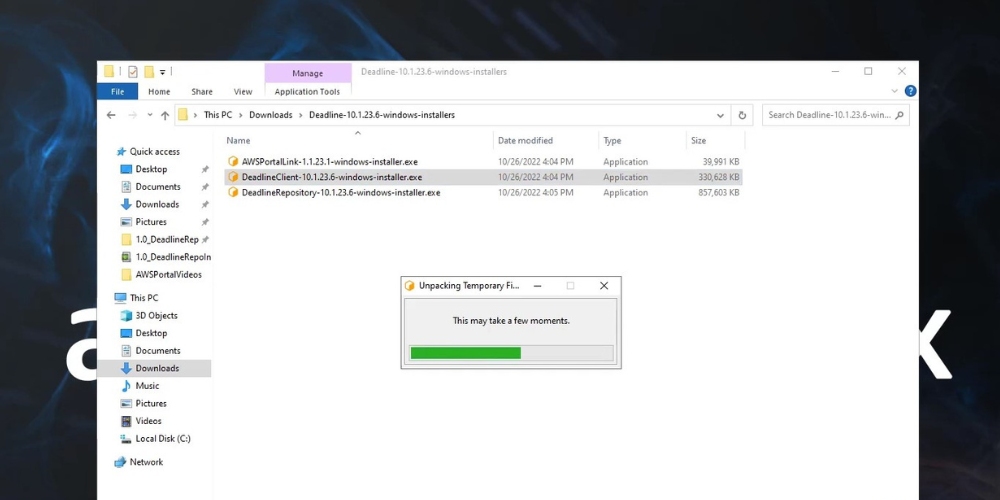
To install the Repository, run the Deadline Repository installer and follow the setup wizard. Below are the steps for version 10.1.23.0:
- Review and accept the End User License Agreement.
- Choose the default repository folder or specify a custom location, ensuring full read and write access.
- Select one of the following:
- If Deadline is being installed for the first time, choose to install a new MongoDB database.
- If MongoDB is already installed, connect to the existing database.
- If installing MongoDB:
- Opt to download MongoDB and accept the license agreement.
- Proceed with the default installation settings.
- The required MongoDB version will be downloaded and installed automatically.
- Set a password for certificates (optional—you can leave it blank).
- Secrets Management Setup: Create an admin user for the Secrets Manager.
- The Repository files will be unpacked, installed, and configured.
Note: If updating an existing Repository, previous files and folders will be backed up automatically.
Step 2: Installing the Deadline Client
The Deadline Client will be installed on Workstations or Render Nodes. Double-click the installer and follow the setup wizard. Below are the steps for version 10.1.23.0:
- Select Installation Type → Choose “Remote Connection Server” (This is required for using the Deadline AWS Portal).
- Specify the Repository Directory → Enter the path where the Repository was installed (e.g., C:\DeadlineRepository10).
- Configure Database TLS Certificates:
- Click the icon next to Database TLS Certificates.
- Navigate to Local Disk (C:) → DeadlineDatabase10 → certs.
- Select Deadline10Client.pfx, then Right-click → Properties → Security.
- Ensure the Deadline user has read and write permissions.
- Open Deadline10Client.pfx.
- Enter the Certificate Password (set in Step 1) → Click Next.
- Assign Server Role → Click Next.
- Create a Deadline Admin User → Save the username and password for future use → Click Next.
- If using a service account, enable Launcher as a Service; otherwise, click Next.
- Configure HTTPS Server Settings → Create a password (needed for connecting to the Remote Connection Server) → Click Next.
The installation files will be prepared, extracted, and installed.
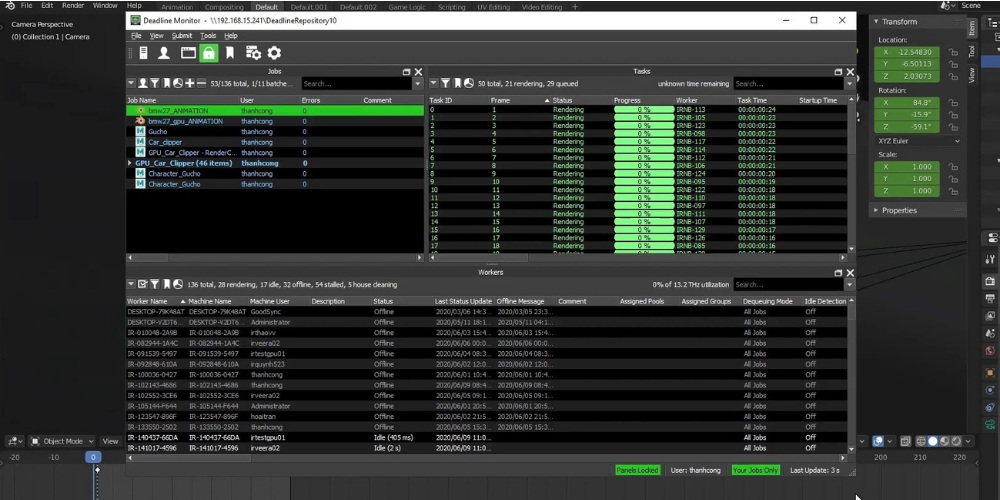
Step 3: Connecting to the Deadline Monitor
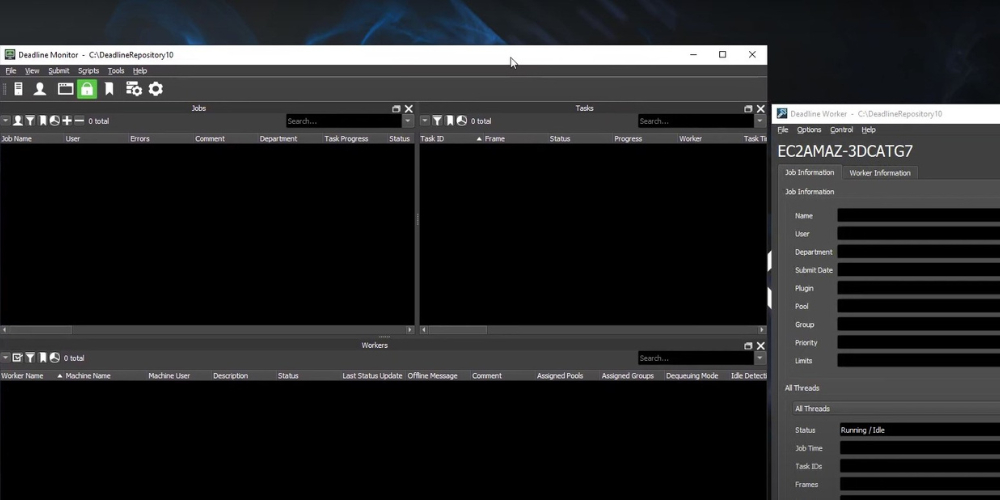
The Deadline Monitor serves as the primary interface for overseeing render jobs, managing machines, and configuring settings. Follow these steps to connect:
- Open Deadline Launcher on the render node.
- Click Launch Worker to activate the Deadline Worker.
- On any machine, open Deadline Monitor.
- Enable Super User Mode (located in the bottom-right corner).
- Go to the Workers panel and verify the status of the client node:
- Idle – The node is ready to receive jobs.
- Rendering – The node is actively processing a job.
- Stalled – There is a connection issue (check network settings).
Step 4: Installing the Integrated Submitter in Your 3D Software
To submit render jobs from 3D software like Maya, 3ds Max, Houdini, or Blender to Thinkbox Deadline, you need to install the Submission Plugin.
- In some Deadline versions, the submission script is automatically installed during the Deadline Client setup.
- In other versions, manual installation is required. You can install it on any machine, such as an artist’s workstation.
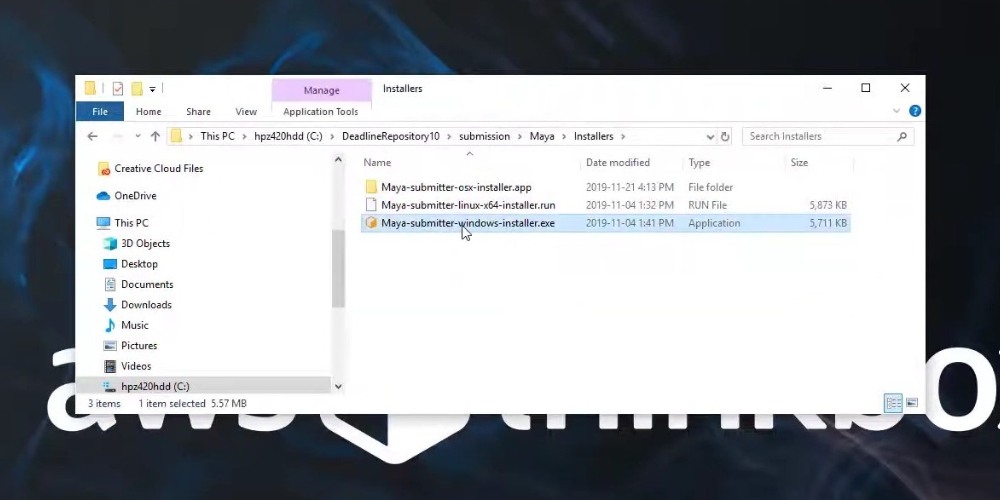
How to Install the Submission Plugin Manually:
- Access the Repository folder (e.g., DeadlineRepository10).
- Navigate to the Submission directory and find the folder for your 3D software.
- Double-click the Installer to begin installation.
Step 5: Submitting a Render Job to Deadline
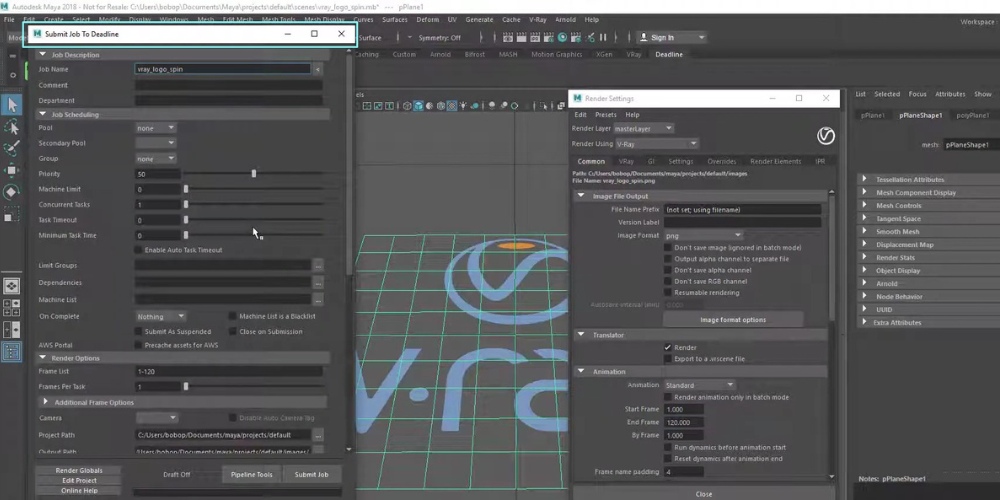
- Open your 3D software on your workstation.
- Load your scene and select your render engine (e.g., Arnold, V-Ray, Redshift).
- Configure the render settings, including frame range, resolution, and output path.
- Go to the Deadline tab and click Submit Job to Deadline.
- Monitor the render progress using the Deadline Monitor.
If you’re looking to render your Houdini project using Thinkbox Deadline, refer to this article for installation instructions and this one for optimization tips.
Utilize the powerful nodes as Thinkbox deadline Workers
iRender provide high-configuration machines with upmarket specifications like AMD Ryzen™ Threadripper™ PRO 3955WX @ 3.9 – 4.2GHz or AMD Ryzen™ Threadripper™ PRO 5975WX @ 3.6 – 4.5GHz, 1/2/4/6/8 x RTX4090 or RTX3090, RAM 256GB, Storage NVMe SSD 2TB.
Why can iRender be a great render farm for you?
In addition to high-configuration servers, iRender provides many other utilities to provide the best user experience.
- Dedicated server for individuals: You have full control and access to the server you rent. The working environment (installed apps, files) will be stored for the next use.
- Easy and free file transfer between your computer and iRender’s server: The transferring task can be done via iRender GPU application for Windows and the iRender Drive application for MacOS.
- 24/7 assistance: iRender’s attentive agents are always ready to support all your queries.
- All software compatibility: iRender’s PCs are built to meet the configuration needs of all 3D software and rendering tools at a variety of cost levels for users to choose from.
Let’s see how fast iRender’s nodes work!


New users will get a 100% bonus for the first transaction within 24 hours of their registration. No minimum amount!! If you top up 50$, you will get 100 points in total to hire our machines.
If you have any questions, please get in touch with me through email [email protected] or our 24/7 support team for a quick response.
Thank you for reading
Image and information source: AWS Thinkbox, thinkboxsoftware
Related Posts
The latest creative news from iRender Tips & Tricks