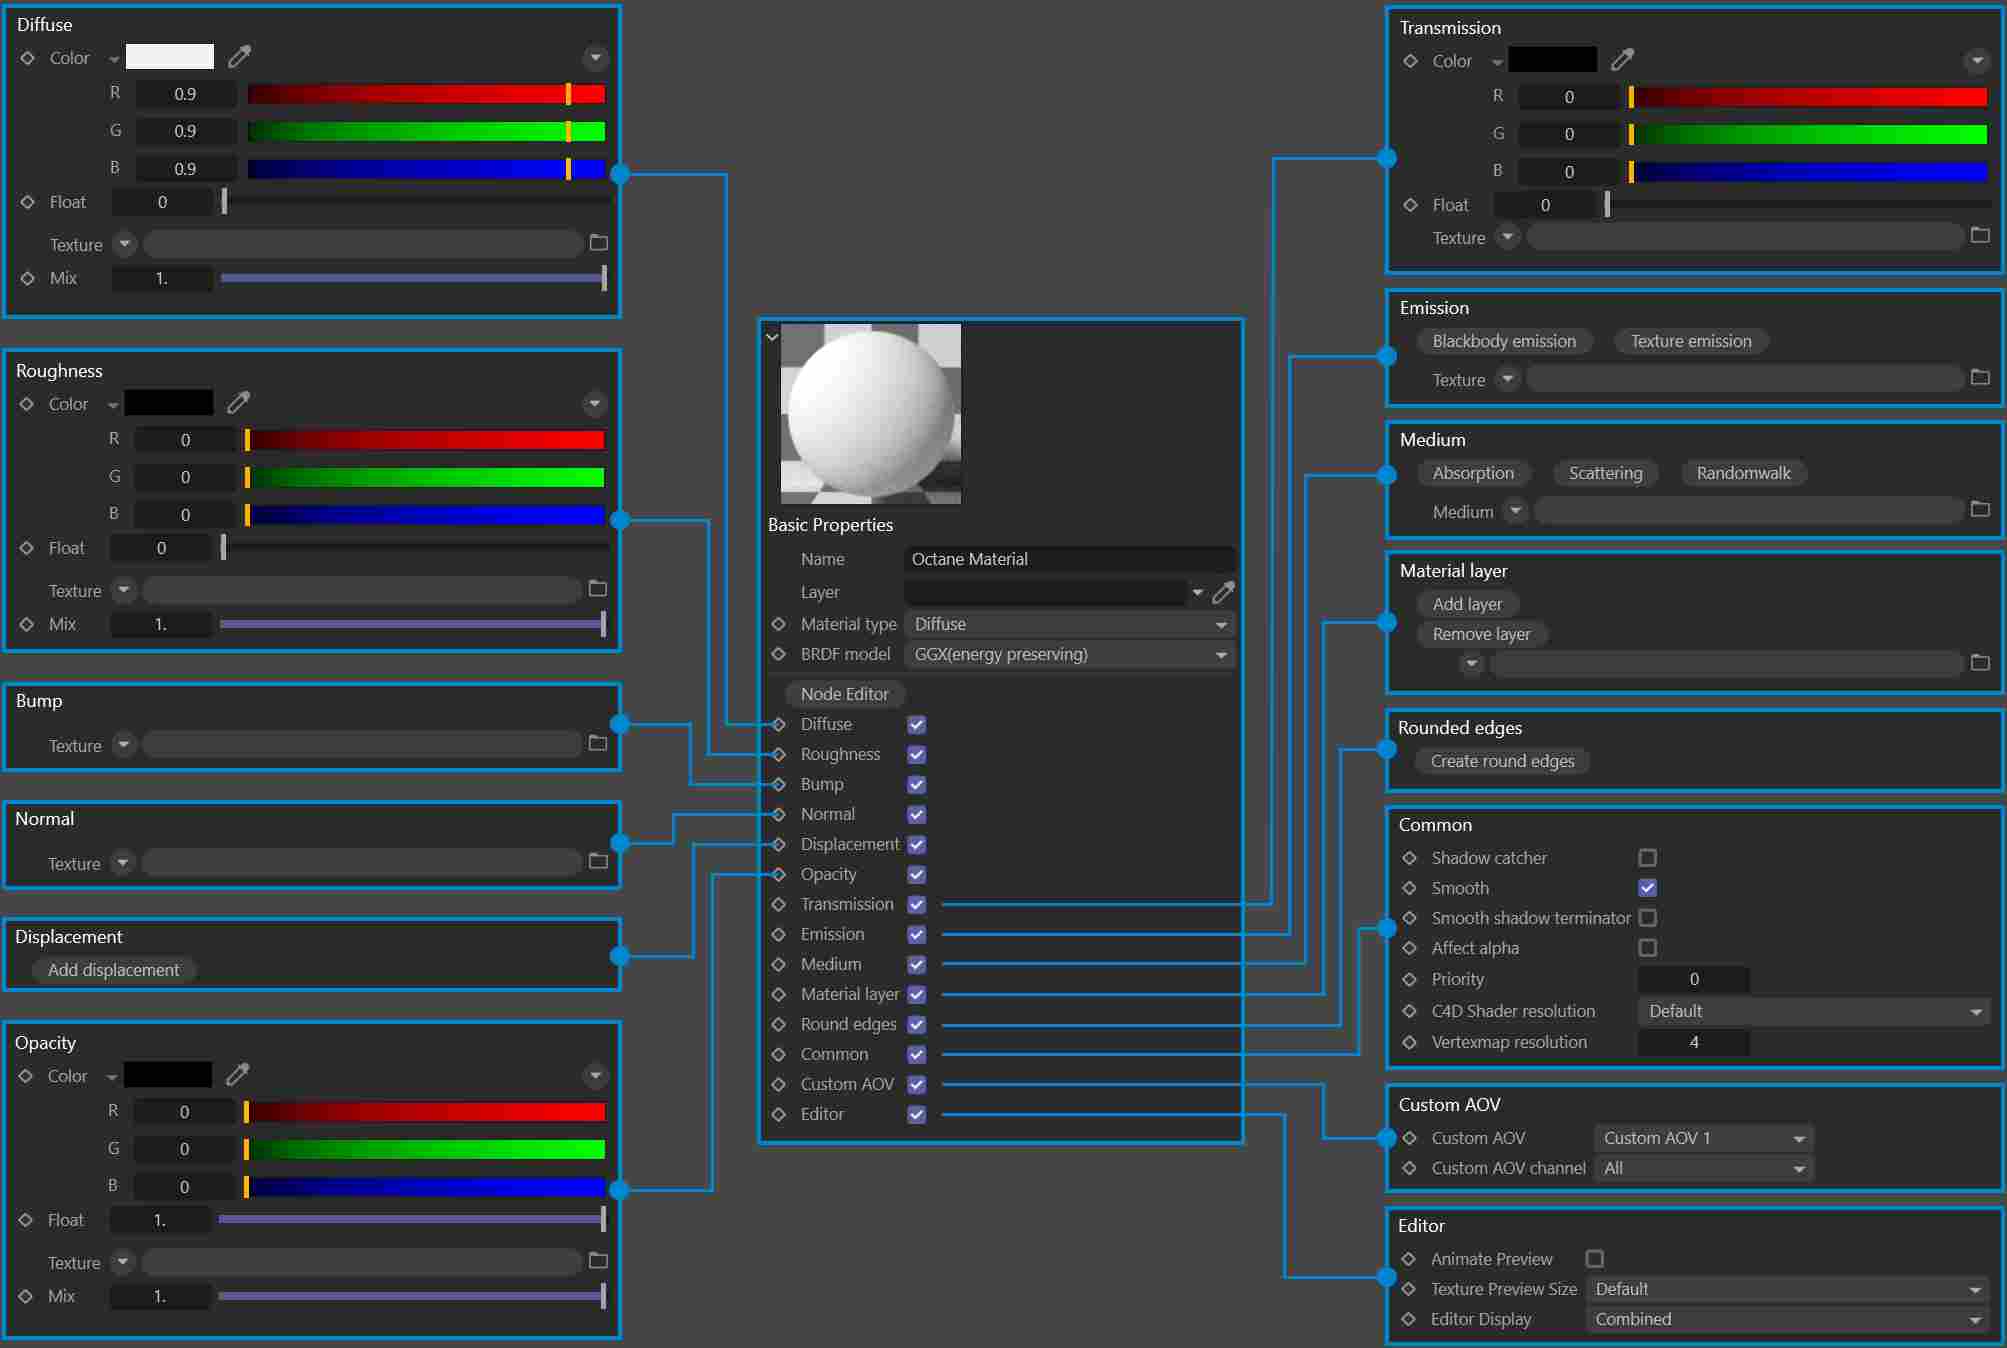
Overview of Octane Diffuse Material in Cinema 4D
In this article we will look at Octane Diffuse Material in Cinema 4D. It models the diffuse or scattered reflection of light from a surface that is scattered at many angles. Depending on the surface, the photon will be reflected differently. Let’s explain more about the parameters of Octane Diffuse Material.

Overview of Octane Diffuse Material in Cinema 4D
Diffuse
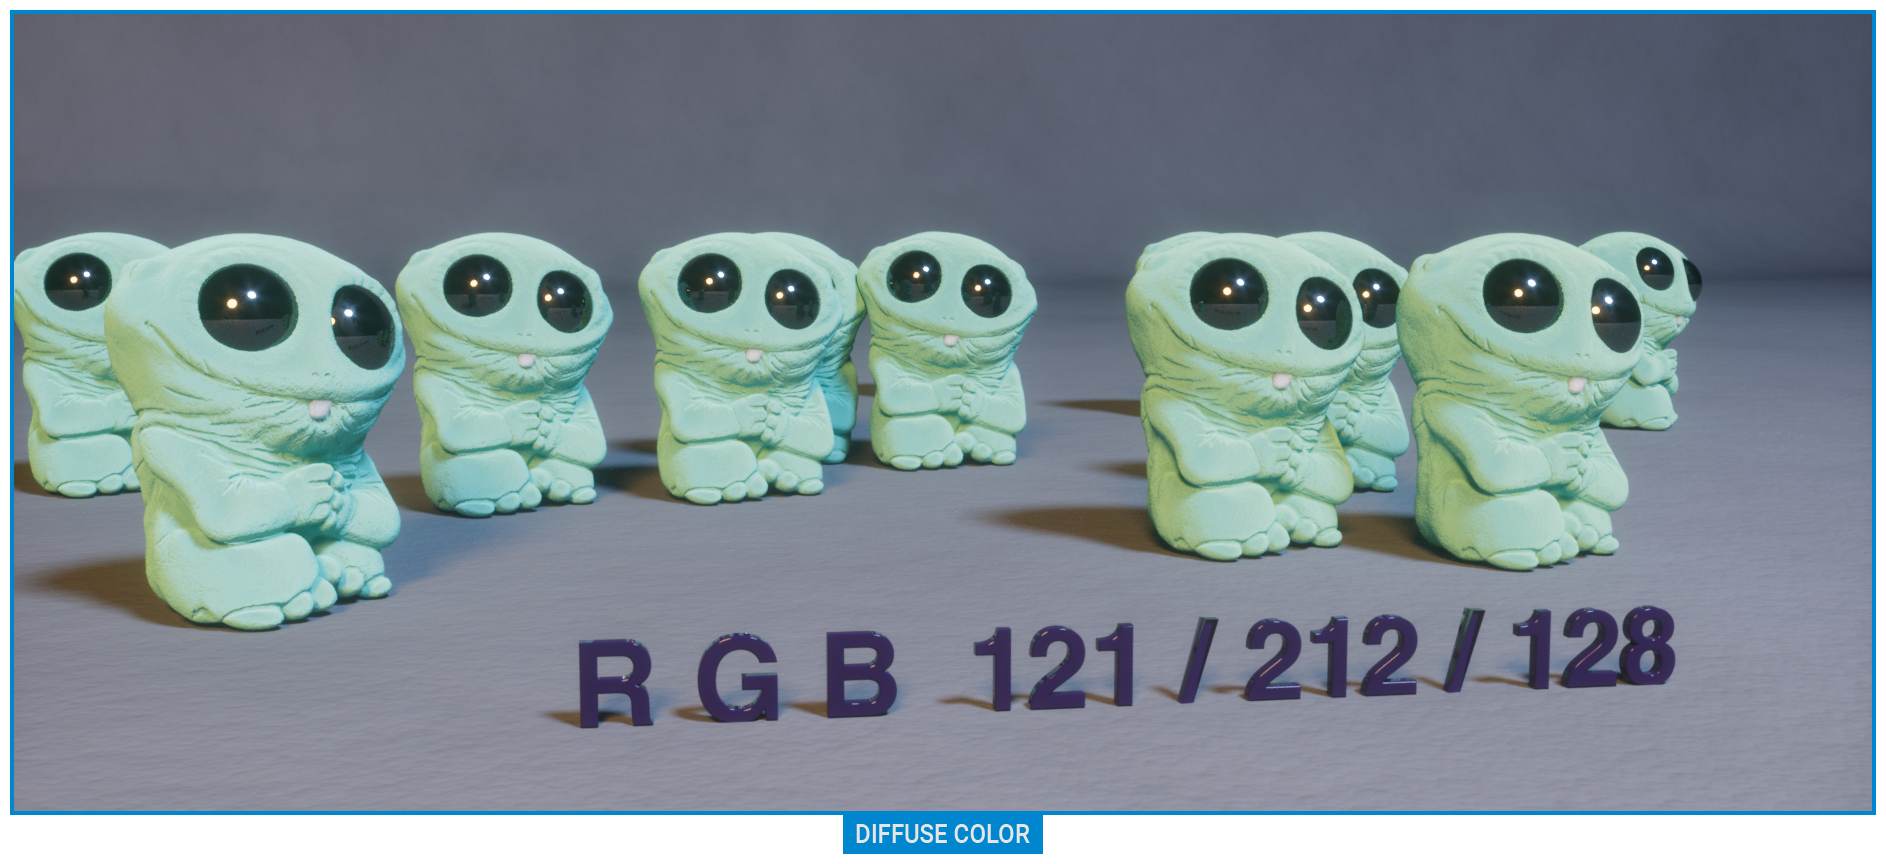
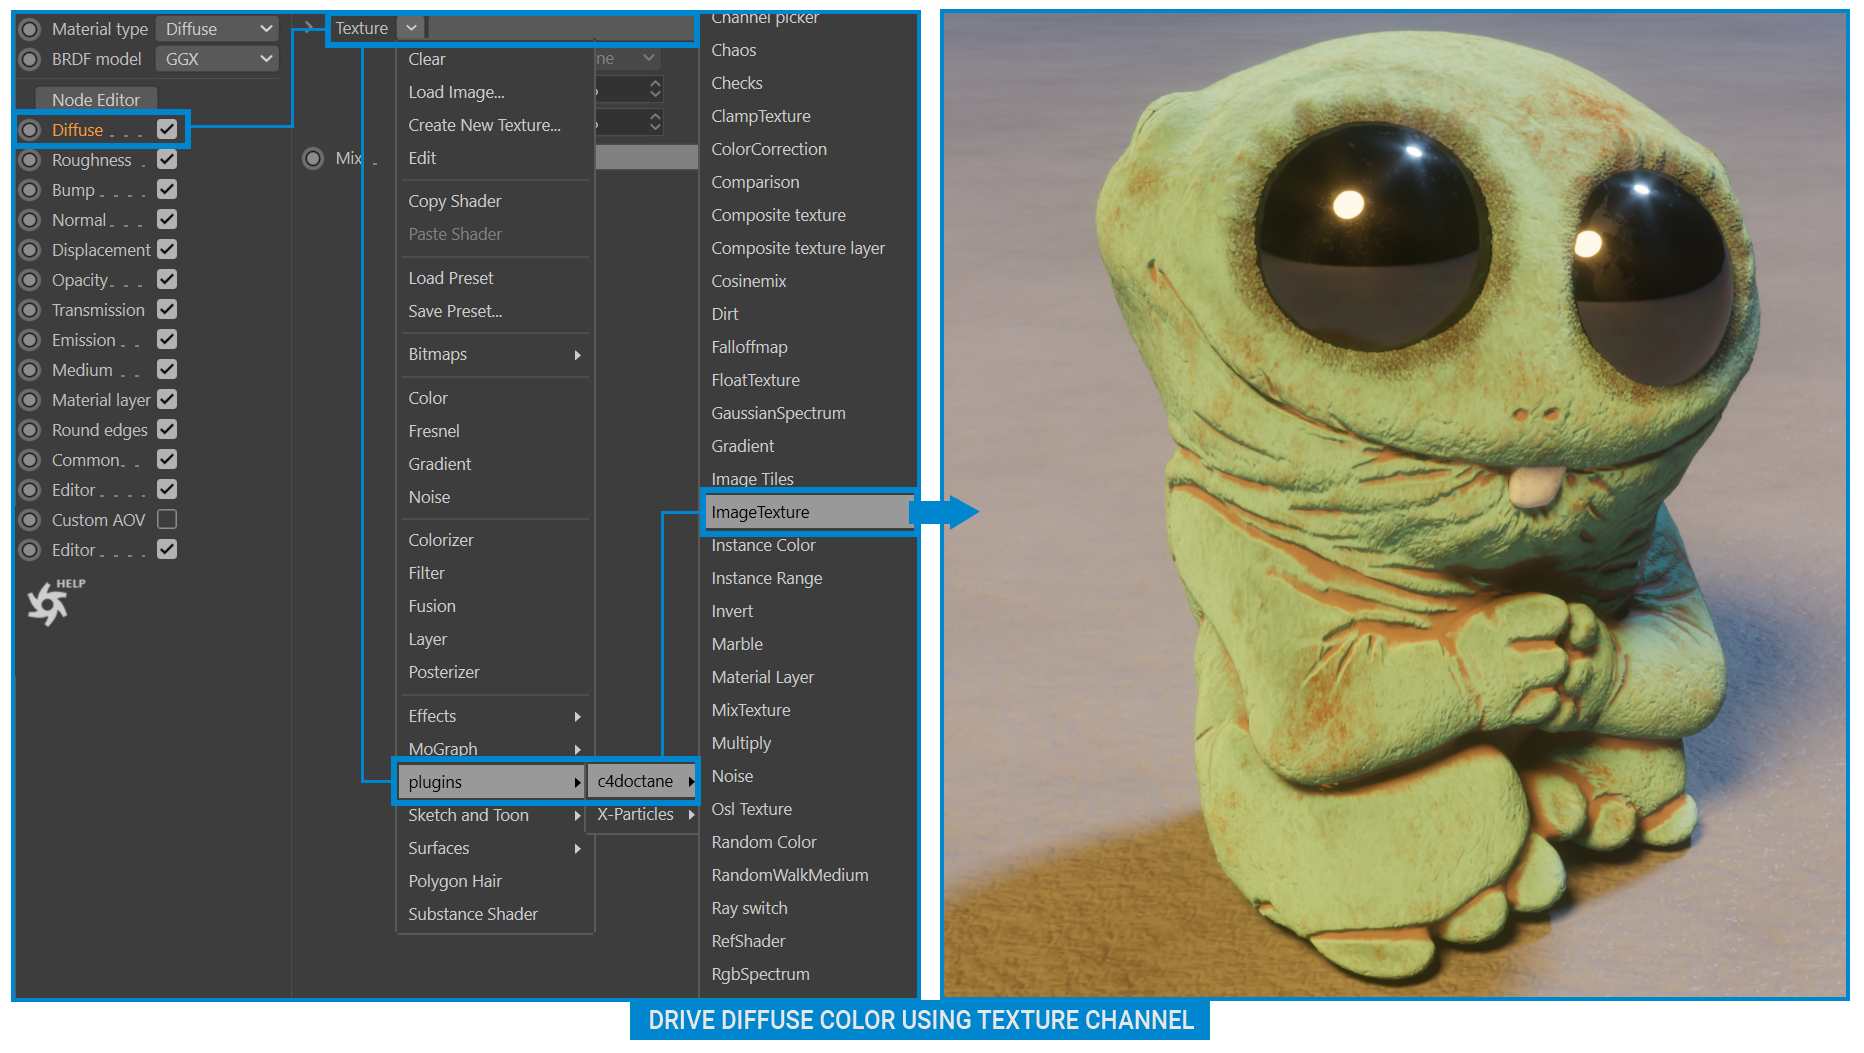
You can give the material its base color or albedo by modifying the Diffuse parameter. Diffuse color can be set using an RGBSpectrum or Gaussian node or by using a procedural or image-based texture.
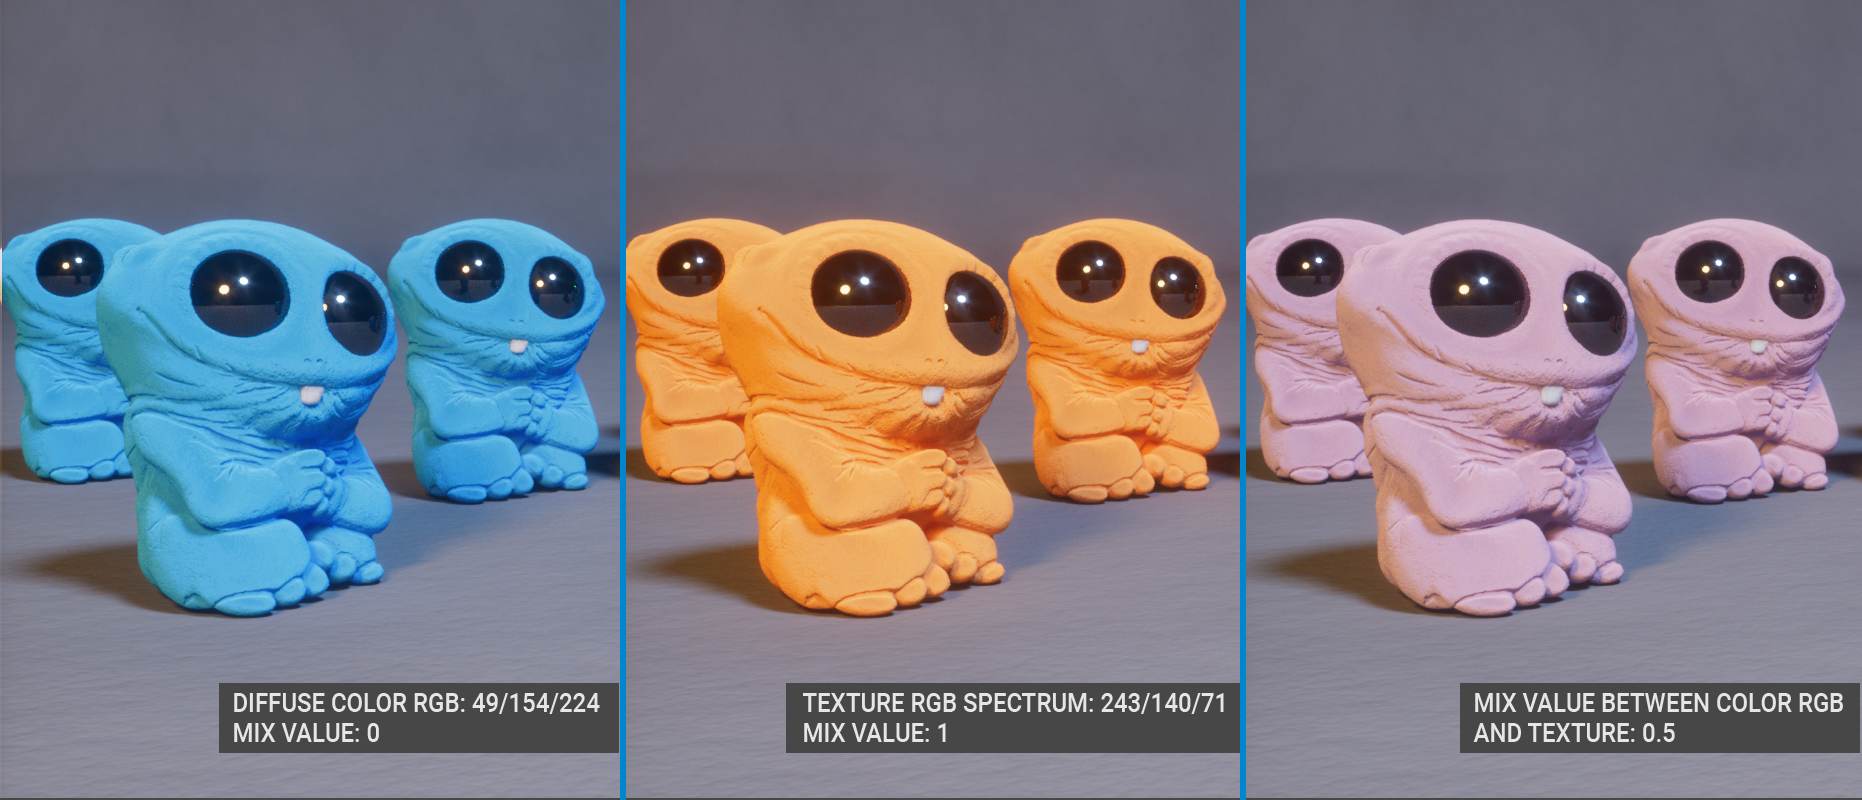
Color: it’s the Diffuse/Albedo color, with RGB color value.
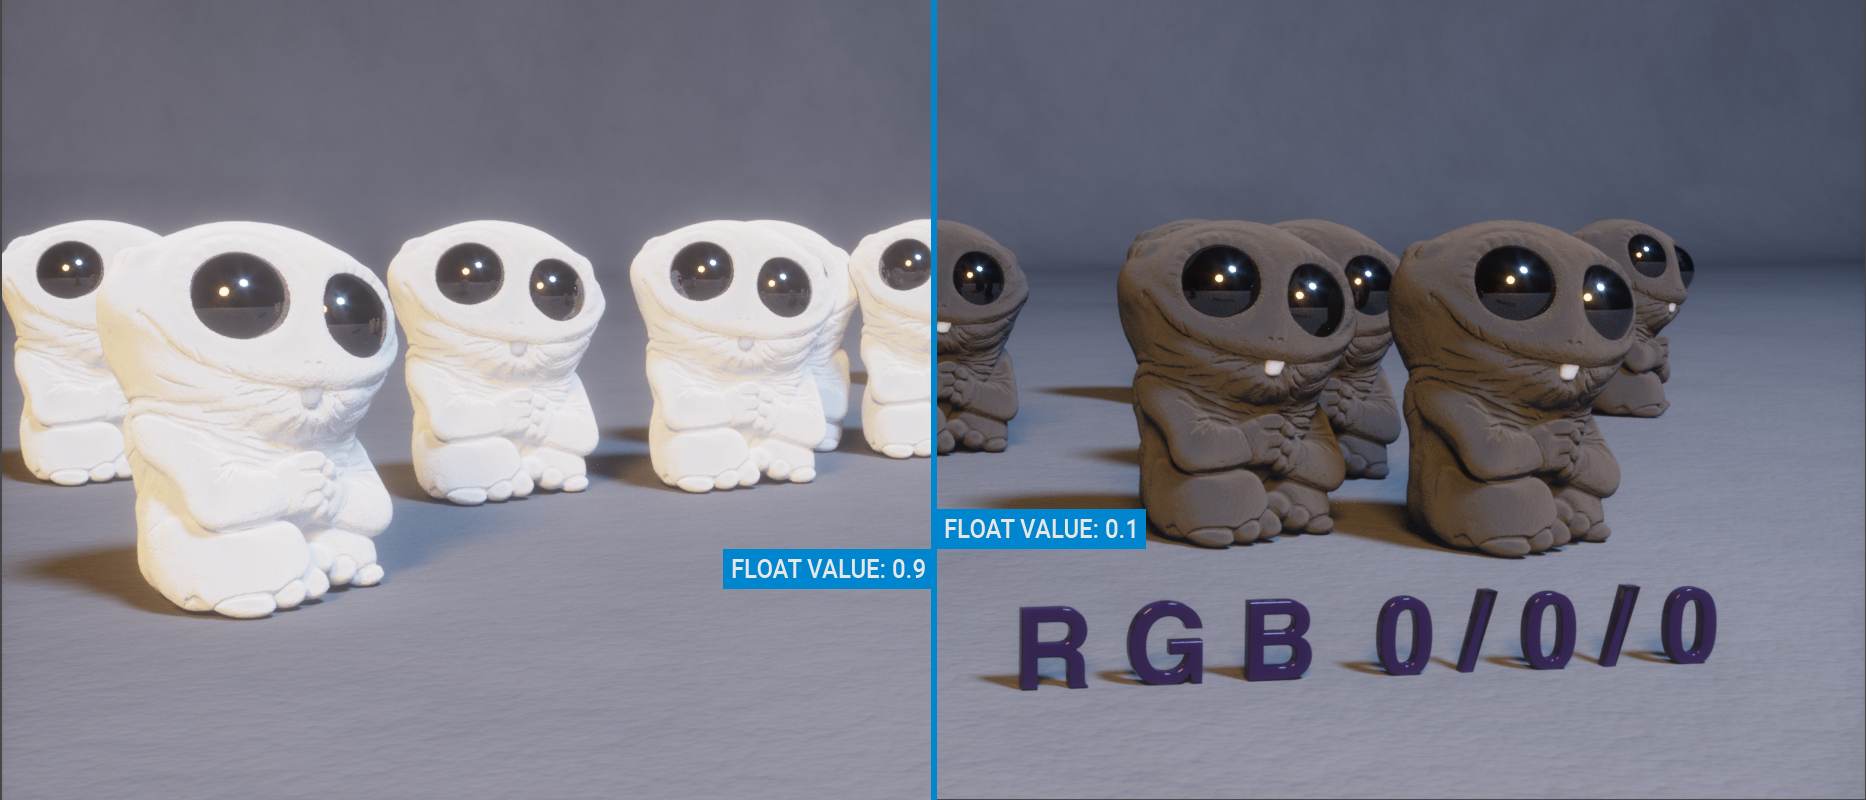
Float: if you prefer greyscale, you can choose this option. If the RGB color is zero, this float value creates black for 0 and white for 1. The float here also works the same in Roughness, Bump, Normal, Opacity and Transmission channels.
Texture: You can define a texture for the diffuse channel using this option. These textures can be any of the image or procedural texture types. When you assign textures here, both the RGB and Float values are disabled. If a mixture of both texture and color is required, use the mix option.
Mix: This option help you mix both the RGB color and the texture type. If you use a value between 0.0 and 1.0, it will mix the color assigned to the diffuse slot and the assigned texture.
Roughness
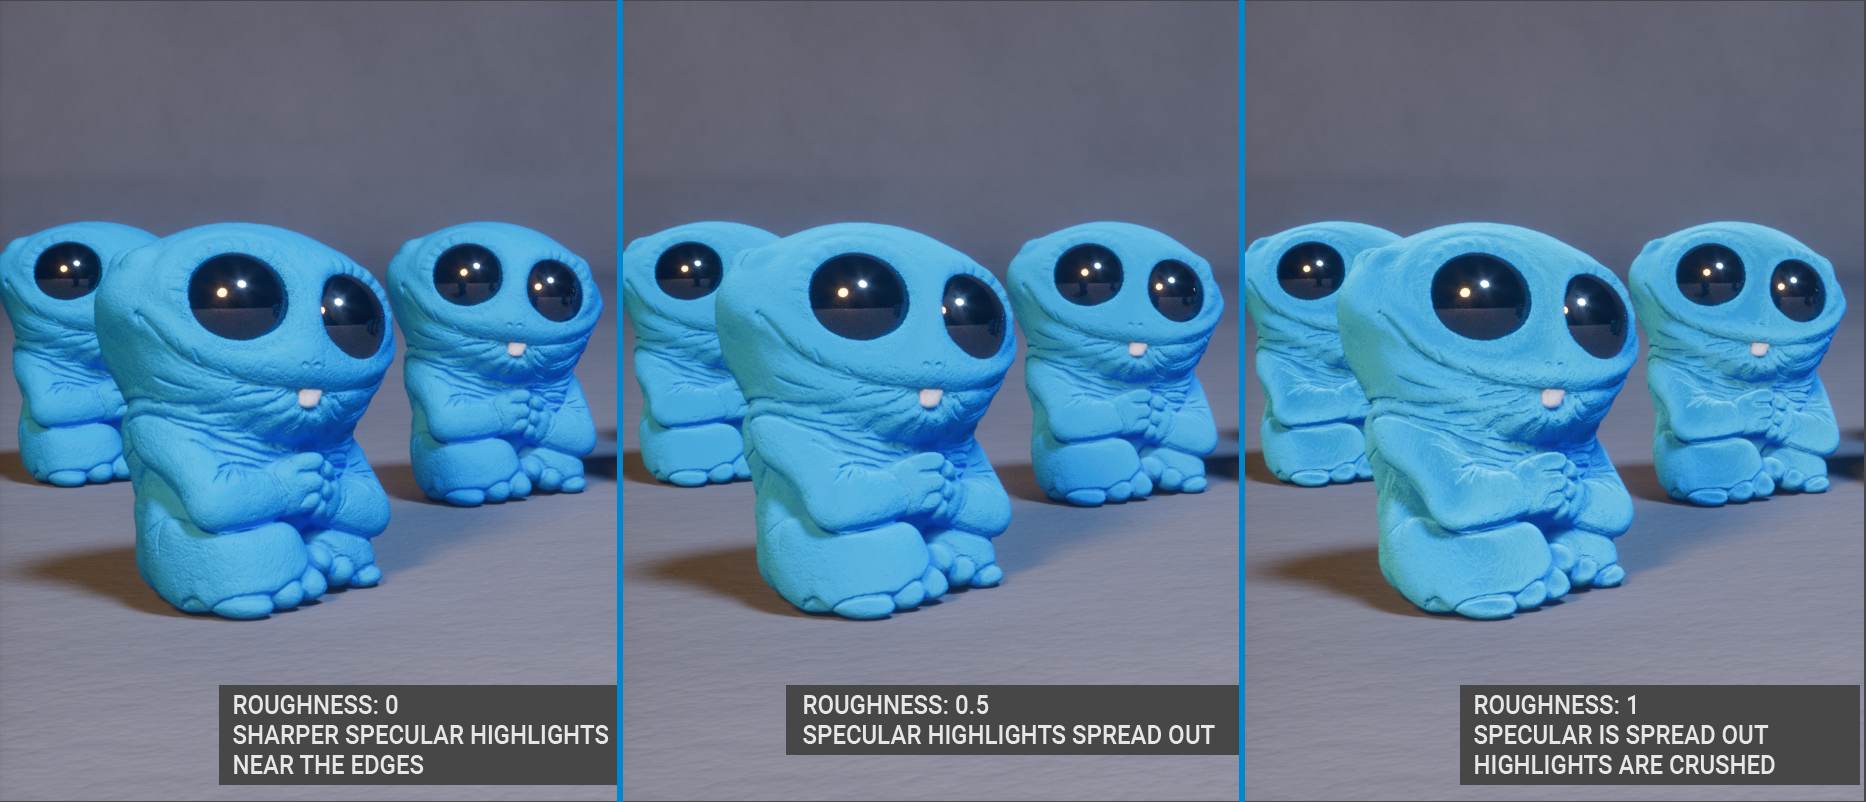
The roughness parameter controls the spread of reflected light (specular highlights) on the surface. Higher roughness values (or lighter colors) create more pronounced highlights. This parameter uses either grayscale or float values. You can also use textures to vary the roughness value across the surface of an object.
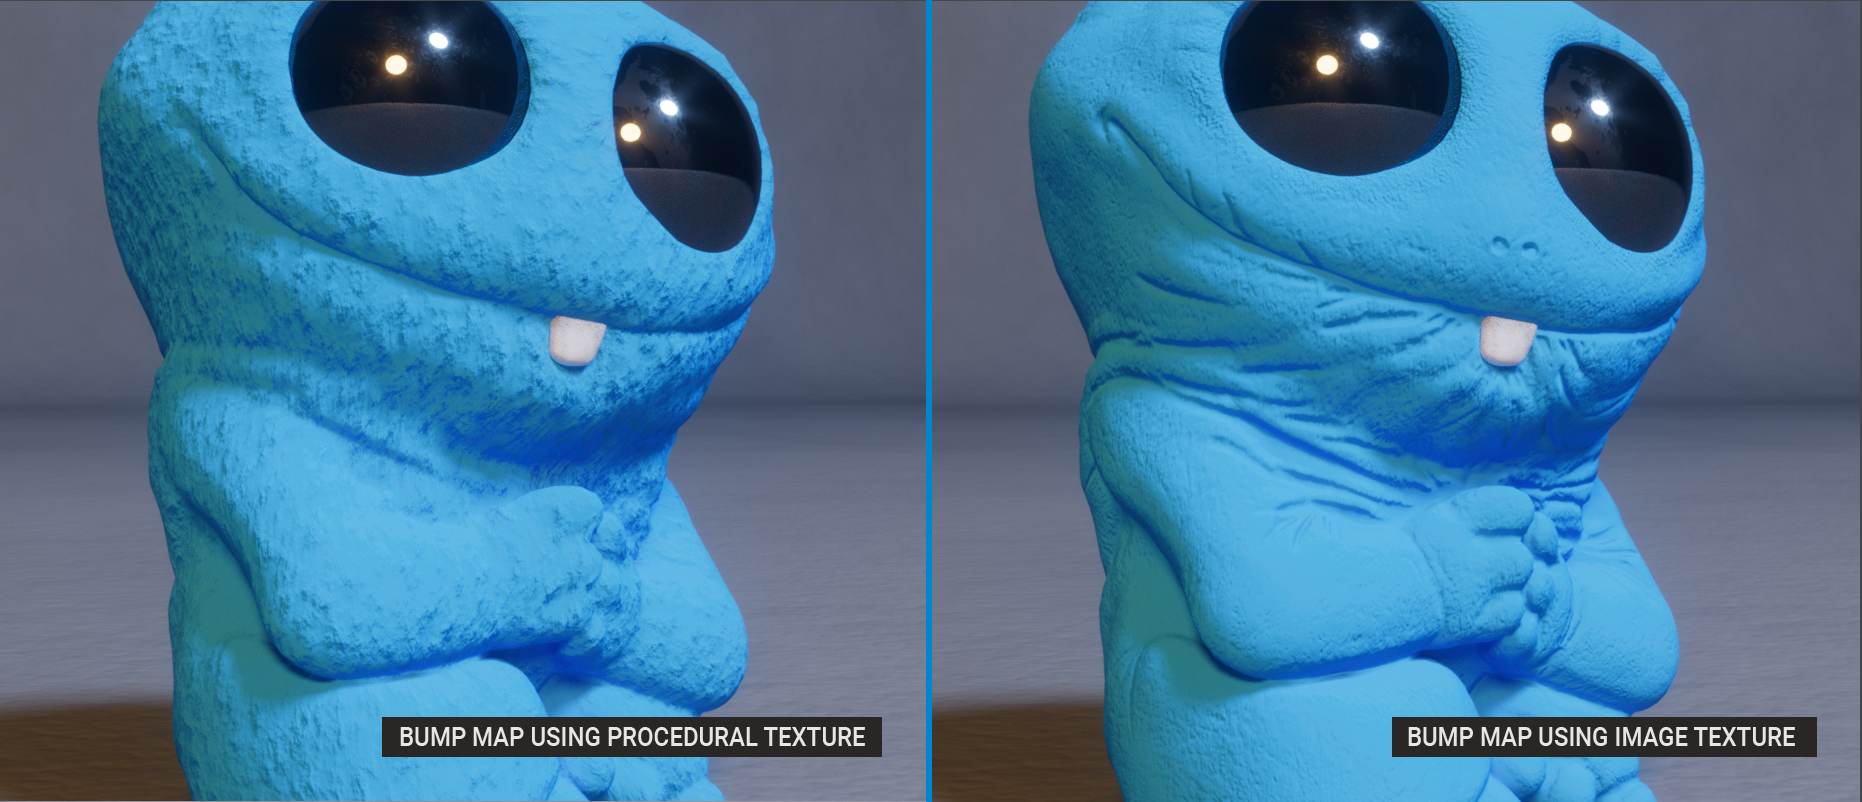
Bump
If you want to create detailed perturbations on the surface of the material, such as chips, scratches and so on, this parameter can help. You can use any grayscale image or procedural texture to save VRAM. Bump maps are actually a cheat to create roughened surfaces while shading but will not affect the silhouette of the object to which it is applied. For that, use displacement.
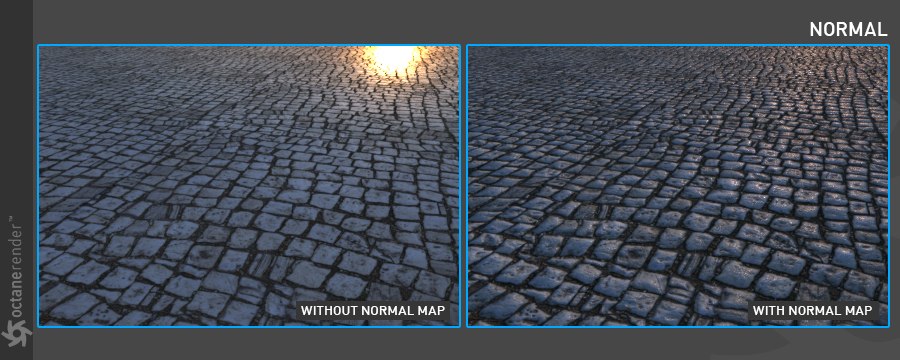
Normal
Normal maps are more advanced than bump maps and canhelp you achieve a more realistic result. Normal maps store data in 32-bits per component, via the red, green, and blue channels, to create detailed indentations on the surface. Some good software to create normal maps are ZBrush, Mudbox, Bitmap2Material or Xnormal. Like bump maps, normal maps will not change the silhouette of the object — you can use displacement to accomplish that.
Normal maps are quite effective and more efficient than displacements, you should use normal maps as much as possible and use displacement maps as a fallback. Octane will treat the gamma of Normal maps as 1.0 regardless of the gamma setting.
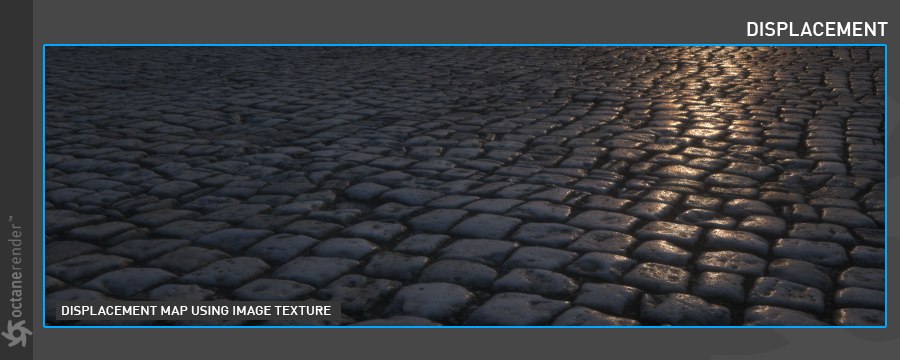
Displacement
Displacements create new polygons at render time. These polygons are generated per the applied grayscale displacement map. Displacement maps require the object to have a UV map, applied via a Displacement node. You should make sure you have enough vertices/polygons in your object. Use the Octane Object tag to subdivide the object and add more resolution. You can do the same thing using a displacement value in the displacement node itself. Both of these options are more efficient than the Cinema Subdivision generator, with one caveat: only the Cinema Subdivision generator supports edge weights.
Displacements will help you produce the most realistic results as the additional polygons will conform and change the silhouette of the object. When you view from any angle, the surface will look detailed in every sense. Displacement is quite versatile and capable of creating more than just small indentations. It is a process that requires a lot of computation and VRAM, so use it wisely. Octane supports two different Displacement types, Texture and Vertex.
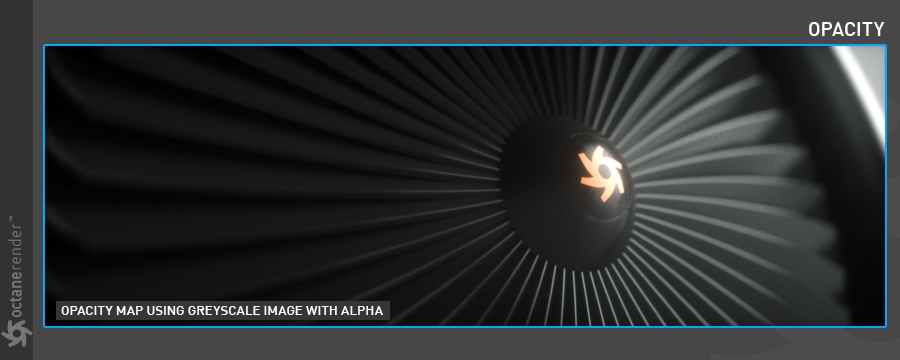
Opacity
You can use this parameter to set the transparency of an object and only requires grayscale values (Floats). Black makes the object transparent; white makes it opaque.
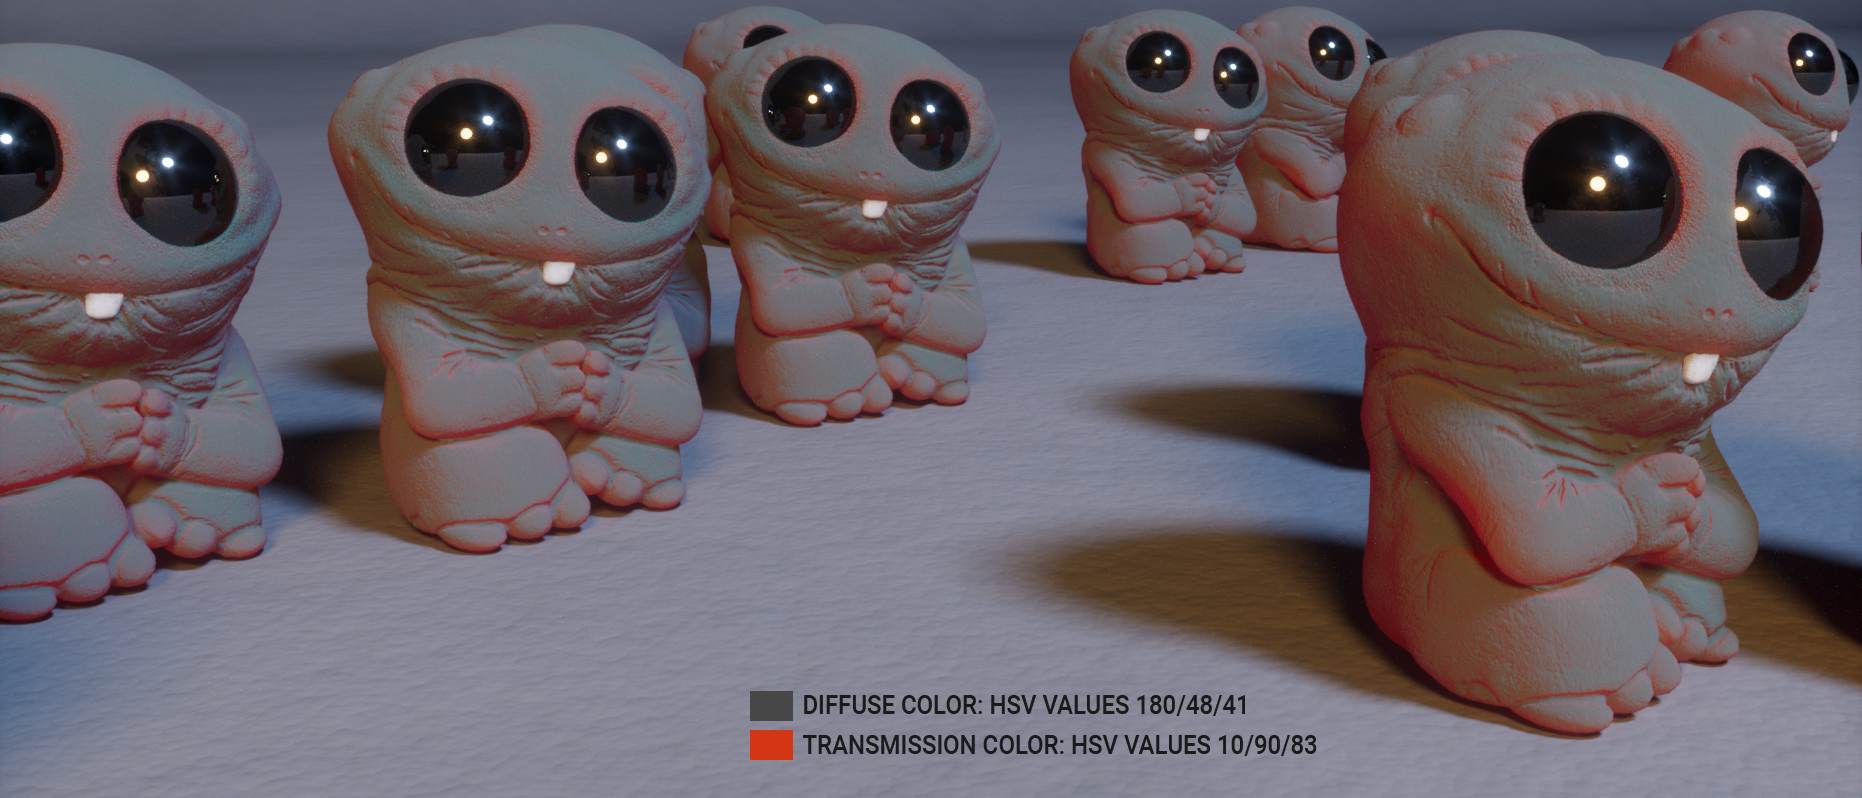
Transmission
Transmission will allow light to pass from the object, giving it a sense of internal illumination. You can use this effect to cheat sub-surface scattering and it is particularly suitable for single-sided objects, but for anything else, use a medium node. In this parameter, the Diffuse RGB and Transmission RGB are mixed according to the Indirect Light hitting the surface.
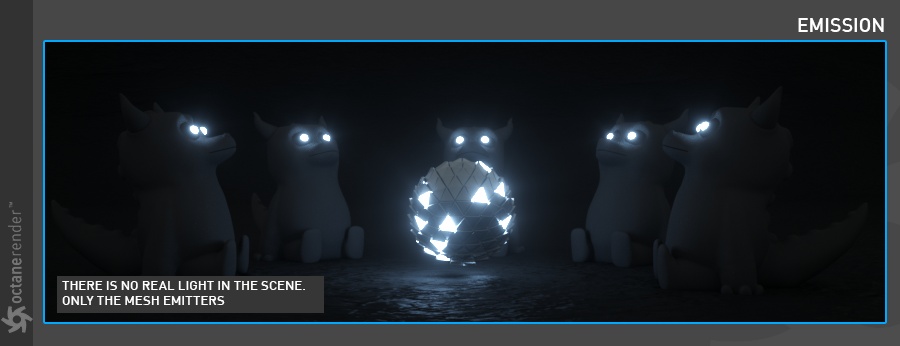
Emission
This parameter help you convert any object or portion thereof into a light source or a Mesh Emitter.
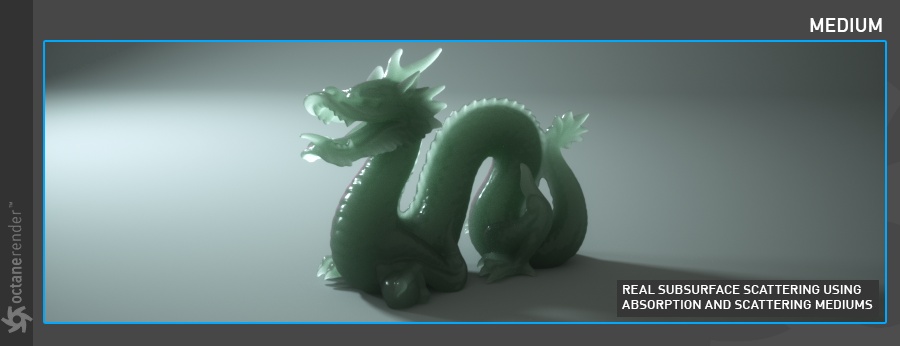
Medium
To create complex translucent materials, such as wax, leather, skin, milk or leaves and so on, you can use this parameter.
Material Layer
You can use the Material Layer to create a custom material by adding up to eight material layers to an existing material (defaults to OFF). These layers are based on components used in standard Octane materials. Complex materials can be recreated in a physically based manner, as opposed to manually mixing materials together. When enabled on the Basic tab, a Material Layer tab will be added to the tab row. In the Material Layer tab, the Add button will display the available material nodes:
-
-
-
- Diffuse Layer— Used for dull, non-reflective materials.
- Layer Group— Adds multiple material layers to existing materials.
- Metallic Layer— Used for highly reflective materials.
- Sheen Layer— Simulates the grazing coloration in fabrics.
- Specular Layer— Used for shiny materials like plastic, or clear materials like glass.
-
-
If you want to “stack” layers together, use the Layer Group. The other material types, if chosen, will replace the earlier layer choice.
The Remove button will remove one layer at a time.
Round Edges
The Round Edges option helps you round off the edges by using a shading effect instead of creating additional geometry (defaults to OFF). This option is best used for rounded edges that will appear small in the final render, as larger sizes will reveal the trick. When enabled on the Basic tab, a Rounded Edges tab will be added to the tab row. There are there five animatable parameters in the Rounded Edges tab:
-
-
-
- Mode — Choose from Fast, Accurate, Convex and Concave. Each choice offers a different look and render time. The Accurate mode will produce better-looking results but may be slower. Accurate mode can select the affected edges by using the Concave Only or Convex Only options.
- Radius — The radius of the rounded edge.
- Roundness — The rounded appearance of the edge (beveled to smooth). A value of 1.0 is completely round, while a value of 0.0 is a chamfer.
- Samples — The number of rays to use when sampling neighboring geometry.
- Consider Others — You can control how rounded edges are applied to different objects with this option. When enabled, intersections between different objects are rounded. When disabled, only the current object is considered.
-
-
Common
This section consists of several options:
Shadow Catcher: You can turn any object into a special object called a “Shadow Catcher” in the scene using this option. It’s very useful to help “ground” a rendered object into a real world shot for compositing.

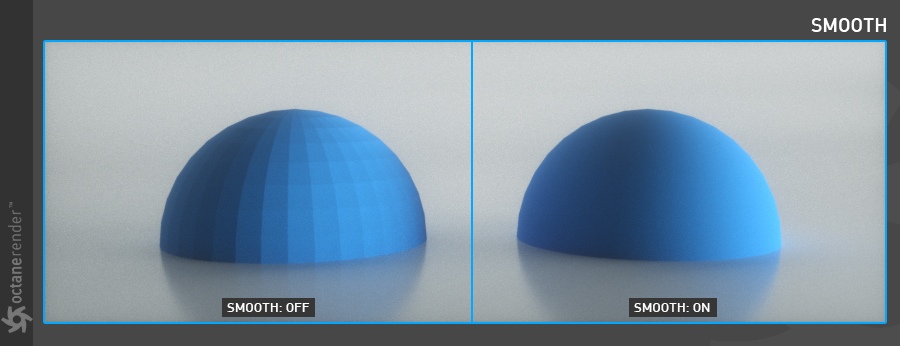
Smooth: The Smooth parameter is a toggle which smooths the transition between surface normals. If you disable this option, the edges between the polygons of the surface will be sharp giving the surface a faceted look.
Smooth Shadow Terminator: The Smooth Shadow Terminator modifies the ray offset locally to avoid terminator artifacts resulting from geometry that is too coarse. There is a minor performance penalty and the projected shadow may shift when used in some cases.

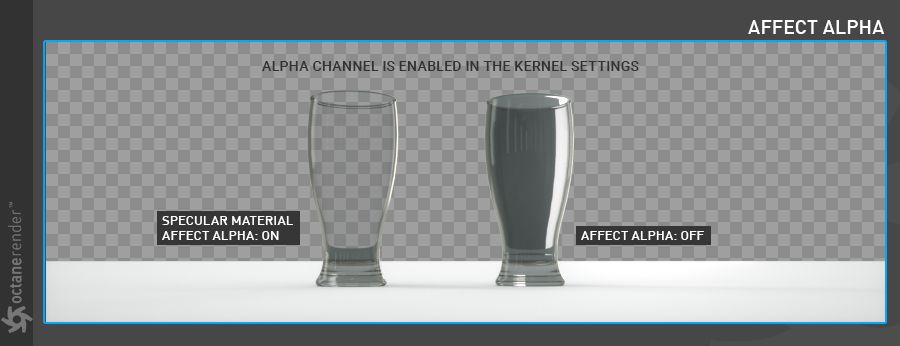
Affect Alpha: When used with the Specular material, this option will render the refractions of the material in the alpha channel for proper compositing. You will need to enable the “Alpha Channel” option in the Kernel settings.
Priority: You can determines the priority of transparent surfaces when Nested Dielectrics is enabled (valid range is -100 to 100) using this option.
C4D Shaders: This value determines the Cinema 4D shader quality.
Vertex Map Resolution: This parameter works internally. The default value is recommended.
Custom AOV
This section enables a customized AOV to be created by the material. Custom AOVs are just RGB containers that can be used to capture certain aspects of your scene via different methods. You can write specific object layer or material maskes into customer AOVs and choose whether the mask should be written into all channels or only into the red, green or blue channel.
Editor
This section offers the following options:
-
-
-
- Animate Preview — Enable the display animated textures or material attributes in the user interface.
- Texture Preview Size — Determines the OpenGL texture preview size for the 3D viewport windows.
- Editor Display — Determine what aspect of the material is used in viewport display. The default is combined, which shows all channels. Use this option for Octane materials, as the individual channels in the list refer to Cinema 4D materials only.
-
-
Help Button
This option will present the corresponding section of this Help file.
Assignment Tab
Displays the scene objects that have the current material assigned.
iRender - The best cloud rendering service for Cinema 4D and Octane
iRender provides you a high-performance and configurable server system for 3D rendering, AI Training, VR & AR, simulation, etc. We believe that design and creative activities are private and personal that only you artists will know what you want with your animation.
As Octane can scale up linearly when you use a multiple GPUs system, we offer you from single RTX 4090 to multiple RTX 4090s/3090s. Check out these articles to know why RTX 4090 is still the best for Octane rendering: Top GPU for Redshift, Octane and V-Ray in 2023 and Compare RTX 4090 vs RTX 6000 Ada vs RTX A6000 for content creation.
We are not only providing you the most powerful graphics card, but also the same level of hardware, such as AMD Ryzen Threadripper processor, 256 GB RAM, 2 TB of storage (NVMe SSD).
For Octane, we suggest our multi RTX4090s or RTX3090s. Below is our test with Octane and Cinema 4D:


Not only those powerful configuration, iRender also provides you more services. Free transferring tool named iRender drive for macOS or Linux users. For Windows users, we recommend using our all-in-one application iRender GPU to work, and you don’t need to come to our website. Our price is flexible with hourly rental which has pay-as-you-go basis, daily/ weekly/ monthly subscription with discount from 10-20%. Plus, you have 24/7 support service with real human who will support you whenever you encounter an issue.
If you use Cinema 4D, kindly create a remote machine with Cinema 4D pre-installed and you are provided one license free. Regarding Octane, you can transfer your own license, or contact us if you want to use our license. Our 24/7 staff will advise you on how to use it.
Register an account today to experience our service and enjoy a very big promotion 100% bonus for new user. Or contact us via WhatsApp: (+84) 916806116 for advice and support.
Thank you & Happy Rendering!
Source and images: otoy.com
Related Posts
The latest creative news from Octane Cloud Rendering, Cinema 4D Cloud Rendering