
Reduce noise to optimize renders in Cycles for Blender (Part 2)
When performing a final render, it is important to reduce noise as much as possible. In the previous article, we learned some tricks to reduce noise to optimize renders in Cycles. Today, we will go through some more ones. Let’s explore!
Some tricks to reduce noise for optimizing renders in Cycles
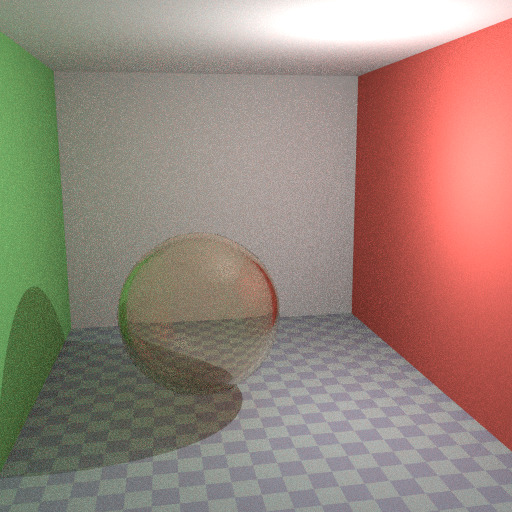
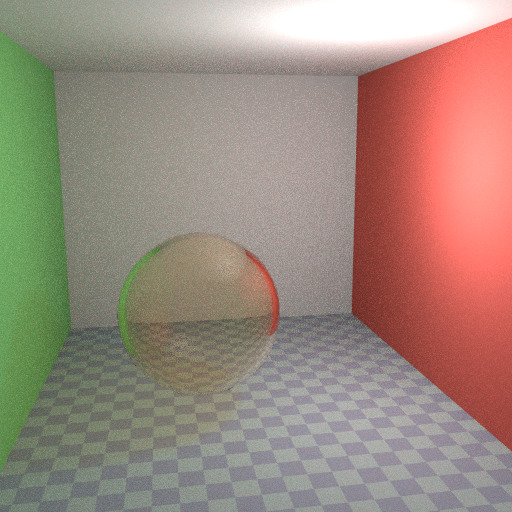
5. Light falloff
In a vacuum, light always falls off at a rate of 1/(distance^2). In reality, light in a vacuum always decays at the rate of 1/(distance2). However, as the distance decreases to zero, this value increases to infinity, resulting in very bright spots in the image. These are mostly a problem with indirect lighting, as the probability of hitting such a small but incredibly bright point is low and seldom occurs. This is a common recipe for Fireflies.
Source: Blender Documentation (docs.blender.org)
To reduce this effect, you can use a Smooth factor in the Light Falloff node to reduce the maximum intensity a light can contribute to near surfaces. The images above demonstrate the default falloff and smooth value of 1.0.
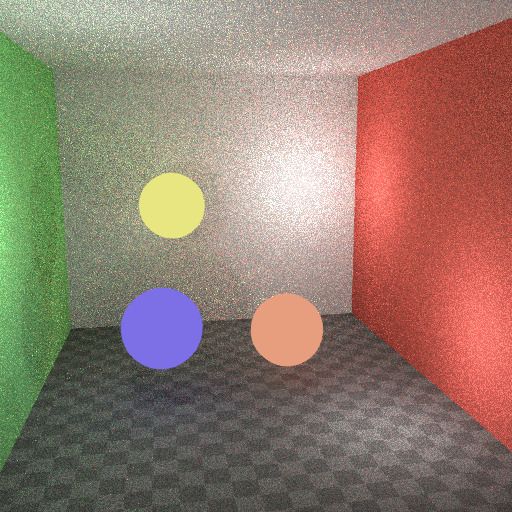
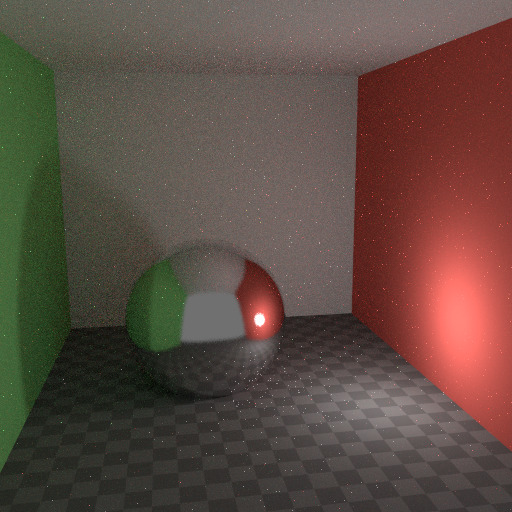
6. Multiple importance sampling
Materials with emission shaders can be configured to utilize Multiple Importance Sampling (Material Settings). This means that rays will be sent directly at them rather than rays randomly bouncing around them. For very bright mesh light sources, this can significantly reduce noise. However, this will take samples away from other brighter light sources that must be found in this manner when the emission is not particularly bright.
The best setting here is difficult to predict; it may be a matter of trial and error. However, it is often clear that a slightly glowing object may only contribute light locally, whereas a mesh light utilized as a light would require this option to be enabled. Let’s look at the below example images where the emissive spheres contribute slightly to the lighting. By disabling Multiple Importance on the emissive spheres, the image renders with slightly less noise.

Source: Blender Documentation (docs.blender.org)
The world background also has a Multiple Importance (Settings) option. This is mostly useful for environment maps that have small bright spots in them, rather than being smooth. This option will then, in a preprocess, determine the bright spots, and send light rays directly toward them. Enabling this option, once again, may take samples away from more essential light sources if it is not required.
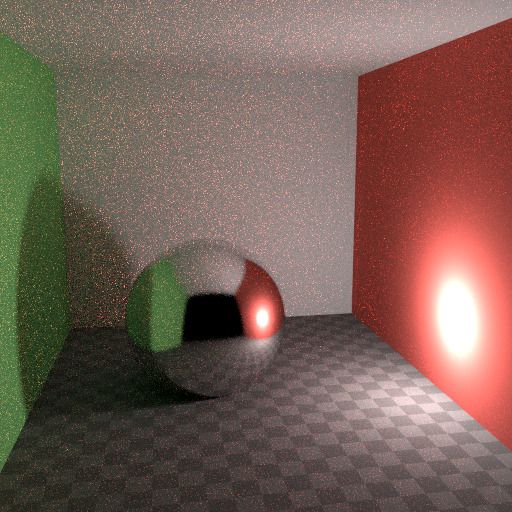
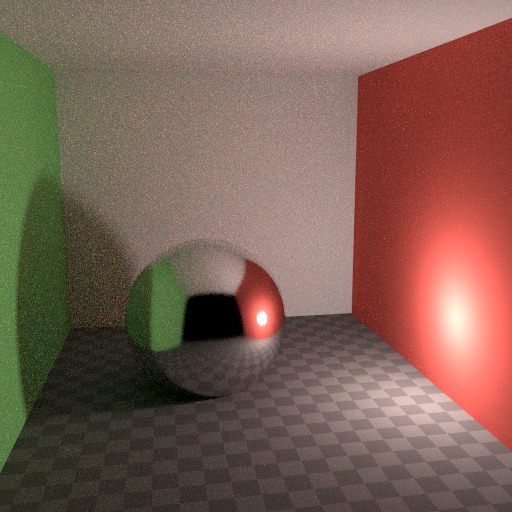
7. Glass and transparent shadows
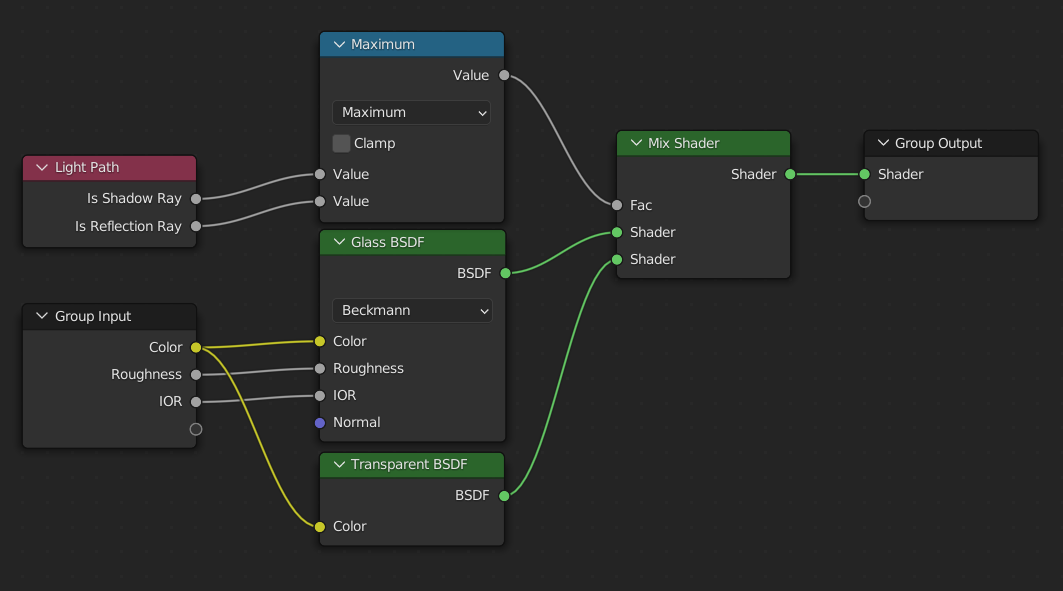
Glass shadows may look too dark when caustics are disabled. On the other hand, caustics may appear too soft when the filter is glossy. We can create a glass shader that uses a Glass BSDF when viewed directly and a Transparent BSDF when viewed indirectly. The Transparent BSDF can be used to identify light sources directly through surfaces and produce properly colored shadows without caustics. The Light Path node determines which of the two shaders to use.
Below we will see the node setup for the glass transparency trick.
We can watch the two following images. The render on the left has dark shadows because of missing caustics. The right image has applied the trick.
Source: Blender Documentation (docs.blender.org)
8. Light portals
When rendering a daylight indoor scene where the majority of the light comes in from a window or door opening, it is hard for the integrator to find its way to them. Light Portals can help with this. You will then need to adjust its shape to match that of the opening you are attempting to fill.


9. Denoising
Even with all of the above settings, there will always be some render noise, no matter how many samples you utilize. To fix this, however, you can use a post-processing method to eliminate the remaining bit of noise. To use this method, enable Denoising in the Properties’ Render tab. Let’s see the denoising effect in the following images (rendered by The Pixelary)

Source: Blender Documentation (docs.blender.org)
10. Clamp fireflies
Ideally, we can apply all of the above tricks to eliminate fireflies. However, they can still happen. When that happens, we can clamp the intensity that any individual light ray sample will deliver to a pixel to a maximum value using the integrator Clamp setting. Setting this value too low can result in losing highlights in the image, which may be necessary to keep for camera effects like bloom or glare. To fix this problem, it’s typically helpful to clamp just indirect bounces, leaving highlights that are directly visible to the camera untouched.
Above are all important tricks to reduce noise in Cycles that iRender would like to share with you. Hope you find them useful to optimize your final animation renders.

Source: Blender Documentation (docs.blender.org)
iRender - The Best Render Farm for Blender
iRender is proud to be a professional GPU Accelerated Cloud Rendering Service provider for 3D Render, CGI, and VFX tasks with more than 30,000 clients. We are appreciated in many global rankings (e.g. CGDirector, Lumion Official, Radarrender, InspirationTuts CAD, All3DP, BlenderBaseCamp, VFX Rendering.)
We are currently a Diamond Sponsor of the Blender Foundation. Our long-term goal is to support the Foundation to partly contribute to the development of this awesome software. Let’s work together and support the future of Blender!
Our service for Blender
We provide high-configuration dedicated servers (physical machines/computers) that are specifically configured and optimized for GPU rendering. Our GPU machines are built with 1/2/4/6/8x RTX 3090 and 2x RTX 4090 (the new server package that we just released). Also, they all have a strong AMD Ryzen Threadripper Pro 3955WX processor, which provides increased performance together with GPU. Moreover, the workstations are ideal with 256GB RAM capacity (which is a great amount for most users, even high-end ones) and 2T NVMe SSD storage (that meets all your small to very huge projects’ files). We highly recommend you try our highest configuration server, the 8x RTX 3090. This server will be a super-configured one that brings crazy speed to Blender. It is rated as one of the most worth-trying workstations so far for Blender.
We are the right place for your custom pipeline
If you use a custom pipeline with a lot of plugins, add-ons, or proprietary tools, we are the right place for you. Using our service, you have complete control over the server(s) you operate. Therefore, you can customize your creative working environment as you expect. You can even run multiple machines simultaneously to speed up the renders, thus no more worrying about any deadline.
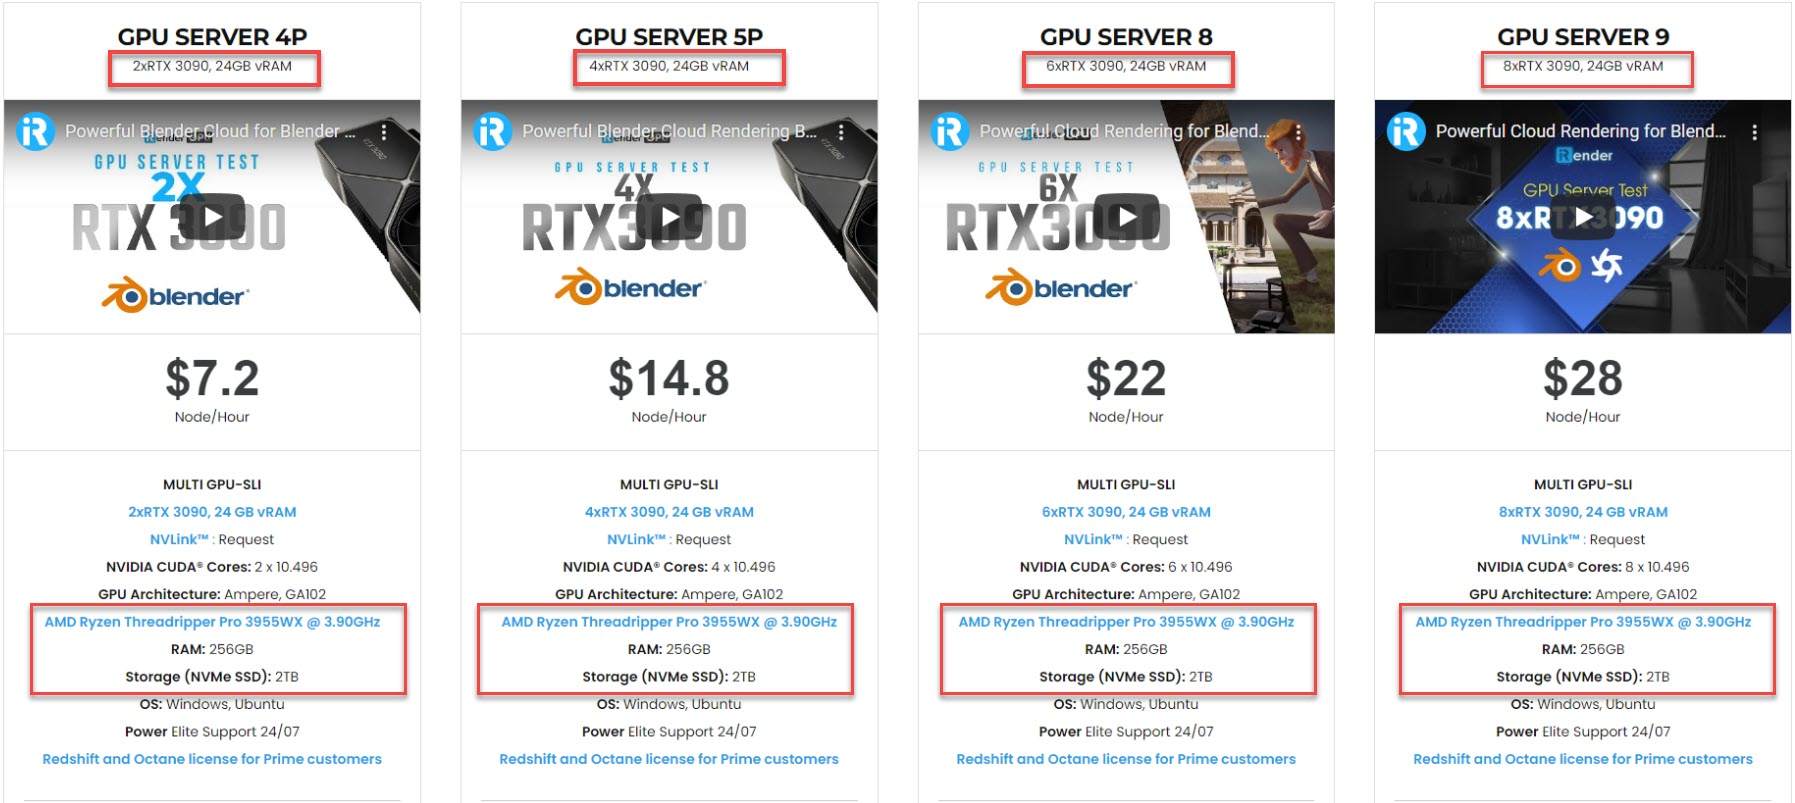
All of our servers’ configurations are publicly posted on our website. Visit HERE for more details about the configuration and the cost.
Blender rendering speed on our RTX 3090 servers
Let’s check out the rendering performance of Blender and Cycles on our 2/4/6x RTX 3090 servers in the 03 following test videos.


This October, we are running a SPECIAL OFFER: 20% Additional Bonus for new clients who register an account and make a top-up within 24 hours of registration.
Let’s get started!
Get a FREE COUPON and totally control high-end computers to boost rendering for your Blender projects now! For further information, please do not hesitate to reach us at [email protected] or Whatsapp: +84915875500.
iRender – Happy Rendering!
Reference source: Blender Documentation
Related Posts
The latest creative news from Blender Cloud rendering.


