Simple Steps to Create Video Creation in Enscape with iRender Cloud Rendering
When navigating a model in real-time is not practical, or you want a pre-scripted path that aligns with your talking points, creating a walkthrough video is the solution. And now with the related updates in Enscape 3.0, the process is even easier! In Blog’s Today, we will cover the powerful video creation features and workflows found within the Enscape plugin. Enscape has a powerful yet simple workflow for developing a video walkthrough.
Getting started with video creation in Enscape
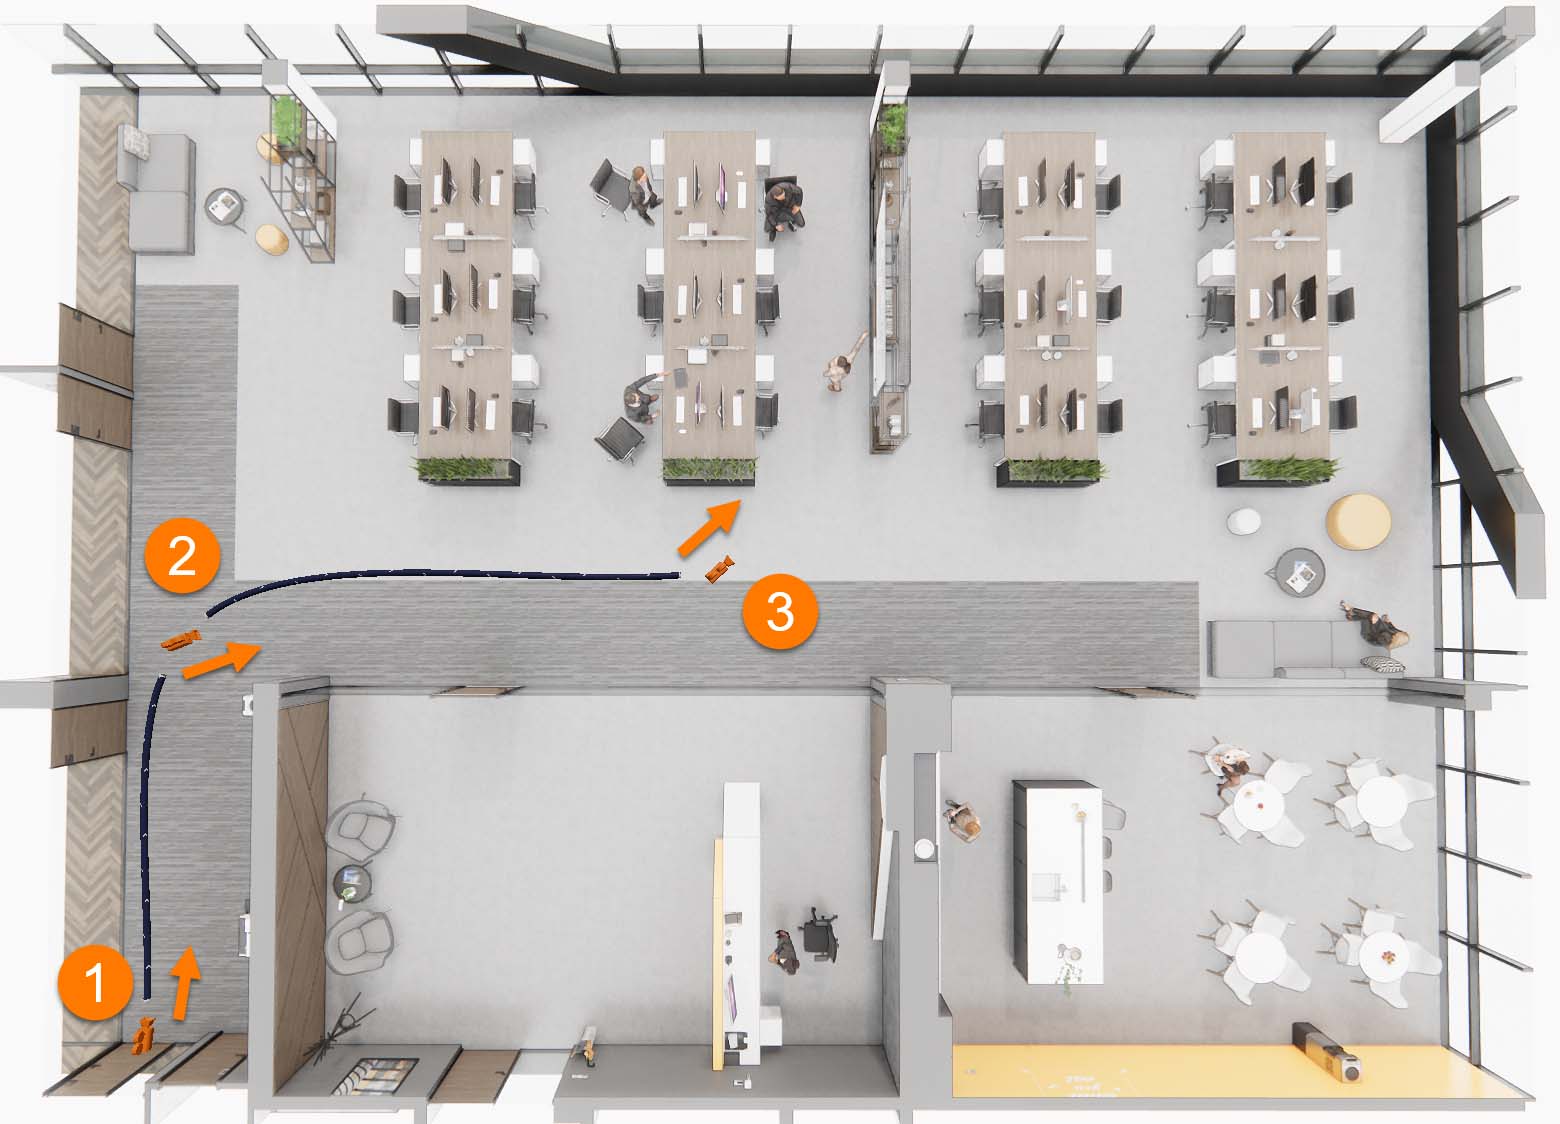
Enscape provides a great video walkthrough renderer in Revit, SketchUp, Rhino, Archicad and Vectorworks. The overall process of walkthrough rendering is very simple. First, in your design software, start Enscape, toggle the Video Editor on, and then compose a view in Enscape (see first image below). Click Add Keyframe (the + button) to define the start point. You can then continue this process along the path you would like the video to follow. The path and keyframes are visible within Enscape, as shown in the second image below. The video follows this path and morphs between each keyframe. For example, notice the view direction arrow added at each keyframe. Enscape will smoothly transition between #1 and #2 and then again between #2 and #3.

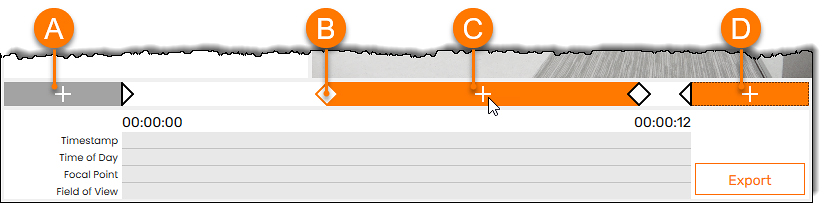
In the video editor, you can select your different keyframes by clicking on the diamond shapes on the timeline. In addition to morphing the view direction, keyframes allow other adjustments such as Time of Day, Focal point, and Field of View. The duration between keyframes can be adjusted by setting an explicit Timestamp. To finish, once the path is defined, the video may be previewed in Enscape using the Preview command (play button). If everything looks good to you, then use the Export command to make an MP4 file which can be hosted online or generally shared. Keep in mind that you can also adjust the output quality and resolution through the Visual Settings -> Capture tab beforehand.
Creating the video path
A video is created by following a camera path and defining this path has never been easier in the AEC industry when using Enscape. To begin the process, within Enscape, click the Video Editor command (or type V). This will activate the Video Editor UI within Enscape – see image below. Next, while in Enscape, simply compose a view and click the Add Keyframe + button (or type K). This adds a keyframe, represented as a diamond on the Timeline. Continue composing views and adding keyframes along the desired path until it is adequately defined to travel around objects, corners and up and down stairs.
TIP: Be sure to save your path before closing Enscape, otherwise your work will be lost!
Keyframe tools legend:
- Add a new keyframe, based on current Enscape view, before the first keyframe
- Click a diamond to select a keyframe
- Click between two keyframes to add a new keyframe
- Add a new keyframe, based on current Enscape view, after the last keyframe
Editing the video path
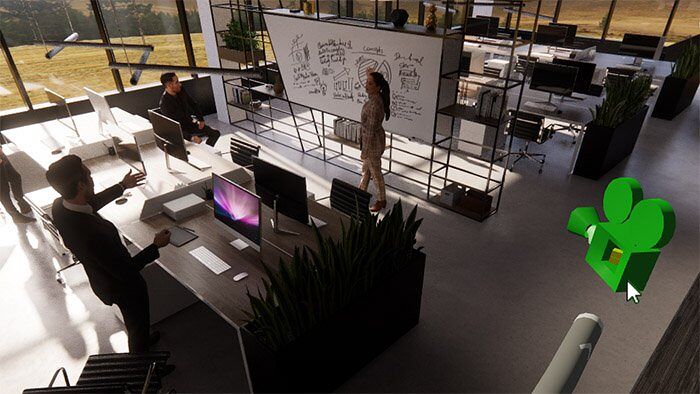
The path may need to be modified to adjust the view direction or avoid colliding with objects in the scene. Enscape makes this easy by allowing us to select keyframes and then visually adjust them. This process can be started within the 3D view or via the Timeline in the Video Editor. In the 3D view, hover your cursor over a camera (i.e. a keyframe) until it turns green (see next image) and then click. Notice how the camera path has arrows on it, indicating the direction of travel.
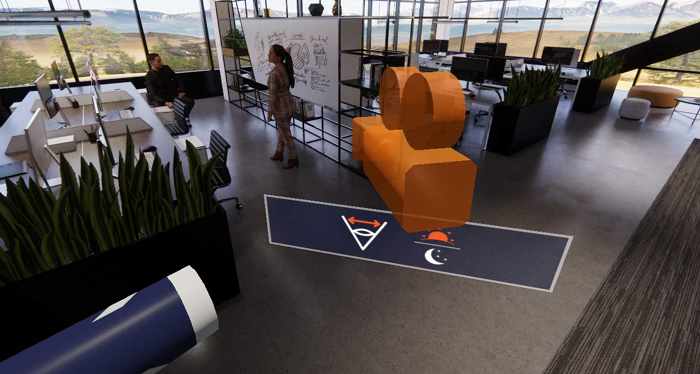
Using the controls in the Keyframe Editor, the Time of Day, Field of View, Depth of Field, and Timestamp can be overridden from the current settings. For example, if a keyframe is selected and the timestamp is adjusted, the duration of the entire video is adjusted. Or, if the time of day is adjusted in at least two keyframes, it will morph between these views. To help keep track of where overrides exist, markers are added to the Timeline as shown in the following image. These same adjustments can be seen in Enscape, next to each keyframe as shown in the second image below. It is important to remember to click Update to save changes to the current keyframe.
Save and load a path
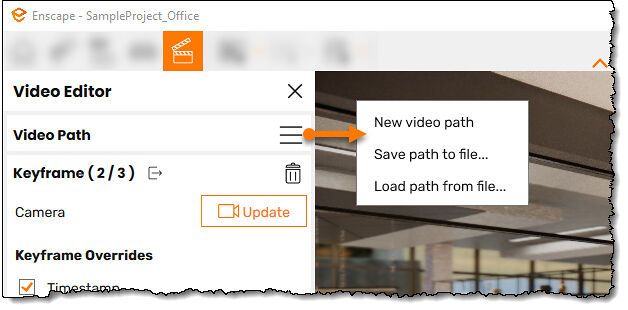
If you want to use a path again in the future, you can save it using the Save Path to file… command as shown below. The ability to define multiple paths within the same project is an especially beneficial feature. Save these files in the project folder on the network so the entire design team has access. Once a path is saved, or if you wish to discard the current path, click New video path. The saved file is an XML file. If you edit this file, you will notice each keyframe has an X,Y,Z value for Position and LookAt. These numbers could be modified to make more precise adjustments along the path – be sure to save a copy first!
Conclusion
In today’s busy and complex world, we need tools that are both powerful and easy to use. As you have seen, Enscape makes the whole process of developing and editing a walkthrough video just that – easy. The ability to create multiple paths and save each one to be individually reloaded later increases efficiency. And, the fact that this process works the same across multiple authoring tools (Revit, SketchUp, Archicad, Vectorworks, and Rhino)
The Professional Cloud rendering service for Enscape
iRender is a Professional GPU-Acceleration Cloud Rendering Service provider in HPC optimization for rendering tasks, CGI, VFX with over 20.000 customers and being appreciated in many global rankings (e.g. CGDirector, Lumion Official, Radarrender, InspirationTuts CAD, All3DP) With our server, you can install any software you need, add your license, and do whatever you like with your project. These tools above are no exception. Most tools for fluids are computationally expensive. Understanding that, we have different config and package compatible with them, from CPU to single GPU, dual and even multi-GPUs.
- Operating System of GPU SERVER 3: Once again, we need to confirm that Enscape use GPU card to render. However, a good CPU can speed up Enscape’s loading times. Because of this reason, iRender exclusively provide the Intel Xeon W-2245 with a strong processor base frequency which is 3.9GHz – 4.7GHz, 8 cores and 16 threads on GPU server 3. According to Bricsys, the minimum CPU is intel corei5. Here at GPU server 3 of iRender,the CPU is intel xeon W-2245 which can be compared to intel corei9 9900k
- The recommended GPU for Enscape is NVIDIA GeForce GTX 1660 or AMD equivalent with 4GB VRAM or higher. But more than that, the GPU of our server 3 is Gefore RTX 3090 having twice the power of Geforce GTX 1660 with 24GB vRAM.
- Let’s see rendering tests with Enscape on server RTX 3090 the latest NVIDIA CARD RTX 3090 with 24GB VRAM will help you reduce your render time very much at iRender:

Moreover, iRender has many more to offer.
- Free and convenient transfering tool: iRender offers a powerful and free file transfer tool: Gpuhub Sync. With fast file transfer speed, large data capacity, and completely free. You can transfer all the necessary data into our Gpuhub Sync tool at any time without connecting to the server. The data will be automatically synchronized in the Z drive inside the server, ready for you to use.
- Flexible price: You can always save from 10% to 20% with our Fixed Rental feature. For those who’s in need of server more than a day, or have extremely large project, we advise to choose daily/ weekly/monthly rental package. The discount is attractive (from 10 to 20% depends on your package), and you don’t have to worry about over-charging if you forget to shutdown the server.
- Real human 24/7 support service, helping you to handle the problem quickly, effectively, saving you both time and money.
If you have any questions, please do not hesitate to reach us via Whatsapp: +(84) 916017116. Register an ACCOUNT today and get FREE COUPON to experience our service. Or contact us via WhatsApp: +(84) 916017116 for advice and support.
Thank you & Happy Rendering!
Source: blog.enscape3d.com
Related Posts
The latest creative news from Enscape Cloud rendering, Lumion Cloud rendering, SketchUp Cloud Rendering , Twinmotion Cloud Rendering , 3D VFX Plugins & Cloud Rendering.