Some tips to create your 3D robot character in 3ds Max and V-Ray
In this article, let’s explore how to create a stunning 3D robot character step by step, from initial concept to the final render, using 3ds Max and V-Ray, with the help of other tools like ZBrush and Substance Painter.
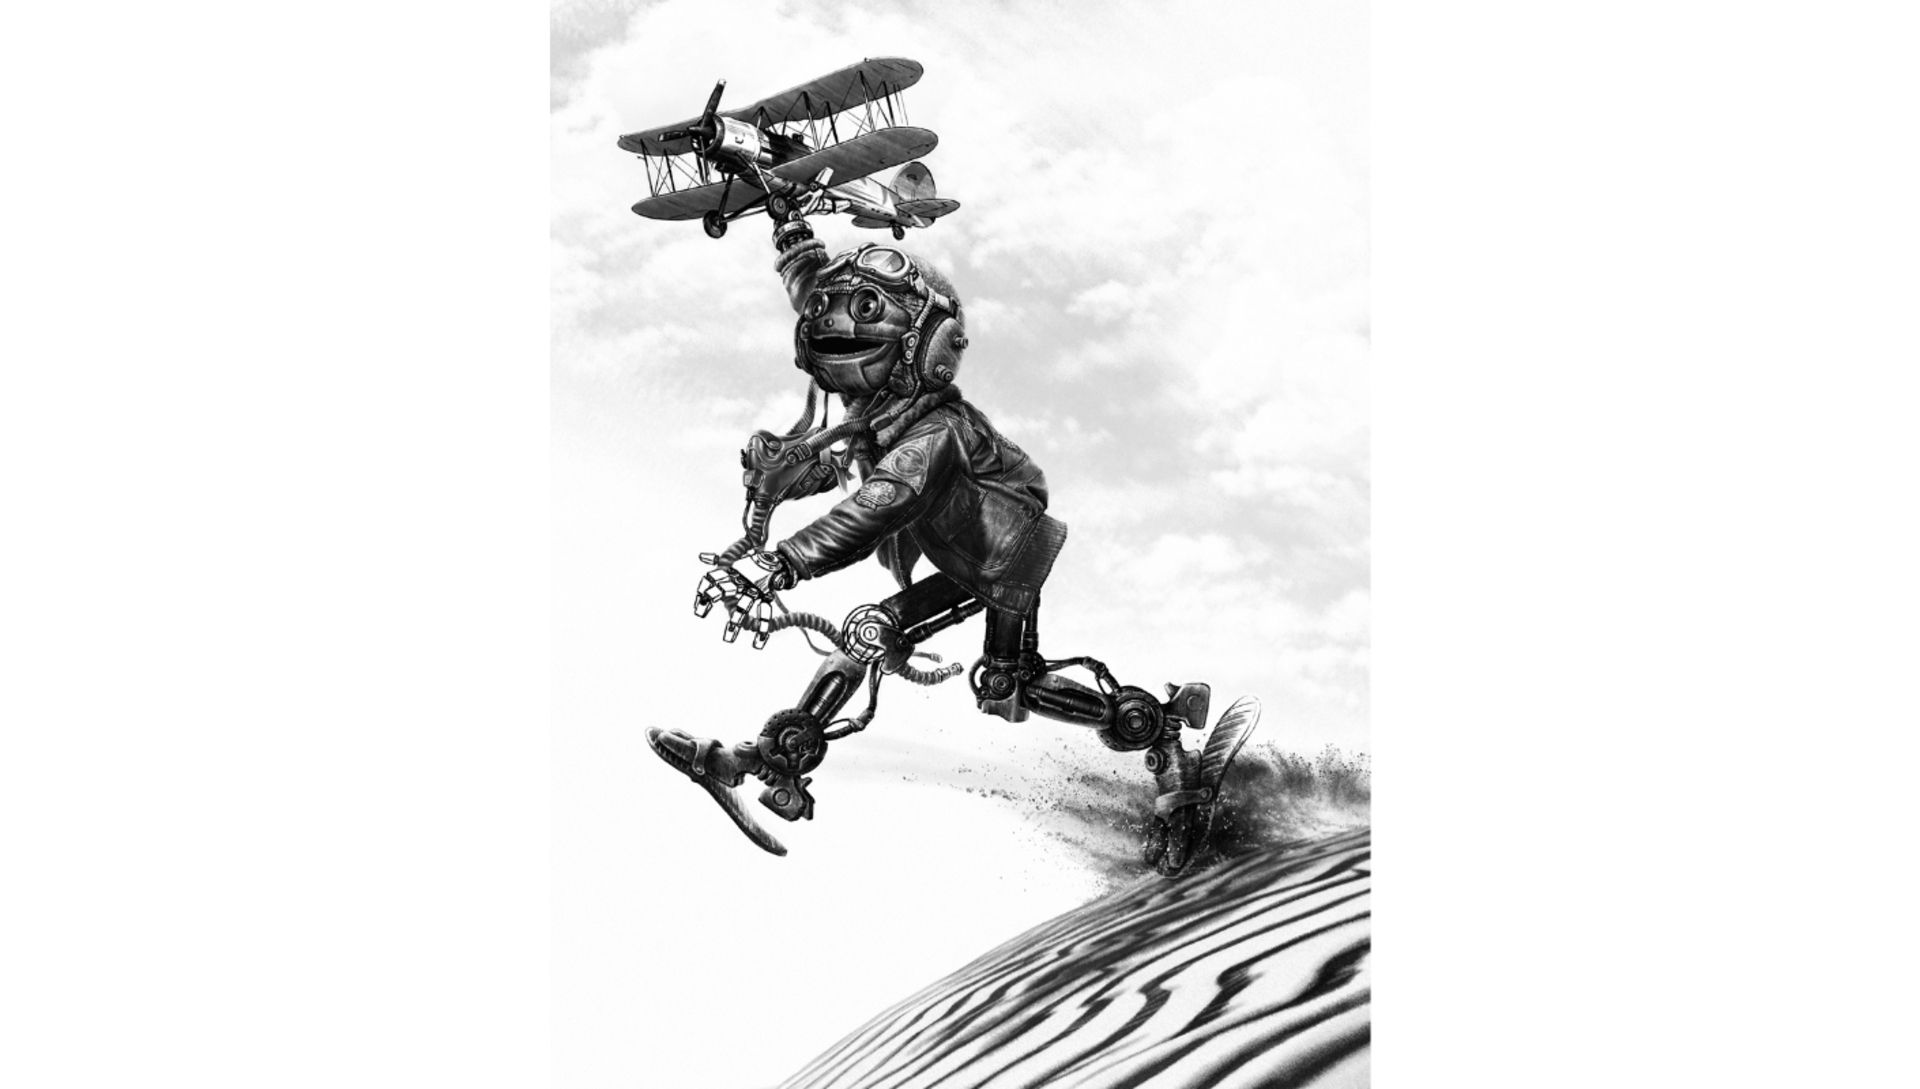
The character in this example is from artist Mihail Topalov.
Concept and modeling
When you start to make something in 3D or in any other art process, always remember one important thing: a concept illustration. You should think about a story behind the image so that the viewer, when seeing it, will be immersed in your world and can feel the dynamic in a single 3D image. In this example, the robot is illustrated as a robot child dreaming of being a pilot.
-
-
-
- You should start modeling the robot using simple shapes that can be easily modified. The aim is to capture the overall proportions and gradually improve it.
- You can use 3ds Max and Zbrush to create the models. Just focus on the overall shapes and not the details.
- Now use Zbrush to create the jacket and the helmet. Remember to mark where you want the stitches to be and add some folds.
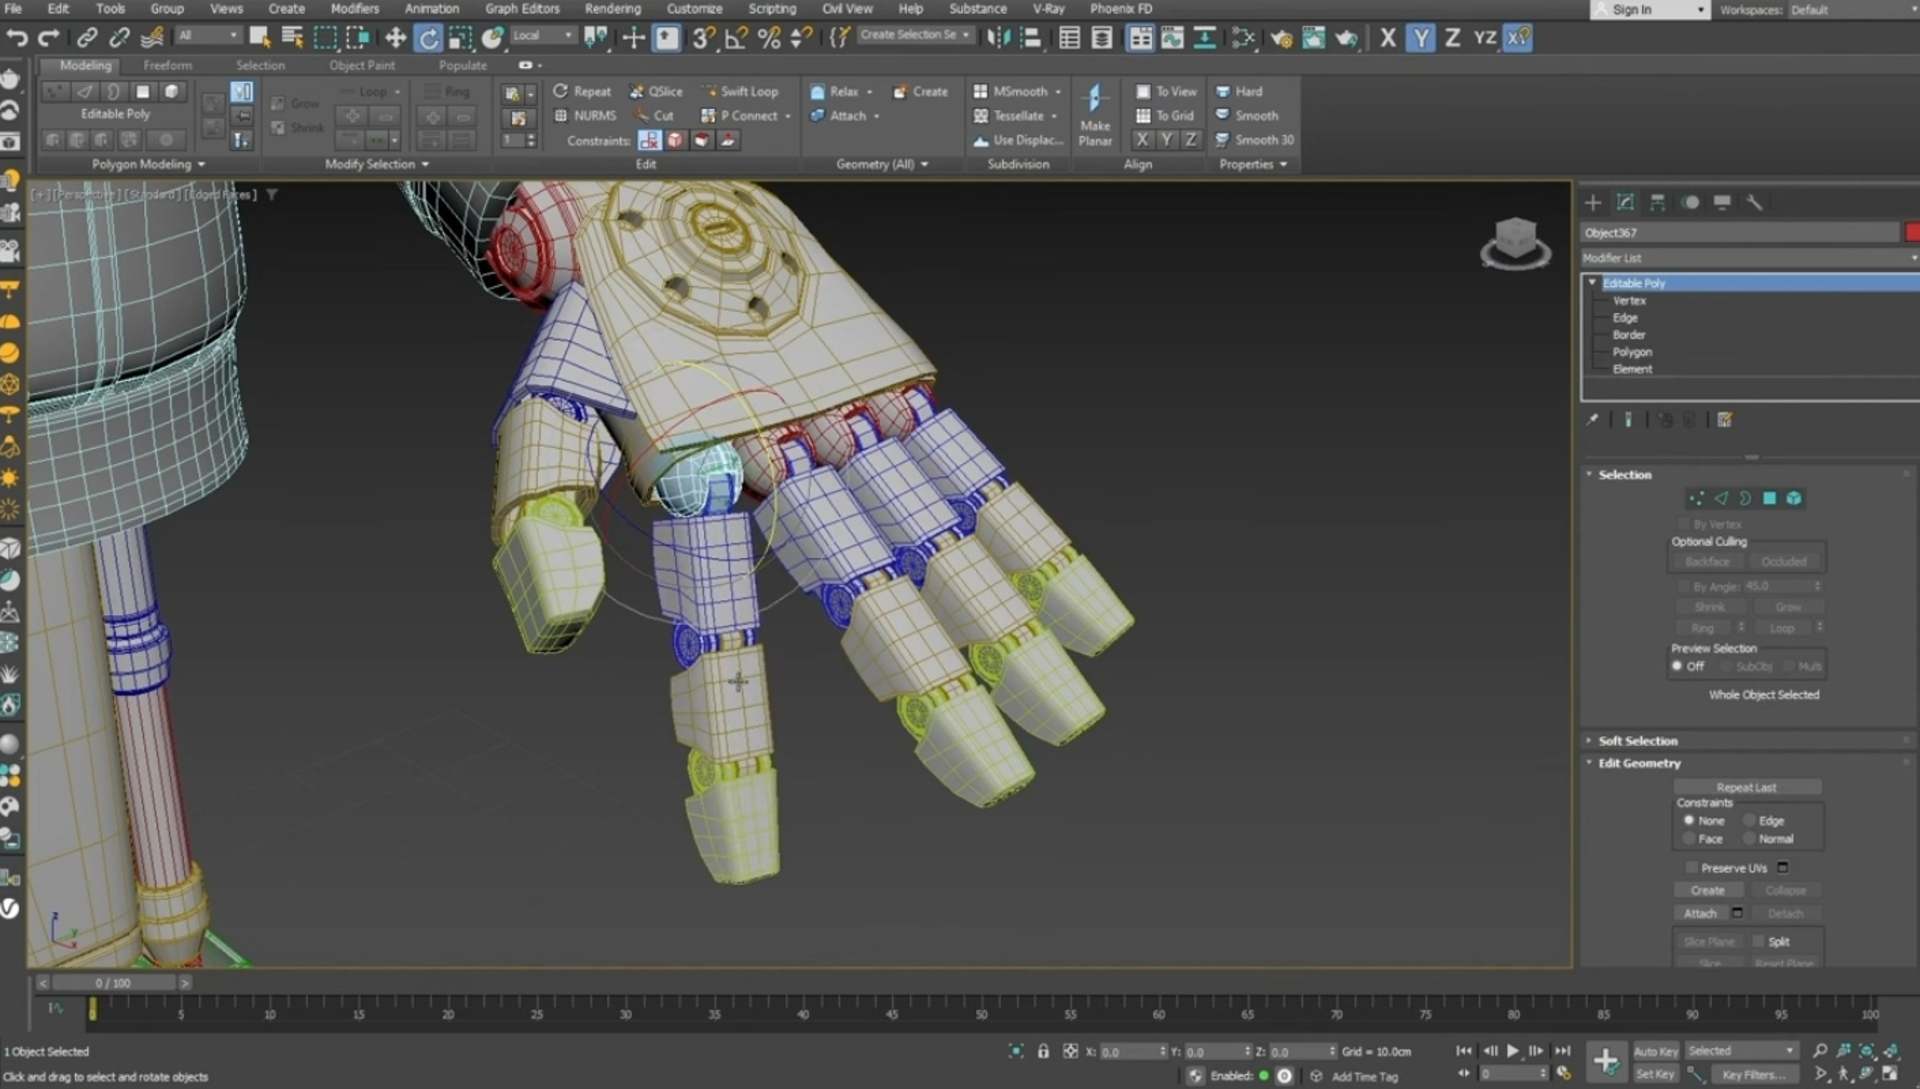
- Import the model back into 3ds Max. This is for creating the correct topology for both the jacket and the helmet. Good topology is the key for texturing and for posing the character.
-
-
Texturing
Now come to the next step: texturing phase. Before texturing, remember to unwrap the model to avoid stretching when applying the texture maps.
-
-
-
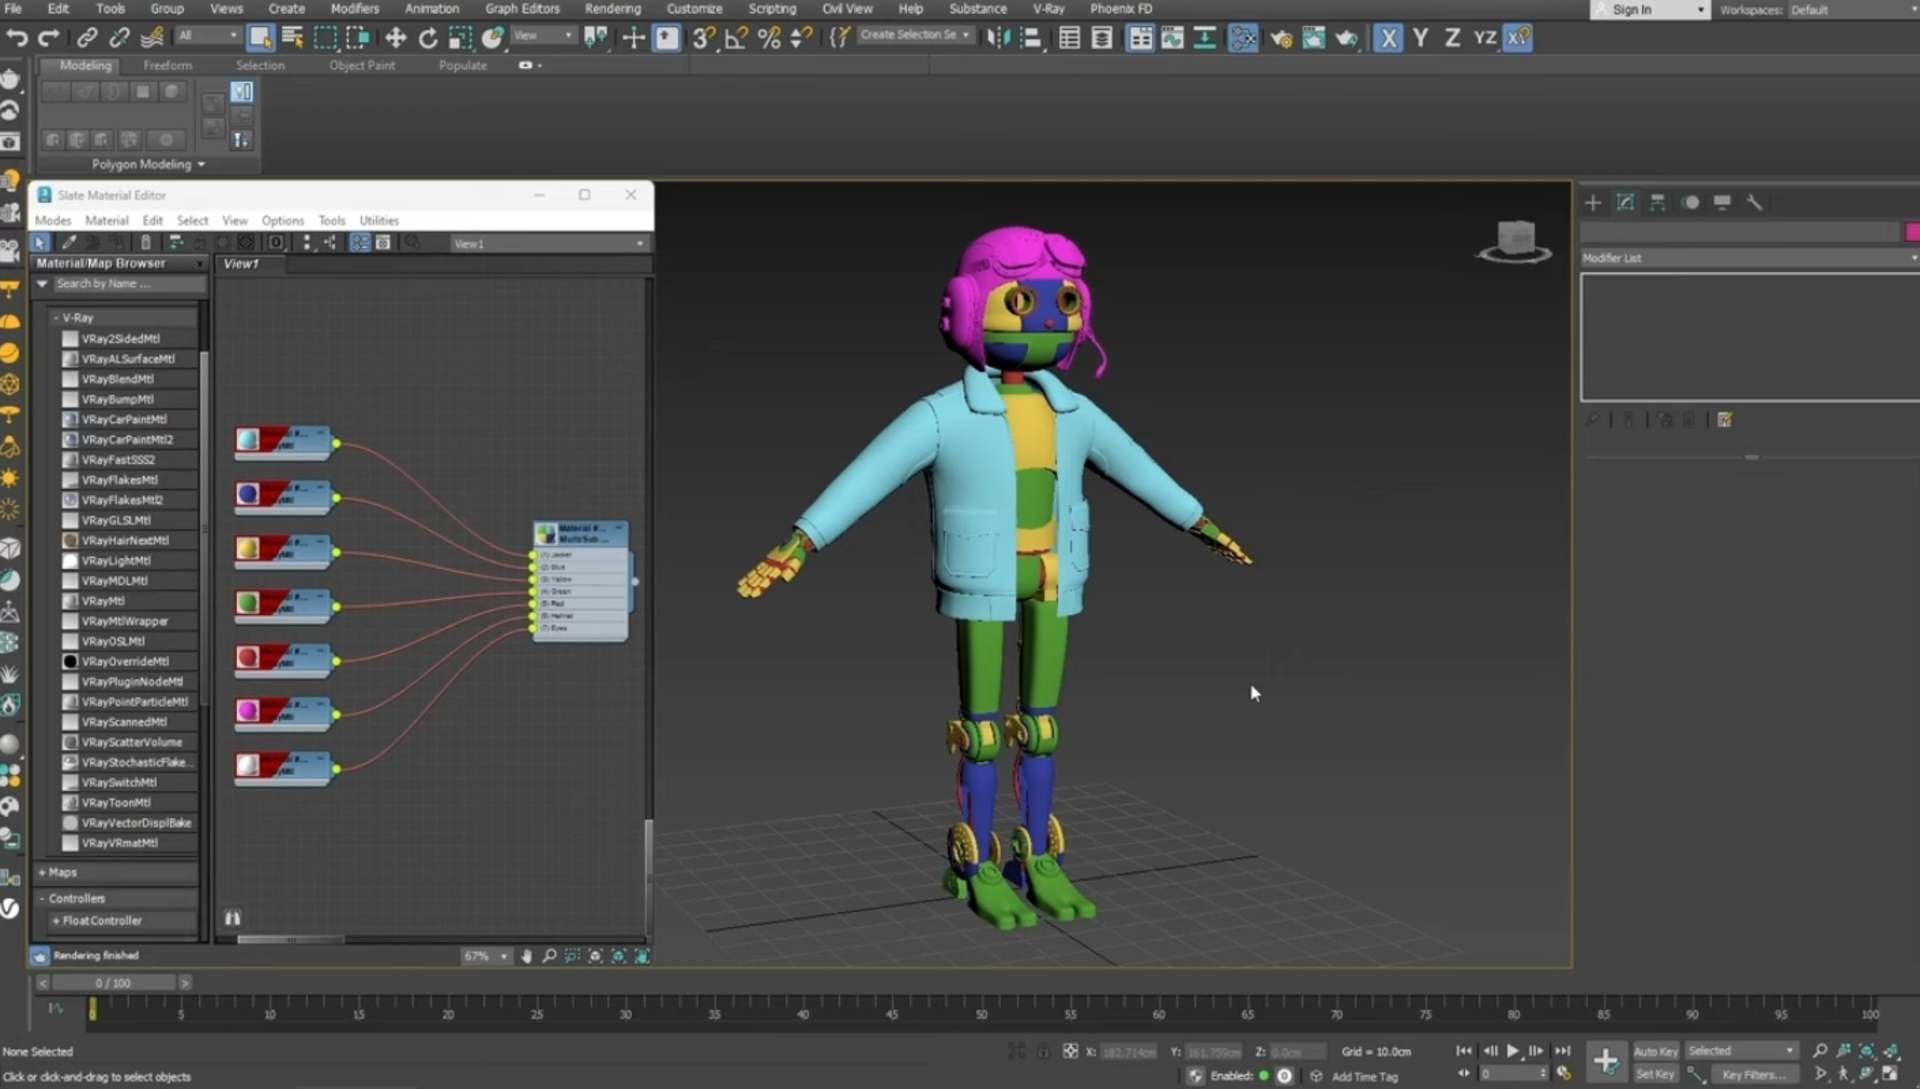
- Before importing the model into Substance Painter for the texturing phase, you should group the pieces in different colors. Pay attention to the pieces that intersect or are too close to each other and separate them to make the texturing process more organized.
- Export the model inFBX format. Keep in mind that when imported into Substance Painter, the model will have different texture sets.
- Next we come tothe baking phase. This phase is important because it helps you generate maps like Curvature, World Map, and AO Maps. These maps are useful when creating materials like worn-out metal to give our model a more robotlike look.
- Now you create a base metal layer and apply it to all metal pieces. On top of the base layer, you can add some worn-out paint. Substance Painter provides maskswhich enable you to control the wear effect you can play around with.
- In V-Ray, there are two workflows for exporting textures: the Specular Glossiness workflow and the Metallic Roughness workflow. In this breakdown, let’s follow the Metallic Roughness workflow.
-
-
Lights, camera, posing
After you finish the texturing phase, the next steps will be posing the model, finding a good camera angle, and setting up the lights.
-
-
-
- Try creatinga simple rig using hierarchical links. This is convenient for rigging simple mechanical joints on the robot.
- Next, you set up a V-Ray physical camera. You can adjust the proportions and the resolution from the render setup.
- Now posing the character.Hide the jacket to pose the arms. When you’re ready with the character’s pose, pose the jacket separately in ZBrush.
- You can add the model of the plane and the groundnow. To enhance the image, play around and find an interesting camera view.
- For the lighting, use V-Ray Sun. To get the best look, start with gray materials only to observe how the light interacts with them.
-
-
Shading and environment
After lighting phase, move on to the shading one and bring the environment to life.
-
-
-
- When it comes to shading, you should start with the default gray material. You can switch the BRDF to Roughness and set the reflection color to white. The shininess of the material can be controlled by using the Roughness value.
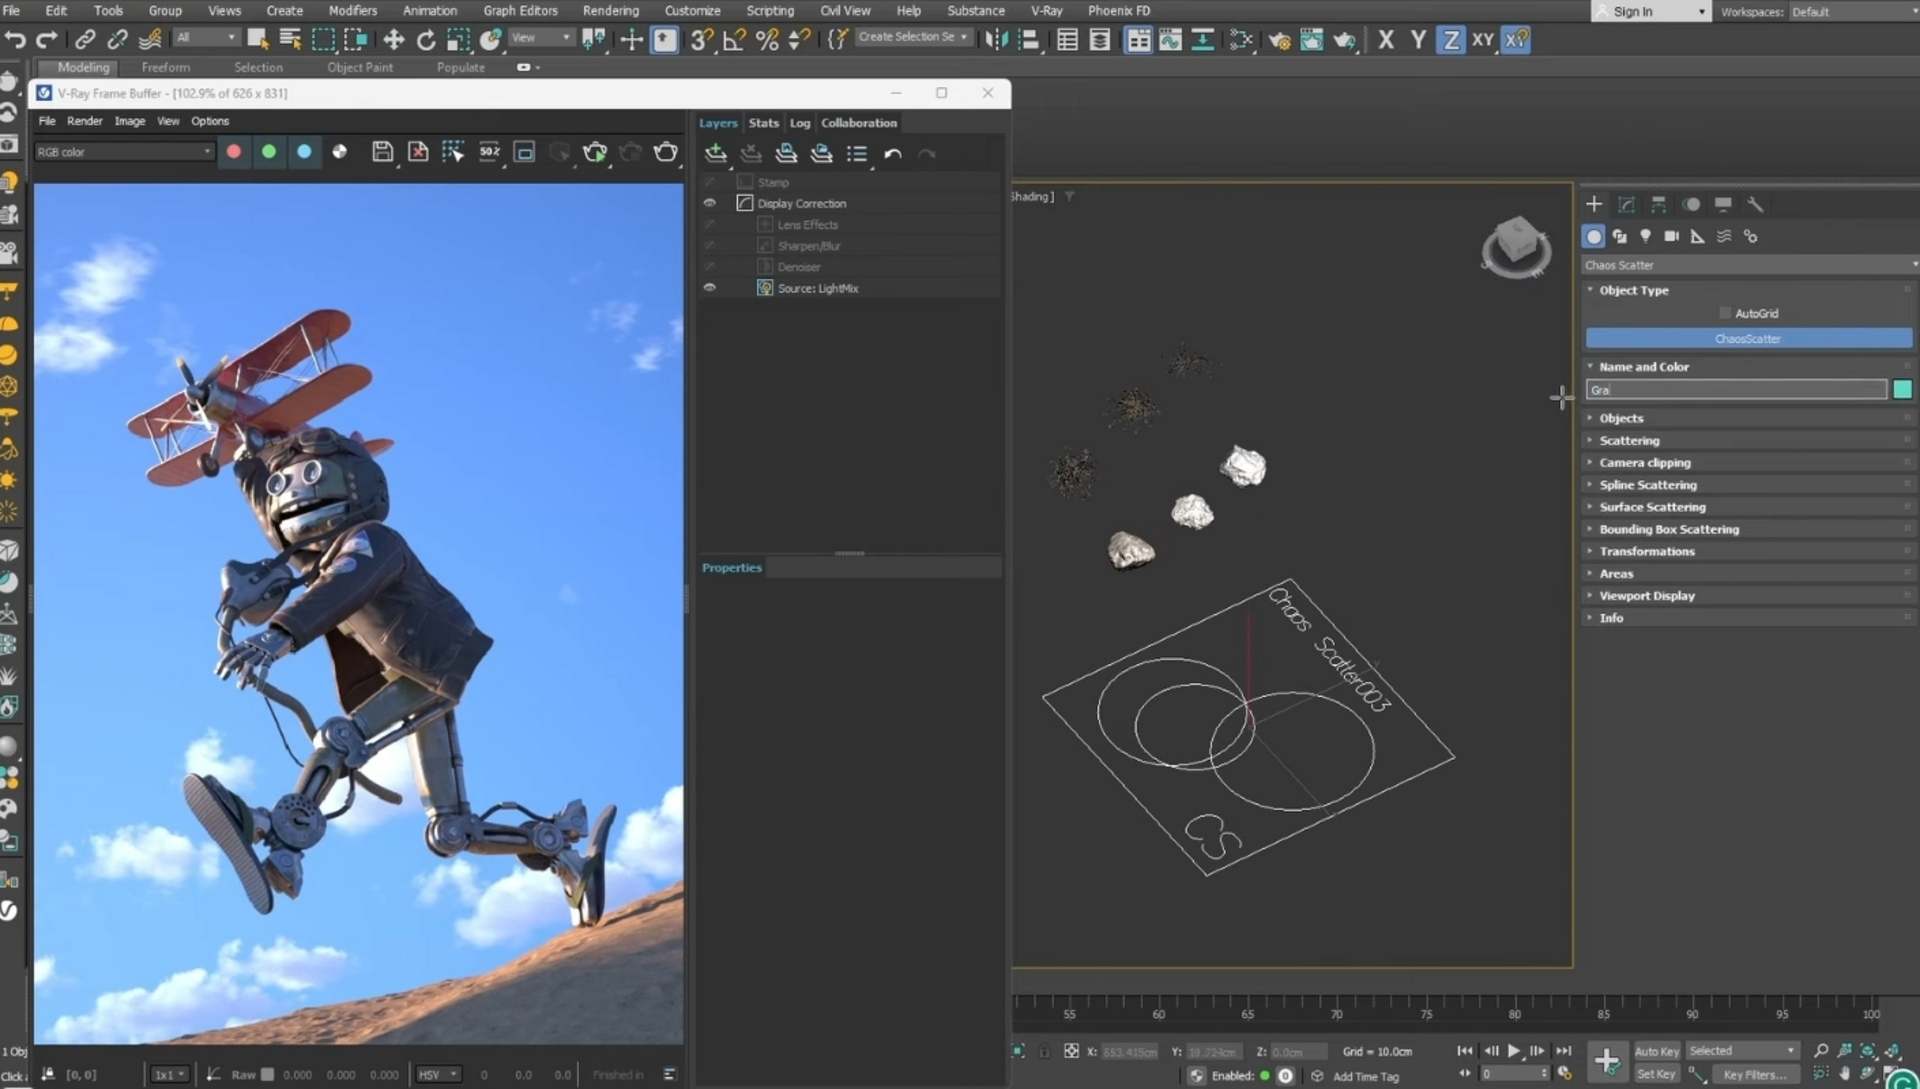
- Now, we move to touching up the environment. Use V-Ray Displacement to make the ground have more detail, such as scatter some desert grass and rocks using Chaos Scatter.
- One tip to help you achieve a more realistic result is adding V-Ray environment fog to an outdoor render.
- Use Phoenix to create a dusty effect.
- If you want to add motion blur to the scene to add extra action, don’t forget that everything else can be blurred but the character should stay in focus.
-
-
Final render and color corrections
This is the final step: create the final render and add some color corrections.
-
-
-
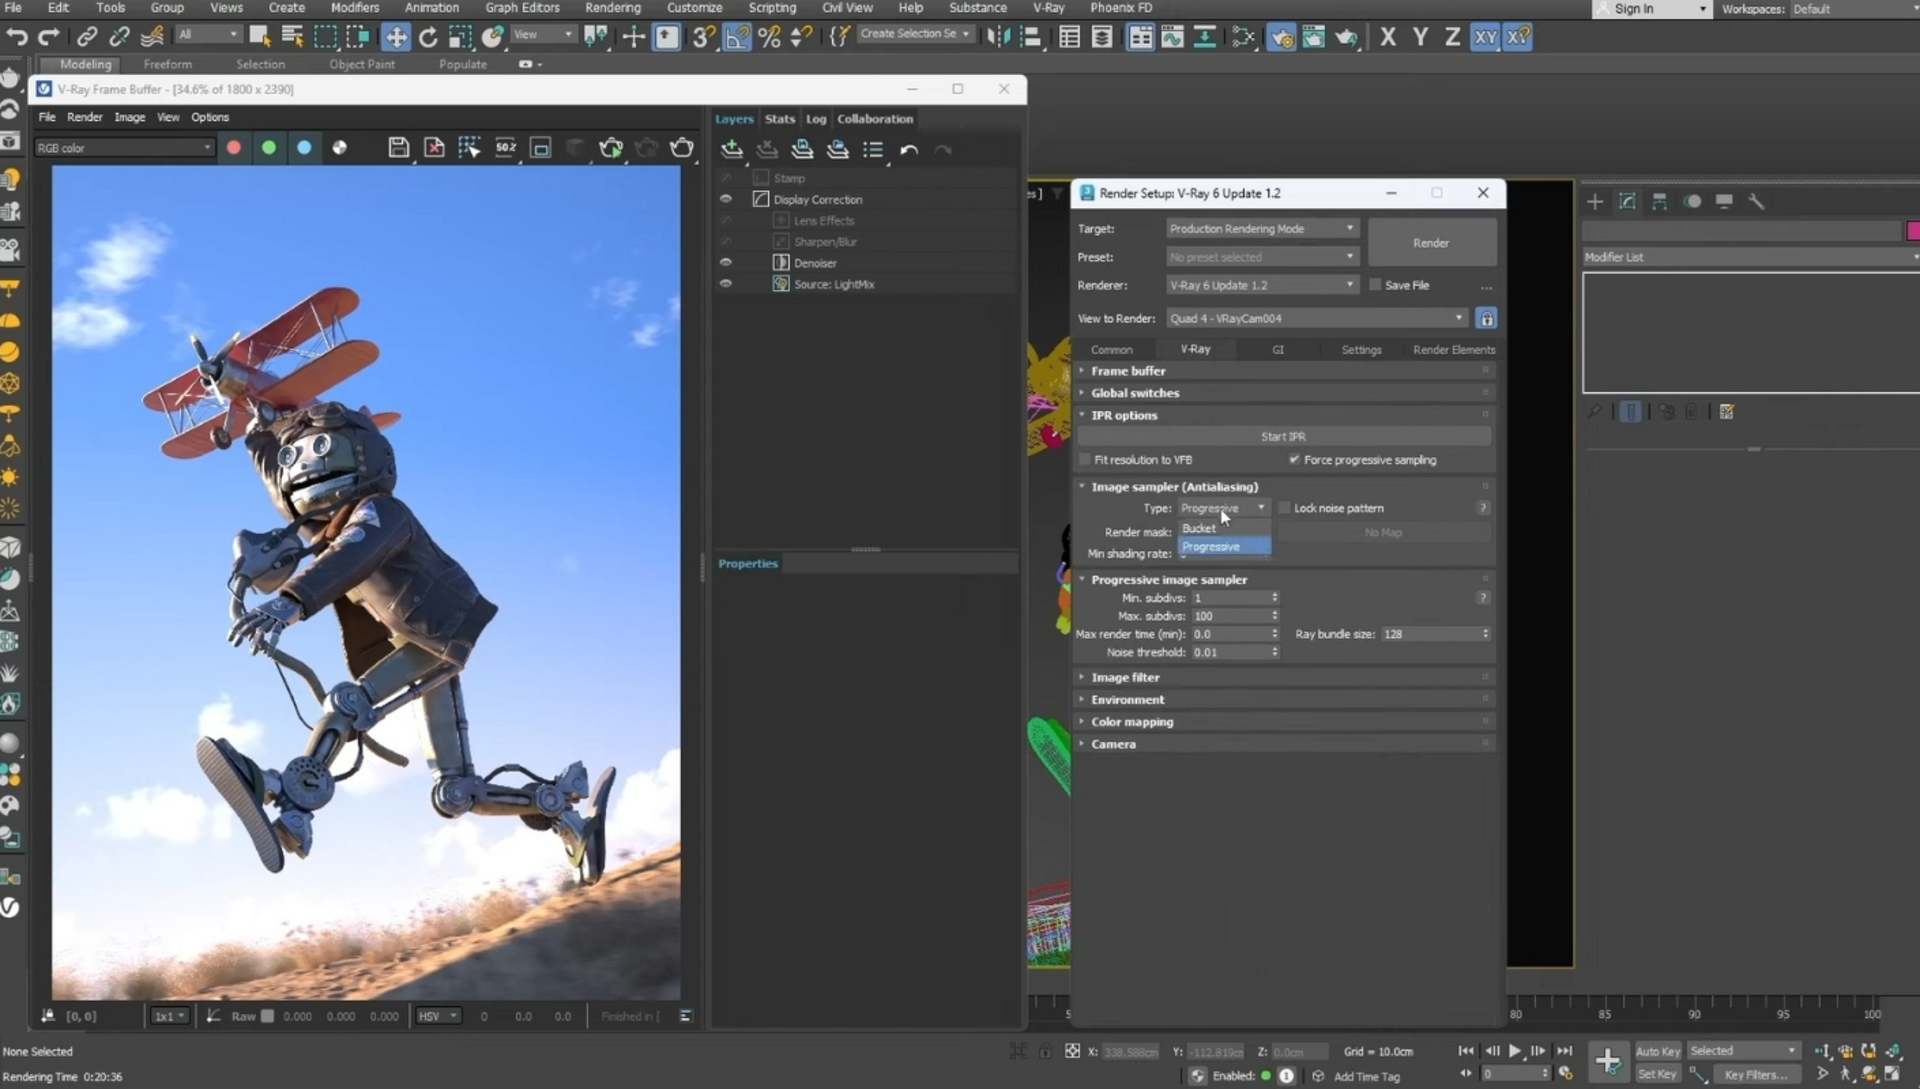
- You should change the image sampler from Progressive to Bucket from the render setup and leave the default settings, before final render.
- Color corrections can be made directly inside the Frame Buffer. As a final touch, you can slightly lower the exposure and add a filmic tone map.
-
-
Does iRender support V-Ray for 3ds Max?
iRender provides you a high-performance and configurable server system for 3D rendering, AI Training, VR & AR, simulation, etc. We believe that design and creative activities are private and personal that only you artists will know what you want with your animation.
You can create a blank remote machine, then install V-Ray and 3ds Max, add your own licenses and start to render like how you always do on your local computer.
For V-Ray for 3ds Max, we suggest our multiple RTX4090 and RTX3090.
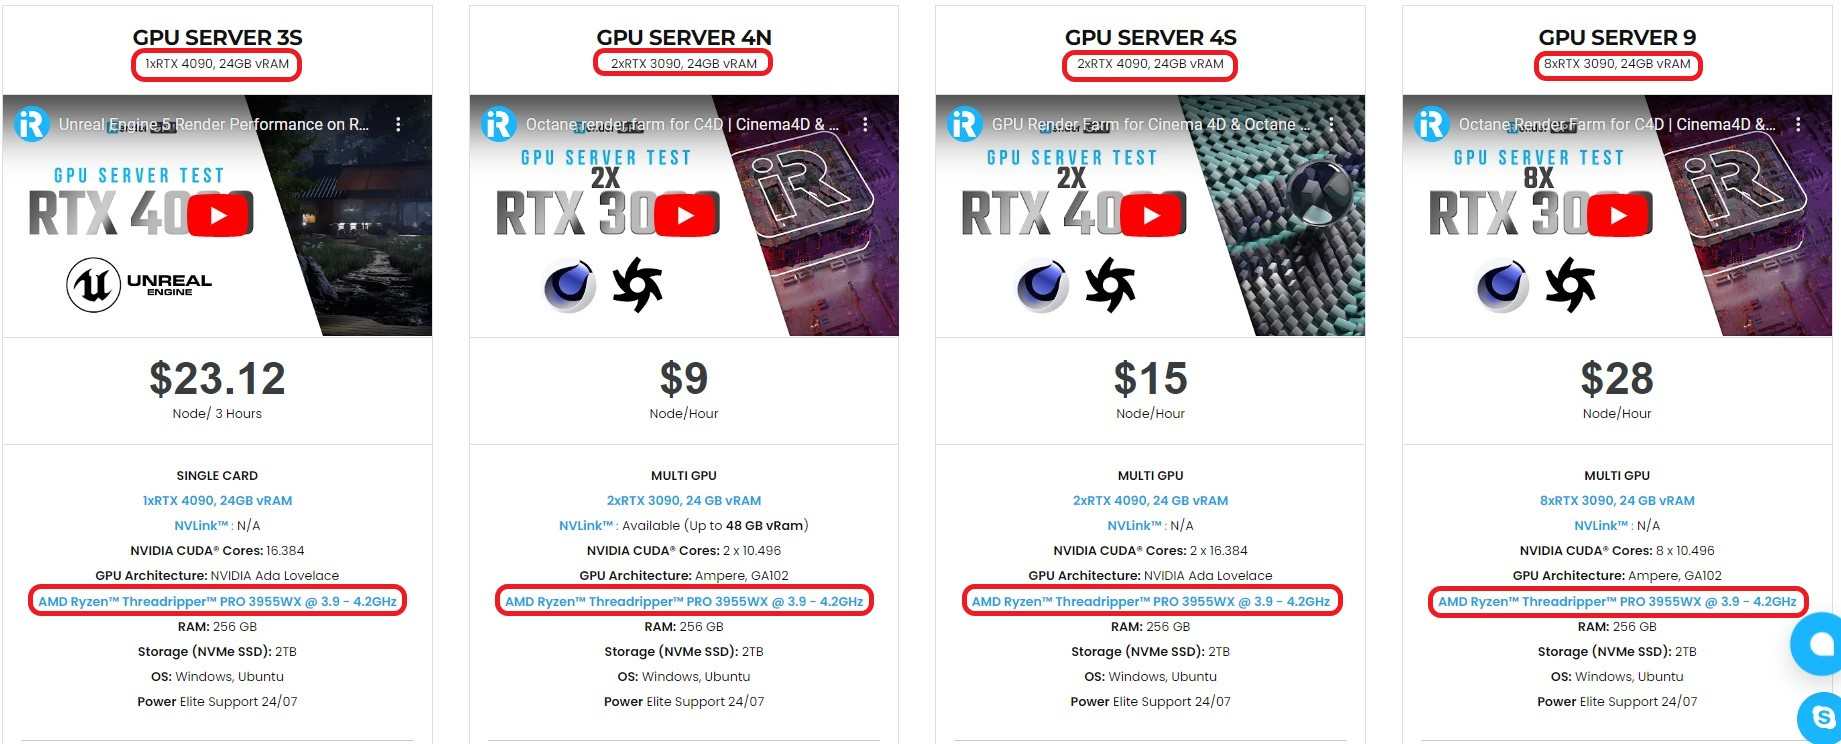
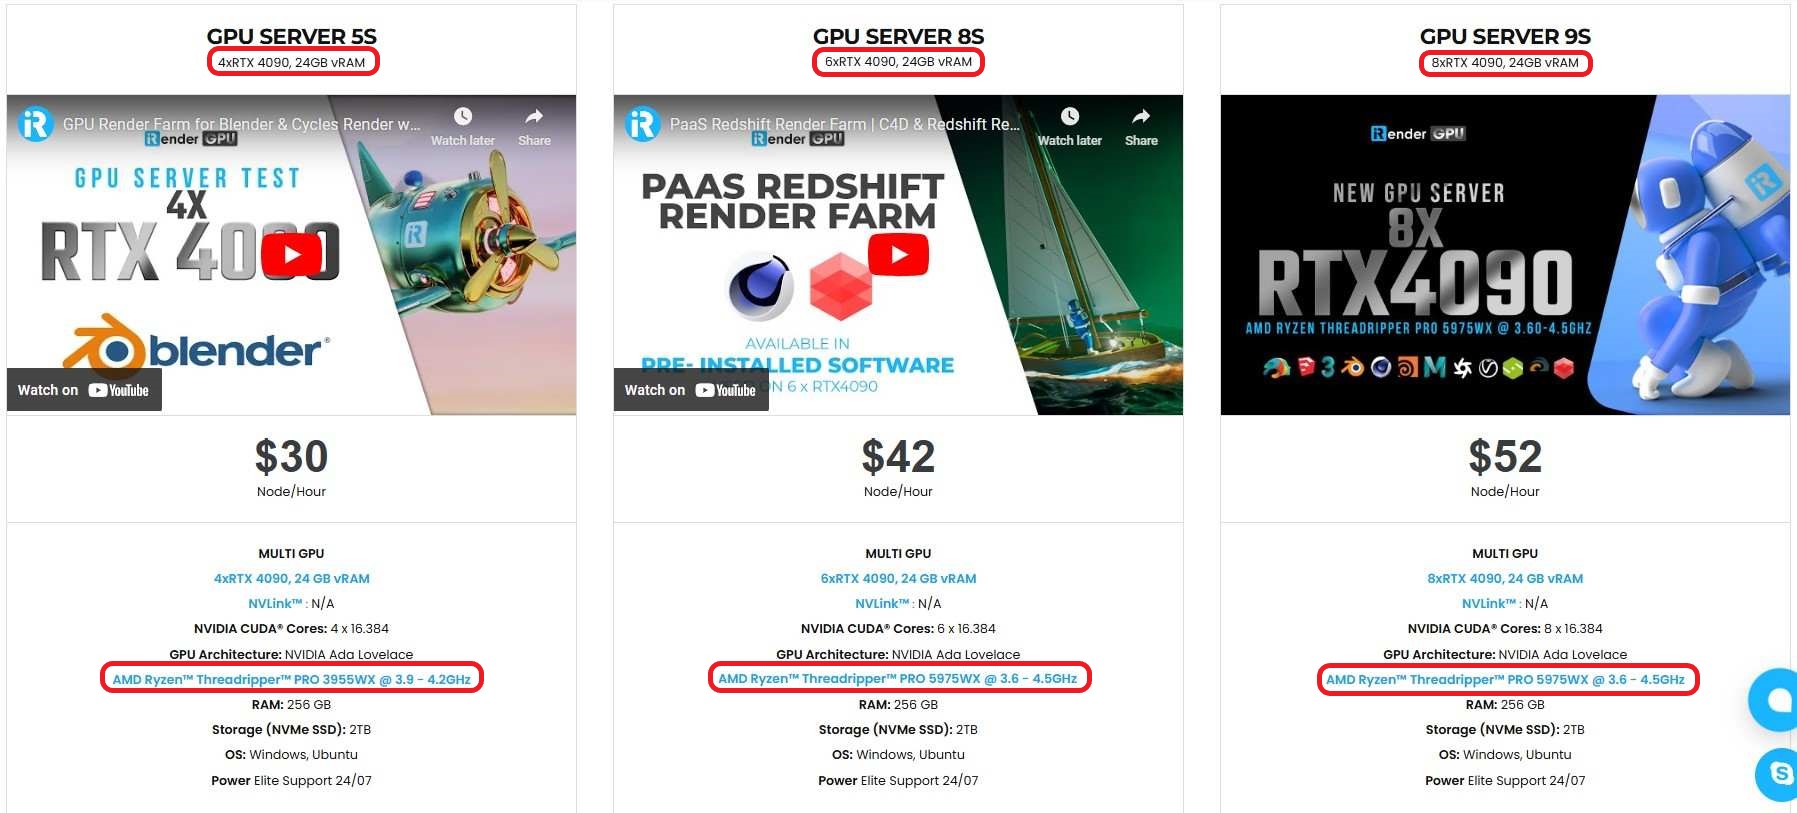
V-Ray can utilize GPU rendering power, we choose to provide RTX 3090 and RTX 4090. You can refer to this article to see how V-Ray performs on these graphics card, especially RTX 4090 being the fastest when it comes to V-Ray rendering.
iRender powerful RTX4090 for V-Ray rendering
Top GPU for Redshift, Octane and V-Ray in 2023
Compare RTX 4090 vs RTX 6000 Ada vs RTX A6000 for content creation
If you have more GPUs, the render time will reduce more. However, don’t expect a perfectly linear reduction.
Let’s see our test with Cinema 4D and V-Ray on our package 6 x RT4090s:


Not only those powerful configurations, iRender also provides you more services. Free transferring tool named iRender drive for macOS or Linux users. For Windows users, we recommend using our all-in-one application iRender GPU to work, and you don’t need to come to our website. Our price is flexible with hourly rental which has a pay-as-you-go basis, daily/ weekly/ monthly subscription with discount from 10-20%. Plus, you have 24/7 support service via livechat with real humans who will support you whenever you encounter an issue.
Register an account today to experience our service and enjoy a very big promotion 100% bonus for new user. Or contact us via WhatsApp: (+84) 916806116 for advice and support.
Thank you & Happy Rendering!
Source and images: chaos.com
Related Posts
The latest creative news from 3ds Max Cloud Rendering , V-Ray Cloud Rendering