Tips for Rendering Grass on Revit with Enscape
Rendering grass has always been a challenge in architectural graphics, especially for the average designer who does not specialize in developing computer-generated graphics (CGI). The best designers could do in the past was to apply a bump map and maximize the setting, so the ground did not look completely flat. However, Enscape can change the game by automatically adding three-dimensional grass within a real-time photorealistic rendering engine and giving designers control over the height and height variation of the blades of grass ( Enscape has gone one step further with the introduction of animated grass and vegetation (version 2.8 upwards).
Any material in Revit, SketchUp, Rhino, Vectorworks, or Archicad with the word “grass” in its name will render, by default, as a thick three-dimensional-looking grass in Enscape. For today’s article, we will see how Dan Stine, an author, blogger, educator, design technologist and Wisconsin-registered architect, the Director of Design Technology at Lake | Flato architects in San Antonio, Texas cover the ins and outs of the grass rendering feature in Enscape, with a focus on Revit software.
Rendering Grass in Revit and Enscape
Using Autodesk Revit, designers can achieve amazing results in Enscape by employing various materials to define grass. Let’s look at how this works and what the options are.
Grass Height
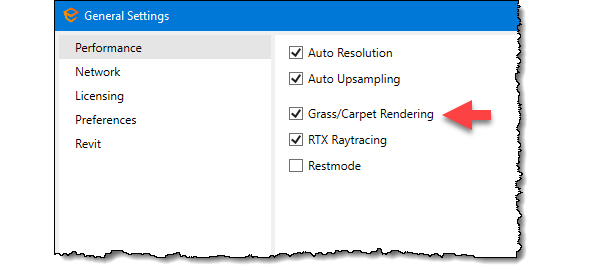
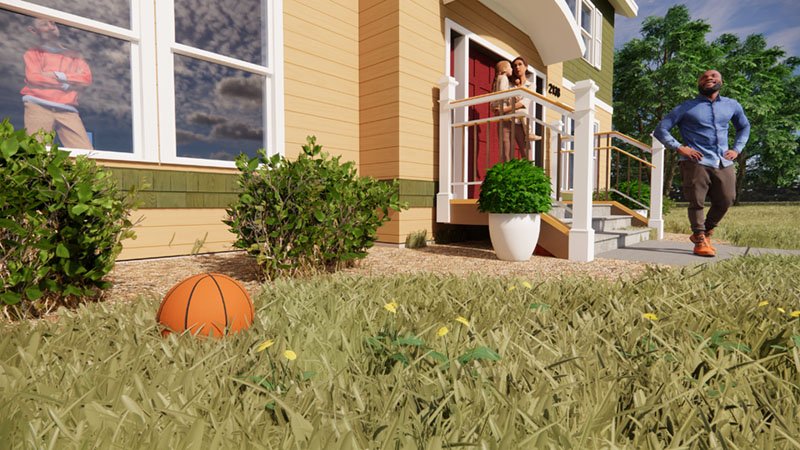
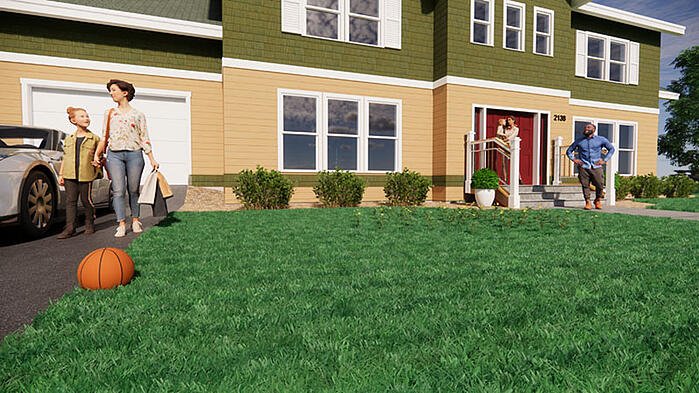
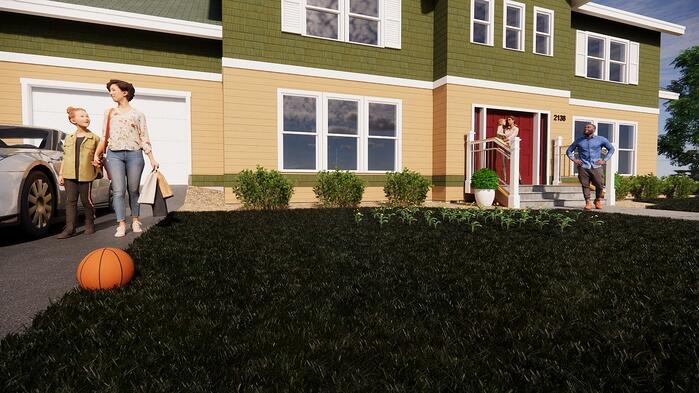
The magic happens when Grass/Carpet Rendering is ticked within the Enscape General Settings dialog and one or more Revit materials have the keywords “grass”, “short grass”, “tall grass” or “wild grass”. And noted that the images in this post are enhanced with Enscape assets such as people, trees, shrubs, dandelions, a basketball, and a vehicle. These components are included at no extra cost with Enscape.
Let see an example of each grass style compared side-by-side.


Here is what happens based on keywords used in the material name:
- Grass: Medium grass
- Short Grass: Shorter grass
- Tall Grass: Taller grass
- Wild Grass: Taller grass with varying blade heights
TIP: The keywords are not case sensitive, but cannot change the order, e.g. “grass tall” is not the same as “tall grass” to Enscape.
Grass Color
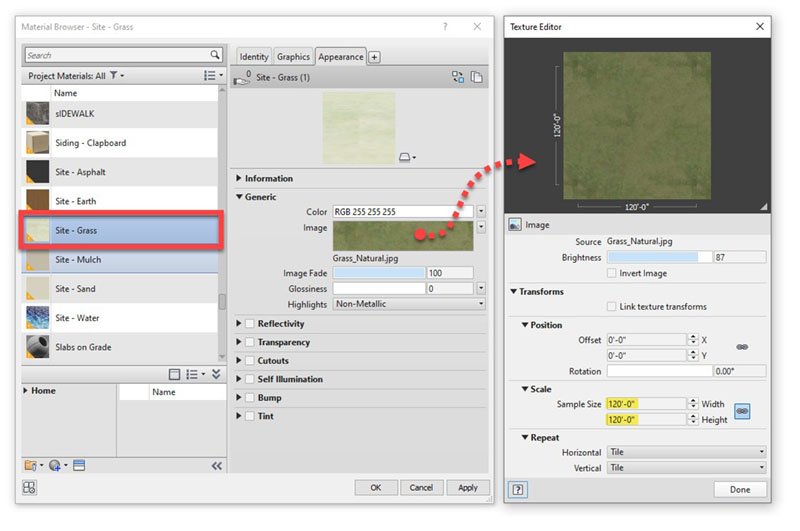
Because Enscape samples the color or texture assigned to the material, designers can achieve interesting results. He said that he has been using this texture for a while as it has subtle variations in color, which translates nicely to Enscape’s 3D grass. It was acquired from a larger high-resolution aerial image.
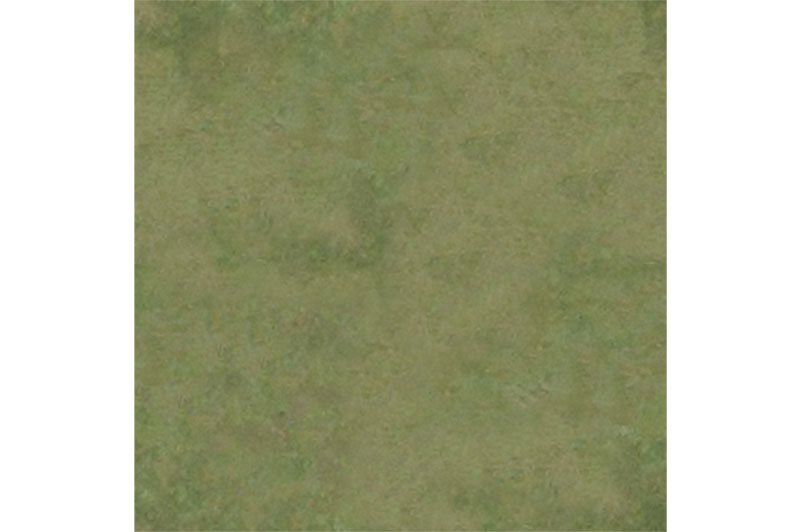
As shown in the following image, Dan sets the texture size to 120’ square; thus, the patterning within the image is not obvious in Enscape due to the scale. Feel free to right-click and save this texture and give it a try in your project.
Then, here are the results in Enscape. Notice that the color is not consistent, which produces an effect that often occurs due to droughts. So, the result is more natural.
Grass Types
Now let’s look at how he can create specific, real-world, grass types. Don’t be worry. It is easy! First, notice a few grass types shown in the image above: Centipede, Bermuda, St. Augustine and Zoysia. He found this image by searching the internet for “grass types”. He then cropped the image down to just the desired grass type (no text or lines) and saved a separate image, with a texture size of about 8-12” (20cm – 30cm) wide and 4-5” (10cm – 13cm) tall produced the results shown below. Of course, finding larger tileable samples would produce better results and look more accurate in Revit if ‘realistic view’ were ever used.
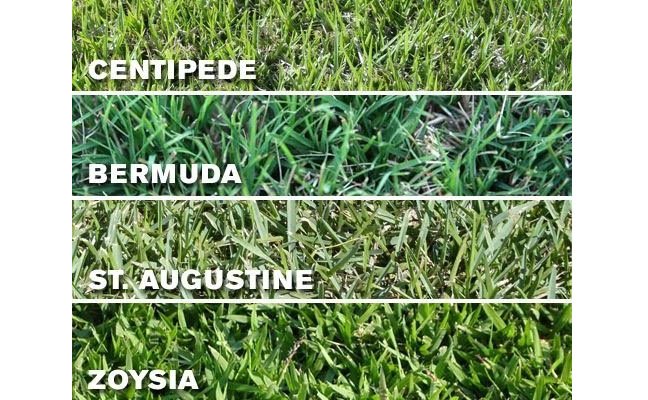
The results of his ‘grass types’ study in Enscape as belows. We could see that Grass is not intended to be applied to predominately vertical surfaces, as the blades of grass are generally vertical, not perpendicular to the surface.

Out of curiosity, let’s look at what the two default Revit grass materials look like in Enscape – these are the ones that install with the software. There is a big difference. The one actually called “grass” is way too dark. The other is better, but still a little off. And this will change with the lighting, so remember to consider the albedo; setting the real-world base color of a material results in more realistic looking graphics in various lighting conditions.
With this, we can see the variety of options we have to represent grass in Revit. If the grass is poking through your floor or walk in Revit, add a Building Pad below the floor/walk to stamp out the top of the toposurface in that area.
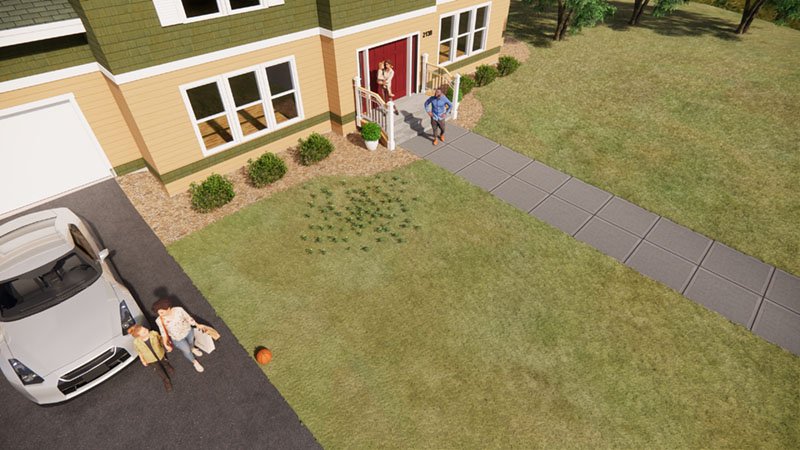
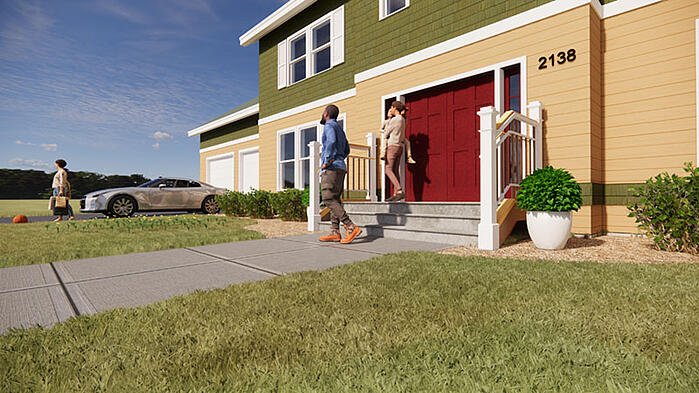
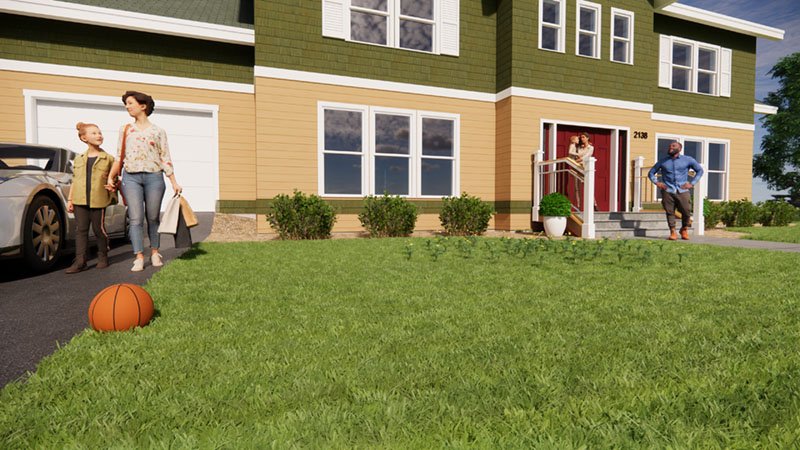
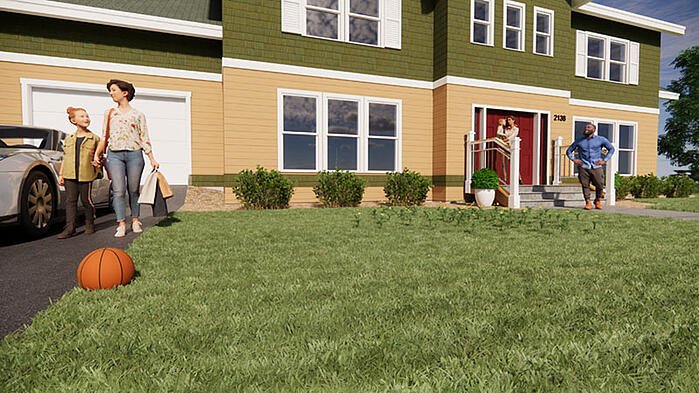
Let’s look at some of images he have created which greatly benefit from realistic and natural-looking grass. Each of these images were rendered with Enscape and have had no post-production edits.
Conclusion
It’s truly exciting to see such dramatic results for grass in a real-time rendering engine, which also has a live link to our favorite 3D modeling environments. And if you think the grass is amazing in these still images, wait until you see it in virtual reality using the Oculus Rift, HTC Vive or Windows Mixed Reality devices. It is breathtaking, and very memorable for clients and stakeholders.
At iRender, we provide servers that are suitable with Enscape users, with the most powerful graphic card nowadays such as RTX 3090 at the price from 3.8 usd per machine hour with the detailed configuration below:
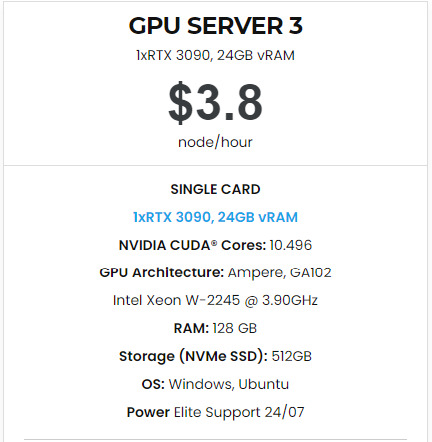

Once again, I need to confirm that Enscape use a single GPU card to render. However, a good CPU can speed up scene’s loading times. Because of this reason, iRender exclusively provide the Intel Xeon W-2245 with a strong processor base frequency which is 9GHz – 4.7GHz, 8 cores and 16 threads on GPU server 3. Here at iRender, we provide you with one of the most powerful GPU currently. It’s Geforce RTX 3090. This GPU card reachs 25,162 G3D mark rating points and have a large 24GB vRAM, which definitely brings much better performance.
So, do not hesitate anymore, let’s HERE to get FREE COUPON to test our GPU servers and reach a new level of cloud rendering.
iRender – Happy Rendering!
Source: Dan Stine on enscape3d.com
Related Posts
The latest creative news from Enscape Cloud rendering, Lumion Cloud rendering, SketchUp Cloud Rendering , Twinmotion Cloud Rendering , 3D VFX Plugins & Cloud Rendering.