Tips to Enhance your ZBrush workflow
All artists have their own unique workflow when creating 3D art in ZBrush. This workflow can mean a bunch of techniques or a hierarchy in which you achieve certain stages. The more time and experience you get with ZBrush, the more advanced a workflow you will create for yourself.
ZBrush lets you take charge, create your own menu and organise the interface to best suit your needs. Try to take advantage of that and save out your own preferences. If there are brushes or buttons you often use, find a place and put them somewhere easily accessible, create a separate menu or assign a keyboard shortcut to them. The Custom User Interface (UI) is a great way of controlling your workflow and maintaining a familiar, comfortable work environment.
There are things we do automatically because they have become our routine, but there are also ways and techniques we might be forgetting or have never investigated. I have gathered some basic knowledge and created this simple ZBrush tutorial to remind you of those little things which, when incorporated into your ZBrush workflow, can help you work much easier or quicker.
Use image planes

These are incredibly useful for likeness sculpts. Say you have a front and side picture of a person you are trying to sculpt, or a blueprint you need to follow – the best thing you can do is set up the image plane. First, make sure your reference images are the same size and preferably square. Navigate to the Texture folder and import them in. Activate the floor grid (shift+P), go to the Draw menu, click on the Front-Back sub-palette and select your front and back images. Repeat accordingly with Left-Right view.
An interesting feature you will probably notice is blue and red lines pointing from the brush icon towards corresponding areas of the reference images. These are called PLines. They help identify the parts on the model/reference image you work on. Notice that there are also a bunch of sliders that can control the opacity of the grid images as well as your model.
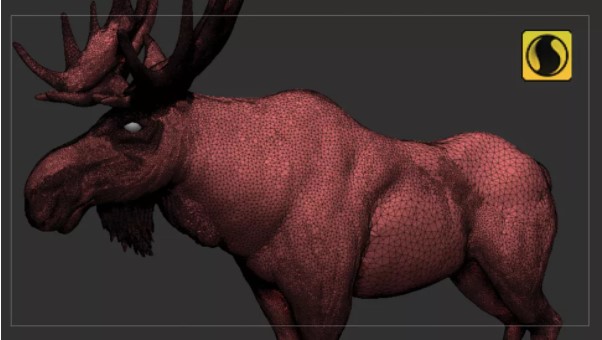
If you already have a model you would like to use as a reference, you can turn it into a grid. Below the opacity sliders, you will find a Snapshot To Grid button. Pressing it will take your model and make it into a reference grid. You can save your new image plane file by pressing the Save button located above the Grid Elevation slider.
Utilise Scale Master
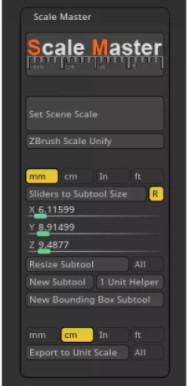
Artists often experience a common problem working across multiple software – scale issues. Import and export can seriously affect the model’s scale. It is useful to use GoZ when constantly switching between ZBrush and other software, because it holds up the bridge for smooth file transitions. If you do not use it but want to make sure your scale is correct, you have to change it manually in ZBrush using the Scale Master plugin. Scale Master calculates the size of the model, lets you choose the units you wish to work with, can generate a bounding box as a subtool, and finally, exports the selected tool as an OBJ file with generic units as the selected unit scale.
Work with Sculptris Pro
One of the most recent additions in ZBrush allows you to focus on sculpting instead of constantly worrying about the subdivision level. Sculptris Pro works fantastically with Clay brushes. The smaller the brush the more dense the tessellation, and the more detail support. Do not forget to switch off Sculptris Pro when smoothing out your model, because Smooth also works in this mode. This problem happened to me a lot when I tried to smooth out the mesh, increased brush size and it wiped my details, replacing them with bigger polygons.
Backface masking
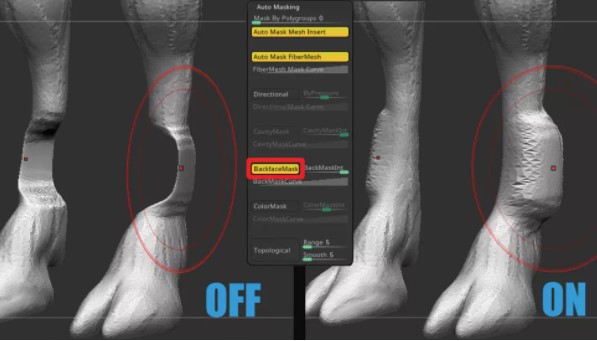
Working on a thin mesh can cause a little trouble when trying to move or sculpt on one side and the backfaces follow the brush. One of my favourite tools in ZBrush is Backface Mask. Hiding in Brush > Auto Masking, Backface Mask can be a real hero and save your day, or at least some stress.
Hard surface modelling
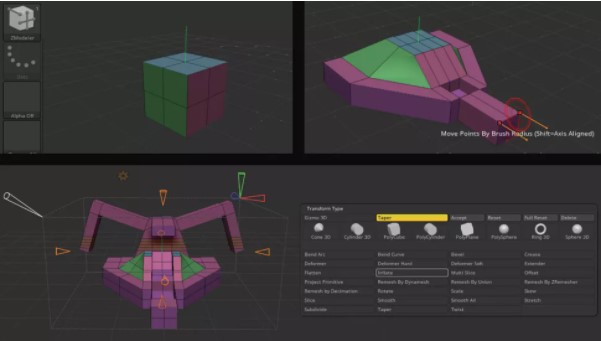
ZModeler is a great tool that enables you to create hard-surface models in ZBrush. It is the most basic yet useful. Hover over the polygons or edges to see what options you have. For extra choice and more complex creations try Gizmo 3D. It provides a vast array of options enabling very precise tool manipulation. Spend a little time familiarising yourself with the cones and corresponding colours, and it will all come together.
Dynamic subdivision
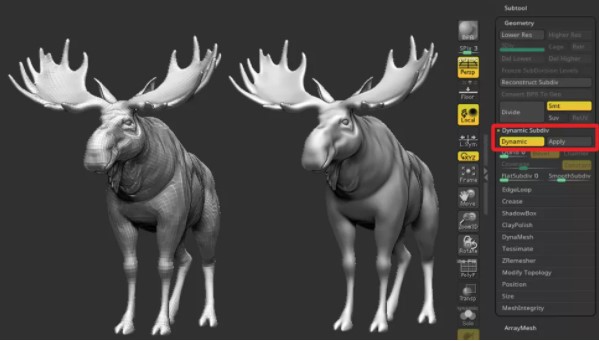
Use dynamic subdivision found in Tool > Geometry > Dynamic Subdiv to smooth out the mesh without adding extra polygons to it. Applying it generates three subdivision levels. It can be useful when working on a low-poly mesh or with ZModeler to view the model in higher polygonal density, but with the brush still operating on a lower-resolution base mesh.
Above are useful tips for better Zbrush workflow, hopefully you will have more experiences to have the most creative works with Zbrush. Besides, iRender prides itself on providing the right configuration packages for every versions of Zbrush to give you a great experience in rendering. If you have any questions about how to speed up your rendering with our service, register for an account today to experience our service. Or contact us via WhatsApp: (+84)912785500 / email [email protected] for advice and support.
Source: Creativebloq.com
Related Posts
The latest creative news from Cinema 4D Cloud Rendering , Blender Cloud Rendering, Redshift Cloud Rendering, Houdini Cloud Rendering , Octane Cloud Rendering, 3D VFX Plugins & Cloud Rendering.