V-ray benchmark and real test with iRender
V-Ray is renowned for its capability to create highly realistic images from 3D models. To identify the best hardware to enhance rendering performance, V-Ray benchmark will be an invaluable tool. It allows users to evaluate V-Ray’s performance across various hardware configurations without testing the hardware themselves.
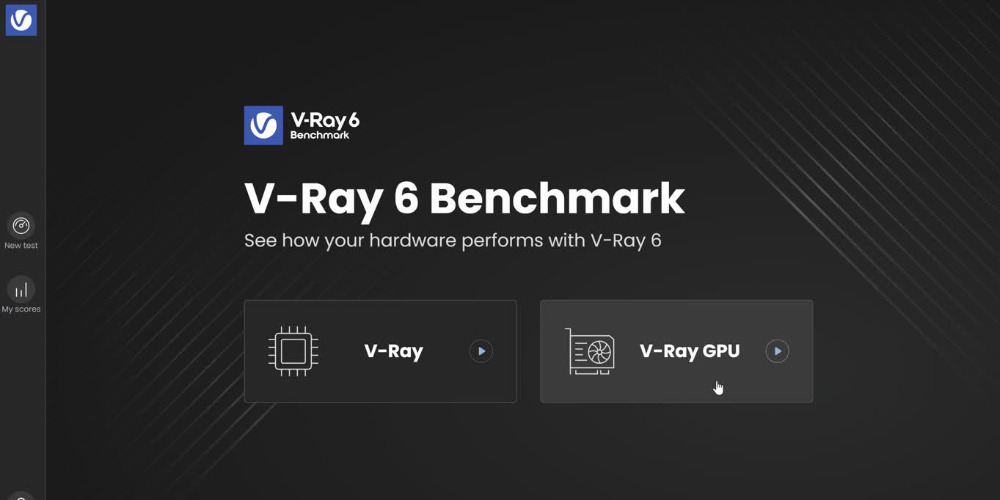
How to use V-Ray benchmark effectively
The V-Ray Benchmark application evaluates a system’s rendering performance by running a test render on a sample scene for a set duration.
No V-Ray installation or license is required to run the benchmark. It is compatible with various versions of popular operating systems, including Windows, Linux, and macOS.
You can benchmark your system using two methods: the graphical user interface (GUI) application or the command-line tool.
1. GUI application
Steps to Test Your Machine Using the V-Ray Benchmark GUI Application
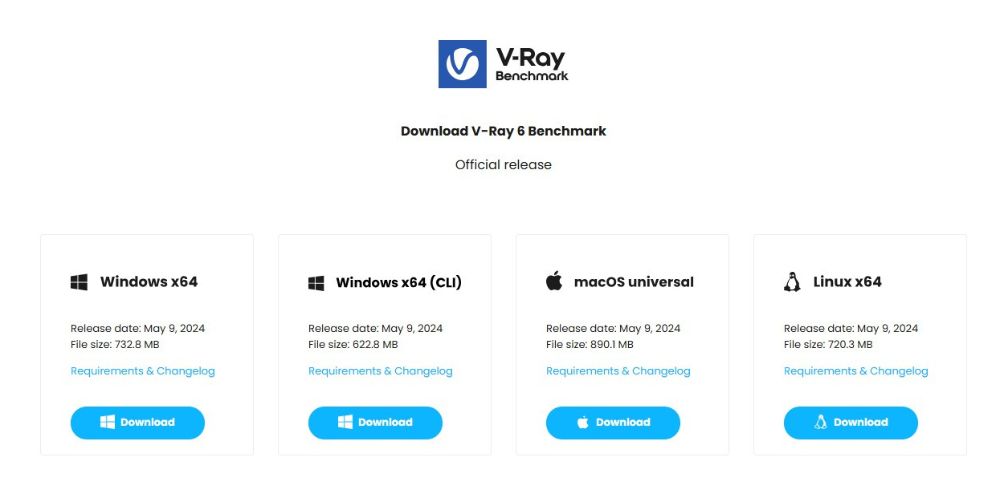
Step 1: Download the Application
Visit the Chaos website to download the V-Ray Benchmark application. Versions are available for multiple operating systems, including Windows, Linux, and macOS. For this guide, iRender tested the V-Ray 6 Benchmark for Windows x64.
Step 2: Run the Application
No installation is required. Simply double-click the downloaded file, accept the License Agreement, and proceed.
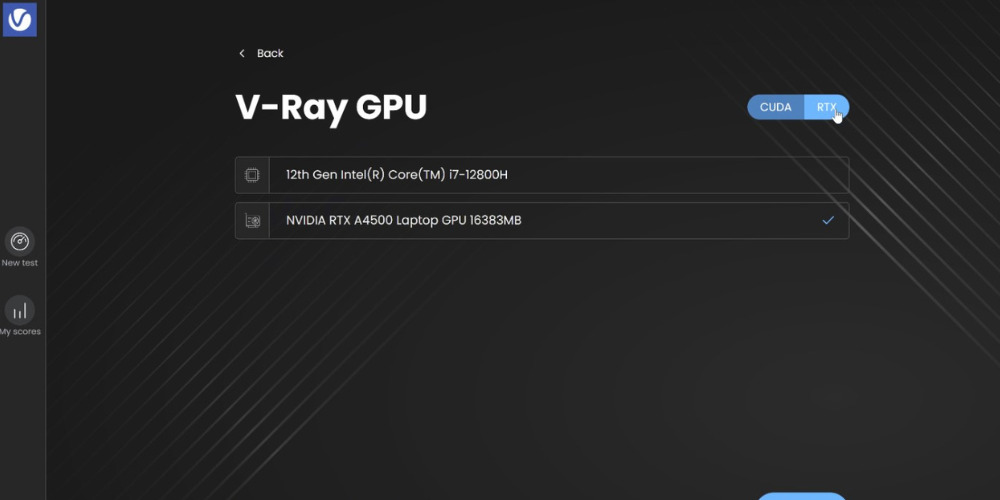
Step 3: Select Rendering Options
Choose between two rendering modes:
V-Ray: Tests the CPU rendering performance of your system.
V-Ray GPU: Tests GPU performance, offering two modes:
- CUDA: Allows testing GPU-only or hybrid rendering (GPU and CPU). The CPU is treated as a CUDA device.
- RTX: Available if your GPU supports RTX but not CUDA. Additionally, you can test specific GPUs in multi-GPU setups by selecting checkboxes in the Benchmark menu under the V-Ray GPU section.
Step 4: Configure the Rendering duration
The test duration defaults to 1 minute, ideal for comparing results with others on the benchmark website. However, you can adjust the duration to 1, 5, or 10 minutes, or run an infinite test.
Tip: Close unnecessary applications and restart your system to maximize available resources (CPU, RAM, etc.) before running the test. If using a laptop, ensure it is connected to a power source for optimal performance.
Step 5: View and Compare Results
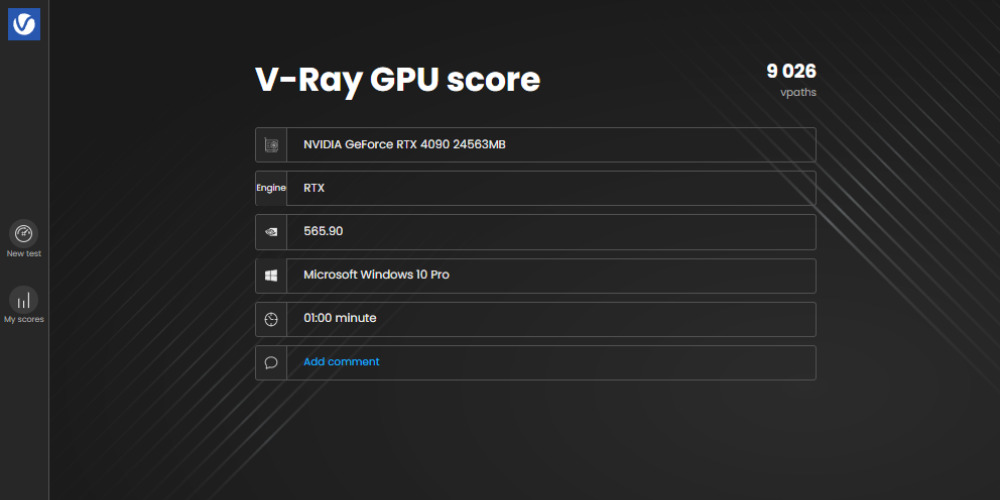
After the test, the performance score will be displayed:
- Final Score: Represents performance metrics in specific units: vsamples for V-Ray, vpaths for V-Ray GPU CUDA, and vrays for V-Ray GPU RTX. Note that scores cannot be compared across engines.
- Configuration: Displays the devices used during the test.
- Comment Section: Add comments about your setup to provide context for other users. A Chaos account is required for this feature.
If multiple benchmarks are run, results can be viewed locally in the “My Scores” tab. This tab lists all results tied to your Chaos account across different devices. Scores can be marked as public (visible to others) or private. Running additional benchmarks updates your scores on the website.
Step 6: Sharing and Advanced Search
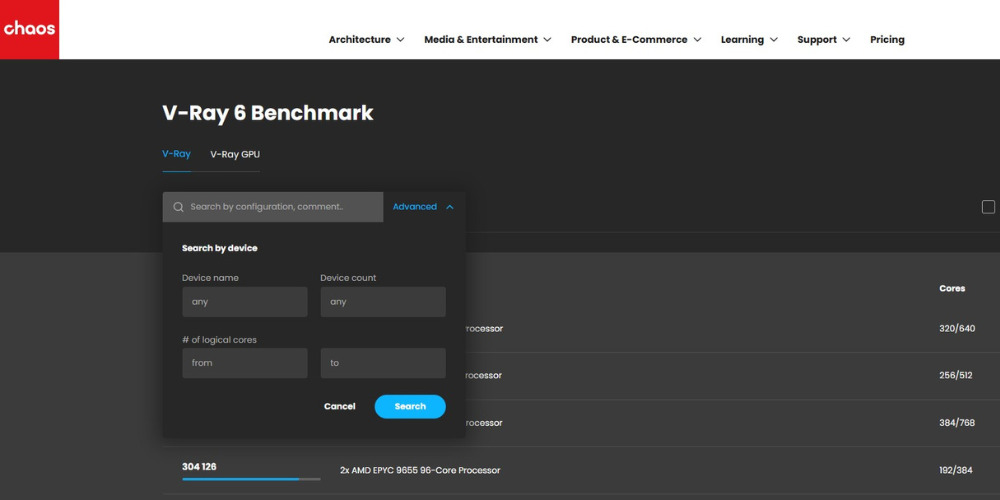
You can share your benchmark results or compare your system’s performance with others on the V-Ray Benchmark website. Use the Advanced Search feature to find specific configurations, such as GPU or CPU models. For example, to search for V-Ray benchmark on dual RTX 4090 cards, enter:
- Device name: RTX 4090
- Device count: 2
2. Command-Line Interface
For machines without monitors, the V-Ray Benchmark can be executed via the command-line interface. To use this method, select a rendering mode or simply run the file which will default to the “all” mode. Once the End-User License Agreement is accepted, the benchmark will start. Note that you can use multiple flags simultaneously during the process.
Here is the command-line Examples: vray-benchmark-6.00.00-cli.exe –mode V-Ray–output D:\CUDA_cards.json
Explanation of the example command is below:
vray-benchmark-6.00.00-cli.exe: The executable file to launch the V-Ray Benchmark: the V-Ray 6 Benchmark
–mode vray: The mode of using CPU rendering for the benchmark.
–output D:\CUDA_cards.json: Outputs the benchmark information to a .json file on C drive
V-Ray benchmark on iRender servers
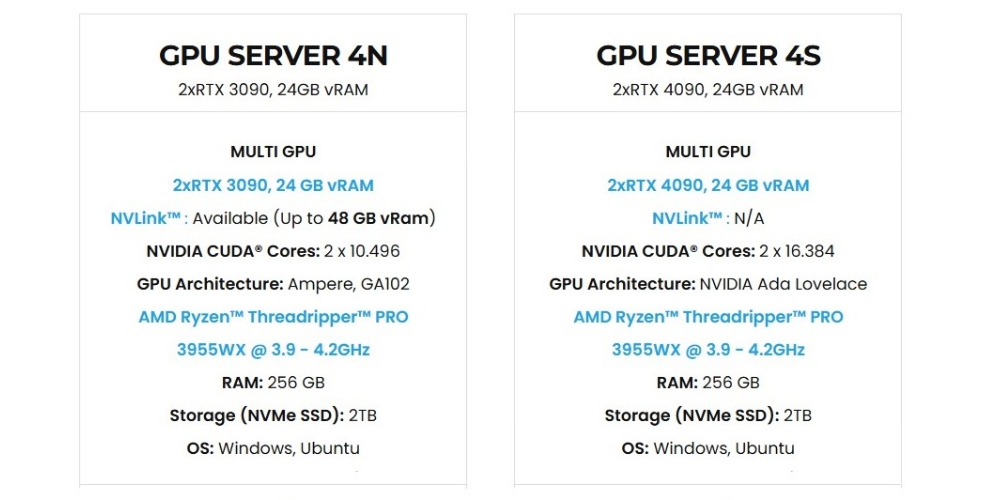
| 4N (2xRTX 3090) benchmark result: | 4S (2xRTX 4090) benchmark result: |
| ⌛ CPU mode: 24141 vsamples
⌛ Single GPU RTX mode: 4543 vpaths ⌛️ Multi GPU mode: ⏱ CUDA: 6111 vpaths ⏱ RTX: 9081 vpaths ⌛️ Hybrid mode (CUDA +CPU) : 14578 vpaths |
⌛ CPU mode: 24357 vsamples ⌛ Single GPU RTX mode: 9026 vpaths ⌛ Multi GPU mode: ⏱ CUDA: 13328 vpaths ⏱ RTX: 18341 vpaths ⌛️ Hybrid mode (CUDA +CPU) : 14578 vpaths |
The results show that rendering with 2x RTX 3090 offers only a slight improvement over 1x RTX 4090, while 2x RTX 4090 delivers significantly faster performance compared to 2x RTX 3090.
Keep in mind that rendering time is influenced by various factors, including rendering settings, scene complexity, and more.
iRender V-Ray rendering test
iRender servers are compatible with all software and render engines, including V-Ray. We regularly create 3D scenes to evaluate the performance of popular software and renderers. While iRender machines are primarily optimized for GPU rendering, the CPU performance is also highly significant and not overlooked. iRender provides high configurations of machines with upmarket specifications like AMD Ryzen™ Threadripper™ PRO 3955WX @ 3.9 – 4.2GHz or 5975WX @ 3.6 – 4.5GHz, 1/2/4/6/8 x RTX4090 or RTX3090, 256GB RAM and 2TB NVMe SSD storage.
Let’s see how fast V-Ray renders on iRender’s machines:
3Ds Max & V-Ray GPU rendering performance on 1/2/4/6/8 GPUs RTX 3090

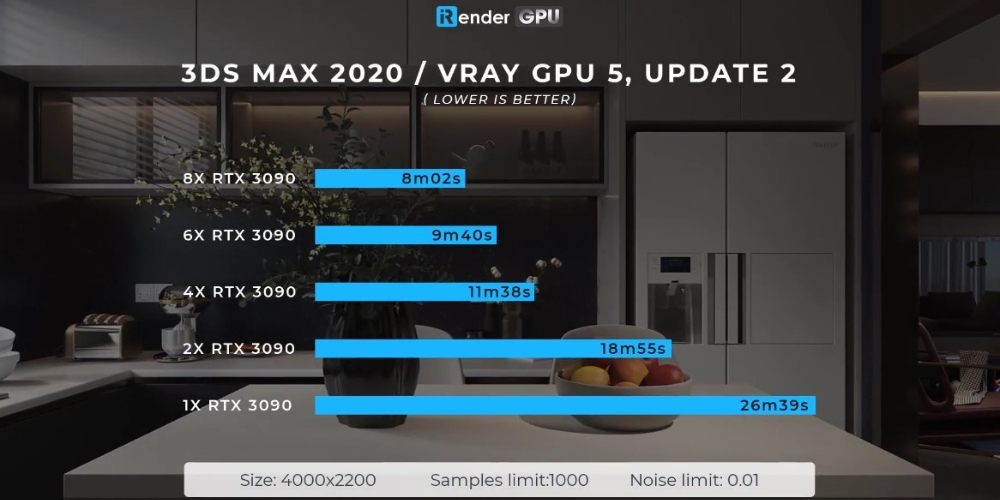
The chart indicates that increasing the number of GPU cards results in faster rendering; however, using two GPU cards does not necessarily double the rendering speed.
SketchUp & V-Ray rendering performance with 6x RTX 3090


As you can see, the GPU rendering time is much shorter than CPU rendering (about 91%) with SketchUp and V-Ray.
Cinema4D & V-ray rendering performance with 6xRTX 4090

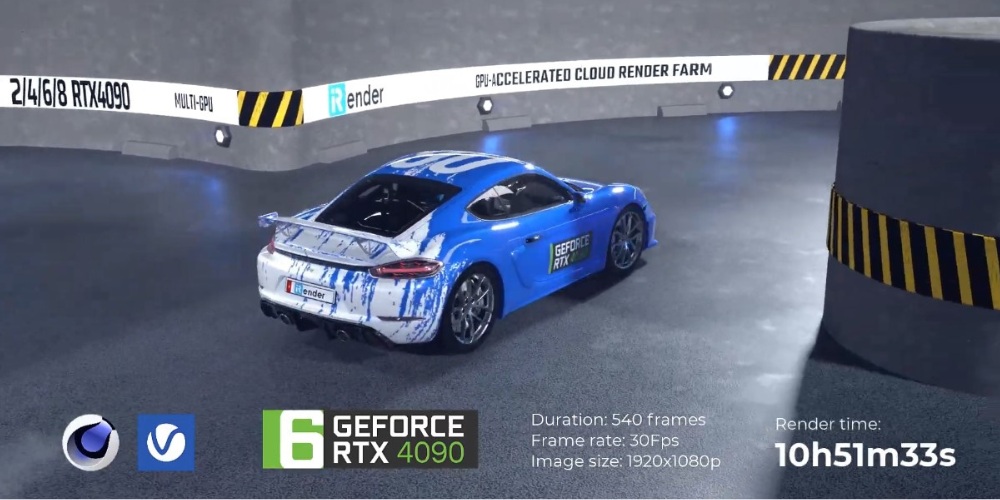
As tested, it takes 10h51m33s to render 540 frames with 30 Fps in frame rate. That means 1.2 minutes per frame.
HOT DEAL: 100% bonus for new users
Why can iRender be a great render farm for you?
In addition to high-configuration servers, iRender provides many other utilities to provide the best user experience.
- Dedicated server for individuals: You have full control and access to the server you rent. The working environment (installed apps, files) will be stored for the next use.
- Easy and free file transfer between your computer and iRender’s server: The transferring task can be done via iRender GPU application for Windows and the iRender Drive application for MacOS.
- 24/7 assistance: iRender’s attentive agents are always ready to support all your queries.
- All software compatibility: iRender’s PCs are built to meet the configuration needs of all 3D software and rendering tools at a variety of cost levels for users to choose from.

New users will get a 100% bonus for the first transaction within 24 hours of their registration. No minimum amount!! If you top up 50$, you will get 100 points in total to hire our machines.
If you have any questions, please get in touch with me through email [email protected] or our 24/7 support team for a quick response.
Thank you for reading & Happy Rendering!
Source: Chaos, Google for Developers
Related Posts
The latest creative news from VRay Cloud Rendering