
7 hidden Blender hacks that will improve your workflow
Who doesn’t love secret tricks? Because Blender is a comprehensive, versatile tool, there are lots of hidden Easter eggs – sleek tools and functions that lurk beneath the visible surface. For today’s article, let’s figure out the best tips Blender hacks to improve your workflow while working with Blender.
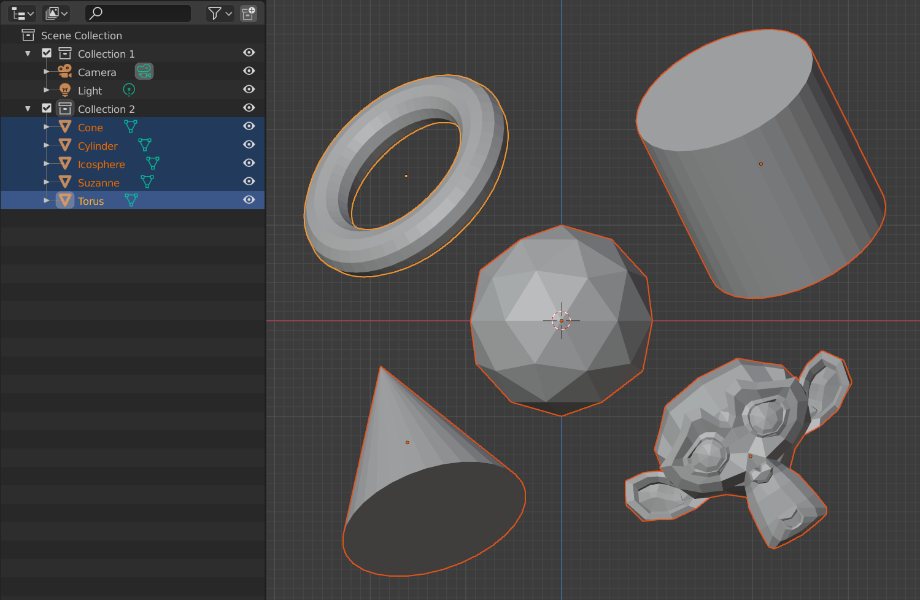
1. Easily select all objects in a collection
First Blender hack! Often you need to select all objects inside a Blender collection and one way to do so is to move your pointer to the Outliner, right-clicking on a collection, and choosing Select Objects. But there’s another, easier way. Just select one object in the collection, then press Shift + G for Select Grouped, and choose Collection.Now, all objects in the same collection will be selected.
2. Use the Scale Cage tool for flexible scaling
Scaling single or multiple objects can be a pain, especially when objects have origins/pivot points that don’t match your desired scaling center. Since Blender 2.8, there’s a tool that’s hidden and easily forgotten: the Scale Cage tool. Here’s how to use it:
First, select one or more objects you’d like to scale. In the Toolbar, press and hold the Scale tool button to get a roll-out. Select the second option: Scale Cage. Click and drag any of the Scale Cage points to start scaling the objects from that point towards the opposite point of the cage.
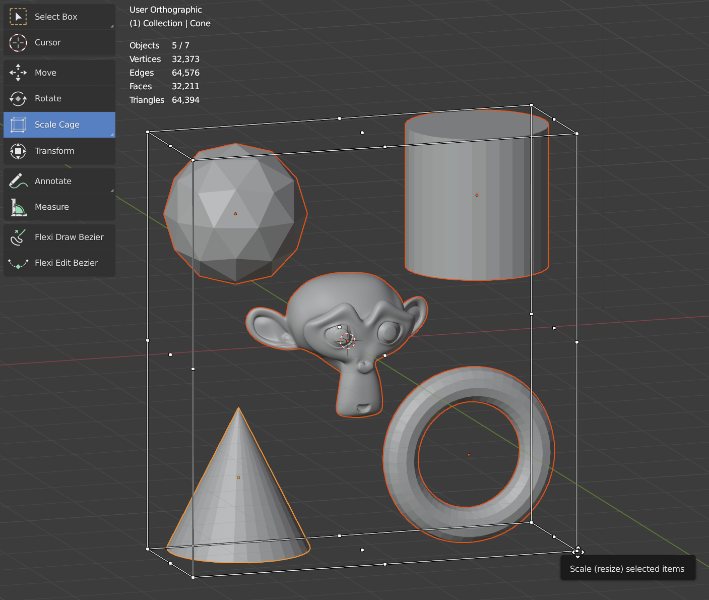
The Scale tool works on multiple objects in Object Mode as well as Edit Mode selections. Don’t forget to press Control + A and select Scale after scaling in Object Mode, or the scaling will remain non-uniform, which can cause undesired results, such as when you start sculpting in Sculpt Mode.
3. Use edge creasing for fine control of polygon subdivision
Let’s come to another useful Blender hacks. Polygon subdivision is a powerful modeling method. To achieve sharper features, you need to add supporting edge loops. This can quickly complicate the editability of your mesh. To work around this, you can make use of edge creasing. Crease value can be assigned to any mesh edge in Blender. Once you subdivide your mesh using the Subdivision Surface modifier, the Crease value of one or more edges will reflect in the subdivided shape: the higher the crease value, the sharper the edge will be in the subdivided result. Value of 1 will cause an absolutely sharp crease – but usually, you’ll want to avoid that, as nothing is truly, perfectly sharp in real life.
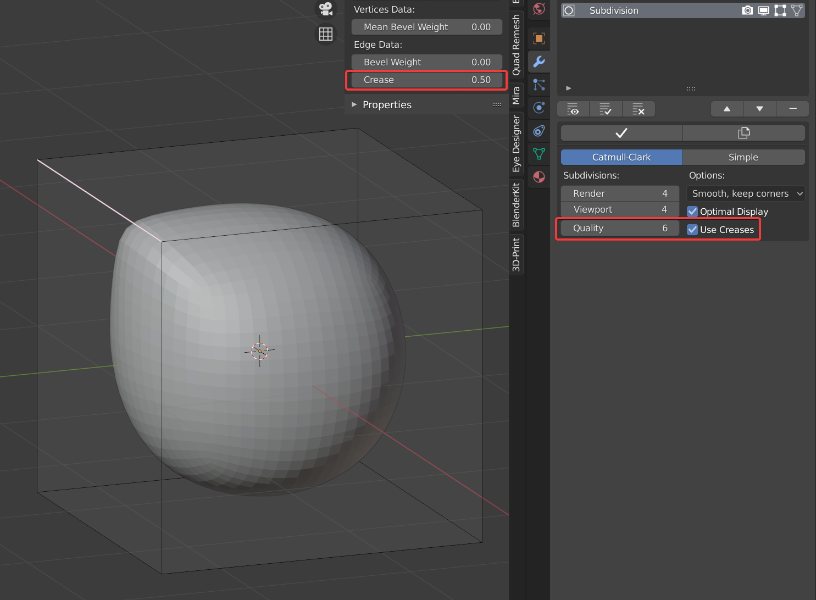
You can assign Crease values to selected edges via the Crease value in the Item tab of the Sidebar panel, but you can also press Shift + E when you’ve selected an edge, and interactively change the crease value, or type in a value and press Enter. Make sure the ‘Use Creases’ checkbox is activated in the Subdivision Surface modifier options. Last but not least, if you increase the Quality value, the subdivided crease calculation will be a bit more accurate, at the expense of some speed.
4. Use Bevel Weights for bevels of varying radius
When creating hard-surface, non-organic models such as industrial devices, nice, rounded bevels are essential. Blender’s Bevel modifier is a powerful tool to achieve this, and if you make use of Bevel Weights, you can achieve fine control over your beveled edges. You can assign a weight to one or more selected edges via the ‘Mean Bevel Weight’ value in the Item panel of the Sidebar. The values range from 0 (no bevel weight) to 1 (full bevel weight).To see the beveled result with Bevel Weight influence, first Add a Bevel modifier to your mess. Then Switch the Bevel modifier width value to Percentage. And finally, Switch the Bevel modifier Limit Method to Weight. Now increase the ‘Width Percent’ value to determine the prominence of the varying bevels. If you want rounded bevels instead of flat chamfers, increase the Segments value.
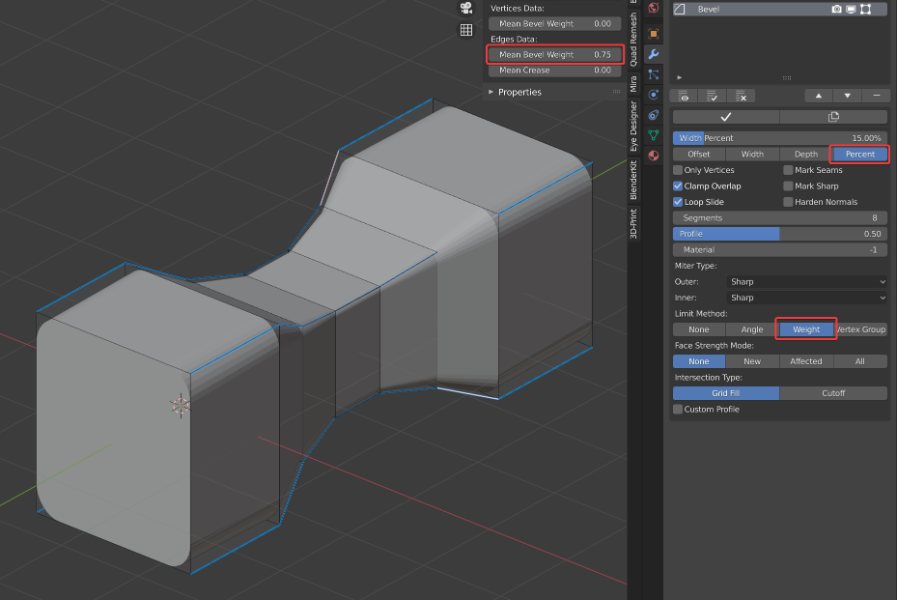
You could change the Bevel modifier’s Outer and/or Inner Miter Type to improve the result if necessary. Moreover, you could add edge loops so you can enter more Bevel Weight values to edges for a more gradual transition of the bevel widths.
5. Change the view orientation to a face selection
Sometimes, you want Blender’s 3D view to be parallel to a face in order to work in the local orientation of the face. This is actually quite easy: Select a face, then press Shift + a numpad view key. For example, press Shift + 7 to orient the view to the top of a face (you’ll mostly use this), or press Control + Shift + 7 to align the view to the bottom (backside) of the face.
If you press Shift + 3 the view will orient to the right side of a selected face, while Control + Shift + 3 will orient to the left side of the face. And so on. Now if you press the comma key (‘,’) for the view Orientation menu, and switch to ‘View’, your view plane will get the orientation of the face to which you aligned the view, so moving, rotating, and scaling will be performed in that orientation.
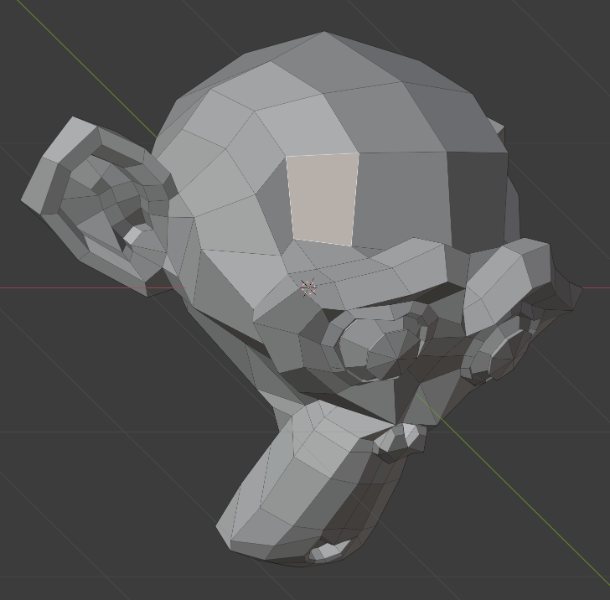
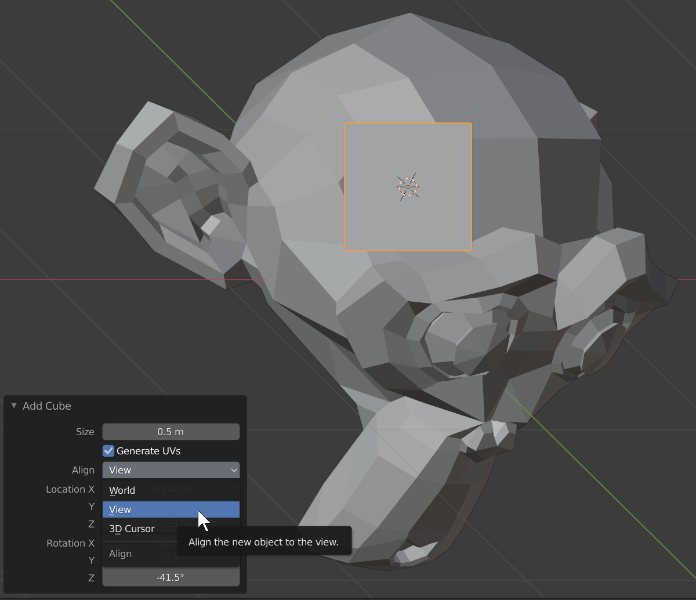
6. Add objects to face orientation
Continuing where we left off in the previous tip. If you press Shift + S and center the cursor to the selected face, and use Shift + A to add a new object, you can change the settings of the new object (press the F9 key for the settings pop-up) to be created in the view orientation, so it’s aligned to the face as well. You can do this both in Edit Mode or Object Mode.
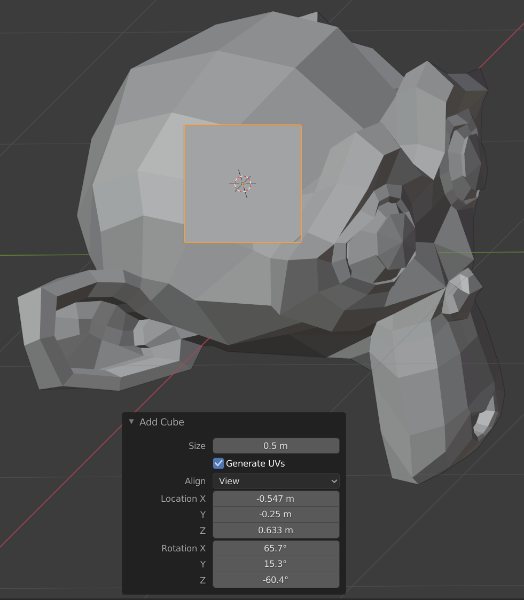
7. Next Blender hack: Roll the 3D view
The final Blender hacks that we would like to introduce today related to Roll the 3D view Adding to the preceding viewport alignment tips, you can press Shift + numpad 6 or Shift + numap 4 to roll the current 3D view clockwise or counterclockwise. This is useful if the alignment of the view to a face doesn’t have the rotation you’d like.
In the following example, the view has been rolled to change the angle of the new cube on the same selected face as before. To update the cube’s orientation after a roll, select ‘View’ from the Align roll-out once more.
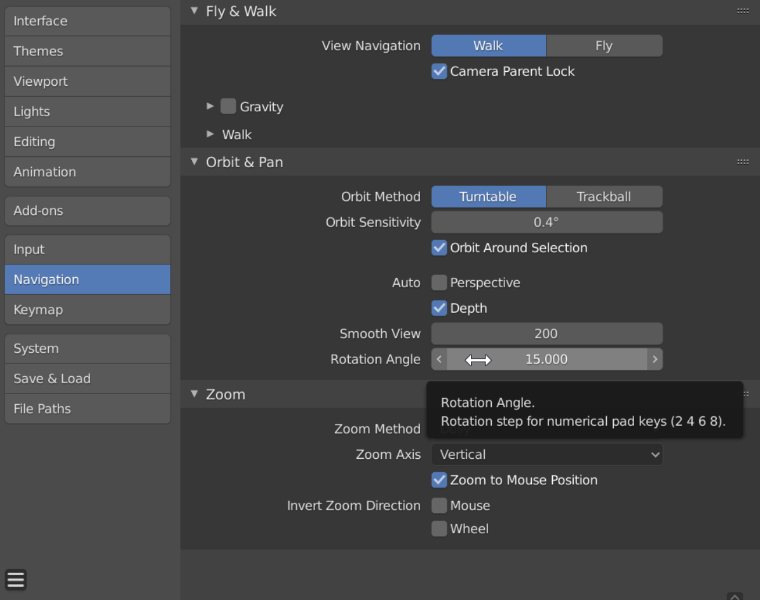
The default view roll angle increment is 15 degrees, but you can easily change this via Preferences ➔ Navigation ➔ Orbit & Pan ➔ Rotation Angle.
iRender - Powerful Cloud Render farm for Blender rendering
Hope that these above Blender hacks and tips can help to save your precious time much and have happier period of time to work with your project.
And in case you are looking for a powerful Cloud Rendering Service, so you are in the right place. iRender is a GPU-Acceleration Cloud Rendering Service provider in PC optimization for rendering tasks, CGI, VFX with over 10.000 customers and being appreciated in many global rankings (e.g. CGDirector, Lumion Official, Radarrender, InspirationTuts CAD, All3DP). This is the only render farm that users can install any software and plugins that serve their project, take full control over the machine and use it as their local computers and usually recommended for Blender rendering.


Now go forth and create! Become a member of the iRender community today to stop wasting pointless hours of rendering and receive the free coupon to test our service. Always at the forefront of cutting-edge graphics technology, we do the rendering, the creativity is yours!
iRender – Happy Rendering!
Reference: Metin Seven on cgcookie.com
Related Posts
The latest creative news from Blender Cloud rendering.


