Blender Render Taking Forever? 9 Fixes Before You Blame Your GPU
If Blender is rendering slowly, it is almost always your Cycles settings, not your GPU. The fastest wins, in order: (1) make sure you are actually rendering on the GPU with OptiX or CUDA, not on CPU by accident; (2) turn on the denoiser and cut your samples hard; (3) enable adaptive sampling and persistent data; (4) trim light bounces, clamp fireflies, and tame subdivision and texture sizes. Most of these are free and take a minute each. Only after all nine, if a genuinely heavy scene still crawls, are you looking at a real horsepower problem worth solving with more GPUs.
I have lost count of how many times someone has told me their GPU is “too weak for Blender,” and then I open their file and the render device is set to CPU, samples are at 4096, and there is a 12 million poly subdivided couch nobody can even see. The card was never the problem.
So before you put a new GPU in your cart, give me ten minutes. Here are the nine things I check on a slow Blender scene, in the order I actually check them. Almost all of them are free.

First, the one that catches everyone: are you really rendering on the GPU?
This sounds too obvious to mention, and it is the single most common reason a Blender render “suddenly” takes forever. Two things have to be set, and people usually set only one:
- In Edit > Preferences > System, pick your backend (OptiX is usually fastest on NVIDIA cards) and tick your GPU.
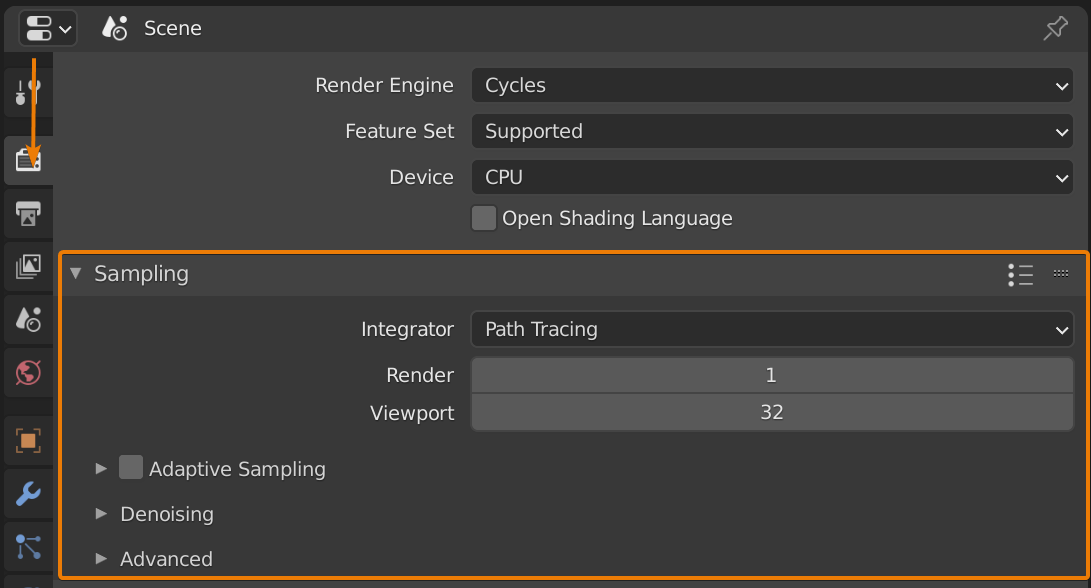
- In Render Properties, set Device to GPU Compute. This one resets on fresh files and downloaded scenes all the time.
I have seen a frame go from around 40 minutes to about 6 just by flipping that second toggle. Nothing else changed. The card was idle the whole time the CPU was grinding away.
The biggest free win: denoise, then cut your samples
If you only do one thing from this whole list, do this. Most slow Blender renders are slow because someone is brute-forcing noise away with thousands of samples. A modern denoiser does that job for almost nothing.
Turn on the denoiser (OptiX or OpenImageDenoise) under Sampling, then drop your max samples and let Adaptive Sampling stop early in areas that are already clean. On a recent interior I went from 4096 samples down to around 512 with a noise threshold of 0.01, and the frame dropped from roughly 12 minutes to about 3. In motion you cannot tell the difference.
Two honest caveats:
-
- For animation, use an animation-aware or temporal denoiser, or you will get a faint shimmer between frames.
- If you push samples too low, the denoiser starts smudging fine detail like thin hair or sharp speculars. Find the floor for your shot. There is no magic number that fits every scene.
The settings that quietly add up
None of these are dramatic on their own, but stacked together they often cut another big chunk off the clock.
Persistent Data (for animation)
Under Render Properties > Performance, turn on Persistent Data. Without it, Blender rebuilds the entire scene from scratch for every single frame. On a heavy file that rebuild alone can cost 20 to 40 seconds a frame, which across a few thousand frames is real money. The trade is higher memory use, so watch your RAM and VRAM.
Light bounces and fireflies
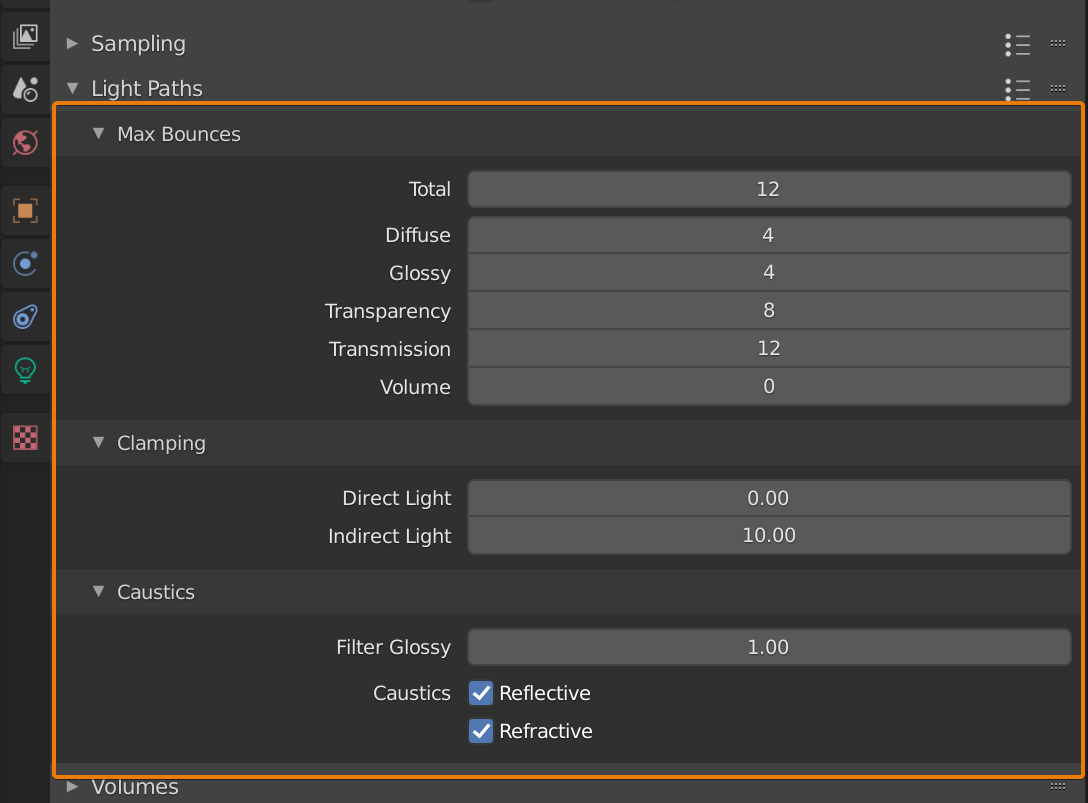
In Light Paths, most interior scenes do not need 12 total bounces. Drop them to what the shot actually needs, often 4 to 6, and watch your time fall 15 to 30 percent with no visible change. Then turn on Clamp Indirect to squash fireflies. That last one matters more than it looks, because once the fireflies are gone you can safely run far fewer samples, which loops right back to fix number two.
Geometry and textures
Subdivision is the loudest hidden cost in Blender. A subdivision modifier at render level 4 can balloon a simple object into tens of millions of polygons. Drop hero objects to level 3 and background objects lower. On camera you will not see it. Then deal with textures: eight 8K maps on a wall in the far background is pure waste. Cap texture size for the render under the Simplify panel, and turn on Simplify in general as a global safety net for max subdivision and camera culling.
You did all nine and it still crawls. Now what?
If you have honestly worked through the list and a frame is still slow, then fine, now it might be the hardware, or the scene is simply heavy enough that no setting will save it. A 200-frame animation at 3 minutes a frame is still 10 hours on one machine, and you cannot use that machine while it runs.
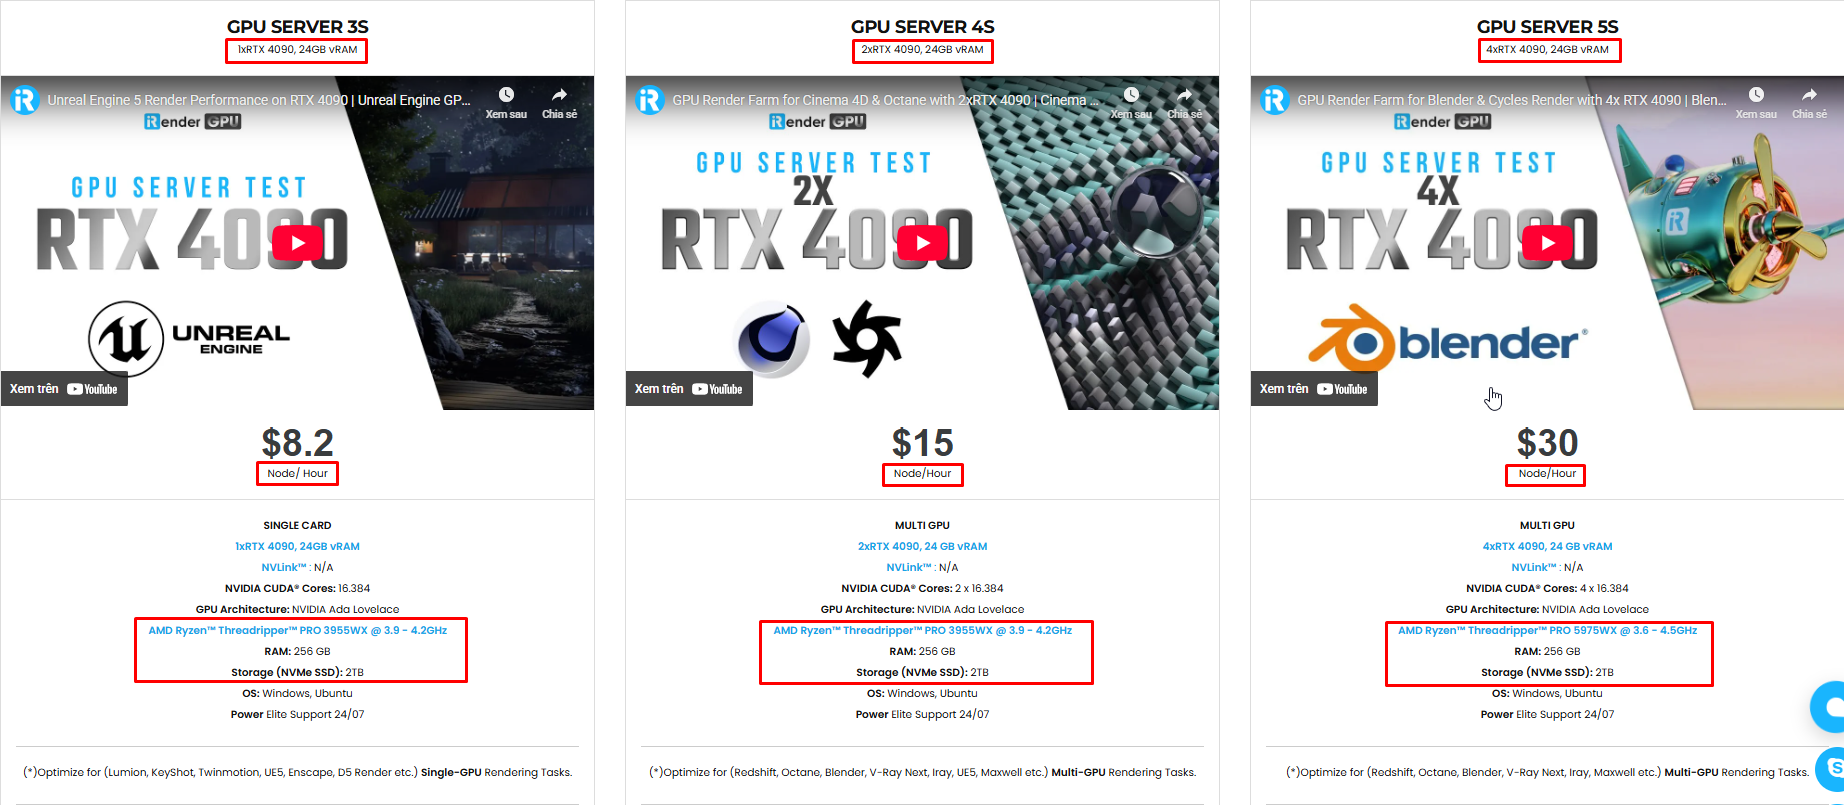
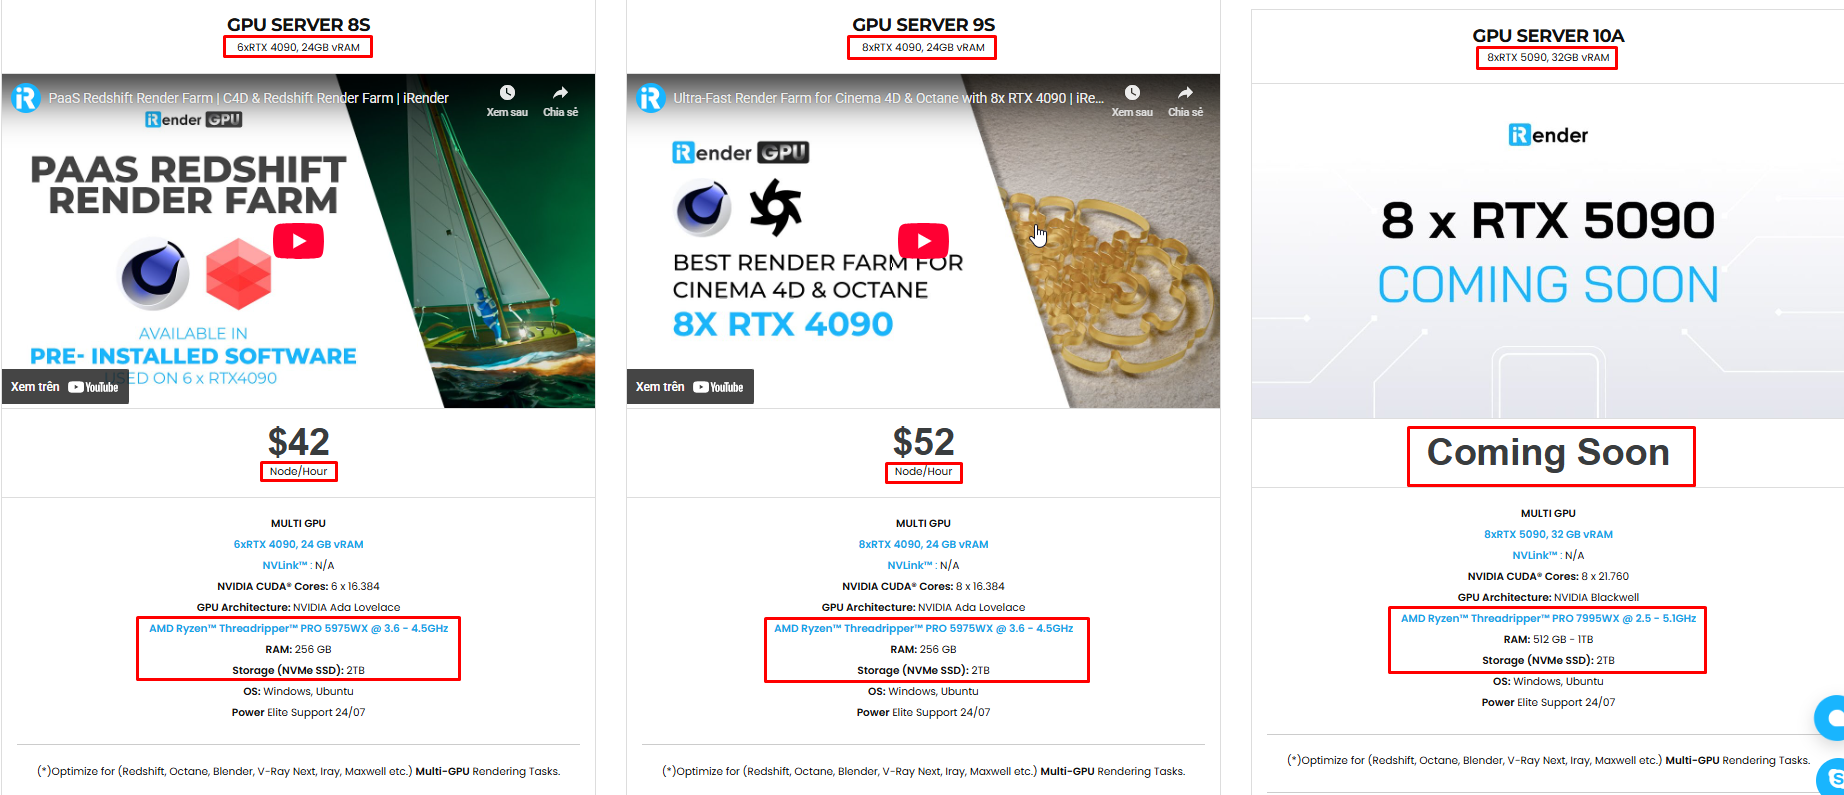
This is the point where more GPUs actually change the number, and where I will be straight with you about how cloud rendering works. iRender does not hand you a black box that decides which Blender version or add-ons you are allowed to use. You get a full remote workstation with RTX 4090 GPUs, 256GB RAM, and fast storage, and you install your Blender, your add-ons, your exact build. The render comes out matching your local machine because you set it up. That is the whole point of “your renders, your rules.”
The honest trade-offs, so you hear them from me first:
- The billing timer starts when the server boots, not when the render starts. Pack your blend file and textures before you connect.
- You shut the machine down yourself. The most common way people waste money is leaving an idle server running after the render finished, so set an alarm or use auto-shutdown.
- First setup takes 15 to 30 minutes. After that your image is saved and you are back in minutes. Do a test run before a deadline, not on deadline night.
And one more honest note: if you just need overnight batch frames with zero fuss and you are happy to give up a live desktop, an automated SaaS render farm can be simpler. iRender is the better fit when you want full control of your Blender environment, GPU horsepower on demand, or you need to scale frames out fast without buying hardware you will not use next month.
Frequently Asked Questions
2. Does the OptiX denoiser reduce Blender render quality?
iRender – Maximize Your Blender Rendering Performance
Why iRender is a great solution:
iRender proudly offers high-performance workstation configurations optimized for Blender, giving you an incredible rendering experience without the limitations of traditional render farms. With iRender, you can enjoy full control over your remote workstation, just like using your personal computer, but on the cloud. Blender comes pre-installed and ready to go, so you can start immediately.

Fully Compatible with Blender
iRender allows you the freedom and flexibility to work the way you want, without restrictions.
- Install any version of Blender you need.
- Add your favorite plugins or specialized render tools.
- Whether you use OctaneRender, Redshift via Houdini Bridge, or export USD for Arnold, you can set up your environment exactly like your local machine.
Powerful Multi-GPU Workstations
iRender offers virtual machines with up to 8x RTX 4090, or high-VRAM GPUs for large scenes. These configurations are perfect for:
- OctaneRender: Linear scaling across multiple GPUs, ultra-fast path tracing.
- Redshift: Biased rendering optimized for animation, saving you time.
- Arnold GPU: Smooth OptiX multi-GPU support.
- V-Ray GPU: Trusted by archviz professionals for both stills and animations.
Scalable & Affordable Pricing
One of the biggest barriers to multi-GPU rendering is the upfront cost of hardware. With iRender, you pay only for the time you use, making it highly cost-effective whether you’re a freelancer rendering a single scene or a studio handling large projects with tight deadlines.
You can see the information about iRender’s service packages here.
iRender is currently offering a SPECIAL PROMOTION: enjoy a 100% bonus on your first top-up. This means your first deposit will be doubled, and your points never expire, allowing you to use them whenever you need.
We’re always happy to help you with any questions. If you have any problems or questions, don’t hesitate to contact our 24/7 support team. Or via WhatsApp: 0912 785 500 for free advice and support.
Sign up for an account today to experience and enjoy our services.
Related Posts
The latest creative news from Blender Cloud Rendering