Understanding volumetric scattering and fog in Redshift for Cinema 4D
In the previous article, we got to know volumetric scattering and fog in Redshift. Today, we will explore another aspect of volume rendering, which is volume object in Redshift for Cinema 4D with iRender.
1. OpenVDB Files
The first thing we explore to understand more about volume object is OpenVDB. OpenVDB files are used to render volume. It stores voxels, which is like three dimensional pixels. Each voxel stores information that describes the volume at a particular point in 3D space. For example, it can store a density value which tells the renderer how opaque or transparent to make the volume at each specific location.
Grids and Channels
OpenVDB organizes its voxel data into grids, which is usually referred to as channels. Redshift also uses the channel terminology when referencing a VDB grid in a volume shader.
Each OpenVDB channels have a unique name assigned to them. For example, volume density information could be written to a channel named “bob” and still function exactly the same as the more common channel name “density.” Thankfully, most applications follow fairly standard naming conventions. However, you need to know what channels are contained in your VDB file to know each channel’s name and its purpose. Volume channels tell Redshift exactly how your volume should be shaded, and results from each channel will be vastly different, because they tend to have very different uses. For example, temperature should be used to drive volume emission for realistic flames and explosions by making use of blackbody emission rather than using the density channel which is tailored for describing thick plumes of smoke or clouds.
Velocity channels
Velocity channels are expected in either two forms:
-
-
-
- A single velocity grid in the float vector type containing all the XYZ information in one Example: velocity
- Three separate float scalar velocity grids that pertain to X, Y, and Z individually. Example: velocity.x , velocity.y , velocity.z
-
-
Finding your channel names
Redshift provides a list of all the available channels contained in a VDB in the Information section of the Redshift Volume Object.
The Redshift Log File can be used to find out which channels are contained in an OpenVDB file. When Redshift loads an OpenVDB file, it prints out the names of all the channels it contains. Here is an example of how this looks in a Redshift log file:
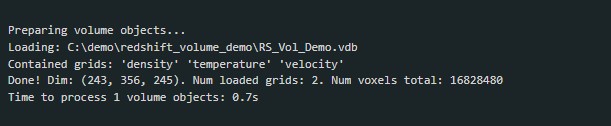
As you can see in the code snippet above, three grids were found: density, temperature, and velocity – these names can be used for shading and motion blur in Redshift.
VDB Resolution
A voxel grid also has resolution like image resolution. A low resolution volume will look blocky while a high resolution volume will look smoother. However, it is important to create a volume with the appropriate resolution for your scene and its distance from the camera. The advanced remapping parameters of the volume shader can be used to help alleviate some of this blockiness but it is a tricky balancing act that may require sacrificing too much of the desired look of your volume, so ultimately what is most important is the actual resolution of your volume simulation.
2. Creating a Redshift Volume object
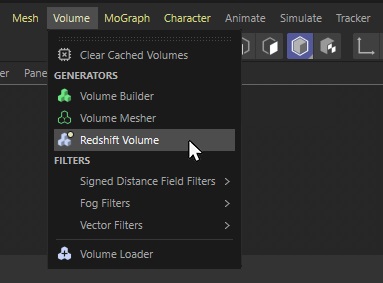
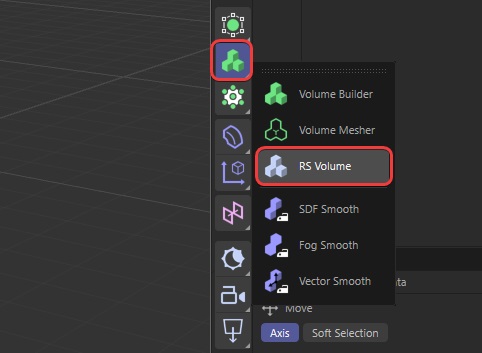
To create a Volume object, select Volume menu > Redshift Volume or select RS Volume from the quick volume creation tools.
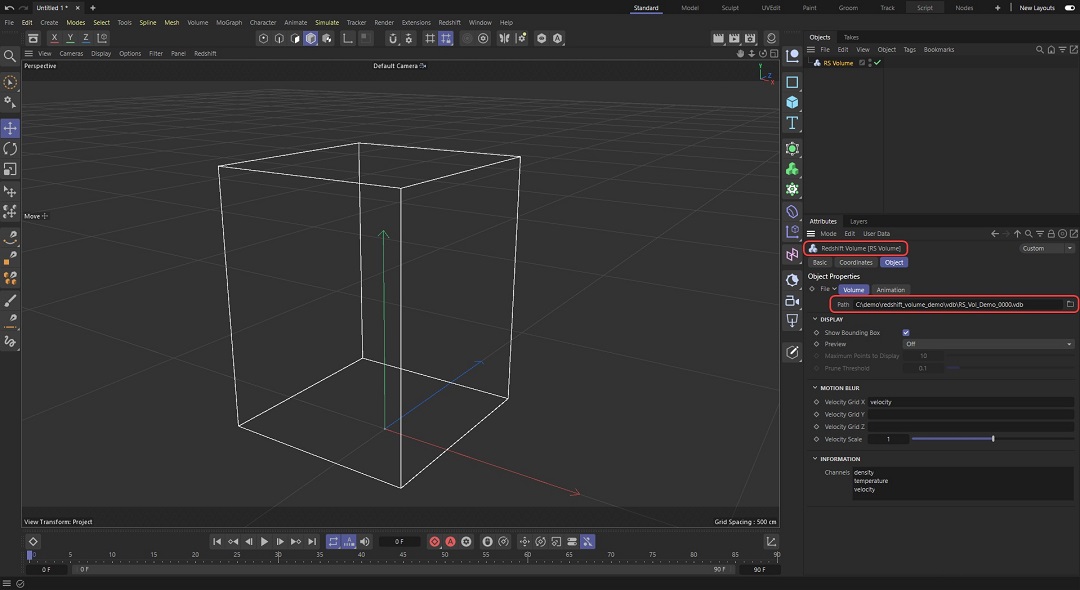
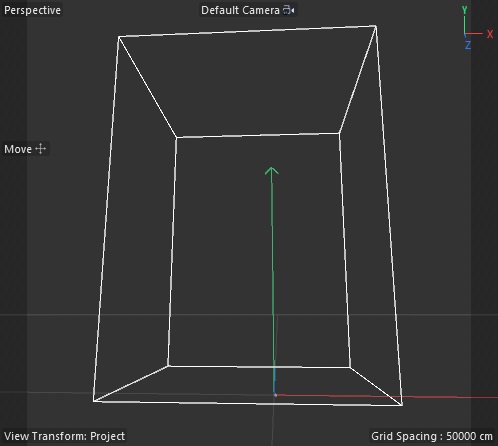
Next set the Path field to an OpenVDB file on your computer as outlined in the image below, for example this demo is the “RS_Vol_Demo” VDB. The VDB should now be loaded into the scene and visible as a bounding box in the viewport.
*Note: Volume objects must be stored on a GPU’s memory in their entirety, volume rendering is not handled by Redshift’s out-of-core system. Therefore, if a scene uses too many volume objects (or if these volume objects are of a particularly high resolution) and do not fit on the GPU’s memory, rendering will be aborted with an out-of-VRAM error message.
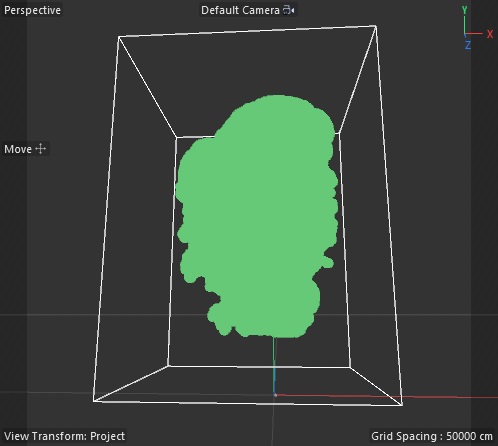
For better viewport visualization, you can change the Display mode to something like points. Use the maximum points and prune threshold parameters to balance viewport performance with the visualization of the volume.
All that remains is to configure a Redshift Volume shader and then you can start rendering.

3. Parameters
In this part we will explore File, Display, Motion Blur and Information.
File
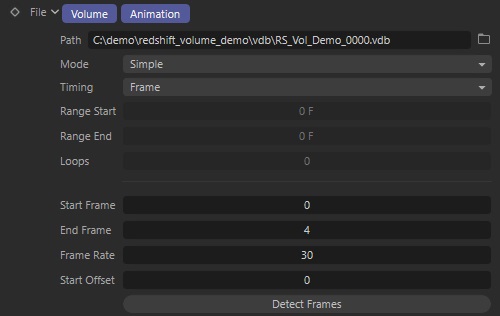
The following settings manage the import process of VDB files and allow you control the playback of animated VDB sequences.
Path
Specifies which VDB file or sequence from your computer will be used for volume rendering.
Mode
This dropdown controls the loading of VDB files and their playback behavior:
-
-
-
- Off: Only load the VDB file that is originally entered in the Path, no animation occurs.
- Simple: Load and animate all VDB files found in a matching sequence with timeline playback. After one full playback of the sequence the last frame is held indefinitely.
- Loop: Load and animate all VDB files found in a matching sequence with timeline playback. After the last VDB file of the sequence has been displayed the sequence is restarted and this process repeats.
- Ping-Pong: Load and animate all VDB files found in a matching sequence with timeline playback. After the last VDB in the sequence is displayed, playback continues but this time in reverse order from the last frame to the first. When you reach the first VDB file, forward playback resumes from beginning to end and repeats this back and forth process.
-
-
Timing
Here the speed of playback is set and a range of VDB files within the sequence can be specified to be displayed and looped:
-
-
-
- Frame: One VDB file is loaded per frame of your animation. No frames will be dropped. If the VDB sequence and your rendered animation use a different FPS setting, the sequence will play back faster or slower than the original speed.
- Time: Help match each second of the VDB sequence with each second of your animation, thus ensuring that the VDB sequence will be played back at the original speed.
- Range: Help play the VDB Sequence over a specified frame range (Range Startand Range End) of your animation. A separate Loop value allows any number of repetitions of the VDB sequence within the given range of frames. Use this option if you do not want the VDB sequence to start playing immediately. If the range of frames is shorter than your VDB sequence, some VDB files will be skipped during playback!
-
-
Range Start
With Range Start you can specify at which frame of your animation the VDB sequence should start playing. All frames before Range Start will use the first VDB file of your sequence. Only relevant when the Timing mode is set to Range.
Range End
With Range End you can specify at which frame of your animation the VDB sequence should stop playing. All frames after Range End will use the last VDB file of your sequence. Leaving this value at 0 has the same result as entering the last frame of your animation. Only relevant when the Timing mode is set to Range.
Loop
Loop sets the number of repetitions for the VDB sequence within the given range (between Range Start and Range End). Increasing the Loop value will always speed up playback of the VDB sequence and can result in more skipped VDB files. Only relevant when the Timing mode is set to Range.
Start Frame
Frequently Start Frame should be 0 to start the sequence with the first VDB file but this can be used to trim unnecessary frames from the beginning of a VDB sequence.
End Frame
This can be used to trim unnecessary frames from the end of a VDB sequence by controlling which VDB file the sequence should stop at.
Frame Rate
Since a sequence of files doesn’t have a fixed playback frame rate, you can enter your own here.
Start Offset
This value will offset the number of the VDB file within a sequence. For example, using Offset 3 would use the third file of the sequence as the new start frame. In this case, the first two files in the sequence will be handled as if they are the last two files of the sequence, so in total the amount of files in the sequence will remain constant.
Detect Frames
This button will automatically detect the number of VDB files in a matching sequence and fill out Start Frame and End Frame for you.
Display
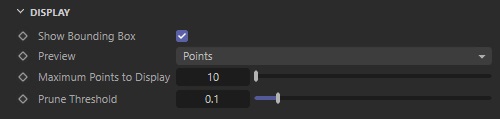
Show Bounding Box
When you activate this option, it will draw a bounding box in the viewport to illustrate the maximum size of your volume even if the Preview mode is switched Off.
Preview
This parameter controls how the volume data will be presented in the viewport.
-
-
-
- Off: No preview of the loaded volume is displayed in the viewport, however you can still activate the Show Bounding Boxoption to display a wireframe bounding box.
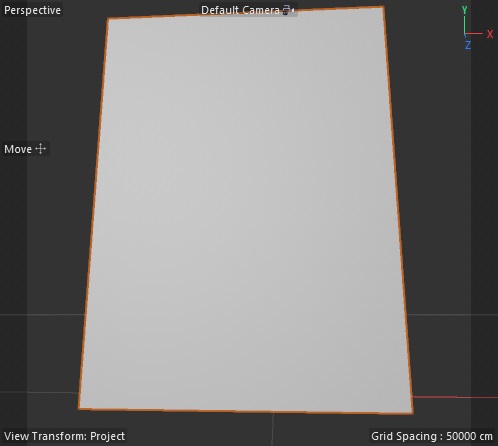
- Bounding Box: Draws an opaque cube based on the size of the loaded volume in the viewport.
- Points: Draws a number of representative points from the volume grid. The number of points shown is controlled by the Max Pointsand Prune Threshold parameters explained below.
-
-
Max Points
It specifies the maximum number of points that would be drawn if the OpenVDB file was completely filled. This value is used only with the display mode set to Points.
Prune Threshold
Any voxels that are lower or equal to this value will not be drawn as Points. Higher values result in fewer points drawn. It’s only relevant for volume display modes that include points.
Motion Blur
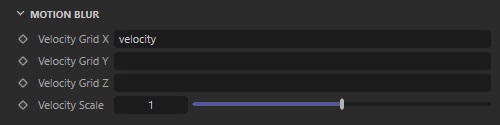
Motion blur simulation is a bit different with volume files as they are stored frame by frame. An object animated via keyframes where the speed and motion curves can be accessed at any time. The solution for this is recording speed information to a velocity grid which can be included in a VDB file. Either separate XYZ grids with float scalar values or a single velocity grid with float vector values is required.
Velocity Grid X, Y, and Z
Enter the names of the three appropriate velocity channels that include the x, y, and z components here. If you only have a single 3D velocity channel with float vector data you can add it all by itself to the Velocity Grid X field and Redshift will handle the rest.
Velocity Scale

Velocity scale is a multiplier for the velocity grids to increase or decrease the motion blur intensity of a volume. Depending on the values in the velocity grid, velocity scale may have to be increased dramatically before motion blur becomes visible.
Information

Displays all the available VDB grids found in the loaded file that can be used for driving volume shading and motion blur.
4. Working on a Cinema 4D and Redshift customized pipeline with iRender’s remote machines
iRender is proud to introduce our remote machine, from single to multiple RTX4090. We provide you supercomputers, with high-end specifications like AMD Ryzen™ Threadripper™ PRO 3955WX @ 3.9 – 4.2GHz or AMD Ryzen™ Threadripper™ PRO 5975WX @ 3.6 – 4.5GHz, RAM 256GB, Storage NVMe SSD 2TB. Most importantly, we always update to the latest GPU technology, with 1/2/4/6/8 x RTX3090/RTX4090.
You are free to install any 3d software or rendering engines, including Redshift and Cinema 4D on our remote servers, add your own license then render or modify your project by yourself.
And now we are having remote servers with Cinema 4D and Redshift pre-installed. Moreover, our users are free to use one Cinema 4D and Redshift license on our remote machine. You just need to activate it via our license app, and start to render your project without having to waste time to install the software.
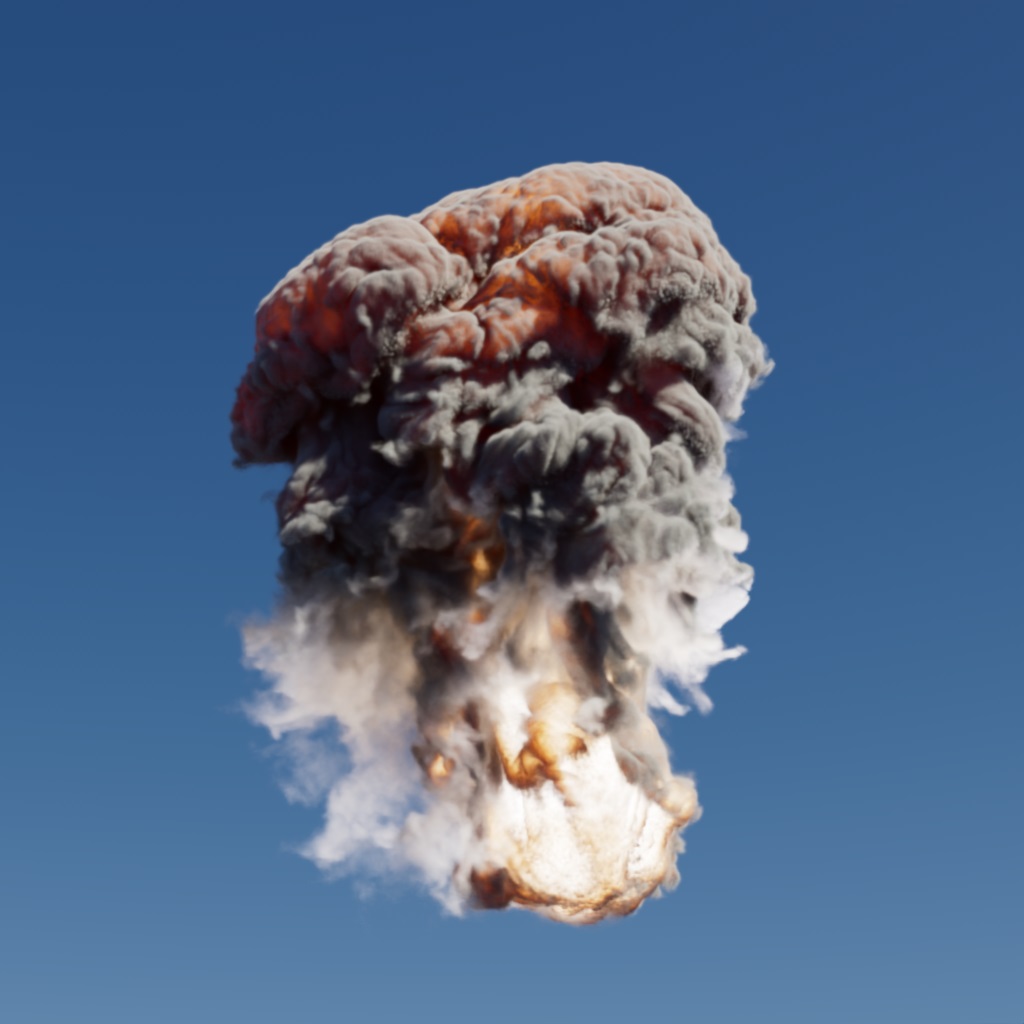
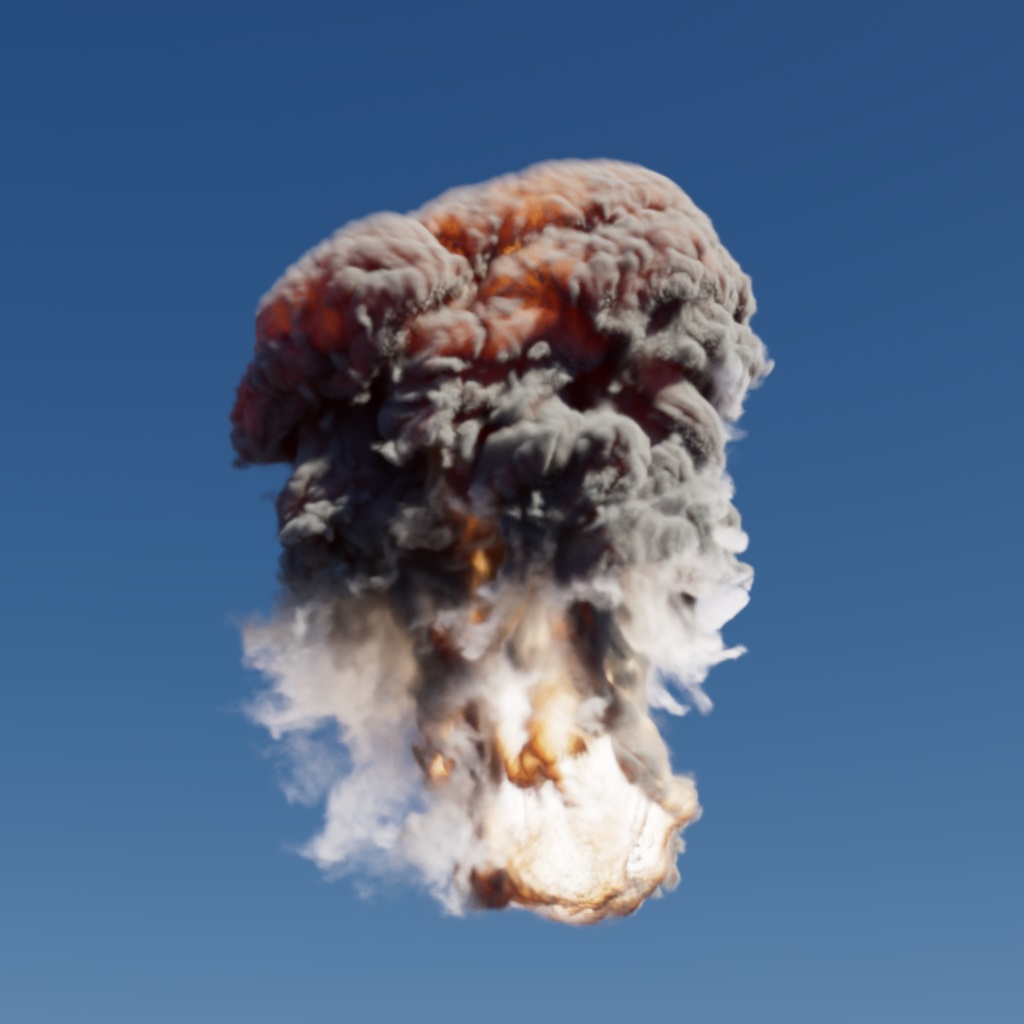
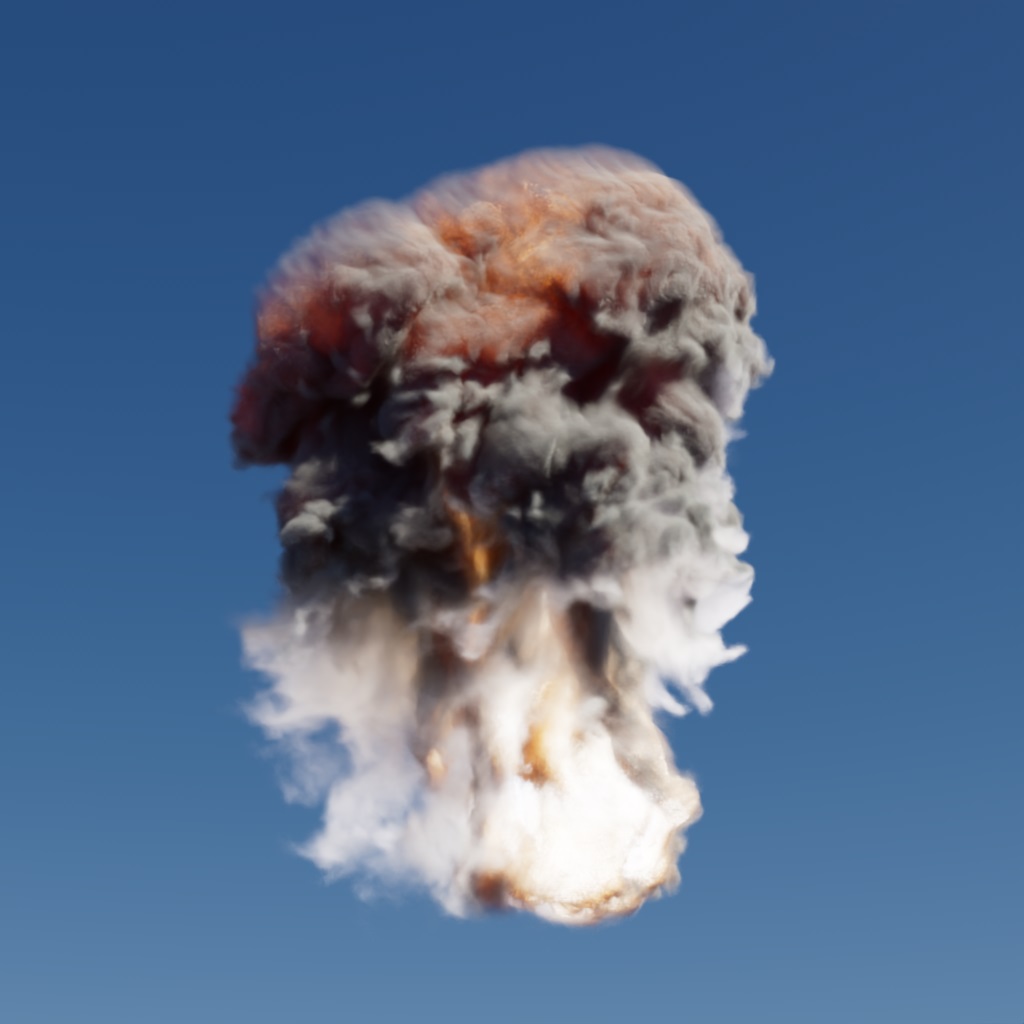
Check out some of our Redshift tests on our server RTX 4090/3090:


iRender also provides you more services. Free transferring tool named iRender drive for macOS or Linux users. For Windows users, we recommend using our all-in-one application iRender GPU to work, and you don’t need to come to our website. Our price is flexible with hourly rental which has a pay-as-you-go basis, daily/ weekly/ monthly subscription with discount from 10-20%. Plus, you have 24/7 support service via livechat with real humans who will support you whenever you encounter an issue.
Register an account today to experience our service and enjoy a very big promotion 100% bonus for new user’s first top up. Or contact us via WhatsApp: (+84) 916806116 for advice and support.
Thank you & Happy Rendering!
Source and images: help.maxon.net
Related Posts
The latest creative news from Cinema 4D Cloud Rendering , Redshift Cloud Rendering