How to apply the denoiser to renders in Redshift for Cinema 4D
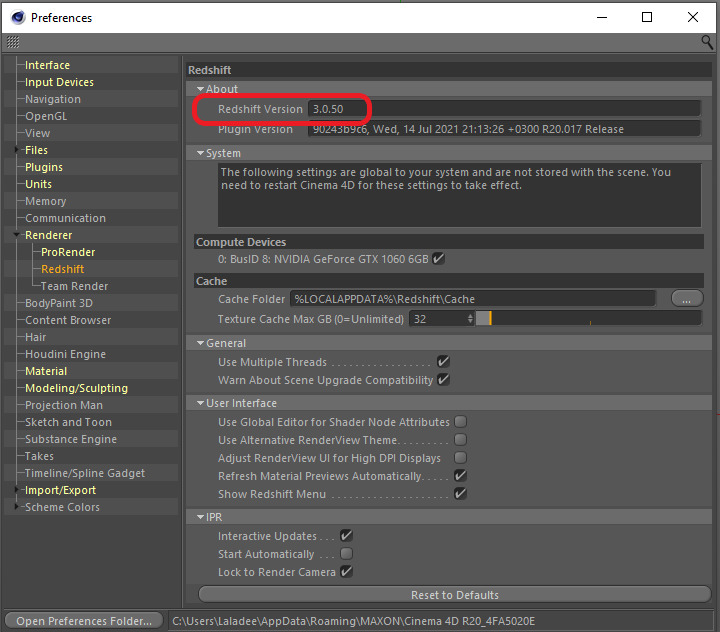
As far as we know, noise is one of the problems which can happen during the rendering process. Obviously, it can degrade the quality of the final result. Therefore, we have some ways to resolve this problem. The first one is increasing the number of samples, but that means longer render times. A faster solution is to use denoising instead. Denoising refers to a rendering technique that removes noise from an image. In this article, I will show you how to apply the denoise renders in Redshift for Cinema 4D. Make sure you check which version of Redshift you have. The denoising features that only exist in Redshift version 2.6 and above.
1. Applying the denoiser
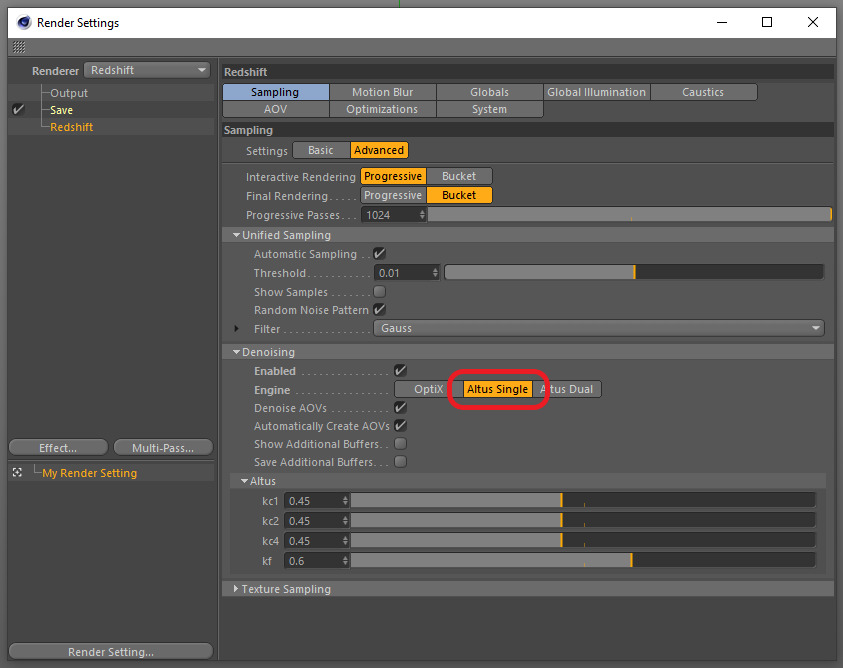
To apply the Altus denoiser to your render, open up the Redshift Render Settings, scroll down to Denoise, and in Engine part, we choose Altus Single. Then, we kick off a new render.
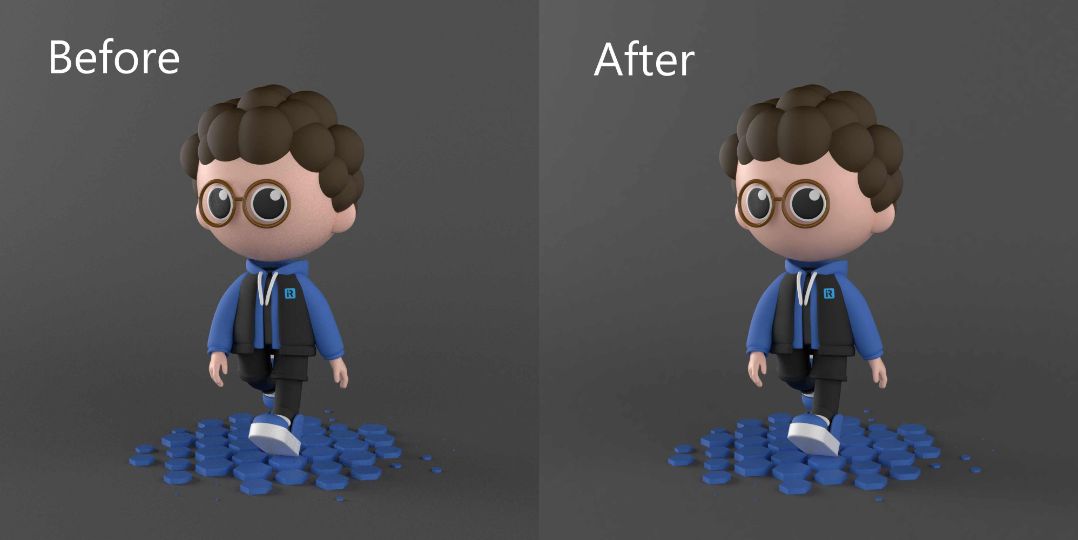
In the above picture, you can see the different results between rendering with and without tlhe denoiser. On the right is the denoised frame, and on the left is the original. There is a large amount of noise in the shadow of the original frame, which would be clearly visible in a full animated render. In contrast, it is difficult for us to see any noise on the right frame. The denoiser has done quite a good job of smoothing everything out and making it much cleaner.
2. Denoiser engines
In the first part, I have shown you how to quickly apply the denoise renders in Redshift. Now, I am going to go over a few details regarding to applying the denoiser in Redshift. Under the Engine are three different types of denoiser. However, the Altus Single is the best one. Altus Dual is an older version of Altus Single and will increase your render time. OptiX is a bit good because you can use it interactively in the render view, but it is inconsistent and doesn’t do a good job with animation, so we are just going to stick the Altus Single.
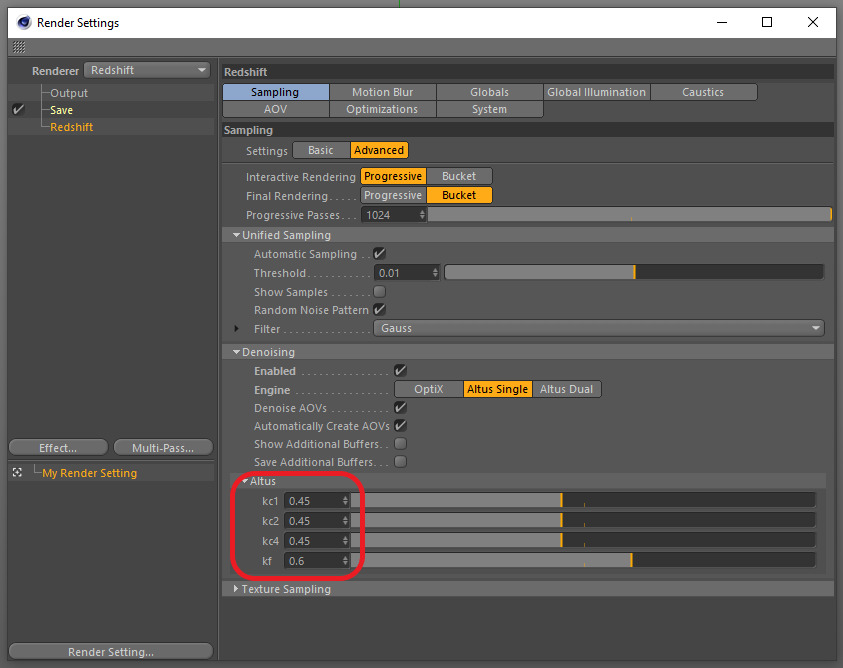
After choosing Altus Single and going down into the Altus options, you will see kc and kf parameters. These settings allow us to control the quality and strength of the denoising effect.
-
-
-
-
- kc1 controls high frequency details so these are going to be sharp smaller details in your image
- kc2 controls the medium frequency detail
- kc4 controls the lower frequency detail
- kf just controls the overall strength of the denoising effect. So the higher the value, the more denoise you get. The lower the value, the less denoise you get.
-
-
-
If you have a particularly fine part of the image that does not need a lot of denoising, you bring down the kc1 value to avoid smoothing over any details. In case a large part of the frame requires a lot of denoising, you can turn up the kc4 value and that should apply more denoising strength to that particular part of the frame.
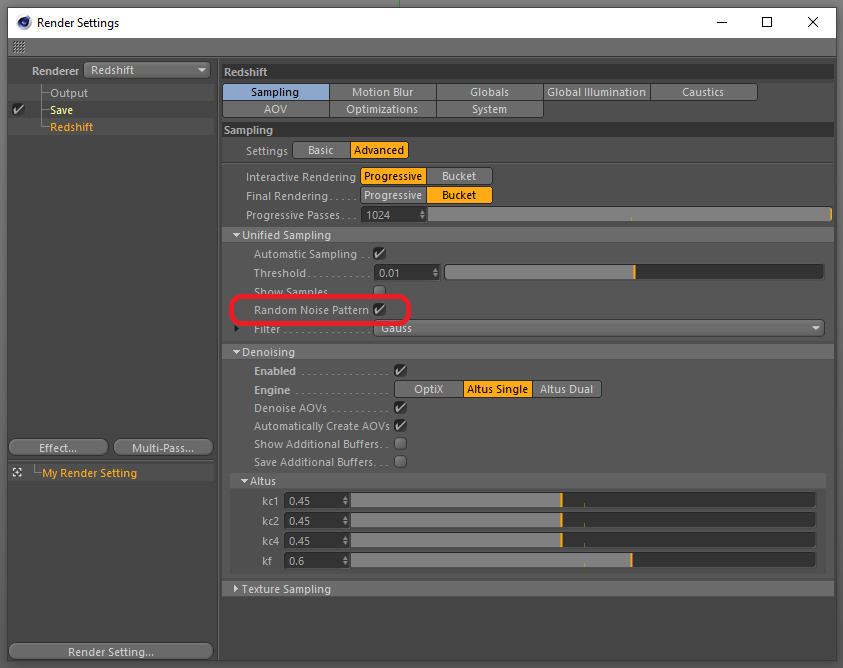
Besides, there is one setting you are going to want to adjust if you are rendering an animation. Go to the Unified Sampling menu and you are going to want to check off the Random noise pattern normally when you render an animation because it helps the noise to remain consistent frame to frame. Therefore, make sure that Random noise pattern is checked off when you’re doing an animation.
So the final thing to consider is that denoising can ruin the image if your sample settings are not set correctly. You can not just have your sample set super low with a super grainy image and expect the denoise effect to just clean everything up. It is difficult to happen. You are going to get this wildly weird smoothing effect over the image; therefore, it is important to remember that you need to set your samples in a way that you clean up about eighty five percent of the noise and then use the denoise effect to clean up that final fifteen percent of the noise in your image
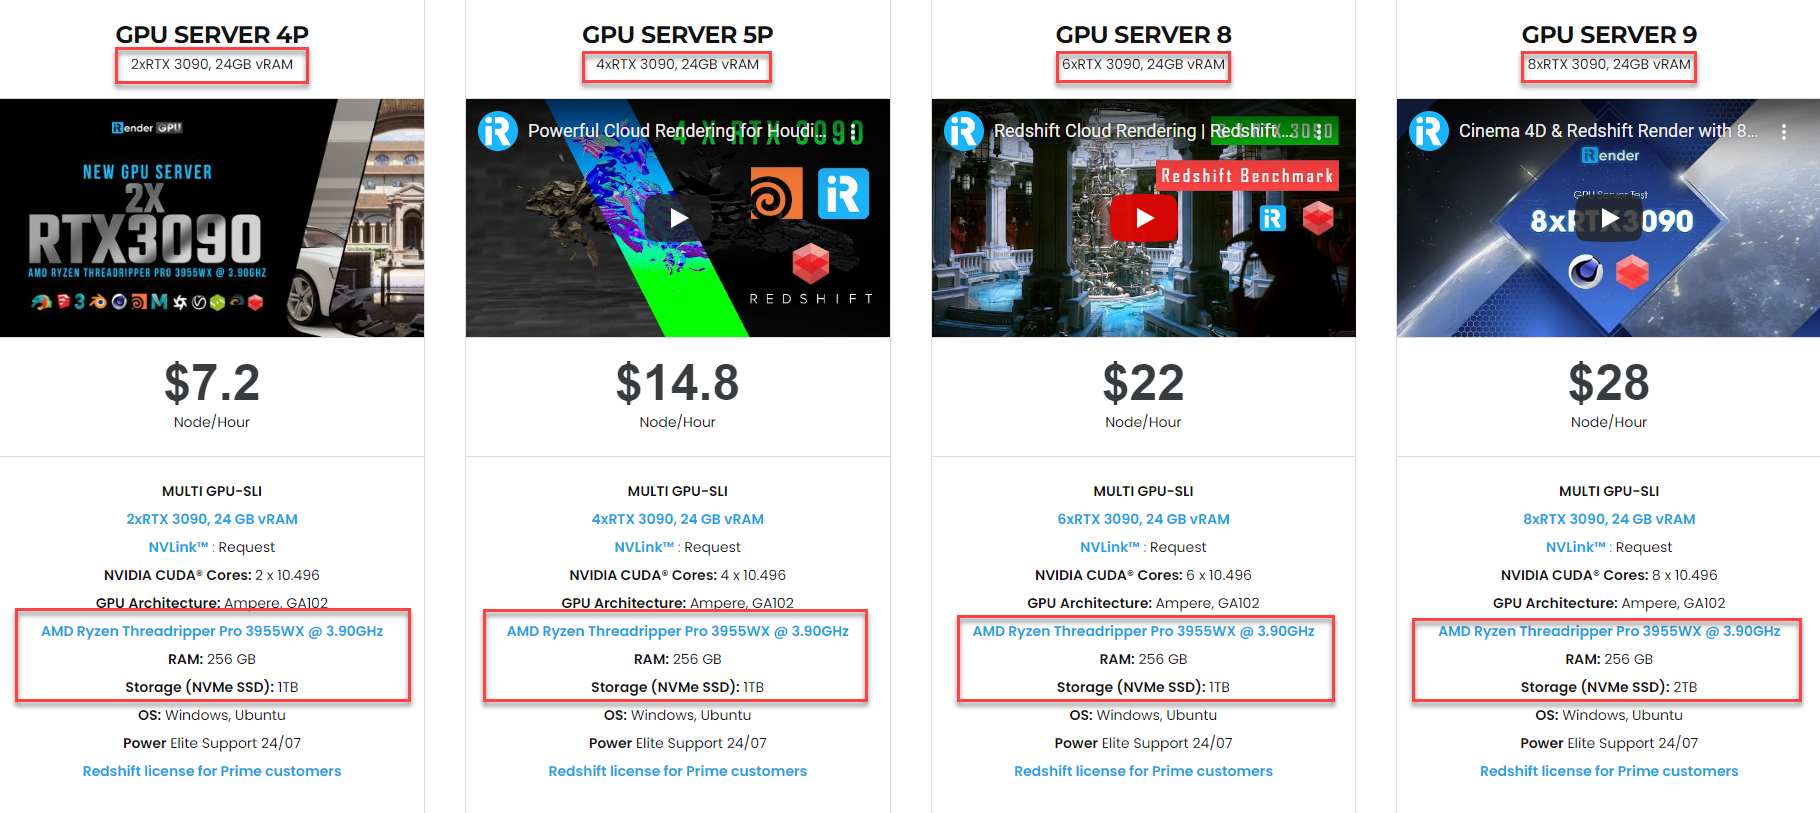
iRender - The Best Cloud Rendering Service for Redshift and Cinema 4D
If you’re a fan of Redshift and Cinema 4D who wants to learn and use the latest features, but your computer configuration is still limited, don’t worry; iRender will provide you with a solution that will completely address your problem. In other words, our company offers a choice of server, allowing you to pick the best server package for Redshift and Cinema 4D. That is all of the processes apply the denoise renders in Redshift for Cinema 4D.
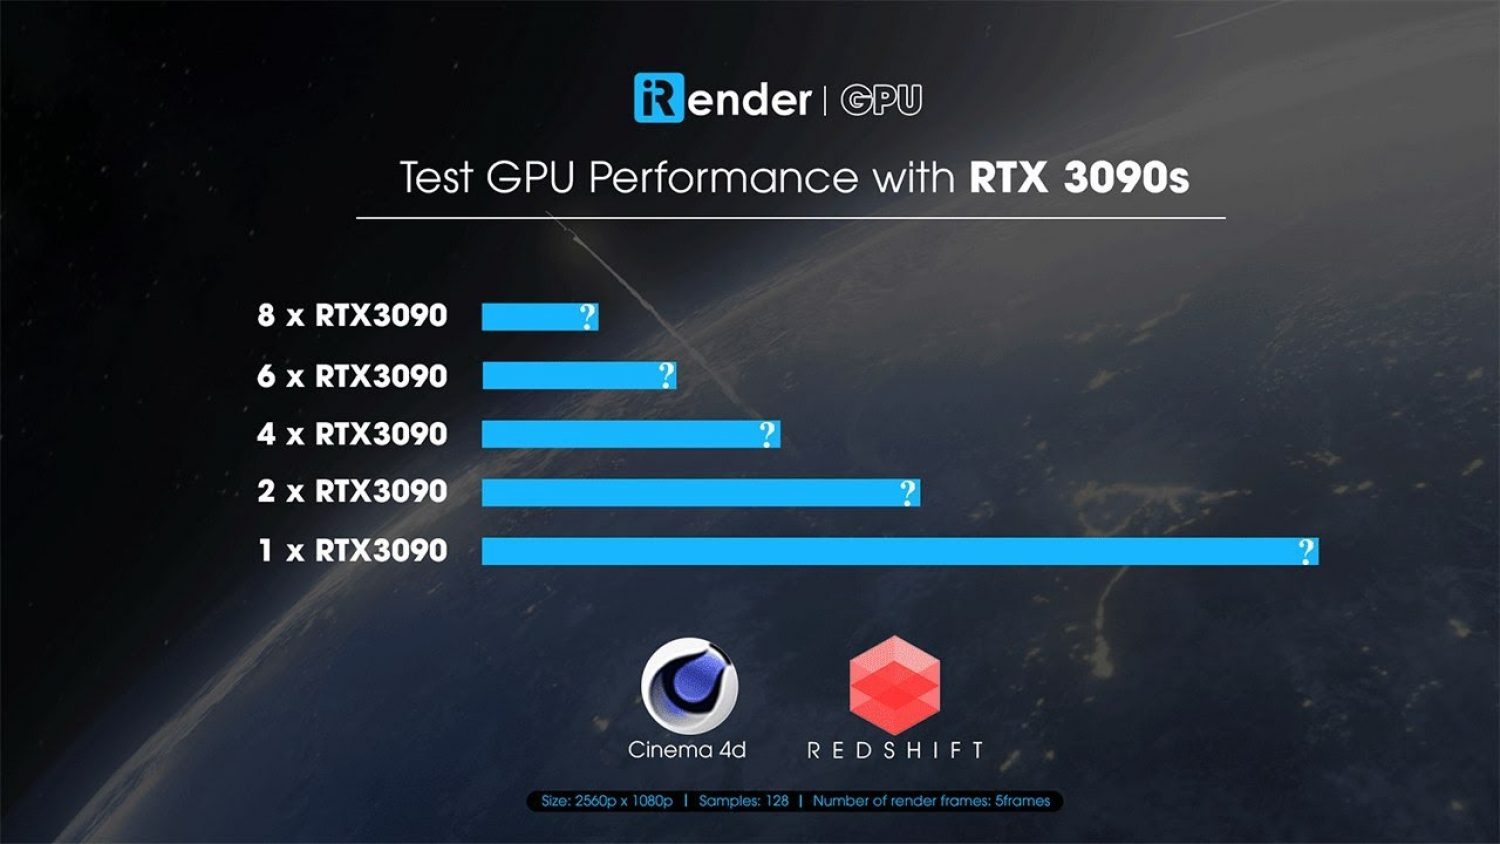
As a result, the powerful machines make rendering enjoyable and quick. In addition, a unique feature is that you will connect to the iRender server and utilize it as your own computer, with total control over setup and capacity. Above all, our server supports any applications; therefore, you may install the program you need only once, and everything will be kept for future use. If you’re concerned about security, be assured that the safety and security of your data is our first priority. No one, including iRender, will have access to any of your data. The privacy policy of iRender may be found here. To understand more about our server’s performance with Redshift and Cinema 4D, you can see the following video:

Through this article, iRender hopes you can apply the denoise renders in Redshift. Besides, we are committed to providing you with a rendering experience unlike any other. iRender, in particular, is running a fantastic deal for you: new clients will receive a 20% bonus on their first purchase within 24 hours of enrolling.To learn and enjoy more, please create an account here.
iRender – Happy Rendering!
Related Posts
The latest creative news from Redshift Cloud Rendering, Cinema 4D Cloud Rendering , Octane Cloud rendering, Houdini Cloud rendering, 3D VFX Plugins & Cloud Rendering.