
How To Solve 4 Common Render Mistakes in Blender
There are many potential problems when it comes to rendering. Here, we cover a few of the common ones that most of Blender users have come across many times:
- Blender crashing before, during or after rendering
- The finished render is a black screen
- Objects are missing in the final render
- We get a harsh line in the render, leaving part of the scene outside the view.
Let’s dive in and see iRender guides you to solve these common render mistakes in Blender.
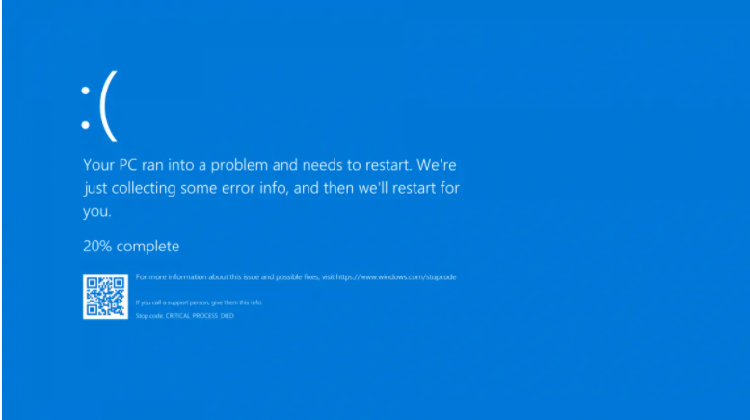
1. Blender crashing on render
First of all, we are talking about render mistakes in Blender: cashing on render. If you start a render and Blender crash and automatically close during the process it is most likely one of two reasons.
- Blender ran out of available RAM
- There was a graphics card issue
If we start with the RAM issue. To check if Blender is running out of RAM during rendering you can “casually” monitor this with the Task manager in Windows. For Linux and MacOS there are similar tools, but I will cover the Windows platform here.
Open the task manager with Ctrl+Shift+Esc. Press “More details” at the bottom of the window if you are in the minimal mode. From here, go to the processes tab and sort by memory. When you start to render you will see that Blender rise to the top or close to it. In the performance tab you can also find memory usage as a graph for your entire system. Here you can see current memory usage and how much RAM you have.
These metrics are good to keep an eye on in real-time as you render. If you see that the memory shoot to the roof and Blender crashes it is a good indicator that your scene is too large for your computer to fit in memory. To solve this, we need to reduce the amount of stuff Blender needs to keep in memory. We do this primarily through these areas.
- Reduce the number of textures or use lower resolution textures.
- Reduce the amount of geometry or objects in the scene.
- Reduce the number of particles in your particle systems or rely more on child particle.
- If using a HDRI, use a lower resolution or a sky texture instead
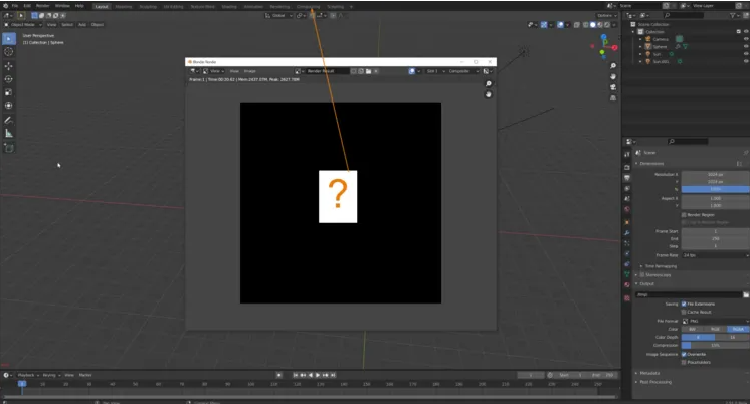
2. Blender renders black frames
One of popular render mistakes in Blender is black frames. If your final render seems to progress correctly as it renders but turns black once it finishes, it is probably because you have compositing nodes that are not connected correctly to the final composite node.
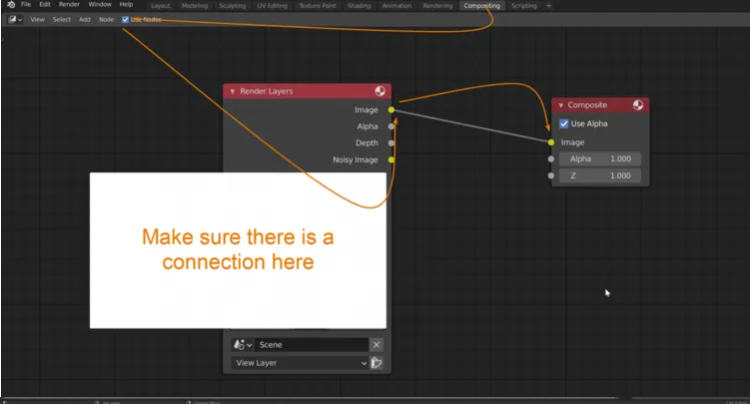
To solve this, go to the compositor workspace tab in Blenders header, and connect your render layers image output to the composite node. Or if you have other nodes setup, connect the last node in your node tree to the composite node to include all your post-processing effects.
Also, double check that “use nodes” is checked in the compositor header. Last, also go to your output properties in your properties panel, find the post processing section and check if Compositing and Sequencer is checked. They should be, by default.
These settings turn on or off the compositor and sequencer pipelines for rendering. So just switching these off and re-render can solve the issue as well.
Another solution can be to uncheck both settings and render again. Keep in mind that if you render a still image, your render can still be recovered without rendering again by connecting the compositor properly. If you are rendering an animation however, Blender will process whatever nodes are in the compositor and save the result to disk in your output folder. These rendered frames cannot be recovered. They will need to be rendered again.
If the compositor isn’t the problem, the problem could be that you have strips in your sequence editor. In this case, unchecking the sequencer in the post-processing section can solve the problem. But I suggest that you double check that your sequencer is empty.
By default, there is no video editing workspace open in Blender. To open one, you can go to the plus sign, next to the last workspace. Go to Video editing. Once in the video editing workspace, you can press and hold your mouse wheel to pan inside the sequencer to see if you have any strips. If you find any that isn’t supposed to be there, click on it to select it, then press X to delete. You can also select all strips by pressing A. Just make sure that you don’t delete any strip that you want to keep.
3. Missing objects in final render
Missing objects in final render also is one of common render mistakes in Blender. If an object is missing in your final render there are primarily two reasons. The first one is that the object could have been disabled for rendering. The second option is that a particle system is attached to the object and that it is set to not render the emitter.
To check if an object is disabled for rendering, go to the outliner, and find the filter icon in the header. Check the camera icon. You will notice how a camera icon appears on the right side on each row in the outliner.
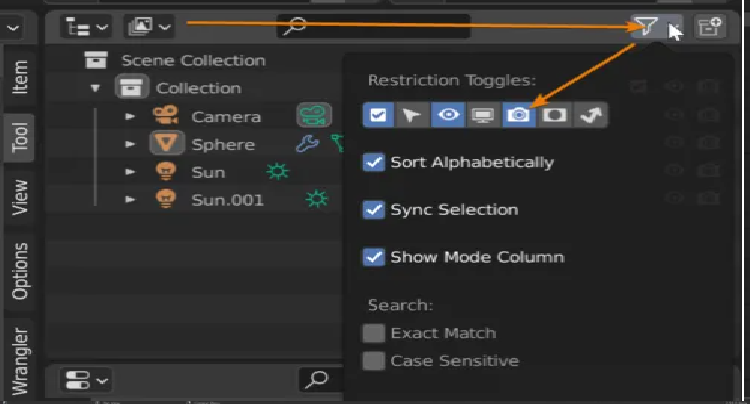
Find the object that isn’t rendering properly either by name in the outliner or by selecting it in the 3D viewport then hover your mouse over the outliner and press period on the number pad to have the outliner focus on the correct object.
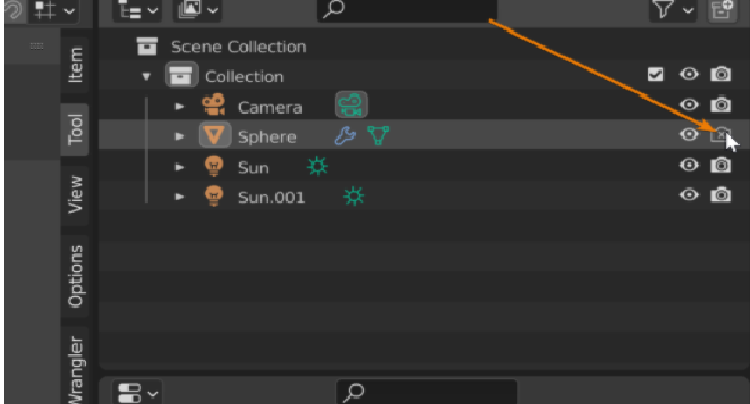
Make sure that the camera icon is white for your object. If it has a camera outline with an X, click it to enable the object. If it is grayed out, it means that the collection that the object is inside a collection that is disabled for rendering.
In this case, scroll up to the collection and make sure that it is enabled for rendering by clicking the camera icon with an X. If you can’t see the object in the 3D viewport or in the outliner it could be that it is inside a collection that is disabled for the current view layer. In that case, check if you have a grayed-out collection. If you find one, check the checkbox just to the left of the collections name and the content will become visible in the 3D viewport.
If this does not solve your problem, go to the particle tab in the properties panel and check if you have any particle system attached to the object. If you do, select the first particle system in the list, and go to the render section. Here you will find a checkbox labeled “Show emitter“. Make sure that it is checked. If you have multiple particle systems, go through each one and make sure that this checkbox is checked for all of them.
4. Objects cannot be seen by the camera because of clipping
When objects seem to disappear when they are either too far or too close from the camera it is called clipping. This can be a problem both in the 3D viewport and for a final render. For the final render we must check the clipping settings for the camera object we use for rendering. We find these settings by selecting the camera and go to the object properties data tab. That is the green camera icon in the properties panel.
In the lens section we find two settings. Clipping start and clipping end. Anything between these distances from the camera can be rendered and any object fully or partially outside this distance will be clipped fully or partially.
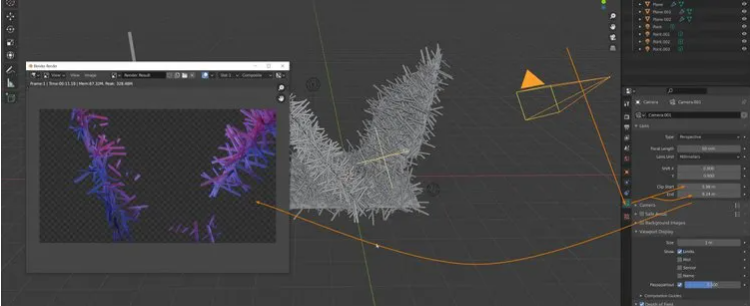
Adjust these settings so that all objects you intend to render are safely within this distance. We can enable a visual guide in the 3D viewport for this distance by going to the viewport display section on the camera object data properties and check limits.
If you still have objects that does not render, you can also check so that culling isn’t enabled. This is only a Cycles feature and isn’t available in Eevee. Go to the render settings tab, find the simplify section. If you have it enabled, either disable it or go to the culling subsection and make sure that camera culling and distance culling is turned off.
If you are having trouble with clipping in the viewport, you find the clipping settings for the viewport by pressing N open the left side options panel in the 3D viewport. Then navigate to the view tab and the view section. Here you will find clipping start and end values that you can adjust. Keep in mind that if you have a huge clipping end value, let’s say five thousand meters, you may have to adjust the clipping start value to a higher number or you can get artefacts on geometry in the viewport.
Final thoughts
There are quite a few ways a render can go wrong. To avoid spending a huge amount of time rendering and re-rendering, always make sure that you make a few tests first so that you know that everything is setup the way it was supposed to. There are of course other potential problems while rendering, for instance too few light bounces, resulting in black glass or light setups that result in enormous quantities of fireflies.
If you have any questions, please do not hesitate to reach us via Whatsapp: +(84) 981-868-890. We will be ready to help you in any way! Become a member of the iRender community today to stop wasting pointless hours of rendering. Always at the forefront of cutting-edge graphics technology, we do the rendering, the creativity is yours!
iRender – Happy Rendering!
Source: artistrender.com
Related Posts
The latest creative news from Blender Cloud Rendering.


