How to use the Spacing and Area tools in Twinmotion
Twinmotion is certainly no stranger to designers or architects in the 3D industry. Developed by Epics Game, Twinmotion is especially useful in fields such as architecture, urban planning, and interior design, providing the ability to present and visualize projects effectively and impressively. With a diverse set of tools, Twinmotion is always one of the top choices of 3D artists. In this article, let’s learn about the Spacing and Area tools in Twinmotion with iRender! These powerful features help you easily create and manage objects in the scene, helping optimize the design and visualization process in Twinmotion.
Overview of Spacing and Area Tools in Twinmotion
The Spacing and Area tools offer a speedy and effective method for dispersing and controlling a large number of assets within your scenes along paths you design or within areas you specify. You can randomly or systematically distribute various asset types across both large and small areas, while also introducing diversity by specifying the density of the paths and areas being populated, and refining the distribution of the assets.
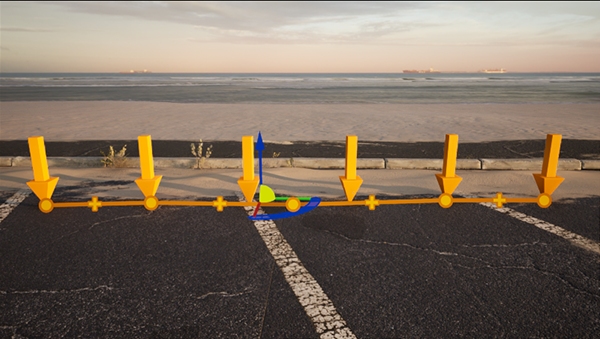
The Spacing tool allows users to create paths that can be automatically filled with chosen assets, such as trees or streetlights, ensuring consistent spacing and alignment.
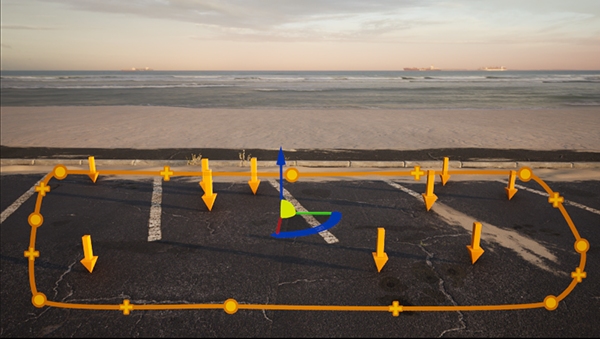
The Area tool, on the other hand, enables users to define specific areas within a scene where assets can be placed with a degree of randomness or systematic arrangement, making it easy to create natural-looking environments or more structured layouts
You can use the Spacing and Area tools in several situations, for example to:
-
-
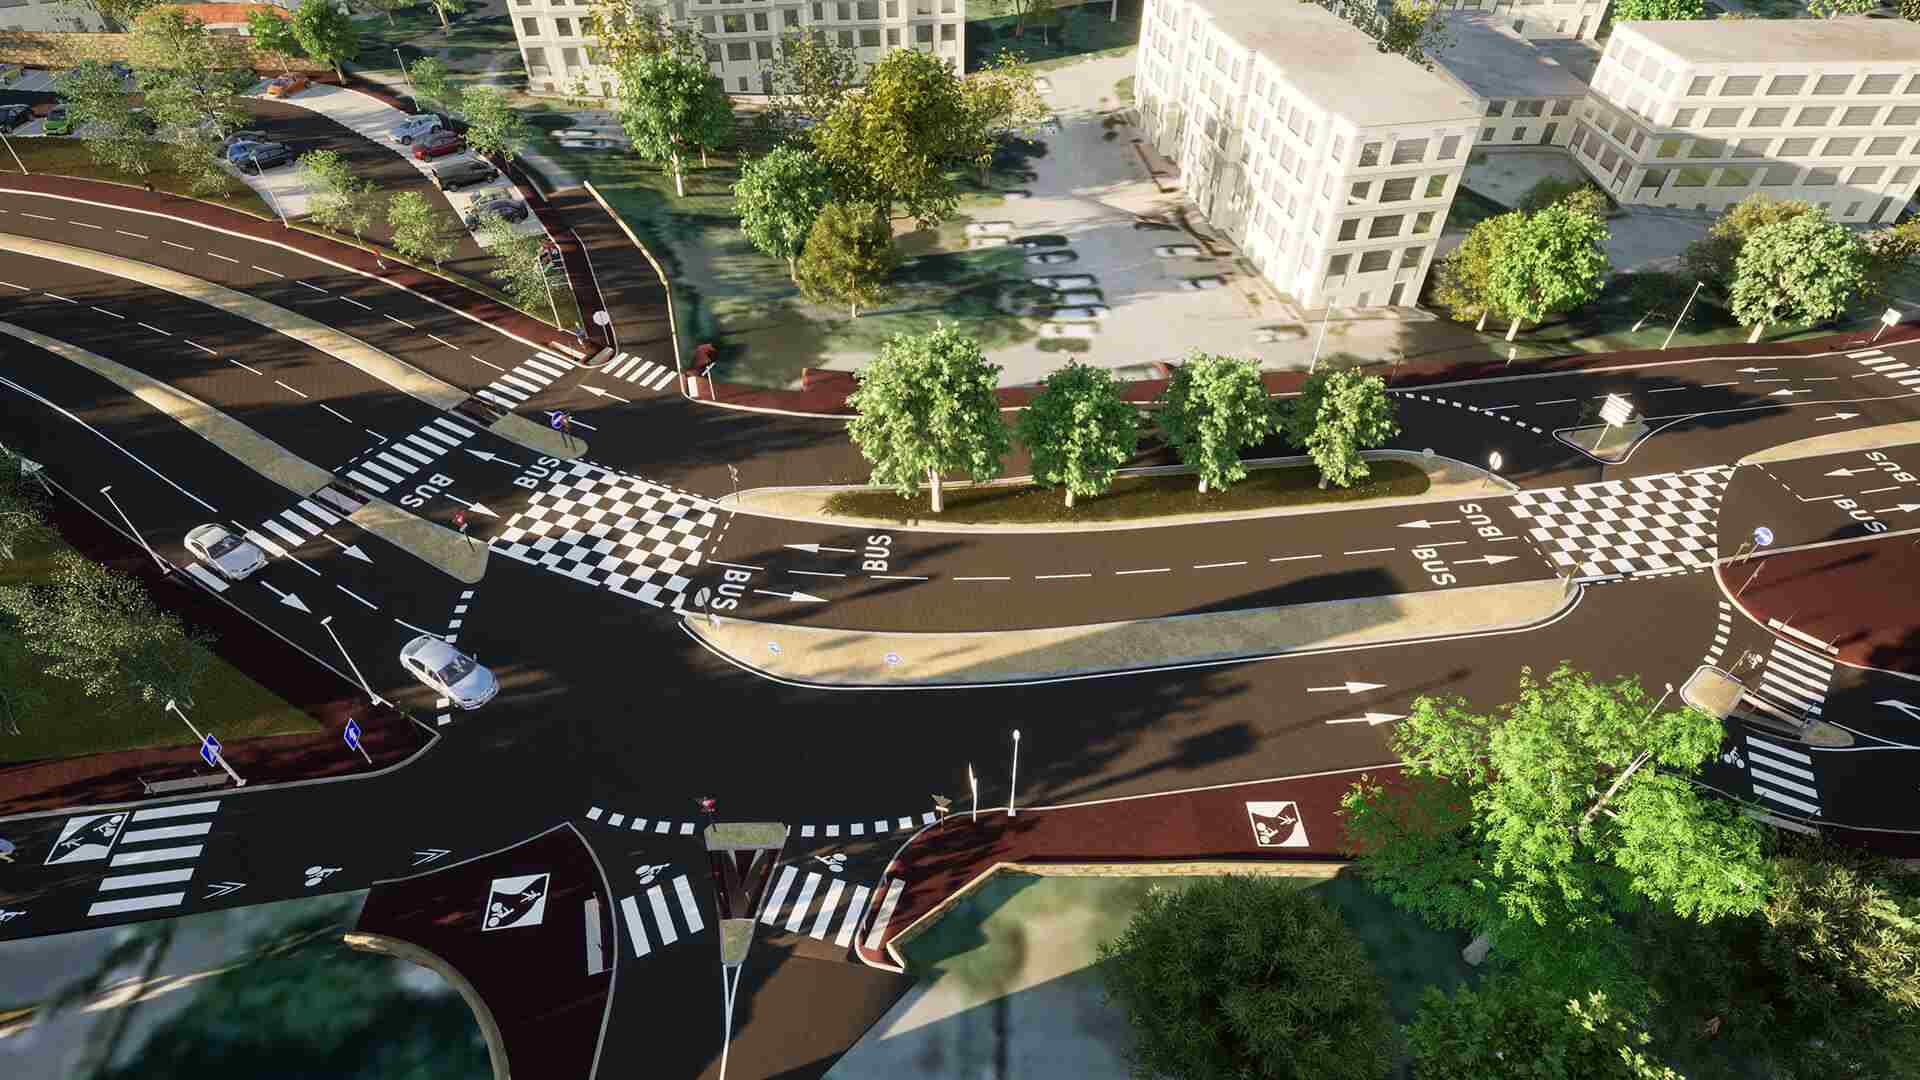
- Add trees and street lights along city streets.
- Populate parking lots with various types of vehicles.
- Add rows of hanging or recessed lights along ceilings.
- Create forests with diverse trees and vegetation within defined areas.
-
The Spacing and Area tools are spline-based
Using the Pen tool, you draw splines in the Viewport that represent paths or areas.
-
-
- Paths are splines that can be open-ended or connected at their ends.
-
-
-
- Areas are splines that connect at their ends to create an enclosed space.
-
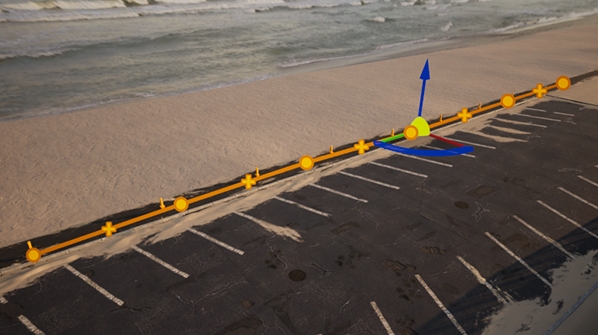
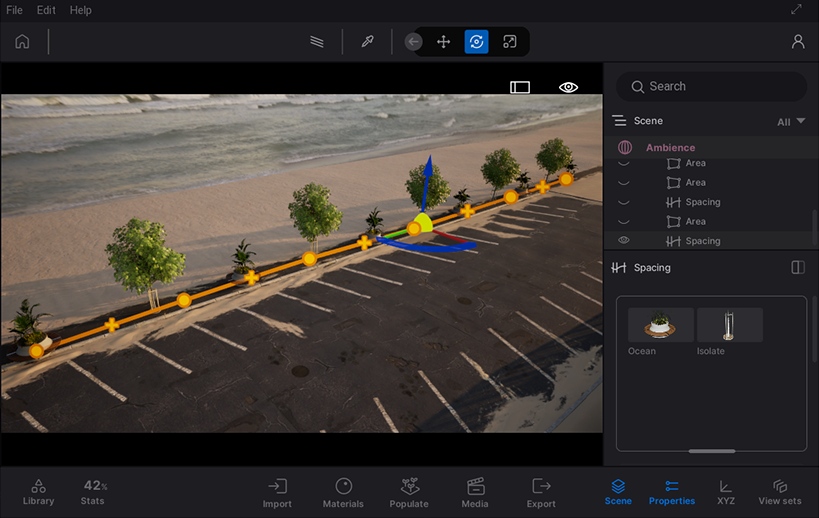
The splines are drawn in segments and separated by spline points you define. The shape and dimension of the splines can be modified and are controlled by the spline points.
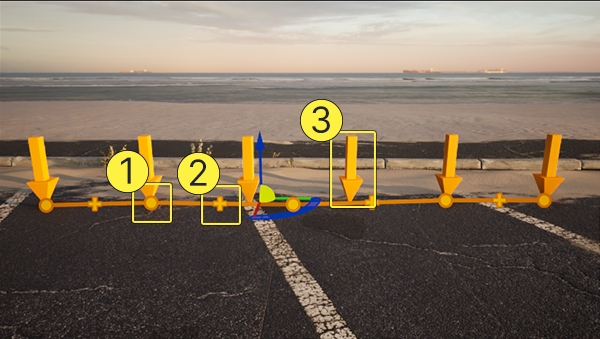
A spline is comprised of the following elements:
1- Spline point: Defines where a segment of the spline starts and ends.
2- Plus sign: Click on the Plus sign to create a new spline point.
3- Arrow: Shows where the assets will be distributed along the path or in the area. You can customize the distribution method with the Scattering properties.
Supported Asset Types in Twinmotion
You can use the Spacing and Area tools with assets you import into Twinmotion and with the Library assets in the following categories:
-
-
- Vegetation (excluding Landscapes and Detail grasses)
- Objects (excluding Water, Sounds, Doors)
- Lights
- Megascans
- Sketchfab
- Posed humans in Characters
-
Using the Spacing and Area Tools
Step 1: Open the Populate panel by clicking Populate in the Footer.
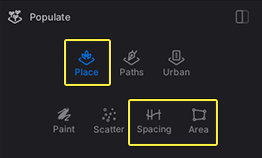
Step 2: In the Populate panel, click the Place tab, then click the Spacing or Area tab.
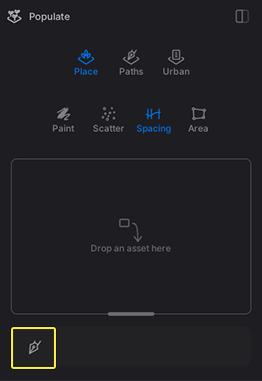
Step 3: Click the Pen tool icon.
Step 4: If you are using the Spacing tool, draw a path in the Viewport.
If you are using the Area tool, draw an area in the Viewport.
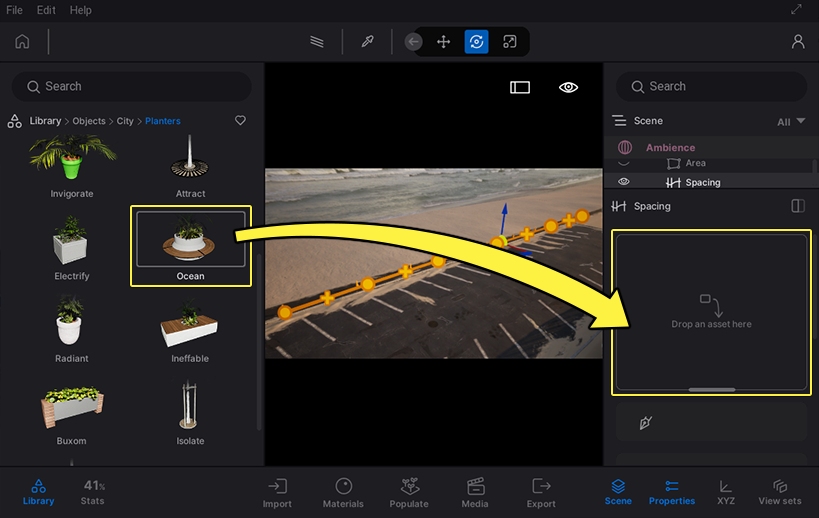
Step 5: Add the assets to the path or area by selecting them from the Library and dragging them to the dropbox.
The assets you add to Dropbox are automatically placed on the path or in the area. By default, they are uniformly placed.
The assets you add to the dropbox are automatically placed on the path or in the area. By default, the assets are uniformly placed.
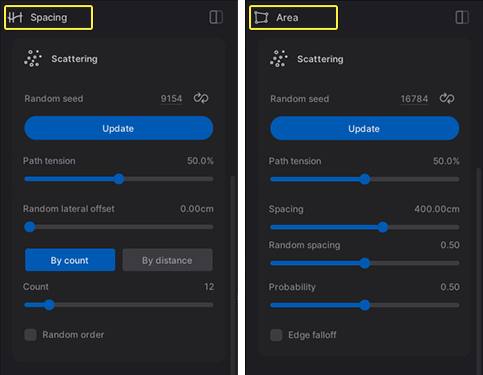
Step 6: Keeping the path or area selected use the settings in the Properties panel to modify the spline or the assets. For more information about the properties you can modify, see Scattering Properties and Object Settings.
Why choose iRender for your Twinmotion rendering?
Rendering in Twinmotion is a powerful feature that allows users to create high-quality visualizations of their 3D models in real-time. Twinmotion leverages the Unreal Engine to provide realistic lighting, shadows, and materials, making it possible to produce stunning images, videos, and VR experiences directly within the software.
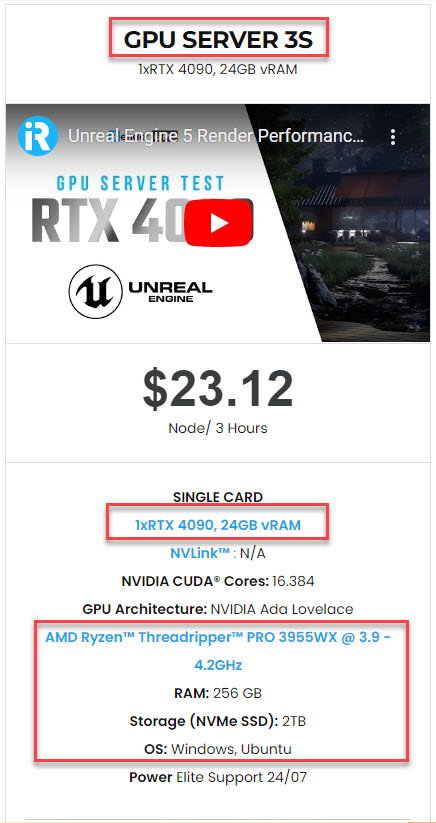
iRender provides high-configuration servers that increase CPU and GPU rendering speeds. We offer the most powerful RTX 4090 configuration packages on the market, all equipped with AMD RyzenTM ThreadripperTM PRO 3955WX @ 3.9 – 4.2GHz and AMD Ryzen™ Threadripper™ PRO 5975WX @ 3.6 – 4.5GHz processors, 256GB RAM and 2T NVMe SSD hard drive capacity. On our system, you just need to set up everything ONCE, your working environment will be saved for your next use.
With Twinmotion, our 3S server equipped with a single RTX 4090 is the most suitable choice. It’s a fixed rental plan with 3 hours (minimum), once you confirm the rental plan, the machine will run nonstop until time ends, and you can not shut down or pause it during the session. You can consider its configuration below:
Let’s watch the video below to see Twinmotion rendering speed test on our RTX 4090 and RTX 3090.
Currently, iRender offers a special promotion for new users, a 100% bonus program for the first deposit within 24 hours of registration, making it an attractive option for those looking to optimize their rendering budget. Just register and get our best deal!
For more detailed information, please contact us via Live chat 24/7 or WhatsApp: +(84)915875500 or Email: [email protected]
iRender – Happy rendering!
References and images source: dev.epicgames.com & twinmotion.com
Related Posts
The latest creative news from Twinmotion Cloud Rendering

