
This article will show how to use Deadline Monitor for 3ds Max in order that you can render your projects by using iRender Remote Render Farm.
If you do not have an account, register now: https://bit.ly/2UqS4uz
What is Thinkbox Deadline in Remote Render Farm Service?

Thinkbox Deadline is the most powerful and famous Slave Nodes Management Software available nowadays. I can explain it simply that through this render farm management software, your project will be divided, individually optimized, and automatically allocated to all Slave Nodes for parallel execution.
For instance: your project includes 100 frames, Thinkbox will automatically split to each Slave Node to render one Frame in parallel, then automatically repackage results and transfer to your Master Node when completed, in the case of a single image (Single Frame), ThinkBox will split your image into Tiled rendering and distribute each part to Slave Nodes for parallel rendering.”
Moreover, ThinkBox DeadLine is also reliable and visual with a detailed graphical user interface to show the performance of the process on each Slave Nodes. Currently, ThinkBox DeadLine is a render farm management software supporting a wide number of 3d applications in the world, more than 80 different content creation applications, 92 Render Engines and to be continually growing. Refer to the detailed list of 3D design software and Render Engines supported by ThinkBox DeadLine here.
Deadline Monitor for 3ds Max
1. Submitter Installer for 3ds Max
- Run the Submitter Installer located at <Repository\submission\3dsmax\Installers
- After running the file, please follow the installation steps. When the installation is finished, let open 3ds Max, go to the Thinkbox Deadline -> section Submit max to Deadline is successfully installed.
Note: Some software already installed on the Master Node will not need to perform this installation step.
2. Submitting Jobs
Render animations with Deadline Monitor
Step 1: Open Deadline Monitor in 2 following methods
- Double-click on the “Deadline Monitor” icon on the Desktop screen (if).
- Enter “Deadline Monitor” to search in the Windows search function.
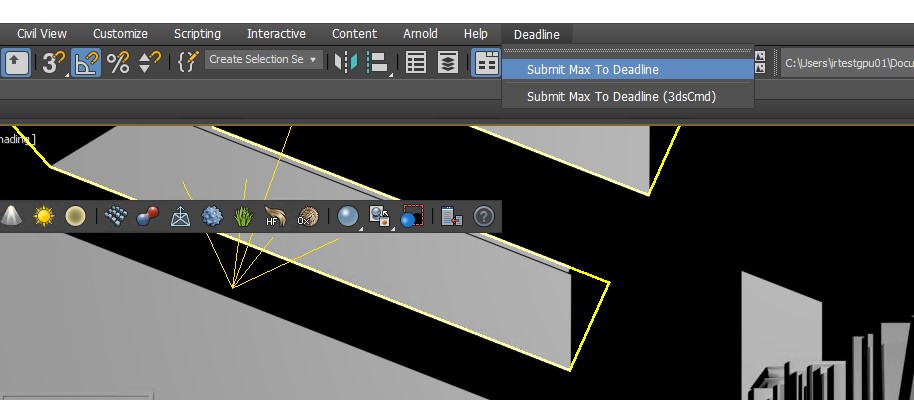
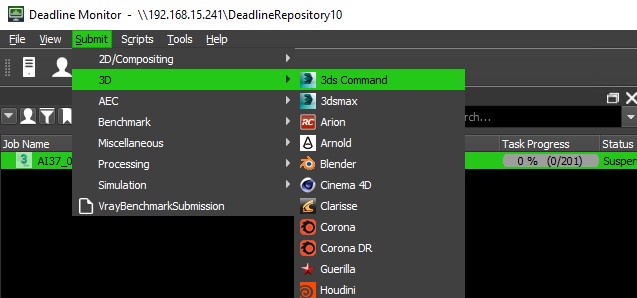
Step 2: From the horizontal menu bar select Submit -> 3D -> 3ds Command.
Step 3: Enter information in Job options tabs, advanced options, Render Options, Bitmap Options, Draft -> click the Submit button
Job options: Enter the information required to enter the red boxes in the image below.
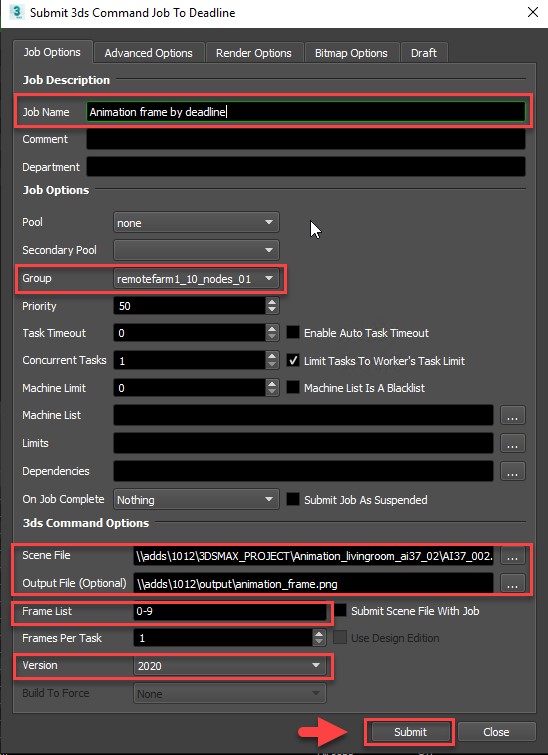
Note: For the Scene File and Output file, let follow these following steps:
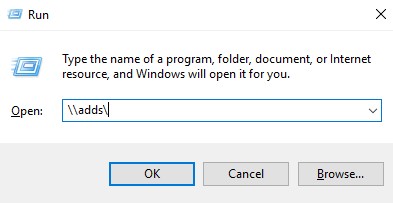
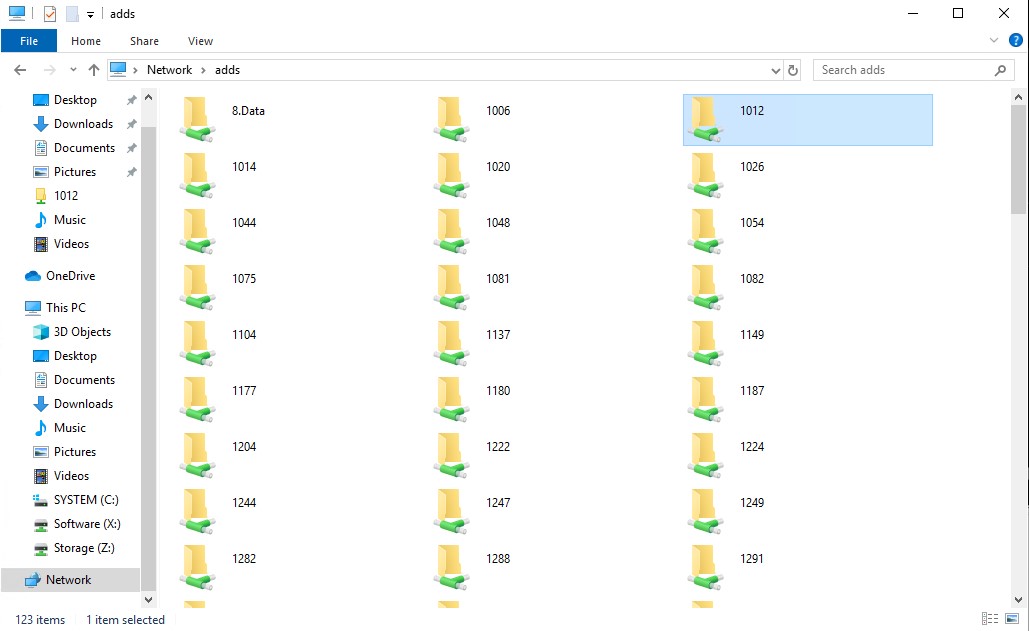
- Open the Run window, enter \\adds\ -> the publish folder to the folder containing the file you uploaded to the Repository
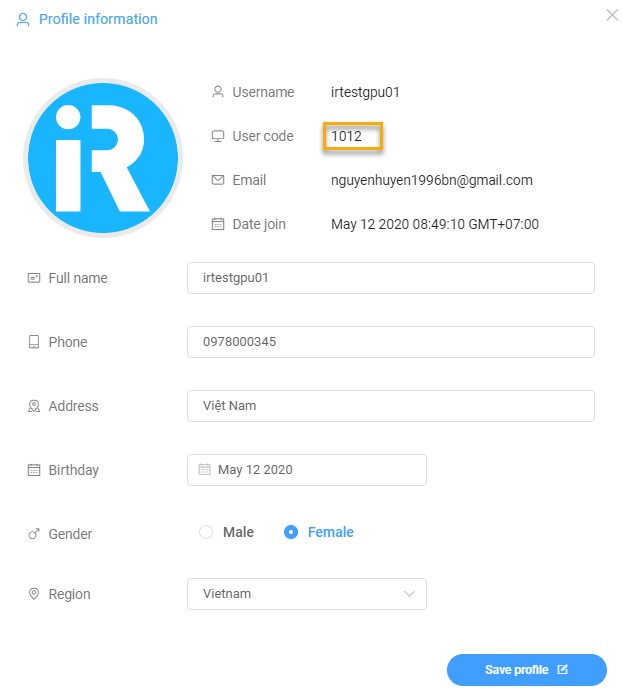
- Each account will have a user code (get the user code in the profile on the gpuhub.net website, eg user code: 1012) corresponding to the folder name placed in the adds folder.


- The data in the user code folder (1012) will be the same as in Storage (Z:)
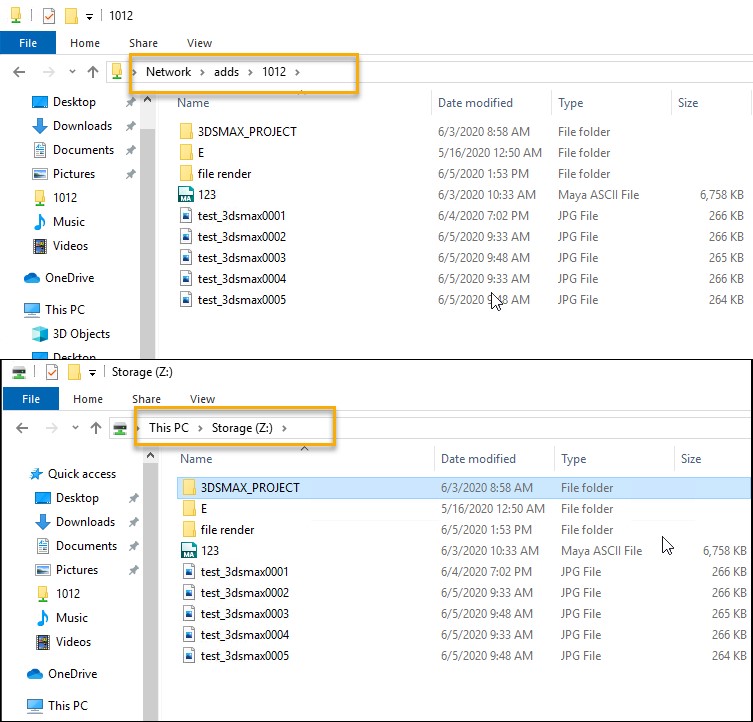
- Input and output must be taken from a single path from the adds folder, properly described in the format:
Scene File: \\adds\’user code’\’Project folder’\file name
Output File: \\adds\’user code’\’Output folder’\file name

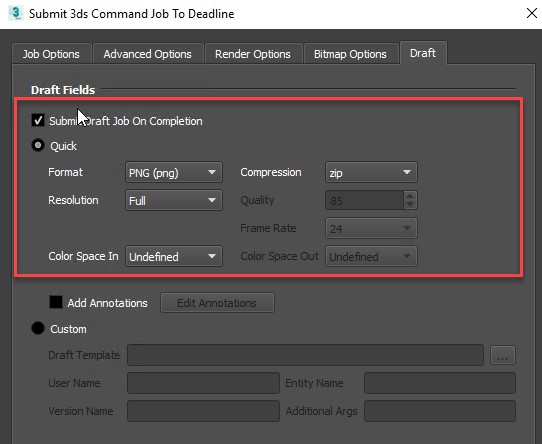
Advanced options, Render Options, Draft -> Depending on the purpose of the job you need to render, you can change the settings or enter the information in the red box below.

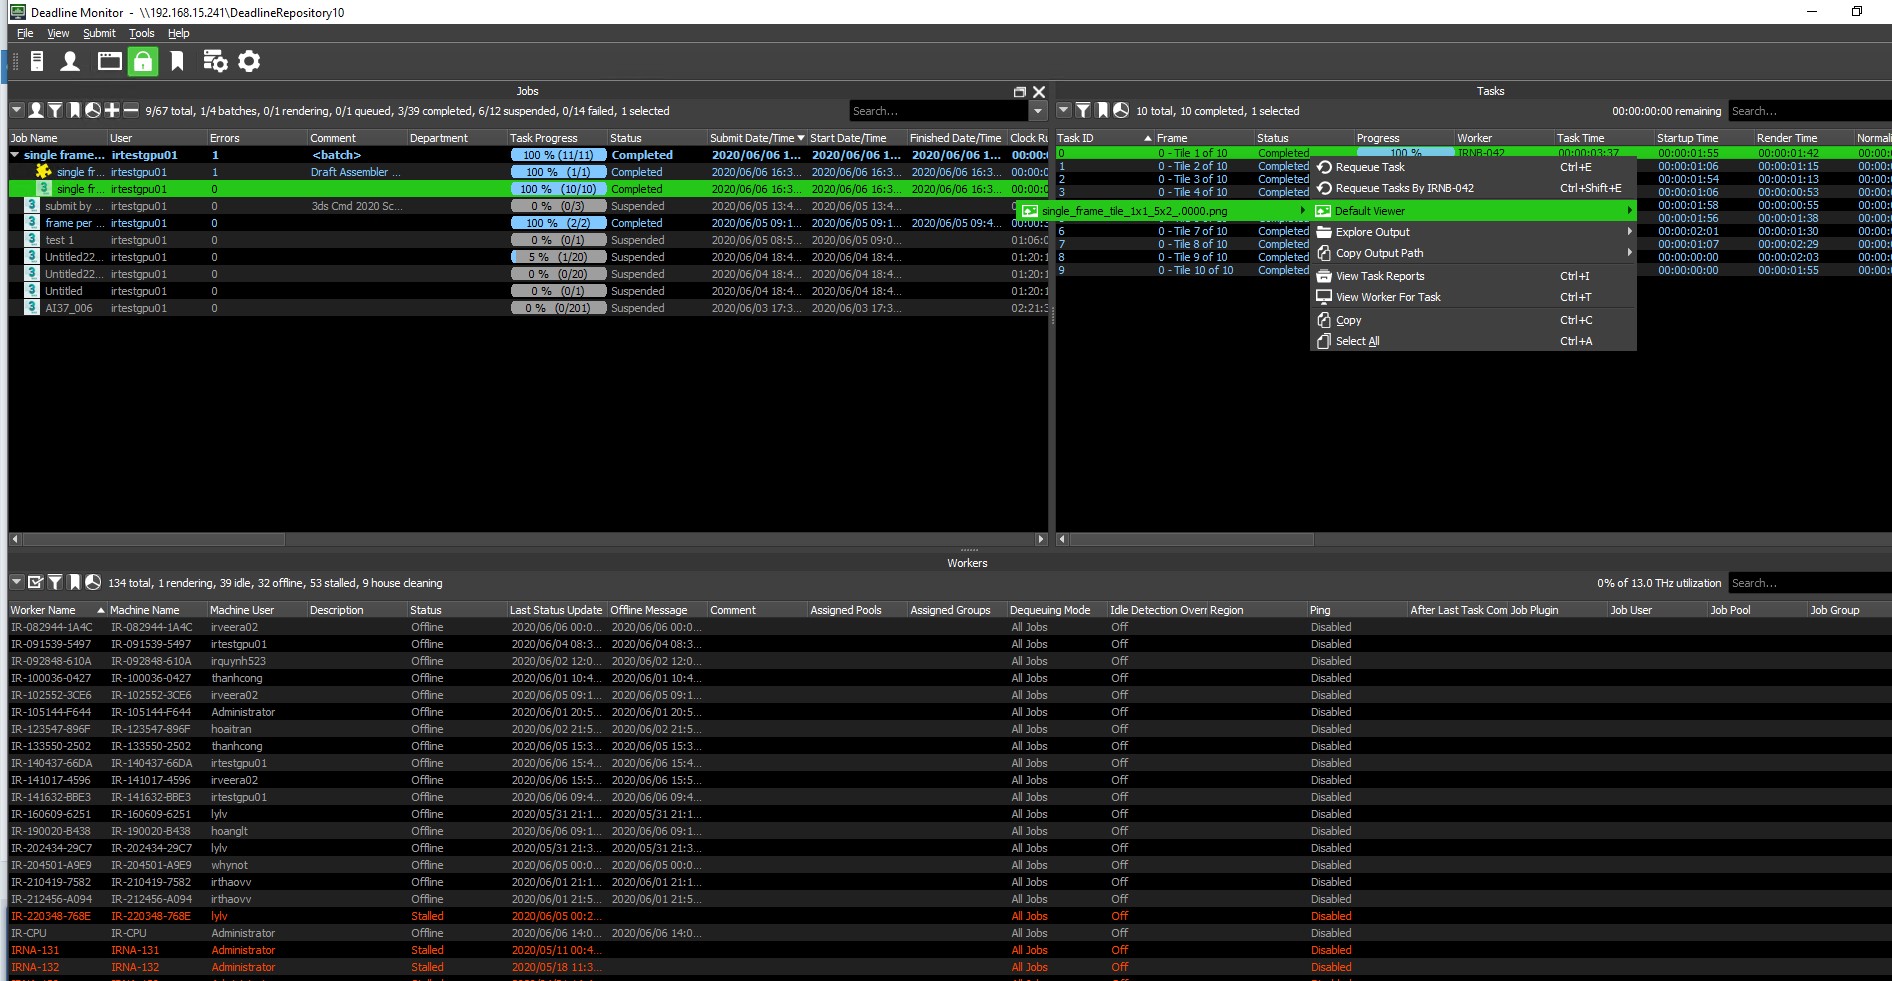
Step 4: After submitting the job, go to Deadline Monitor to track the job render process (type “Deadline Monitor” from the Windows search section to run the software) into the red lines below.

3. Submission Options
(The settings need to know in order to submit a job from the Deadline Monitor)
Job Description
Job name: Defines the name of the job; used to easily recognize its content and purpose.
Comment:
- Defines the content of the comment property of the job.
- The Comment property does not affect the processing of the job but can be very useful to communicate additional information about the job to all users.
Department:
- Defines the optional Department property.
- The Department text field has no effect on the processing of the job, but can be useful for sorting and filtering purposes.
Job Options
Pool & Secondary Pool: Keep the default value as “none”.
Group: Choose from the package of 10 slave nodes or 50 slave nodes or 100 slave nodes.
Priority: A job has a priority from 0 to 100, where 0 is the lowest priority, 100 is the highest priority. All other conditions are equal, the highest priority job will always be selected to render first when the Slave node is choosing the next job to render.
Task Timeout:
- Defines the time in minutes a Slave may work on a Task before timing out and re-queueing it.
- Set to 0 to disable.
Enable Auto Task Timeout: When checked, the Task Timeout will be calculated automatically from the Task times of previously rendered Tasks of the same Job.
Concurrent Tasks: Defines the number of Tasks a single Slave can pick up at once (by launching multiple instances of 3ds Max on the same machine). The default value is 1.
Limit Tasks To Worker’s Task Limit:
- When checked, the number of Concurrent Tasks will be limited by the Slave’s Task Limit which is typically set to the number of available CPUs.
- For example, if ‘Concurrent Tasks’ is set to 16 but a Slave has 8 cores, only 8 concurrent tasks will be processed.
Machine Limit, Machine list and Machine List is a Blacklist:
- Machine Limit: Defines the number of Slaves that will be allowed to dequeue the Job at the same time. When set to 0, no limit will be applied.
- Machine list: Defines the list of machines to be used as a Whitelist or Blacklist according to the Machine List Is A Blacklist checkbox’ state.
- Machine List is a Blacklist:
When unchecked (default), the Machine List will be used as a Whitelist, allowing only the listed machines to render the job.
When checked, the Machine List will be used as a Blacklist, preventing the specified machines from rendering the job.
On Job Complete: Specifies the action to perform on the Job upon completion. Possible values are:
- Nothing – the Job will be left in Completed state in the Queue.
- Archive – the Job will be archived automatically.
- Delete – the Job will be deleted automatically.
Submit Job As Suspended: When unchecked (default), the Job will be queued for processing immediately after submission.
When checked, the Job will be placed in Suspended state and will not be processed unless resumed manually.
3dsmax Options
Scene File: Specifies the 3ds Max .MAX scene file to be submitted.
Output File (Optional): The output is stored when the file is complete.
Frame list: Specifies the frames to be rendered.
Submit the scene file with a job:
- When unchecked, the specified 3ds Max file will be referenced from its network location and will not be made part of the job submission.
- When checked, the 3ds Max file will be copied with the Job to the Repository.
Frames Per Task: As the value increases, each slave node will perform the amount of work corresponding to the value selected at frames per task.
Example: The number of frame lists is from 2 to 5, frames per task has value = 2, so each Slade Node will have to perform the task of rendering 2 frames (2-3, 4-5).
Version: Specifies the 3ds Max version to use.
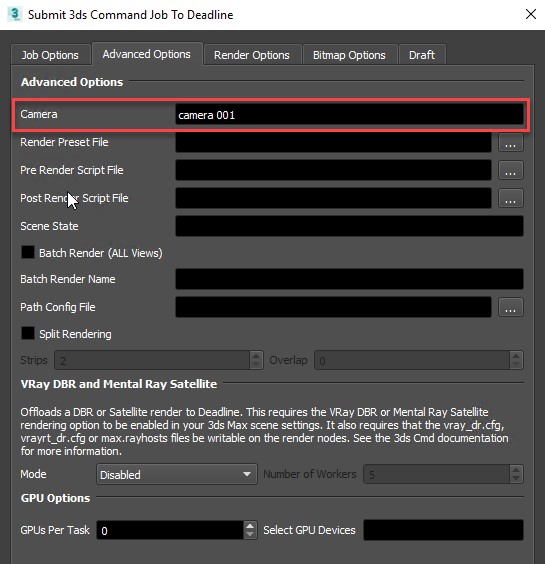
Advanced Options
Camera: Can be used to specify a valid scene camera name to render (if there is no camera, will be determined by the scene).
4. Render a Single frame Tile Rendering
Step 1: Open the 3dsmax file, go to Deadline -> Submit Max to Deadline

Note: For opening 3dsmax files, follow the instructions below
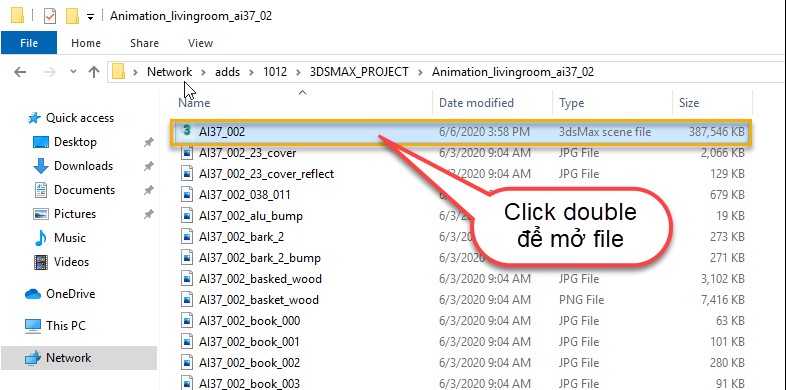
- Open the Run window, type \\adds\ -> will bring out the publish folder to the folder containing the file you uploaded to the Repository.

- Each account will have a user code (get the user code in the profile on the gpuhub.net website, eg user code: 1012) corresponding to the folder name placed in the adds folder.
- Go to the folder corresponding to your user code and run the 3dsmax file to render.
Step 2: Enter the required information into the job submission form -> click “submit”
- Enter the information in the fields: Job name, comment, Group (select the group corresponding to the image package created on the website)
- Click the asset section -> Check that the assets link is correct or not

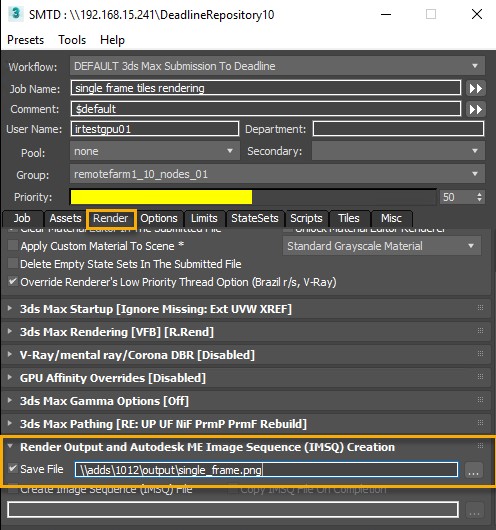
- VGo to render -> Enter the output path in the following format:
Output: \\adds\’user code’\ ‘output folder’ \’file name’
- Go to Tiles -> Tiles & Region Rendering Options -> select Single Frame
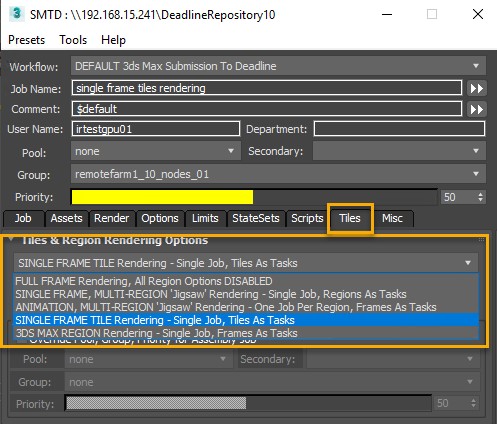
- Enter the information in the yellow boxes below to divide single frame by tiles rendering.
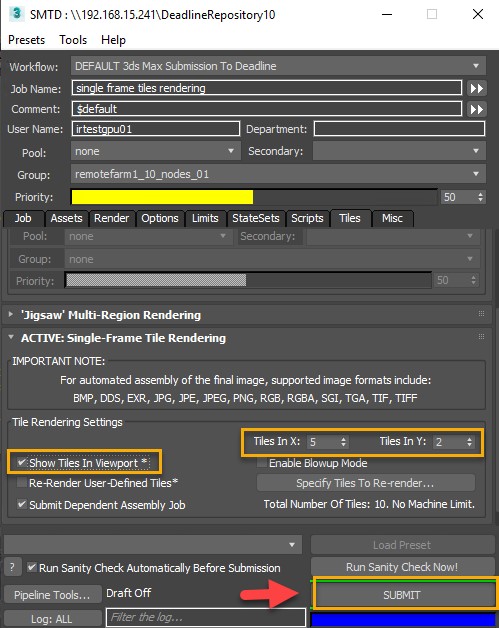
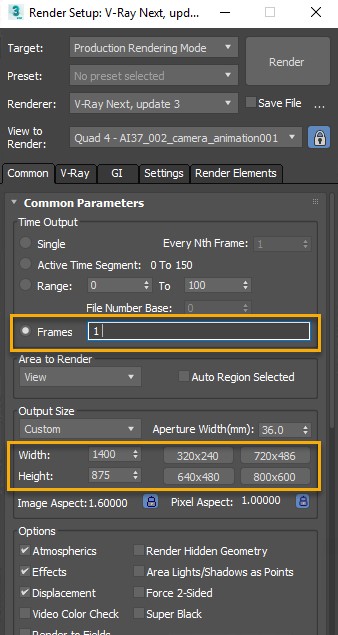
Note: Before submitting -> open settings of 3dsmax to enter the frame you want to render
Step 3: After submitting the job, go to Deadline Monitor to monitor the job render process (type Deadline Monitor from the Windows search section to run the software)
If you do not have an account, register now