Know bucket and progressive rendering in Redshift
Redshift features bucket rendering and progressive rendering modes. Bucket rendering divides images into independent “buckets” for parallel GPU computation, speeding up renders. Progressive rendering iteratively improves results over time, enabling early previews without waiting for full completion. These methods optimize hardware and provide incremental feedback to boost creative workflows. In this article, iRender will detail these two rendering modes and share with you some tips for faster rendering in Redshift.
Rendering modes in Redshift
There are two rendering modes in Redshift: bucket and progressive.
Bucket rendering
Bucket rendering is Redshift’s method for final, high-quality rendering. Bucket mode divides the frame into a grid of square sections called “buckets”. The individual buckets are rendered one by one until the whole frame is complete.
Source: Maxon Training Team
In a multi-GPU system, multiple GPUs will render multiple buckets at the same time. Each bucket is only rendered by one GPU. Therefore, the maximum number of buckets being rendered simultaneously depends on the number of GPUs available for rendering in Redshift.
Progressive rendering
Progressive rendering is Redshift’s interactive rendering mode. It renders the frame in multiple passes that start out noisy and progressively become clearer. This mode is helpful for getting quick feedback when shaders, models, or lights are still edited.

Source: CG Shortcuts
Let’s learn more about bucket and progressive rendering modes in the following sections.
Source: maxon.net
Using Progressive for interactive rendering
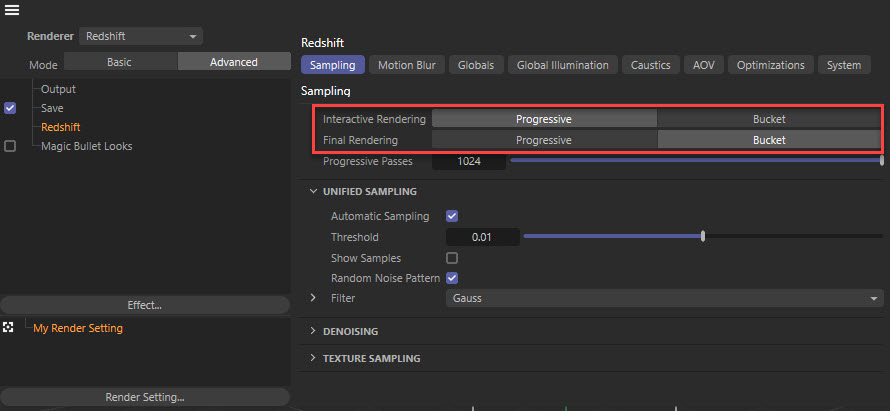
In the Interactive Rendering sampling option, you can choose between Progressive and Bucket rendering modes. The enabled mode will be used when starting an Interactive Rendering session (like when you hit the Start / Stop IPR button in the Redshift Render View.)

Source: maxon.net
Progressive is set as the default rendering mode and it is suggested to use this mode for Interactive Rendering here. The reason is that Progressive favors speed over clean renders, so it gives faster interactive feedback.
Note:
You can still set Interactive Rendering to Bucket. Setting to “Bucket” instead of “Progressive” enables the Render View to automatically update whenever you make changes to your scene. This is useful when you need to preview render features that the Progressive rendering mode doesn’t support.
Progressive rendering mode is controlled exclusively by the Progressive Passes setting. Progressive Passes controls the maximum number of passes that Progressive mode can reach, thus it controls the maximum achievable visual quality of Progressive rendering mode. The higher the number of Progressive Passes, the higher the render quality and the less visual noise.
By default, Progressive Passes is 1024. This setting functions differently depending on whether Progressive rendering is used for Interactive Rendering or Final Rendering. In the Interactive Rendering, the Progressive render will only reach the maximum number of Progressive Passes if given the necessary amount of time between scene edits and changes.
Using Bucket for final rendering
In the Final Rendering sampling option, you can choose between Progressive and Bucket rendering modes. The enabled mode will be used when starting a new Render/Batch Render, like when hitting the Render button in the Redshift Render View.
Source: maxon.net
For final rendering, Bucket is set as the default rendering mode. It is intended for high-quality final renders that prioritize image quality over rendering speed. Bucket mode produces the cleanest, highest fidelity renders and is therefore always recommended for Final Rendering.
Note:
You can still use Final rendering in Progressive mode. Setting to “Progressive” instead of “Bucket” allows you to batch render your scene more quickly. This is useful for rapidly previewing the general rendered look of animations, but Progressive rendering is not intended for final renders. In Final Rendering, the Progressive render will always reach the exact maximum number (no more, no fewer) of Progressive passes set before moving to the next frame.
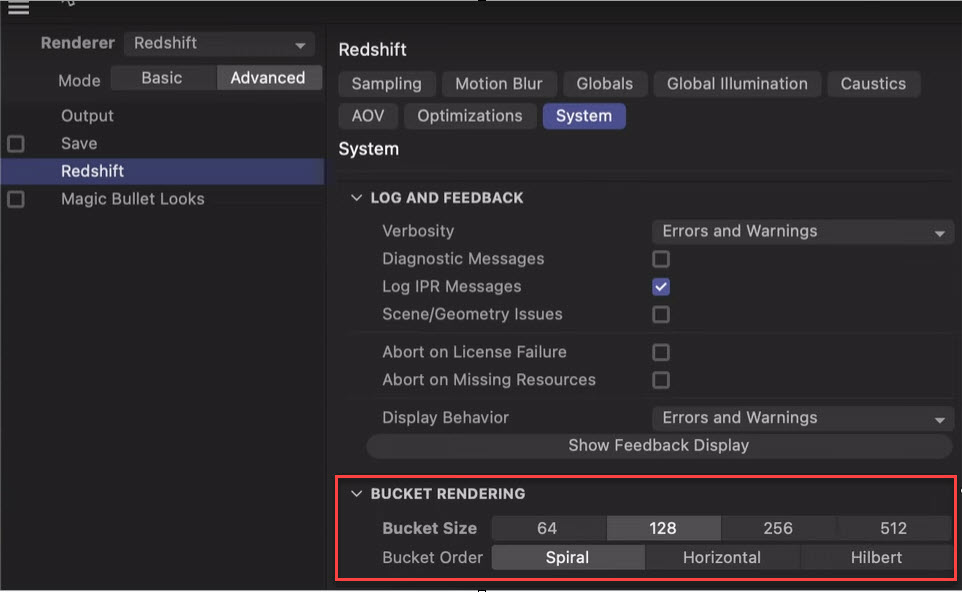
Redshift Bucket Rendering settings
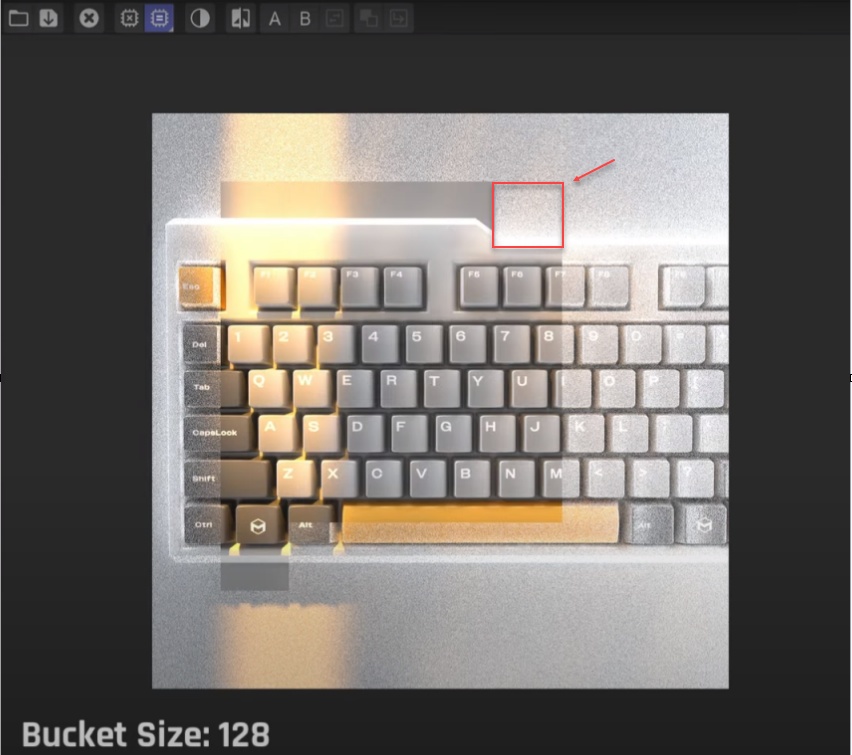
When rendering in the Bucket mode, Redshift renders the frame in square tiles (also known as ‘buckets’ or ‘blocks’.)
Source: Maxon Training Team
Bucket Size
Controls the size of the buckets when rendering. There are some size options.
-
-
- 64: Redshift renders in 64×64 pixel square buckets.
- 128 (default size): Renders in 128×128 pixel square buckets.
- 256: Renders in 256×256 pixel square buckets.
- 512: Renders in 512×512 pixel square buckets.
-
Tips and Notes:
-
-
- If your GPU has a lot of VRAM, you can increase the bucket size to speed up your render times. In the Render Settings >> under the System tab >> increase the bucket size to 256 or 512.
- Each bucket size is important to GPU performance! When rendering with multiple GPUs, the large size can reduce the performance in case the frame is not at a very high resolution. This is due to the “last bucket effect“. “Last bucket effect” is the situation when the last bucket of the frame has been assigned to a GPU and it is currently rendering, while the other GPUs in the system have finished with their buckets and are waiting for this last bucket to be rendered completely. This effect reduces parallelism and can waste seconds of the render time per frame. On the other hand, very small buckets risk underutilizing GPU resources. A balanced bucket size of 128×128 pixels helps distribute the frame workload evenly without wasting cycles, maximizing parallel rendering efficiency across multiple GPUs.
-
Bucket Order
Control the order in which the buckets are rendered. There are some options to choose from:
-
-
- Spiral (default): Rendering begins in the center and progresses outward in a spiral pattern until the entire frame is finished.
- Horizontal: Buckets are rendered from left to right, starting at the top of the frame, then moving down and continuing horizontally until complete.
- Hilbert: Buckets are rendered utilizing a zig-zag pattern aimed at always selecting the closet bucket next for efficiency, filling the frame entirely with this method.
-
In summary, this article covered the different modes of bucket and progressive rendering in Redshift. Bucket rendering is recommended for final, high-quality renders since it prioritizes image quality over speed, while Progressive rendering allows for faster previewing of animations by trading off some quality. Understanding these modes empowers users to choose the appropriate approach for final or iterative tasks.
iRender - The Best Render Farm for C4D and Redshift
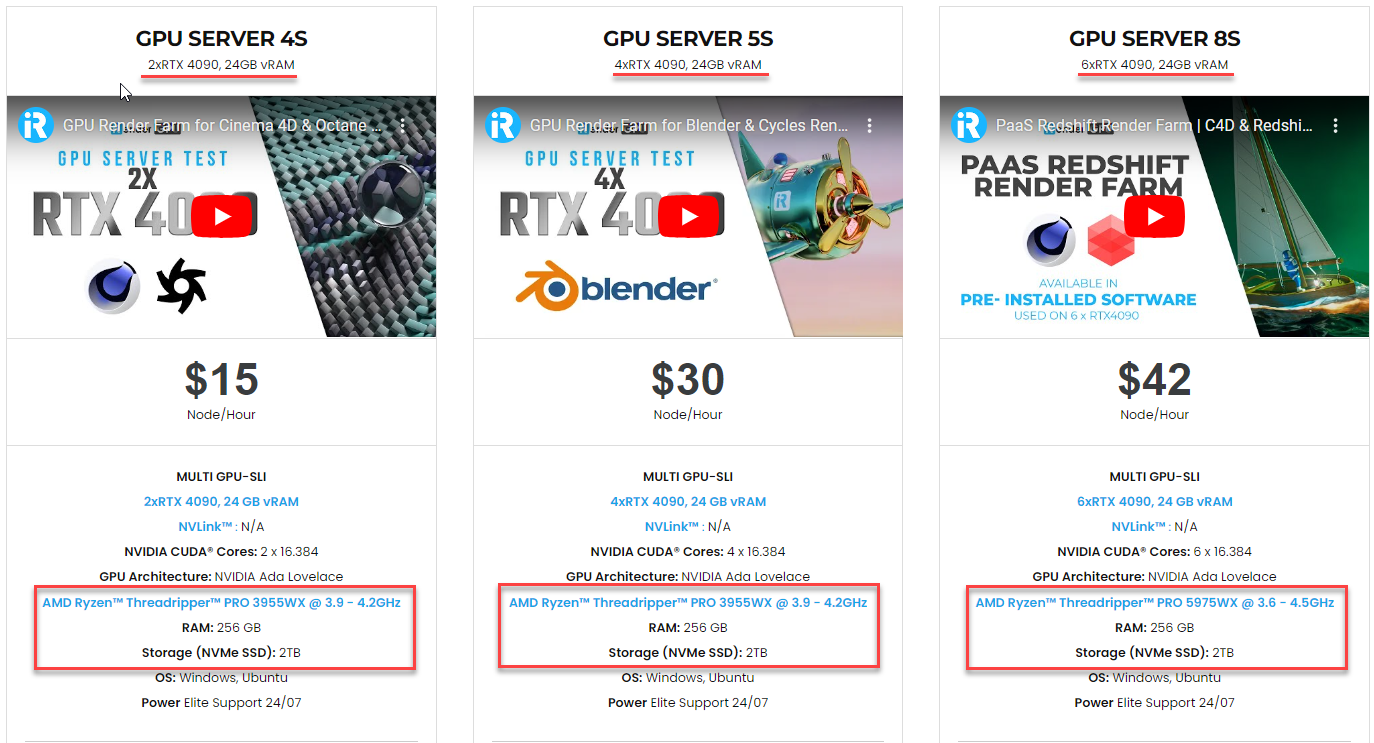
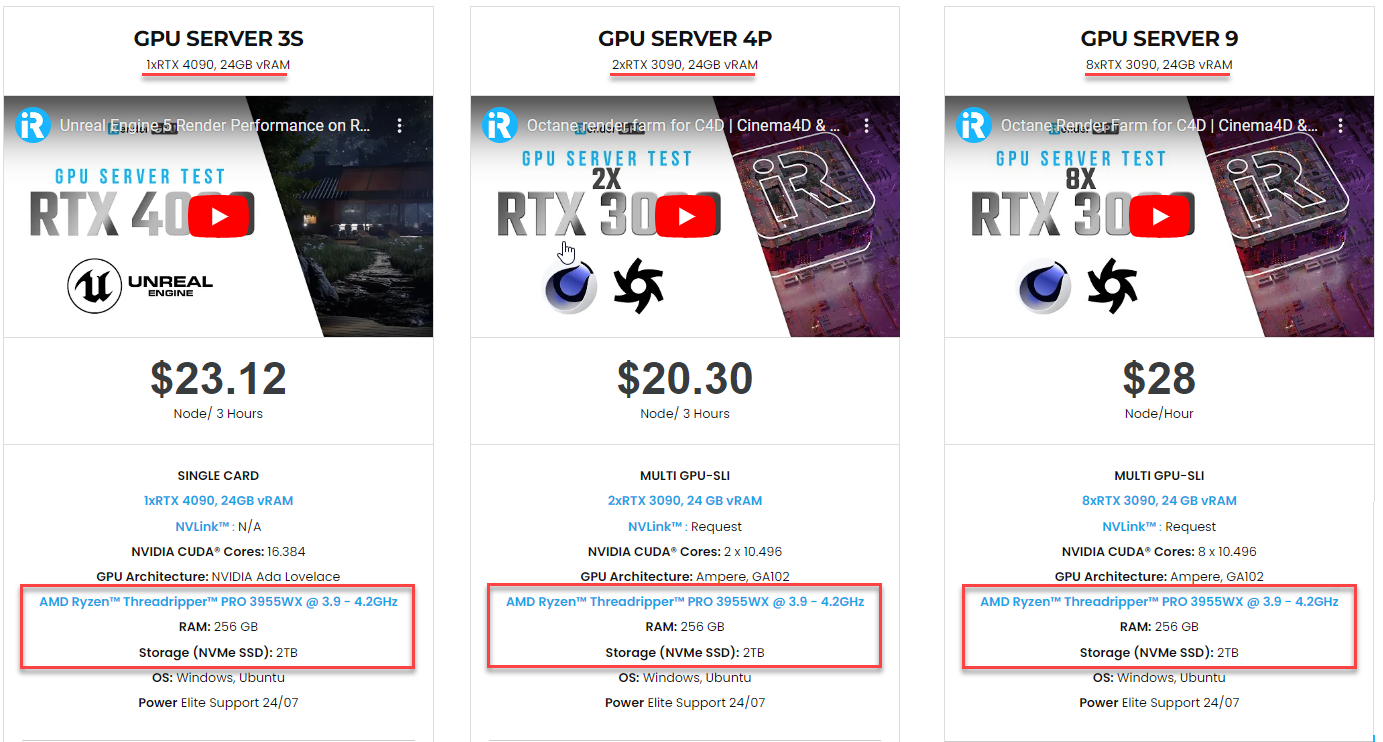
iRender has the most powerful machines for rendering
iRender powers up your creativity with unlimited GPU rendering resources. Our GPU render farm houses the most powerful 3D rendering machines. Configure from 1 to 8 GPU with top-tier RTX 4090/RTX 3090, Threadripper Pro CPUs, 256GB RAM and 2TB SSD storage – iRender’s machines are capable of any 3D project demands.
iRender support all C4D and Redshift versions, providing you with total workflow freedom
Once renting our machines, you will own them as your personal workstations. Therefore, you can install and use C4D, Redshift, plugins, and/or any other software of any versions (even the newly released ones).
iRender has pre-installed C4D and Redshift machines and provides license(s) for free
As an official partner of Maxon, we currently provide pre-installed C4D and Redshift machines to streamline your pipeline further!
Let’s explore how to use our C4D and Redshift machines through our Desktop app.

New user incentives
This November, we are offering an attractive 100% Bonus Program for our new users making the first deposit within 24 hours of registration.
Enjoy our FREE TRIAL to try our RTX 4090 machines and boost your Redshift rendering now!
For further information, please do not hesitate to reach us at [email protected] or mobile: +84915875500.
iRender – Thank you & Happy Rendering!
Reference source: Maxon & CG Shortcuts
Related Posts
The latest creative news from Redshift Cloud Rendering.