Understanding Global Illumination in Redshift
In the real world, light photons come from light sources. They bounce off multiple surfaces, and these surfaces modify photons’ color along the way before reaching our eyes. In computer graphics, Global Illumination (GI) try to simulate the interactions of photon bouncing. This simulation adds realism to lighting and it helps achieve more life-like images. Let’s explore Global Illumination in Redshift with us!
Introduction to Global Illumination
Global Illumination can have a profound effect even on the most simple scenes. The example below shows this effect.

Light reaching the object surfaces without any bounces is called Direct Lighting. Once light bounces off one or more surfaces, it’s called Indirect Lighting. Essentially, Global Illumination computes indirect lighting.
When a light photon hits a rough surface, it’s scattered around randomly – referred to as Diffuse Global Illumination. A photon tends to bounce in a more predictable direction when hitting a highly reflective or refractive surface like mirror or glass. Consequently, photons bouncing off such surfaces tend to get clumped together, creating interesting lighting patterns called Caustics. Generally, GI refers to both effects – Diffuse Global Illumination and Caustics.

Redshift handles Diffuse Global Illumination and Caustics them separately using different GI engines.
Diffuse GI can be simulated through a combination of Photon mapping, Brute-Force, Irradiance caching, and Irradiance point cloud engines
In contrast, Caustics effect can only be achieved by one engine – Photon mapping.
Primary and Secondary GI Engines
Among the Redshift GI engines mentioned above, photon mapping is the only one that works similarly to how lighting works in the real world (by shooting photons from light sources). All other engines work inversely: shooting rays from the camera, bouncing them around and hitting a light eventually.
When these camera rays hit an object, the primary GI Engine handles that interaction. If GI needs multiple bounces, the secondary GI Engine will be used for these bounces. The figures below demonstrate this process when we enable brute force for both primary and secondary engines.

No GI Bounces
The camera shoots a ray and it hits the wall (“A”). The primary GI engine is used to shoot another ray (in red). This way, direct lighting on the floor (“B”) affects point “A”.
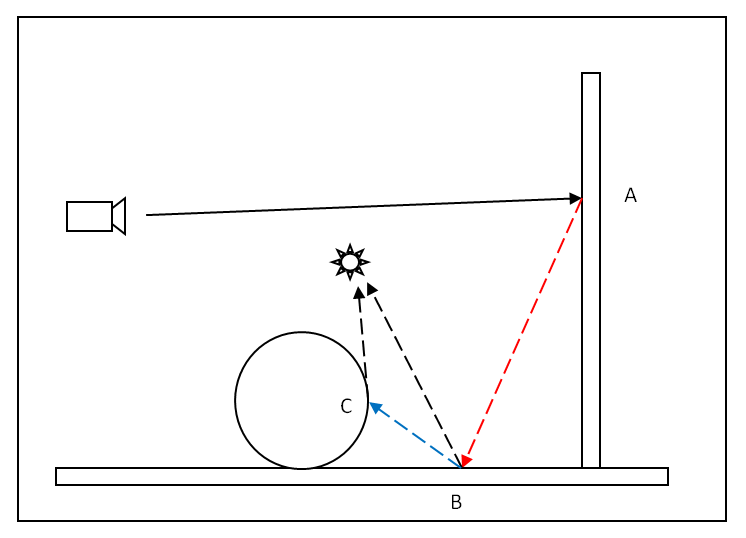
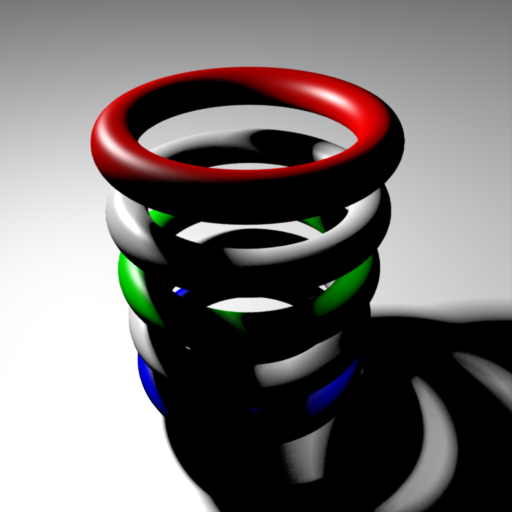
One GI Bounce
The simulation goes an additional step. At point “B”, the secondary GI engine gathers illuminance information from the sphere by firing a single ray (in blue). This allows the direct lighting falling on the floor (point “B”) and the sphere (point “C”) to both affect point “A”.
Shooting photons from lights or rays from our eyes produces, in some ways, equivalent results. If we flip the direction of all the above arrows, it will be as if lighting went from the light source and bounced off sphere surfaces, floor, wall, and reach the camera.
So why use separate primary and secondary GI engines?
The results of primary GI lighting are visible directly to the camera; therefore, it needs the highest quality possible. On the other hand, secondary GI lighting often represents a smaller portion of the final lighting; therefore, it can accept a somewhat lower quality, blurrier or noisier, without causing significant visual artifacts. Approximating secondary GI in this way brings significant performance benefits and sometimes even improved quality.
Main Global Illumination Settings
GI Engines and Number of Bounces
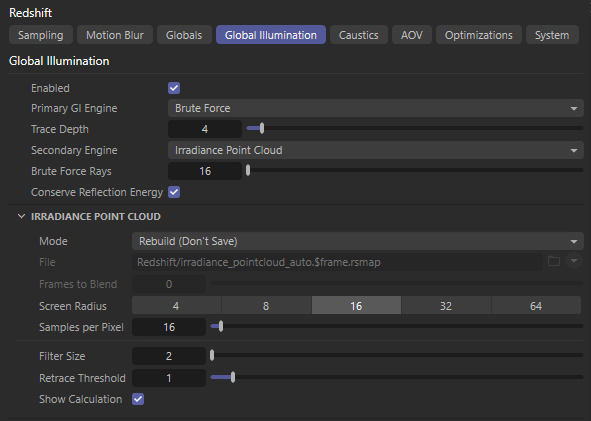
The first step for enabling GI is selecting the primary and secondary GI Engines and setting the number of GI bounces.
Including additional GI bounces into a scene often results in brighter lighting but slower rendering. It also tends to somewhat “wash out” the lighting. Therefore, some users opt to limit the number of bounces due to these factors.
The scene below has several vertical tiles, one lit by a strong spotlight. The clearest visual difference (for this specific scene) exists between 0 and 1 GI bounces. (*These images were rendered using Irradiance Caching as the primary GI engine and Irradiance Point Cloud as the secondary engine.)
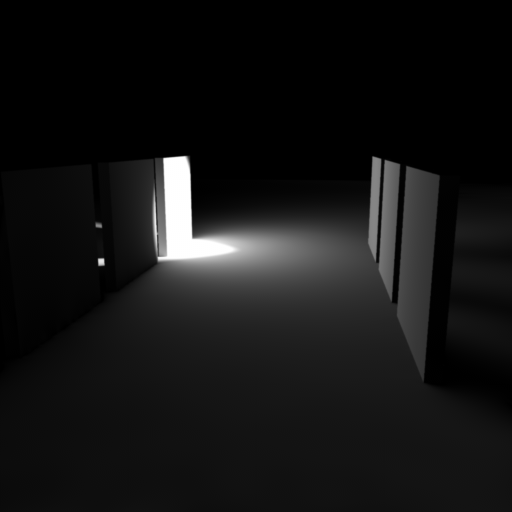
Zero GI Bounces
The right tiles are lit by the direct lighting on the center-illuminated tile.
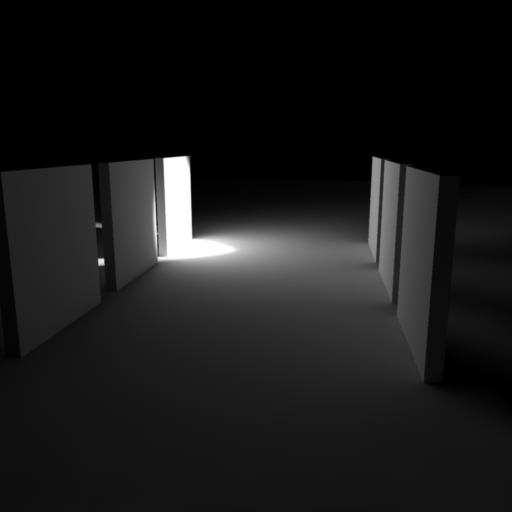
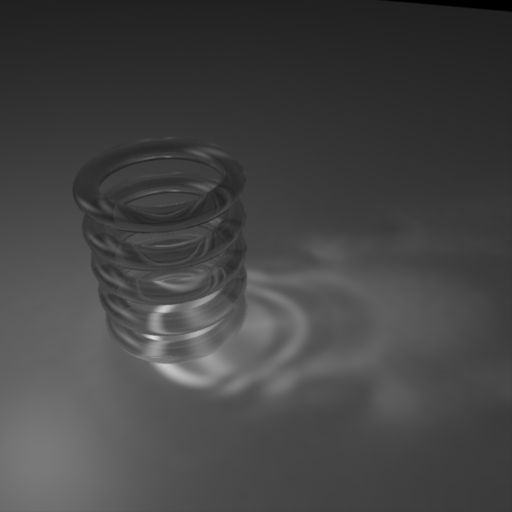
One GI Bounce
The indirect lighting on the right tiles is bouncing off once and illuminating the left tiles. The ground below the right tiles now also receives additional illumination.
Conserve Reflections Energy
Currently, Redshift doesn’t support reflection ray sampling within Global Illumination calculation, this can lead to lost energy. Activating ‘Conserve Reflections Energy’ enables a simple method to add back the reflective energy that would otherwise be lost (i.e. the color tint from reflections) to material diffuse color tints during GI calculation. This creates the illusion of reflective bounces contributing to GI, especially noticeable with high-intensity or colored surface reflections.
After selecting the primary and secondary GI engines and setting the number of GI bounces, you’ll need to configure them (depending on the engine you choose).
Recommended Settings
Occasionally, users feel overwhelmed by the many options available and seek recommendations for optimal configurations.
While different scenes have different requirements, below are the recommended settings among the multitude of choices:
-
- Set the Primary GI Engine to “Brute-Force”
- Set the Secondary GI Engine to “Irradiance Point Cloud”
- Set the “Number of GI Bounces” value to either 2 or 3
- If your scene requires caustics, as with glass or mirrors, please refer to the caustics section of the photon mapping.
Regarding GI quality, follow these points:
-
- Scenes having several lights can typically get away with fairly low GI settings (number of rays, number of samples, etc)
- Scenes having very few, very strong lights need more aggressive GI settings.
- Outdoor scenes lit with environment shaders (like “physical sky”) can typically get away with fairly low GI settings
- To summarize all of the above: lots of lighting contrast needs higher quality settings, and lower contrast can get away with lower quality settings.
Boost Redshift rendering to the fastest with iRender
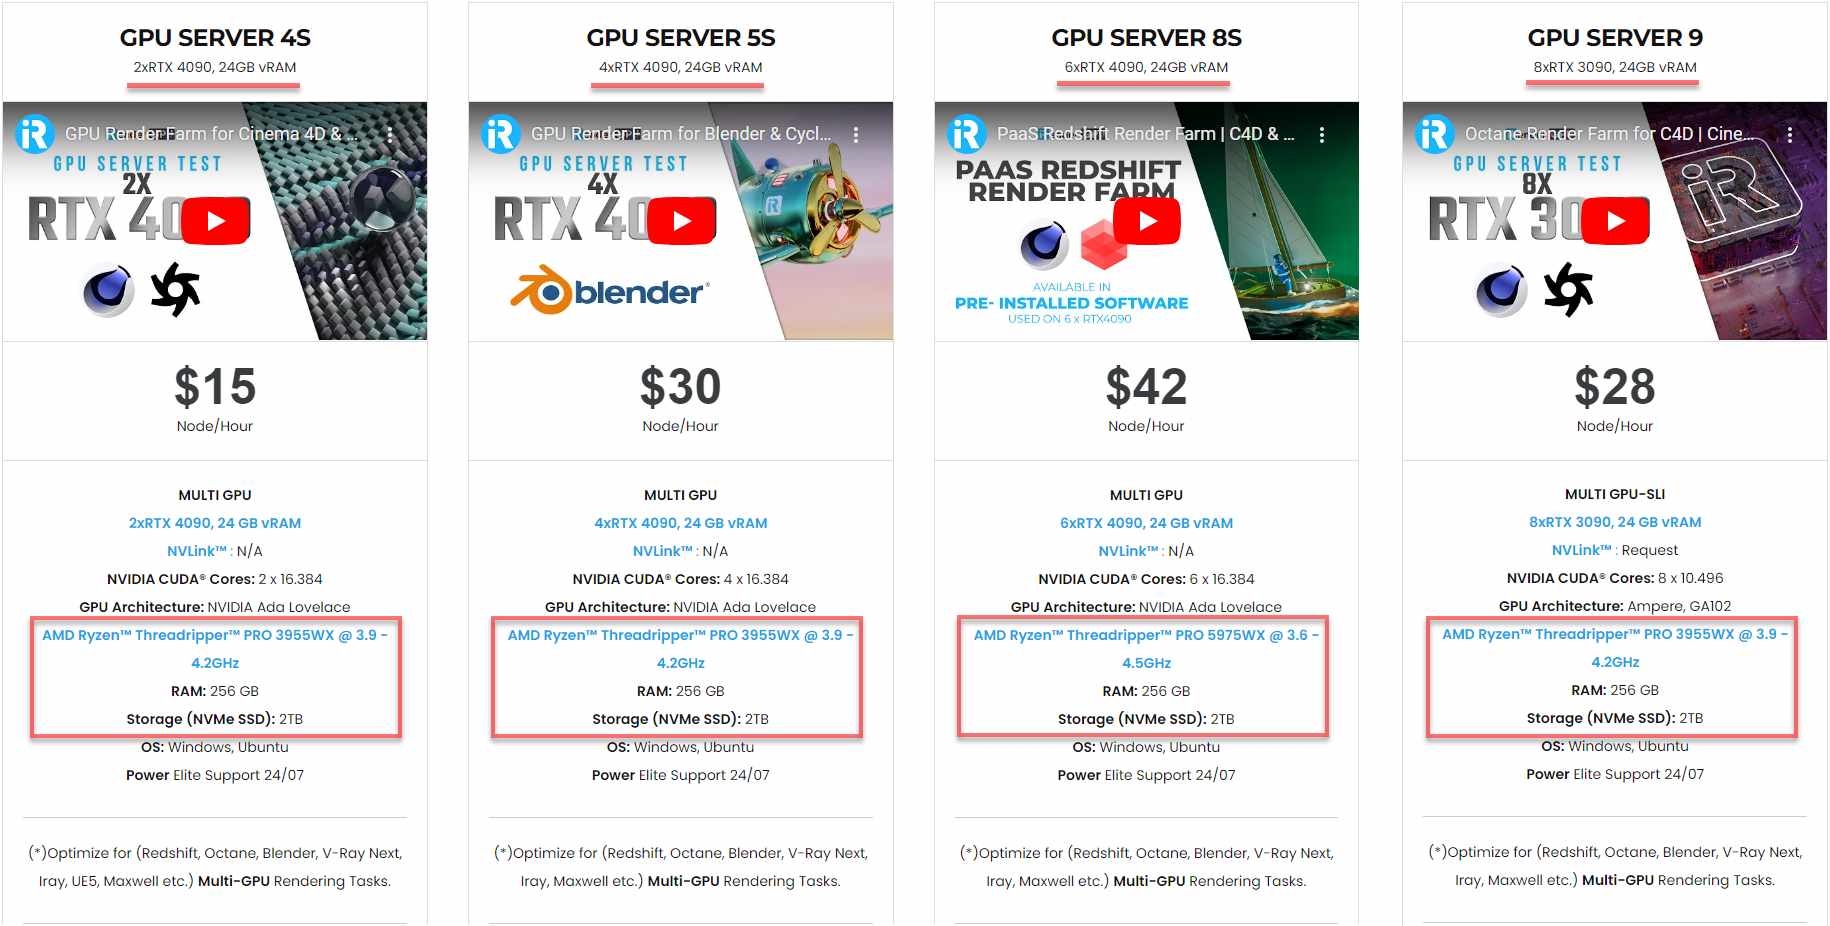
iRender powers up your creativity with unlimited GPU rendering resources. Our GPU render farm houses the most powerful 3D rendering machines. Configure from 1 to 8 GPU with top-tier RTX 4090/RTX 3090, Threadripper Pro CPUs, 256GB RAM, and 2TB SSD storage – iRender’s machines can handle any 3D project demands.
Once renting our machines, you will own them as your personal workstations. Therefore, you can install and use C4D, Redshift, plugins, and/or any other 3D software of any version (even the newly released ones).
As an official partner of Maxon, we currently provide pre-installed C4D and Redshift machines to streamline your pipeline further! Let’s explore how to use our C4D and Redshift machines through our Desktop app.

New user incentives
This April, we are offering an attractive 100% Bonus Program for our new users making the first deposit within 24 hours of registration.

Enjoy our FREE TRIAL to try our RTX 4090 machines and boost your Redshift rendering now!
For additional information, please do not hesitate to contact us at [email protected] or mobile: +84915875500.
iRender – Thank you & Happy Rendering!
Reference source: help.maxon.net
Related Posts
The latest creative news from Redshift Cloud Rendering.