Create High-Quality Renders with Movie Render Queue in Unreal Engine
Are you a game developer or an animator looking to create stunning, high-quality renders of your scenes or gameplay from Unreal Engine? Look no further, as Unreal Engine’s Movie Render Queue feature is here to make your rendering process smooth and efficient.
In this blog, let’s learn how to create high-quality renders with the Movie Render Queue plugin in Unreal Engine with iRender. We will also talk about how to use CLI Encoder to automatically generate various popular file formats like mov, mxf, and mp4.
What is Movie Render Queue?
Most professional studios producing content in Unreal Engine use Movie Render Queue (MRQ) to render their images. This high-quality renderer allows users to efficiently render movie clips, trailers, and promotional materials directly from the engine. The tool provides a streamlined workflow for creating professional-grade renders, allowing game developers, filmmakers, and animators to easily create stunning visuals.
Key features
Movie Render Queue is capable of anti-aliasing, motion blur, and ray tracing or path tracing. Key features of this plugin include the ability to manage multiple shots and sequences within the same project and configure render settings such as output resolution, frame rate, format, and quality. At the same time, it leverages Unreal Engine’s powerful tools like cinematic cameras and Sequencers to choreograph complex animations and camera movements.
Additionally, the Movie Render Queue offers options for optimizing rendering efficiency, such as background rendering and distributed rendering across multiple machines.

Image Source: unrealengine.com
Create High-Quality Renders with Movie Render Queue
First, follow this tutorial Movie Render Queue’s render settings in Unreal Engine to set up the plugin into the UI.
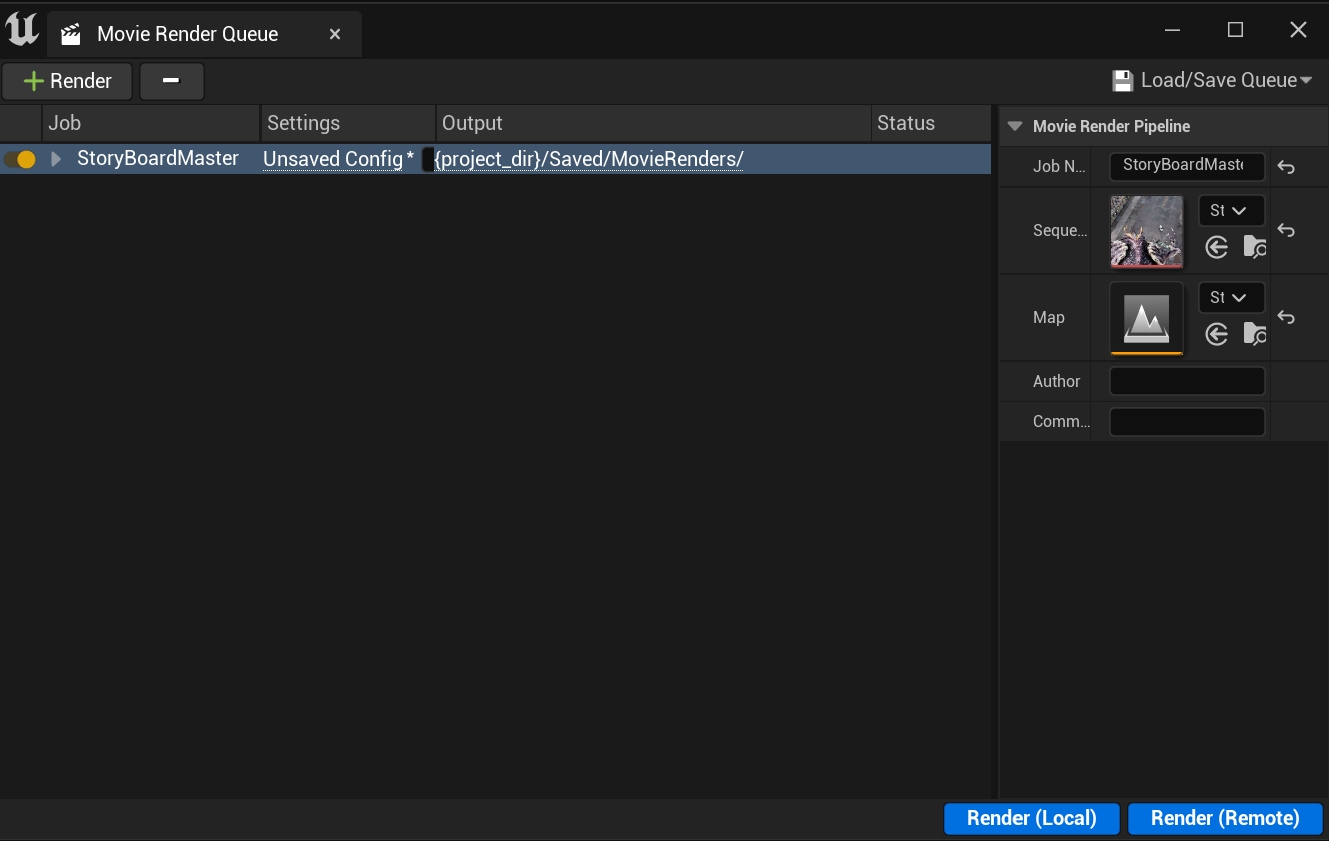
Now select “Unsaved Config“. Assuming nothing has changed in the project preferences, the configuration user interface (config UI) will load with some default tabs.
File Type
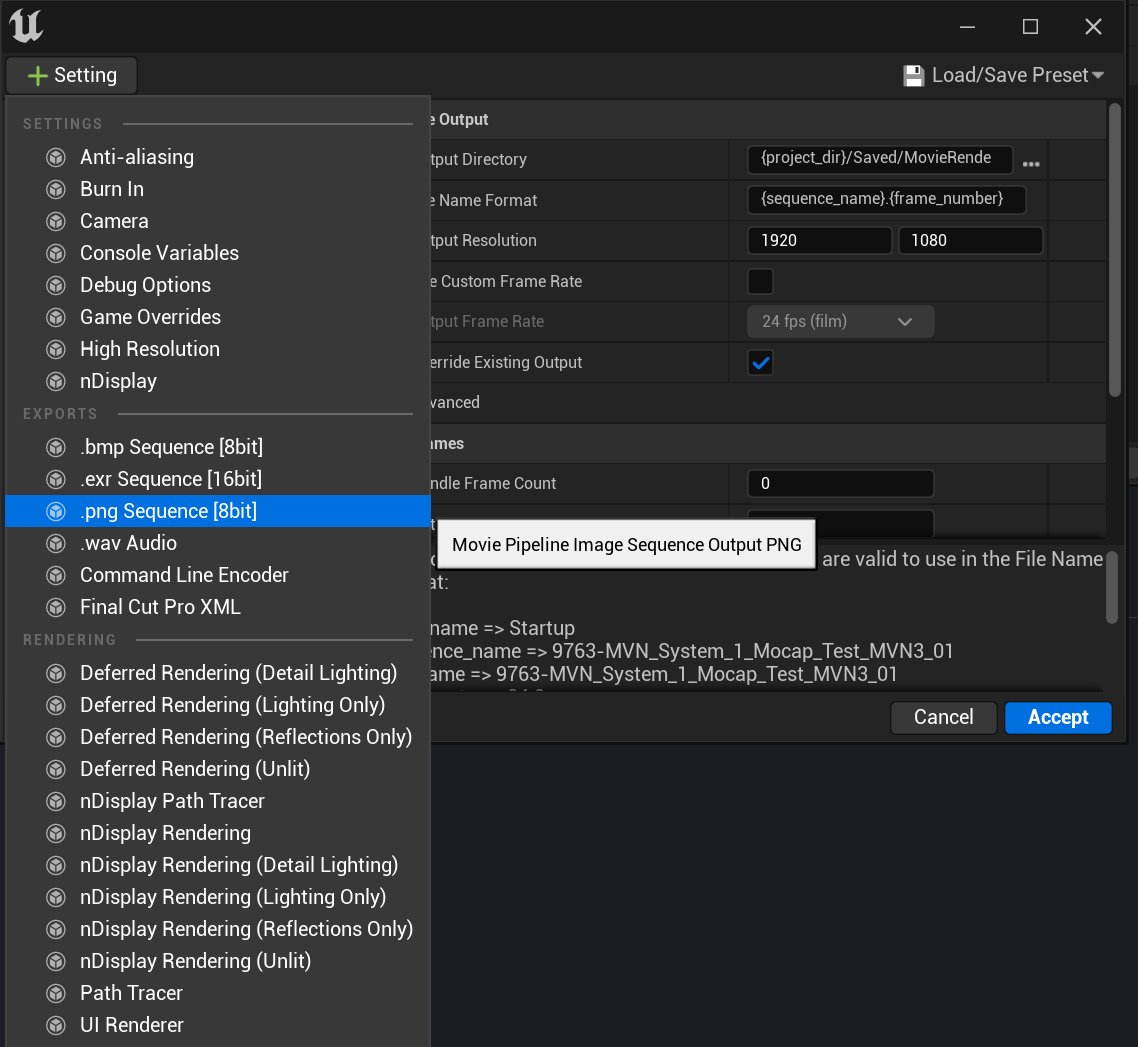
By default, your sequence will be rendered as .jpg. If you want to change the format, you can select and delete it or turn off the orange switch on the “.jpg tab”. Next, select the desired file format by clicking the “Settings” button located on the top left of the user interface (UI) to drop down a list of options.
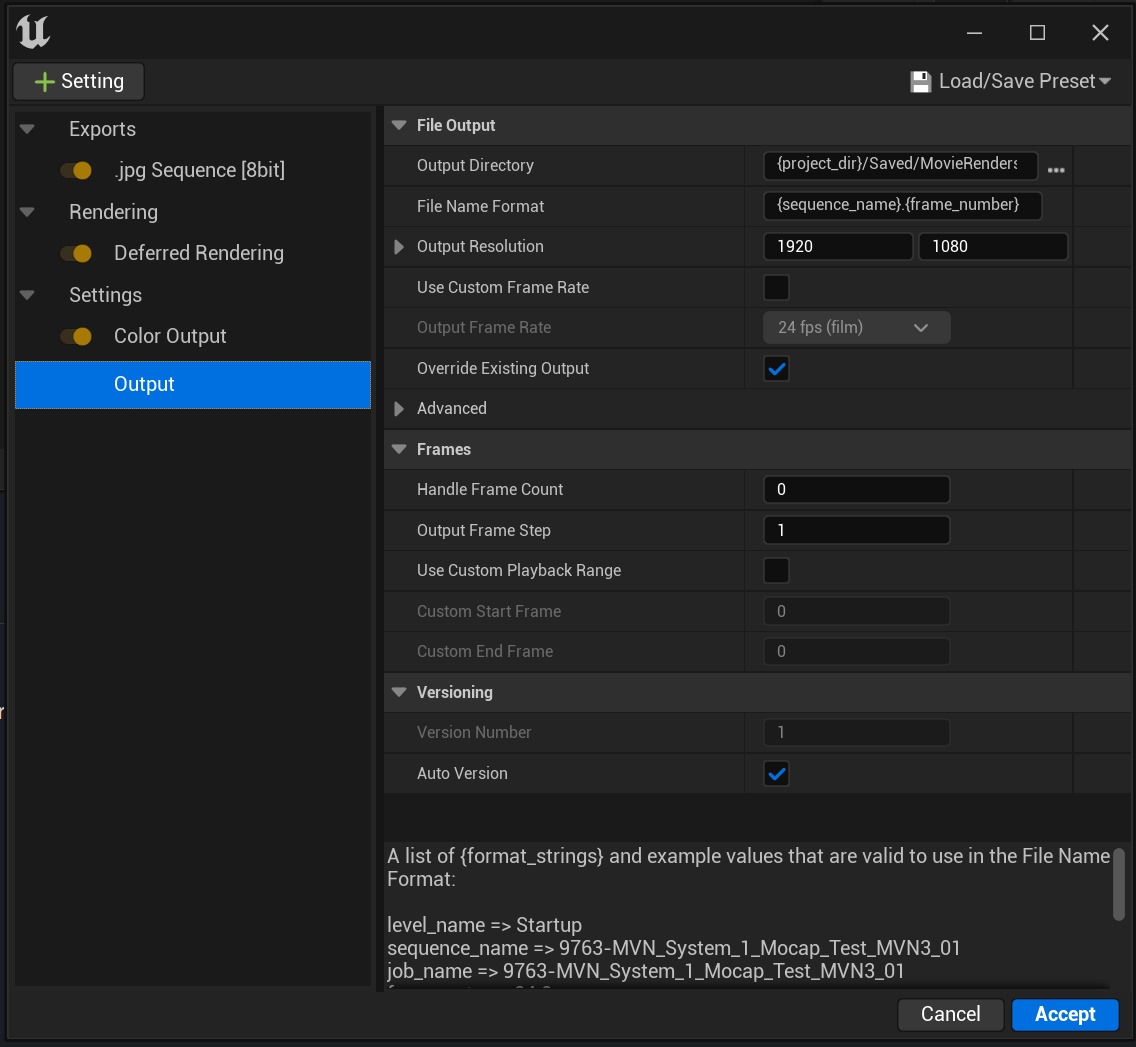
Output
Now let’s move on to the output. Here, you can set the output path where your rendered image will be saved. By default, it will render in the Saved/MovieRenders/ folder inside your Unreal Engine project, but you can also set a new path in the Output Directory. You can adjust the Filename Format and Output Directory fields to suit your preferred workflow using the naming variables at the bottom of the tab under {format_strings}.
Additionally, MRQ will default to pulling the frame range from your Level Sequence, but you can change it in this section. Finally, you can also set the rendering resolution according to your needs.

After completing the Output settings, you can press the blue Accept button at the bottom right of the tab. Then, in MRQ, click Render Local and a render window will appear. When you click on the path list under Output, it will automatically take you to the rendered image path. Now you can upload them to your favorite image viewer.
Actually, this is fine at this step, but it would be better if you took one more small step!
Anti-aliasing
To enhance your renders further, let’s return to your configuration and add the Anti-aliasing tab.
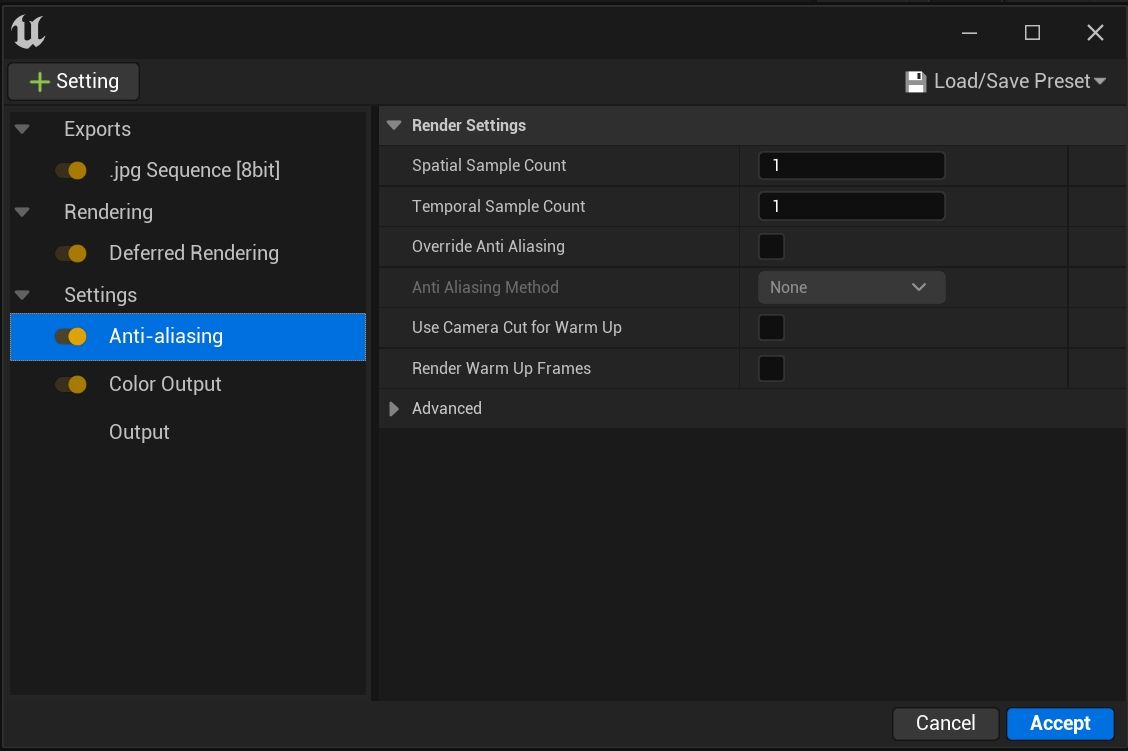
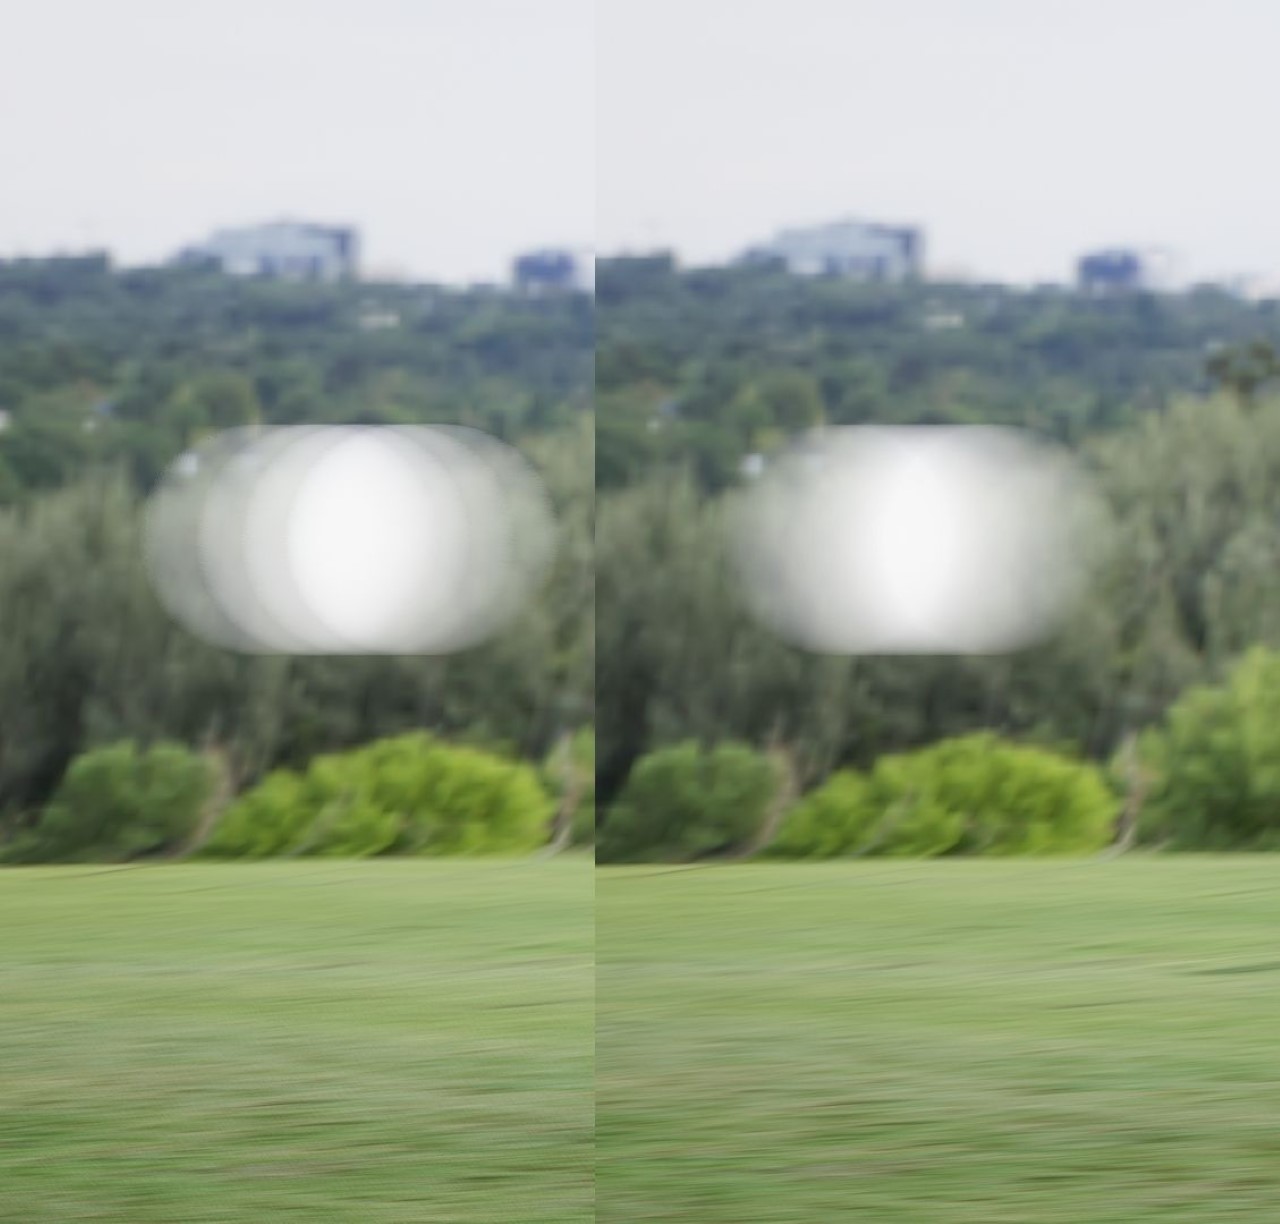
Your Anti-Aliasing quality will improve with both Spatial and Temporal Counts. This term describes the degree of smoothness that can be achieved when representing a piece of geometry across pixels in a non-perfectly straight line, either vertically or horizontally.

But what we need to consider between Spatial and Temporal Sample Counts is that Temporal will tick the engine forward but Spatial will not. So, the optimal way is to use Temporal Samples for motion blur and conversely, use Spatial Samples if you don’t need blur. Also, it doesn’t help to combine samples, just use one or the other. Basically, you just need to increase the number of samples until you get the smooth motion/geometry you want.
Let’s look at an example of increasing Temporal Samples to smooth out motion blur.
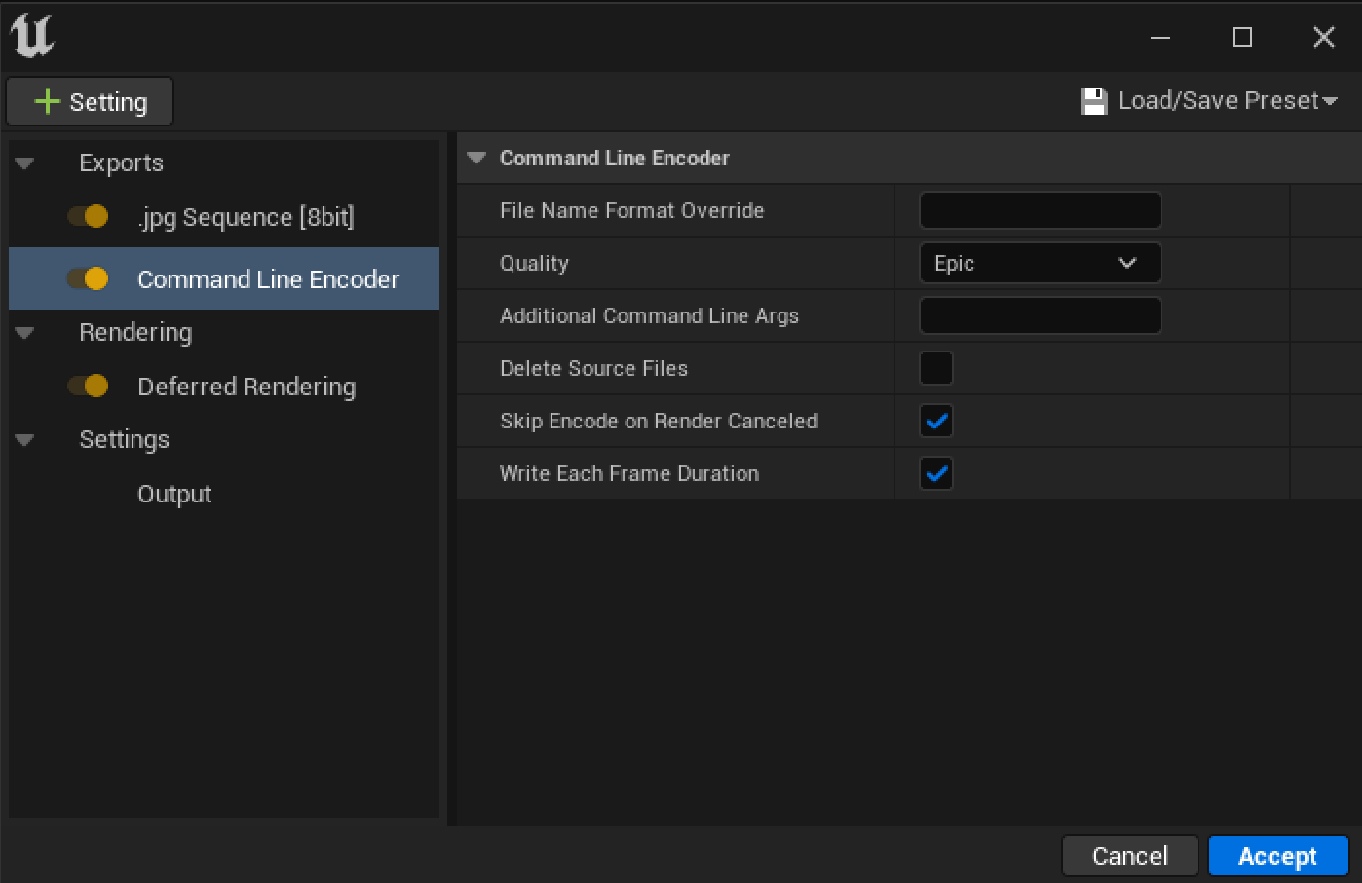
Command Line Encoder
What if you want an MP4 file instead of an individual frame type? Or file types like .mxf or ProRes Quicktime.
To do this, you can enable the Command Line Encoder tab in config. It is used to create your own output format from a third-party software called FFmpeg. However, you need to find and install the appropriate version of FFmpeg.
You can follow this video to set up FFmpeg. But it’s also important to note that some codec are free but others are not. So, consider your usage needs.

Basically, they include the following steps:
-
-
- Download a precompiled binary of FFmpeg and install it.
- Go into the project preferences and go down to Movie Pipeline CLI Encoder under the Plugins section. Add the path to ffmpeg.exe under Executable Path. Then put libx264 under Video Codec and mp4 under Output File Extension, just like in the picture above.
- Lastly, go into your MRQ config and load the Command Line Encoder setting. Now, when you render, a .mp4 file will be made in your specified directory as a post-render task.
-
You can list all that are available to you in the output log with the console variable MovieRenderPipeline.DumpCLIEncoderCodecs if you want a different codec or container. Thus, you may simply modify them to what you want in the plugin’s project settings’ Video Codec and Audio Codec fields.
Alternatively, the engine is equipped with Avid Media and Apple Prores plugins. Thus, you can enable those so that the ProRes and DNxHD options appear in your MRQ configuration without requiring you to work with the CL Encoder or FFmpeg.
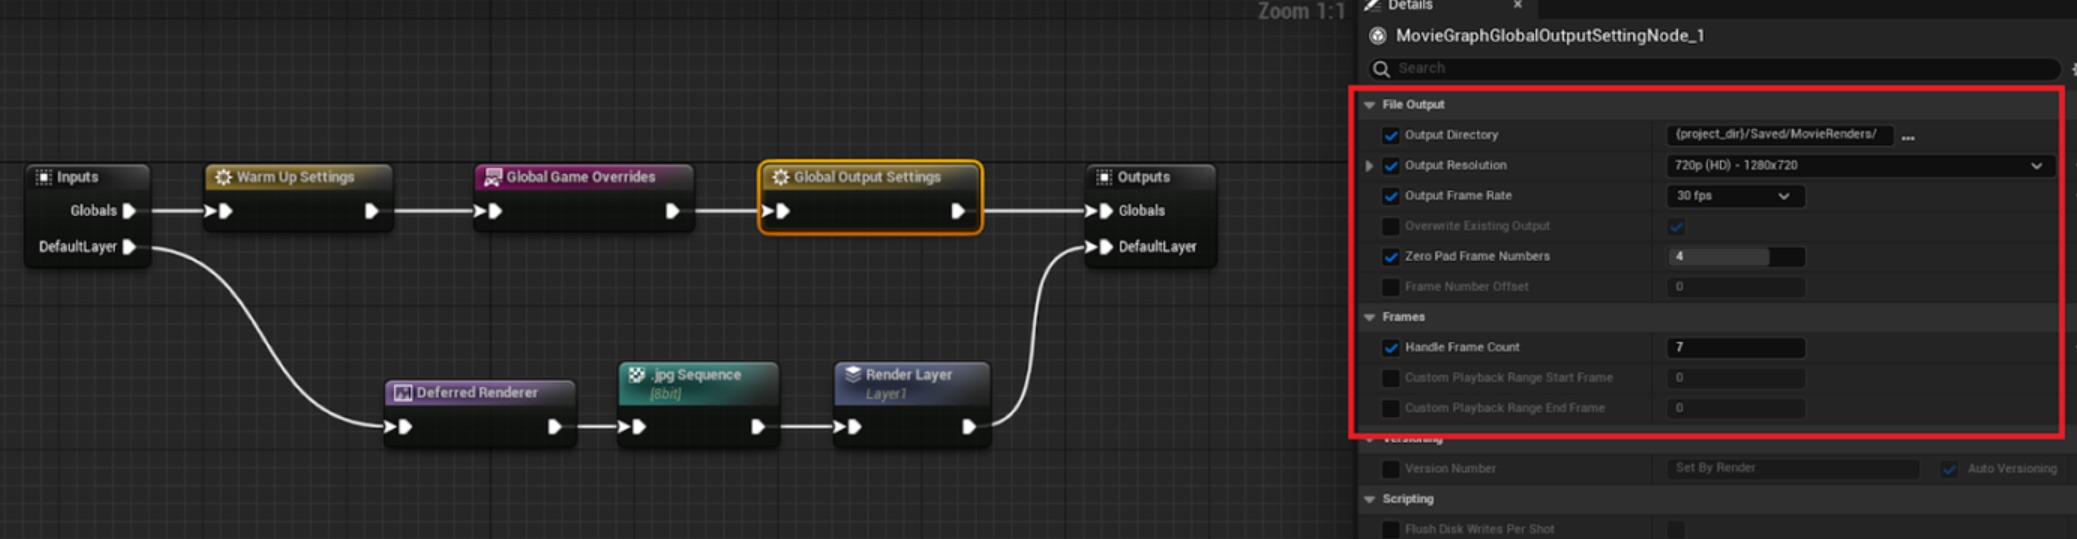
Movie Render Graph
Movie Render Graph was added to Unreal Engine 5.4 as an experimental feature. This is where you can render more naturally in layers inside the software.
iRender - Best Cloud Rendering Service for Movie Render Queue and Unreal Engine
iRender is the perfect cloud rendering service that well-supported Unreal Engine and its plugins.
Why choose iRender?
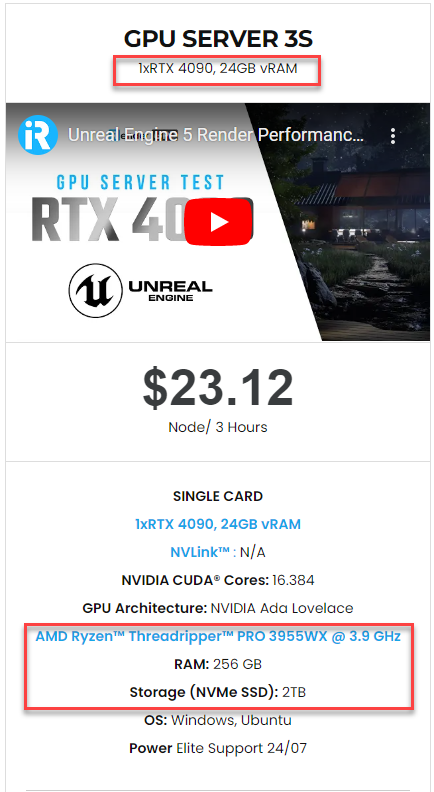
iRender provides high-configuration servers that increase CPU and GPU rendering speeds. We offer the most powerful RTX 4090 configuration packages on the market, all equipped with AMD RyzenTM ThreadripperTM PRO 3955WX @ 3.9 – 4.2GHz and AMD Ryzen™ Threadripper™ PRO 5975WX @ 3.6 – 4.5GHz processors, 256GB RAM and 2T NVMe SSD hard drive capacity. With a wide range of GPU servers (1/2/4/6/8x) – RTX 4090, you can choose the server that suits your needs to start the rendering process.
With Unreal Engine, the 3S (1xRTX 4090) is the most suitable package.
- Full Control: Our service will give you full control over the servers you rent. Therefore, you are free to create your own working environment.
- Go Green: We are committed to using 100% solar renewable energy towards environmental sustainability.
- Real-human 24/7 Support: Our professional support agents and technicians guarantee to bring you the best rendering experience.
Check out Unreal Engine performance on our server.

REGISTER NOW to get a trial and receive a 100% bonus promotion for your first transaction within 24 hours of registration with us. Welcome July with our promotions: 50% bonus promotion for all transactions from $230 and 100% bonus for all transactions from $1500.

For more detailed information, please contact us via Live chat 24/7 or WhatsApp: +(84) 962868890 or Email: [email protected]
iRender – Happy Rendering!
Images and Sources: dev.epicgames.com
Related Posts
The latest creative news from Unreal Engine Cloud rendering.