Daz3D Iray Lighting Tutorial with iRender

Lighting sometimes can be the main asset of your scene and render. Almost always good lighting can improve your scene in every way. You can emphasize the advantages of your scene and remove attention from disadvantages with the light. And your scene can’t be realistic without good lighting. Lighting your indoor or outdoor set in Daz Studio can be one of the most time consuming activities when setting up a scene for render. Most artists will have lighting as a pain point during their workflow and it is not always easy to get to the root cause of why lighting may not work on a set. So in today’s Blog, iRender will give some tips to help you adjust lighting with iRay Daz3D.
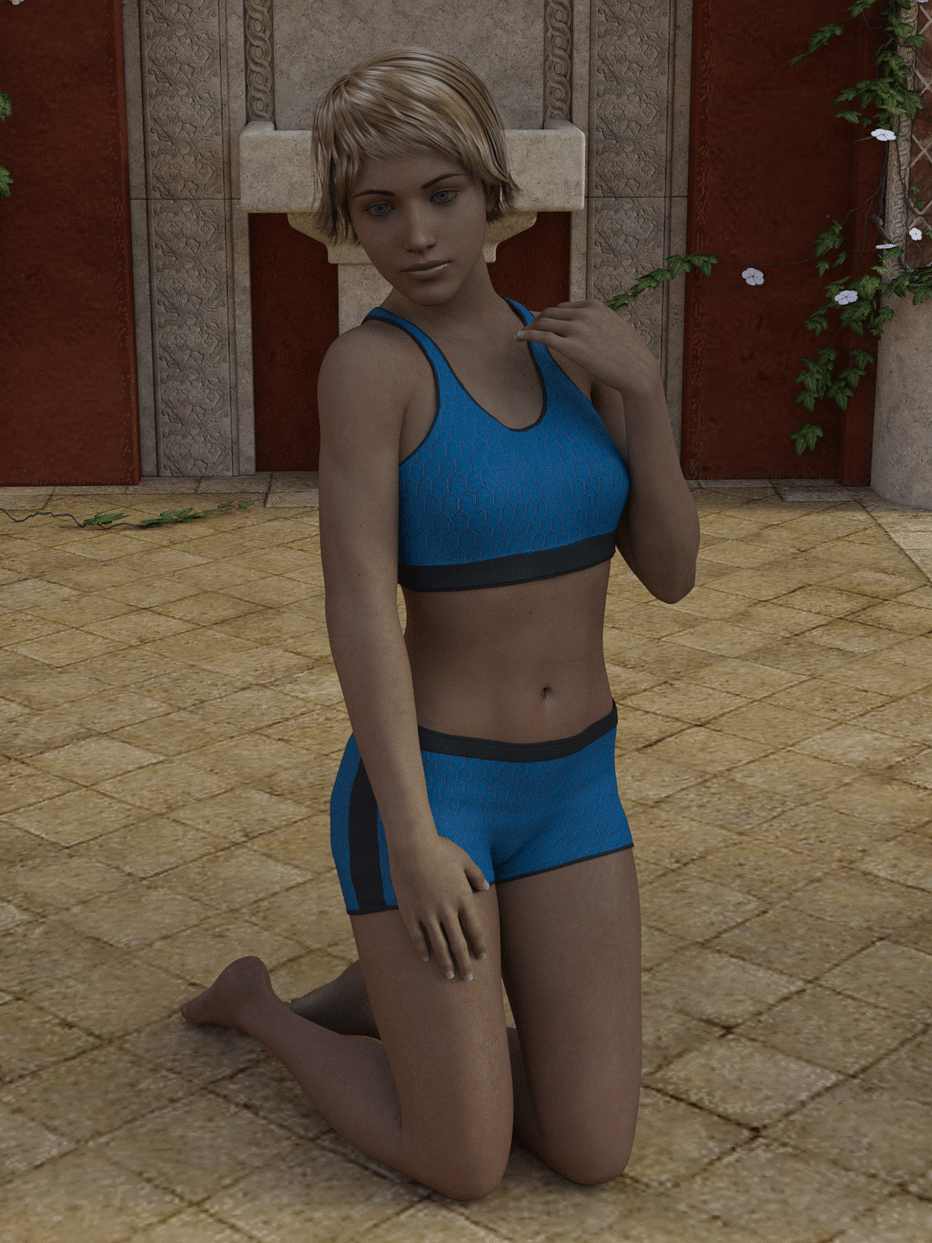
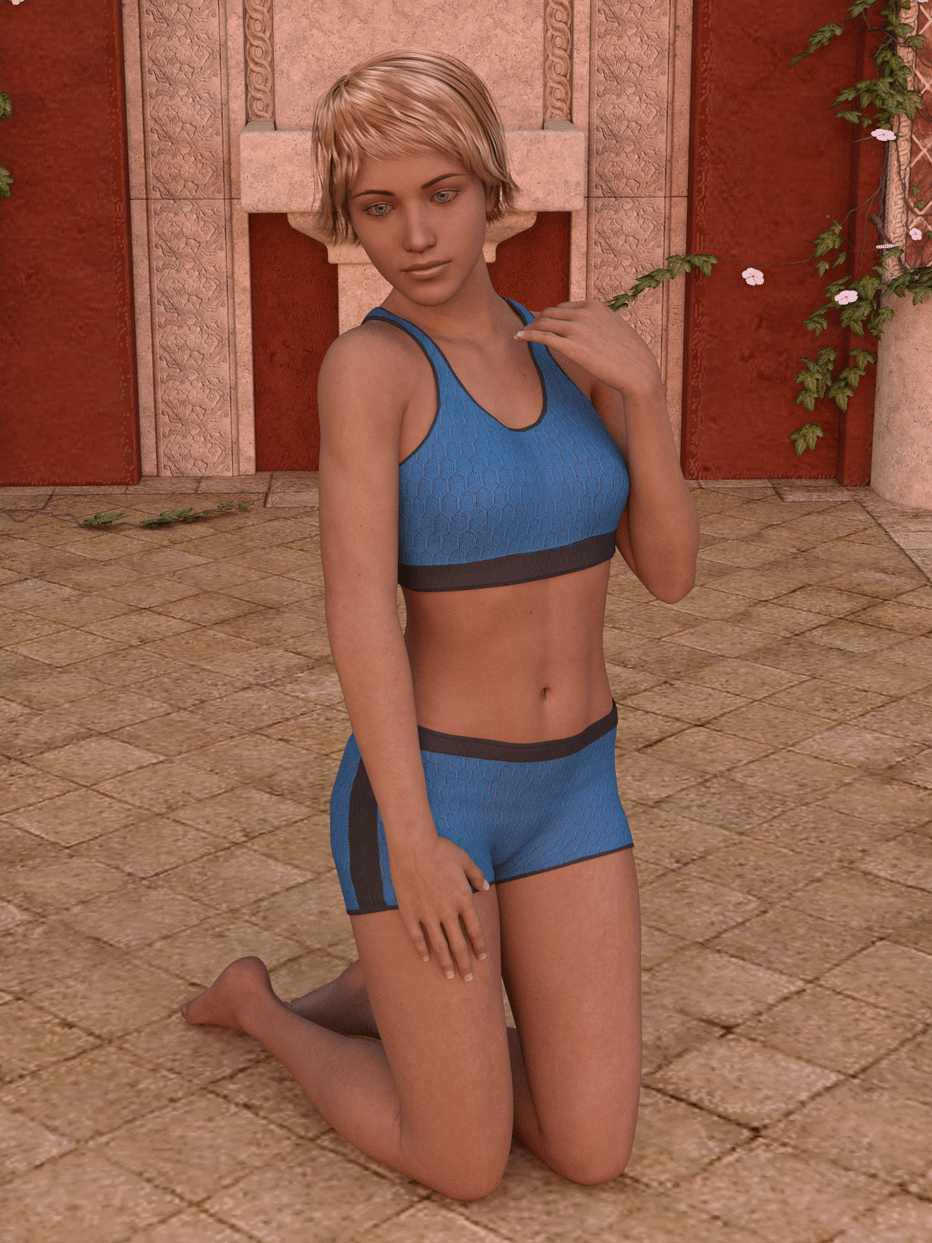
Let’s compare the render that used only the default lighting:

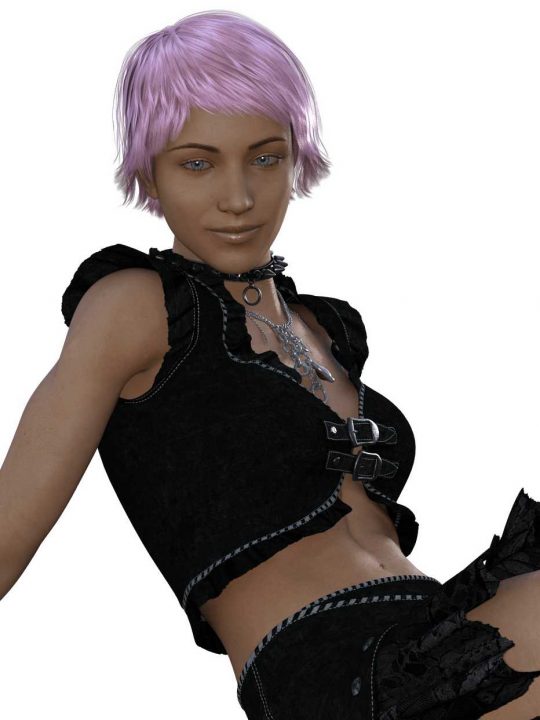
You can clearly see how flat the first picture looks compared to the second. It is bland and absolutely not interesting. And the only difference between the two renders are the lighting. So Bolg’s today bring to you about Environmental Daz3D Iray lighting and HDRIs especially. And about the most known lighting setup – three point lights.
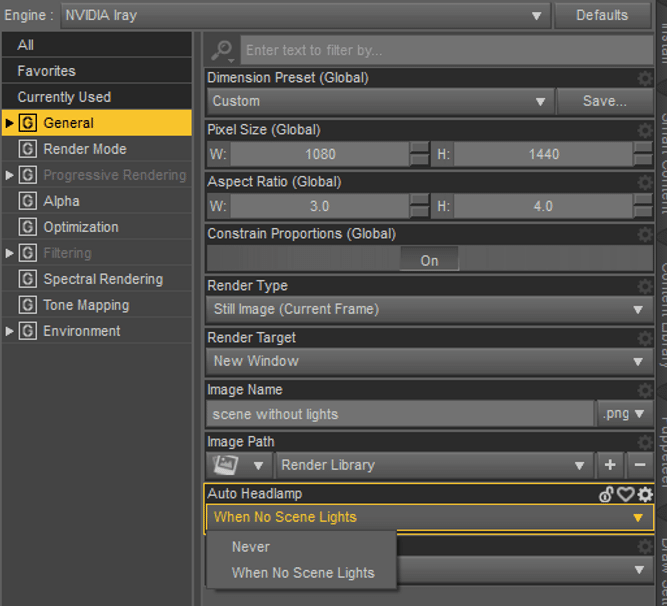
Let’s work on a simple scene for beginners. A good starting point for this daz3d iray lighting tutorial would be to find in the Render Settings menu right at the bottom the “Auto Headlamp” option and to turn it off. Headlamp is the lights everything you look into on the viewport. And this even shows on renders. After setting it no “never” everything would be dark. But that is exactly what we want, because we are going to light a scene ourselves.
Environmental Lighting
First of all, let’s look at the environmental lighting. Environmental lighting is something that adds an environment to your scene. And your scene would obey the laws of this environment. For example, you can add sun and sky. Obviously this will make your scene lit like it is outside. Everything about environmental lighting can be found in the Render Settings menu under the “Environment” tab.
Sun and Sky Settings
At the beginning of this Daz3D Iray lighting tutorial, let’s look into the Sun and Sky settings and how to set up them yourself. Firstly, let’s create the simple scene without any lights. Everything used here can be found in Daz Studio right after install for free.
All the Sun-Sky settings in the environment menu have their name start with SS(sun-sky). If you look at them, you can see that it is possible to choose the longitude and latitude of the real place in the world. Also to choose the time. And Daz Studio then will simulate the position of the sun at that time in that place. It is an interesting thing. But it’s quite hard to just place the sun at the position where you want it. It will need some fiddling with all the numbers and sliders. So this setting is not an optimal way to set up the sun.
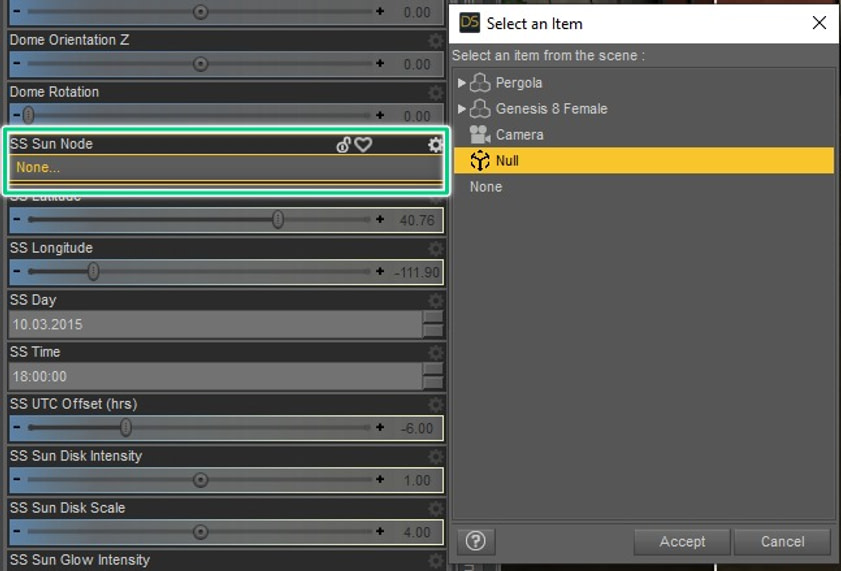
A better alternative would be to create the sun yourself. And it is quite easy to do so too. Firstly you need to create an object that will play the role of the sun. The best object for this role is the Null object, basically nothingness as object. You can find it in Create > New Null. After that you simply need to choose this object as the sun in the Environment menu, under SS Sun Node.
Then you just need to move this object wherever you want it, and it would move the sun on your scene. Place it lower so it would simulate the sunset or sunrise, higher for noon. Other available settings for the Sun-Sky would be changing the horizon height and its blurinnes. But the more important one would be “SS Haze”. It controls how hazy the weather and the default is set to 0. Note that the sky is never absolutely clear, so it would be unrealistic. This means that it is a good idea to set it to a 1 or higher every time. Also haziness controls sharpness of the shadows. Hazier the the sky – softer the shadows.
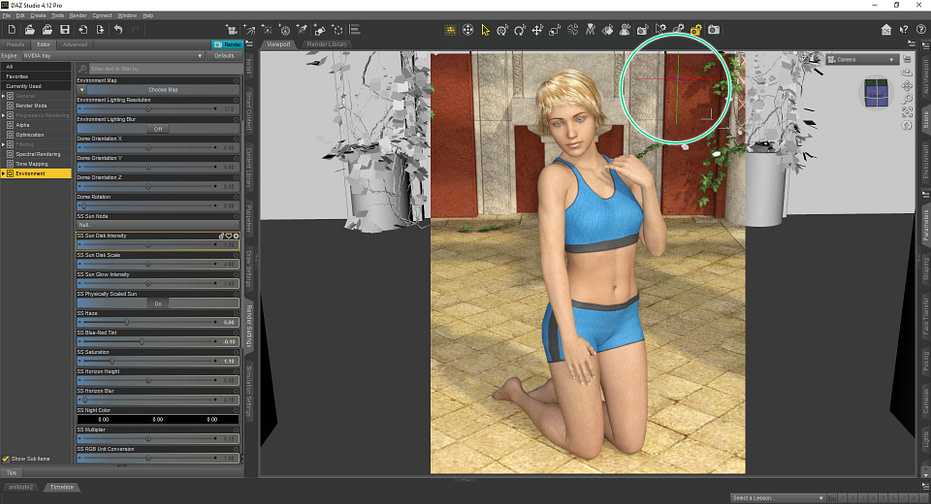
In the screenshot you can see how our scene has changed when we added the sun. You can check used settings on the left. Also notice the position of the Null object that is playing the sun(in green circle).
HDRI (Image Based Lighting)
There is a much simpler way to add environmental lighting to your scene. That is an image based environmental lighting. And it’s called High Dynamic Range Images or just HDRI. HDRI is a 360° image that contains info about the environment and its lighting. So any source of light from the picture, be it sun or softbox, also would illuminate your render. Imagine that your scene is transported into place from the picture. That is basically HDRI. There is a default HDRI just from get go available in the Daz Studio. To find it you should use the “Environment map” option.
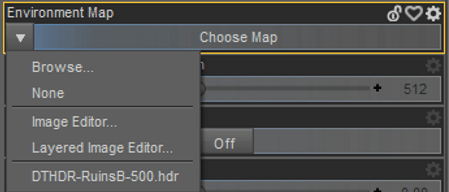
Just click on the left arrow and find the “DTHDR-RuinsB-500.hdr” in the drop-down menu. This will add the HDRI and override all of the other environment options we made. Even the sun that we added as a null object.
Here how Daz3D iray lighting tutorial scene looks with the default HDRI and its settings:
For this Daz3D iray lighting tutorial we are going to use assets from the HDRI Haven website. We plan to make a warm colored scene, like a sunset. After a little search, we have found the HDRI that should work well with our scene. We chose this image called “the sky is on fire”. You can download HDRIs in different resolutions, the higher the resolution, the better it would work. But beyond 4k it is not a big difference, so we chose 4k resolution.
Here is the result of adding this image based lighting. Render looks much better than previous examples. You can clearly tell that it is supposed to be sunset there, lighting is very warm. Just adding the environmental map is not all. One should also look at the settings. Mainly things like “Environment intensity”, “Environment Lighting Resolution” and “Dome rotation”.
If your HDRI is too dull or too bright for you – then change it to compensate. Lighting Resolution is making shadows sharper on lower numbers or softer on higher. Good idea would be just to match this setting to your HDRI resolution. Lastly, “Dome Rotation” is for rotating your HDRI image relatively to the scene. In our example we rotated the HDRI a bit, to make lighting more orange, because in other rotations it even can be blue.
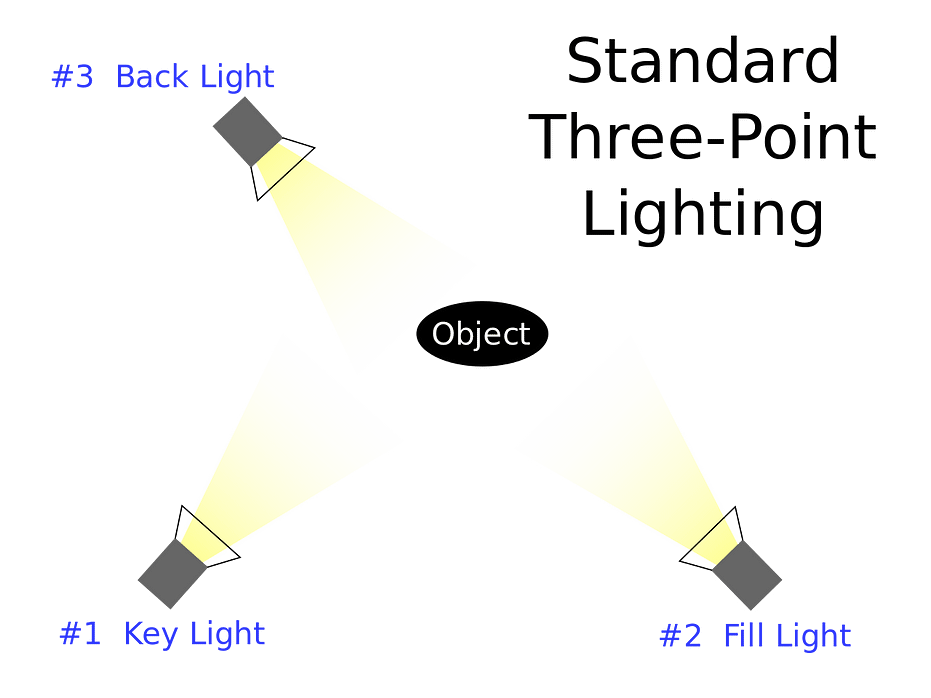
- About Three Point Lighting:
In this Daz3d iray lighting tutorial we are going to use the most recognized lighting technique – three point lighting. This setup is the most popular lighting setup that is used in all kinds of media such as films, theatres, photography and even 3d renders. Main advantage is that by using three separate lights in different positions, you have a lot of control over the illuminations of the subject. So it can easily be adapted to a lot of different cases.
Let see how Daz3D Iray works with 6 rtx 3090, 6 rtx 2080ti at iRender:


Final Thought
We hope this overview will help you add source lights to your scene. As you may know, iRender provides a high performance and configurable server system for 3D rendering, AI Training, VR & AR, simulation, etc. With our server, you can install any software you need, add your license, and do whatever you like with your project. These tools above are no exception. Most tools for fluids are computationally expensive. Understanding that, we have different config and package compatible with them, from CPU to single GPU, dual and even multi-GPUs.
Moreover, iRender has many more to offer.
- Free and convenient transfering tool: iRender offers a powerful and free file transfer tool: Gpuhub Sync. With fast file transfer speed, large data capacity, and completely free. You can transfer all the necessary data into our Gpuhub Sync tool at any time without connecting to the server. The data will be automatically synchronized in the Z drive inside the server, ready for you to use.
- Flexible price: You can always save from 10% to 40% with our Fixed Rental feature. For those who’s in need of server more than a day, or have extremely large project, we advise to choose daily/ weekly/monthly rental package. The discount is attractive (from 10 to 40% depends on your package), and you don’t have to worry about over-charging if you forget to shutdown the server. In this July, we offer a discounted price for GPU server 3 and other servers, users will take advantage of these to level up their renders.

- Real human 24/7 support service, helping you to handle the problem quickly, effectively, saving you both time and money.
In addition, we always have attractive promotions to thank our beloved customers. SPECIAL OFFER for this July: Get 20% BONUS for all newly registered users.
If you have any questions, please do not hesitate to reach us via Whatsapp: +(84) 916017116. Register an ACCOUNT today and get FREE COUPON to experience our service. Or contact us via WhatsApp: +(84) 916017116 for advice and support.
Thank you & Happy Rendering!
Source: renderguide.com
Related Posts
The latest creative news from Daz3d Cloud Rendering, Octane Cloud Rendering, V-Ray Cloud Rendering , 3D VFX Plugins & Cloud Rendering.