Dive into Redshift Camera types for Maya
Besides Maya camera settings, Redshift also provide its own camera to better support you to create perspective renderings of the 3D model from particular points of view. In this article, let’s dive into Redshift camera types for Maya with iRender.
4 extra Redshift camera types for Maya
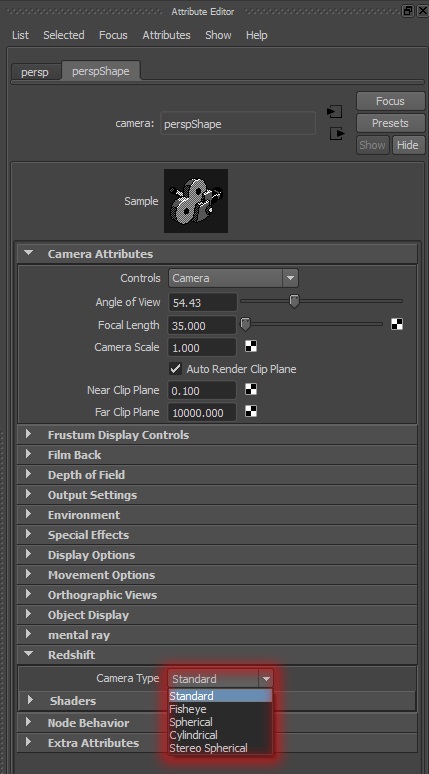
In Redshift for Maya, you have standard camera and 4 extra camera types, which are Fisheye, Spherical, Cylindrical and Stereo Spherical.
To change or create those types of camera, you go to the camera’s Redshift attributes and use the Camera Type attribute.
1. Fisheye camera
Fisheye lenses can capture ultra-wide-angle images that are circularly distorted. In some cases, the distortion can be aesthetically desirable.
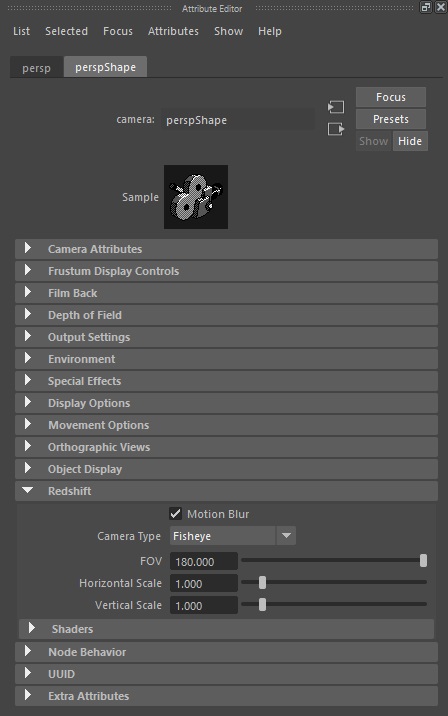
The horizontal and vertical scales will allow ‘zooming into’ the distorted image. This get rid of the black area surrounding the image.
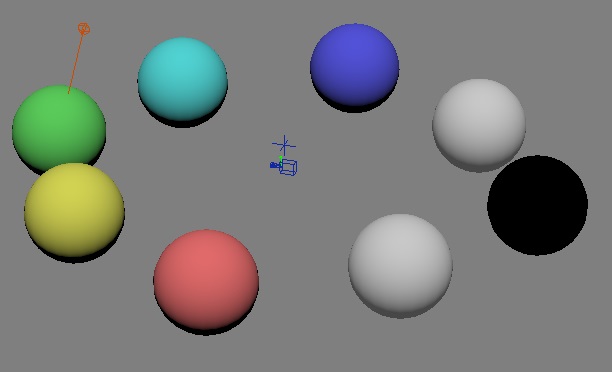
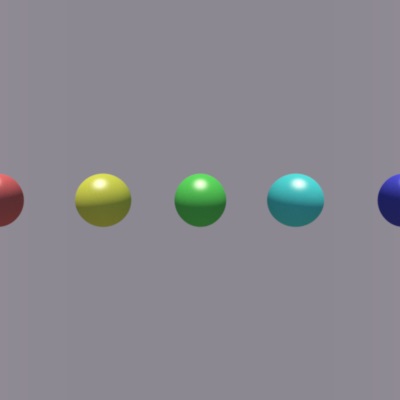
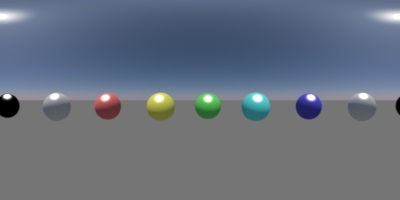
To imagine the effect of the fisheye camera (and all the other types), let’s see the following reference scene. The camera is pointing towards the green sphere. The red sphere is 90 degrees to the left of the camera and the blue sphere is 90 degrees to the right. The black sphere is exactly behind the camera.
Here demonstrating the fisheye camera with an Angle of View / FOV (Field Of View) of 180 degrees. This captures the entire front hemisphere of the camera.
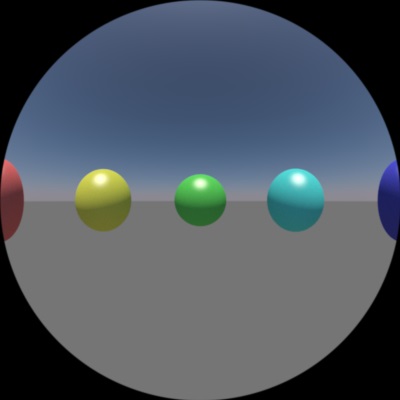
If you don’t want the surrounding black areas, just use the horizontal/vertical scales to zoom into the image and get rid of them. In this case, a scale of 1.41 is used (the square root of two) which is the scale needed to fit the image exactly into the circle.

2. Spherical Camera
A spherical camera can capture a 360-degree panorama. The produced images are called ‘latitude-longitude’ images (or ‘latlong’) and can be used as environment maps or as a dome light texture.
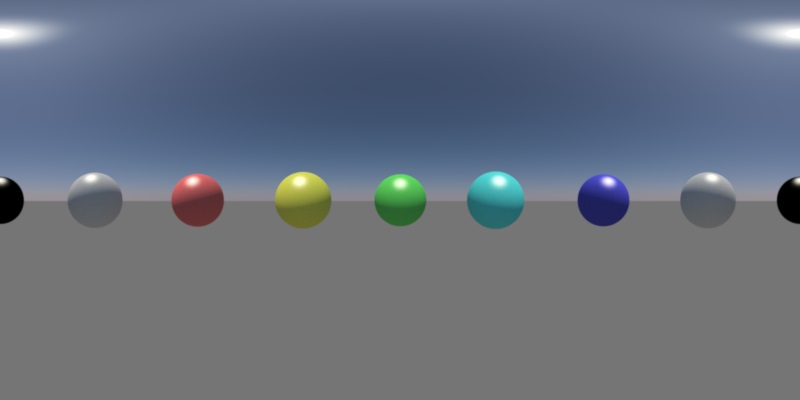
The spherical camera has no options of its own. The main camera’s FOV is ignored but its aspect ratio is used to allow for fine-tuning the effect. A spherical camera always captures an image with 360 degrees of horizontal FOV and 180 degrees of vertical FOV. For this reason, it is recommended that the rendered image size has a 2:1 aspect ratio. The recommended camera aspect ratio is 1.0.
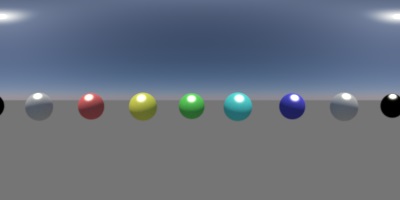
To imagine the effect of the spherical camera, the reference scene is used just like fisheye camera.
Below is the demonstration of the spherical camera on 2:1 pixel ratio image. It captures a full 360 degree panorama around the camera.
3. Cylindrical Camera
The cylindrical camera is similar to the spherical camera except it can capture a user-defined horizontal and vertical FOV range.
When using a cylindrical camera, the main camera’s FOV is ignored but its aspect ratio can be used to fine-tune the effect.
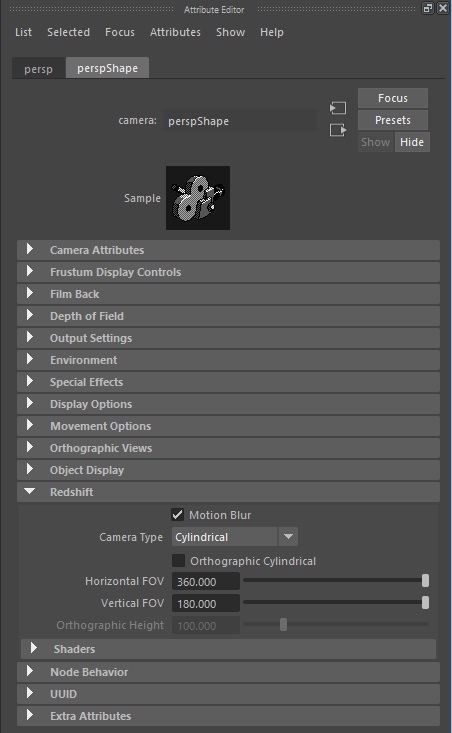
The cylindrical camera has its own horizontal and vertical FOV settings (Angle of View for X and Y). Furthermore, it can optionally use an orthographic projection for the vertical axis. In that case, the vertical angle is replaced by an orthographic height. The function of this orthographic height is the same as with a regular orthographic camera.
The reference scene is used one more time to better demonstrate the effect of the cylindrical camera.
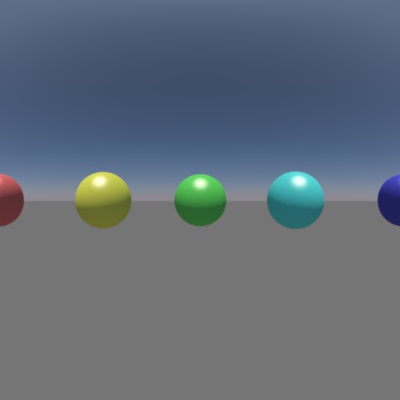
Below is a cylindrical camera with a 180 degree FOV on both the vertical and horizontal axis. Because the horizontal and vertical FOVs are the same, a 1:1 aspect ratio for this image is chosen. As it can be seen, the image is the same as the middle part of the spherical camera image shown in the previous section. If 360 degrees for the horizontal FOV and 180 degrees for the vertical had been used, the resulting image would be identical to the one of the spherical camera. In that case, a 2:1 aspect ratio should have been selected.
Picture below demonstrates the effect when the orthographic projection is enabled. The orthographic height was set to 60 units.
You can notice the background color is different. The reason for that is because the camera is now orthographic on the vertical axis. It’s essentially ‘zooming in’ on the physical’s sky’s horizon.
4. Stereo Spherical Camera
The stereo spherical camera is primarily useful for Virtual Reality (VR) applications. It can render stereoscopic panoramas in various different modes.
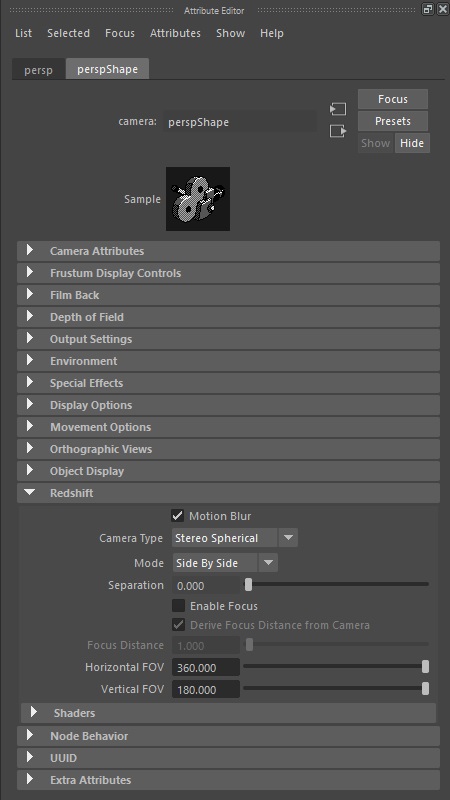
The stereo spherical camera’s Mode setting determines the image layout. “Side by side” means that the left and right eyes are going to be placed horizontally next to each other. “Top bottom” means the images will be placed on top of each other and, finally, you can choose to render the left and right eyes separately. For the separate left/right eye rendering, you’d need to configure your 3d app to render in two passes to get both images.
The stereo spherical camera also has an eye separation setting which determines the distance between the left and right eye. The separation value is in scene units so it depends on your scene’s representation of a unit (meters, centimeters, inches, etc).
By default, the stereo spherical ‘eyes’ look straight ahead. The focus distance setting allows the eyes to slightly rotate and focus at a particular distance from the camera’s position.
The stereo spherical camera also has horizontal and vertical FOV settings.
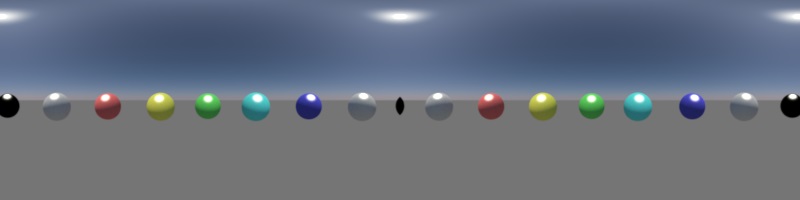
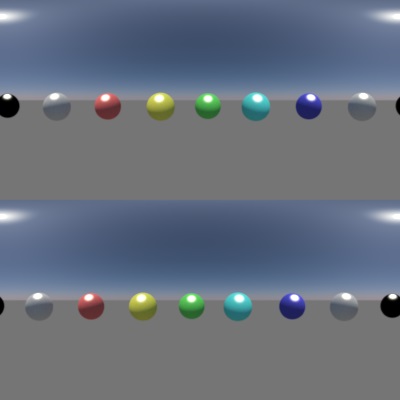
Use the reference scene again to demonstrate the effect of the stereo spherical camera.
Below pictures show the effect of a stereo spherical camera using the different modes.
For these examples, you can use the default 360 degree horizontal and 180 degree vertical FOV settings. The “Side By Side” image was rendered with a 4:1 aspect ratio. The “Top Bottom” with a 1:1 aspect and the “Left Only” and “Right Only” images with a 2:1 aspect ratios.
These choices were made to produce non-squashed results. Please note that some VR applications might expect different image aspect ratios!
If the horizontal and vertical FOVs were adjusted, the aspect rations should also be adjusted. For example, if you use a 180 degree horizontal FOV (i.e. the “front hemisphere”), the aspect ratios should be 2:1, 1:2 and 1:1 for “side by side”, top bottom” and “left/right only” respectively.
Working on a Redshift customized pipeline with iRender’s remote machines
iRender is proud to introduce our remote machine, from single to multiple RTX4090. We provide you supercomputers, with high-end specifications like AMD Ryzen™ Threadripper™ PRO 3955WX @ 3.9 – 4.2GHz or AMD Ryzen™ Threadripper™ PRO 5975WX @ 3.6 – 4.5GHz, RAM 256GB, Storage NVMe SSD 2TB. Most importantly, we always update to the latest GPU technology, with 1/2/4/6/8 x RTX3090/RTX4090.
You are free to install any 3d software or rendering engines, including Redshift and Maya on our remote servers, add your own license then render or modify your project by yourself.
Right now, our users are free to use one Redshift license on our remote machine. You just need to install it and activate it via our license app. Regarding Maya license, please transfer your own to our remote machine.
Check out some of our Redshift tests on our server RTX 4090/3090:

iRender also provides you more services. Free transferring tool named iRender drive for macOS or Linux users. For Windows users, we recommend using our all-in-one application iRender GPU to work, and you don’t need to come to our website. Our price is flexible with hourly rental which has a pay-as-you-go basis, daily/ weekly/ monthly subscription with discount from 10-20%. Plus, you have 24/7 support service via livechat with real humans who will support you whenever you encounter an issue.
Register an account today to experience our service and enjoy a very big promotion 100% bonus for new user’s first top up. Or contact us via WhatsApp: (+84) 916806116 for advice and support.
Thank you & Happy Rendering!
Source: help.maxon.net

Related Posts
The latest creative news from Redshift Cloud Rendering, Maya Cloud Rendering