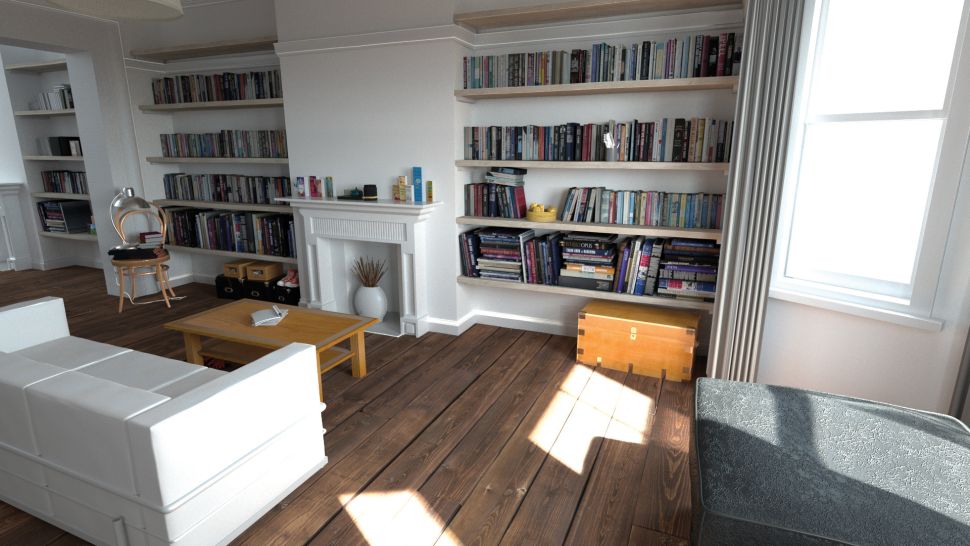
How to render a photorealistic room scene with Redshift
Want to know how to create a realistic 3D architectural fly-through but aren’t sure where to focus your efforts within the pipeline? If you know the basics of 3D art, this article is for you. Let’s figure how David Throssell created and render a photorealistic room scene with Redshift.
1. Define your aims

The first question that needs to be asked is who the project is for. You need to have a really good idea of who the audience is so you can be clear about how you want it to look. In this case, the project is to be shown to a TV executive and played off a laptop, and the idea is that it looks like it could have been shot on a smartphone.
2. Find references
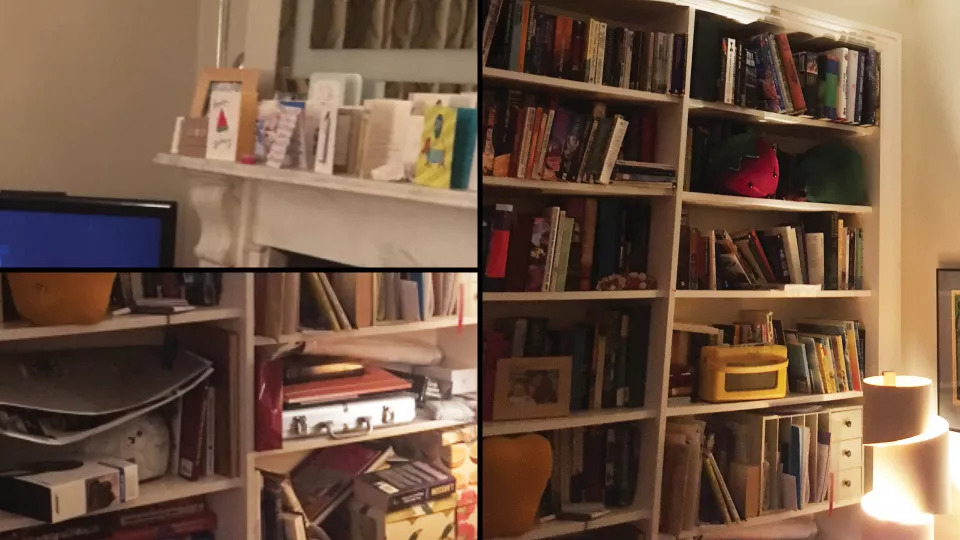
Once you have a concept in mind, go forth to the internet and find as many images as you can as reference. It is so much easier if you have something to hand to provide you with ideas, or to show you exactly what something looks like in indoor lighting.
3. Model simple geometry
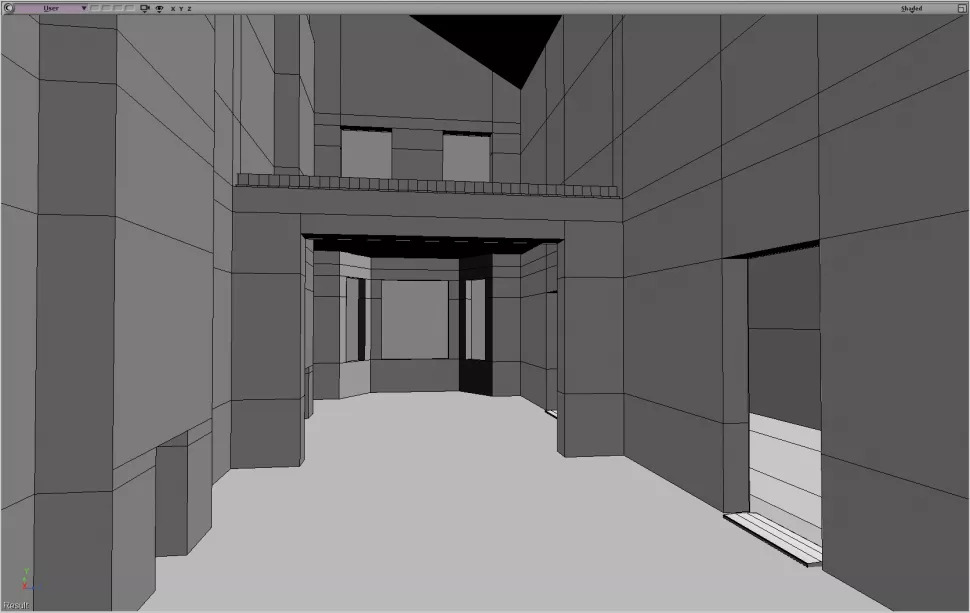
Get a primitive cube and start to model the base geometry of the architecture. In this case, it is a traditional two room ground floor North London house. Decide where the windows should be and make sure you’ve got all the major bits of architecture in place. If you’re having internal lighting, then get stand ins for those, too.
4. Start lighting
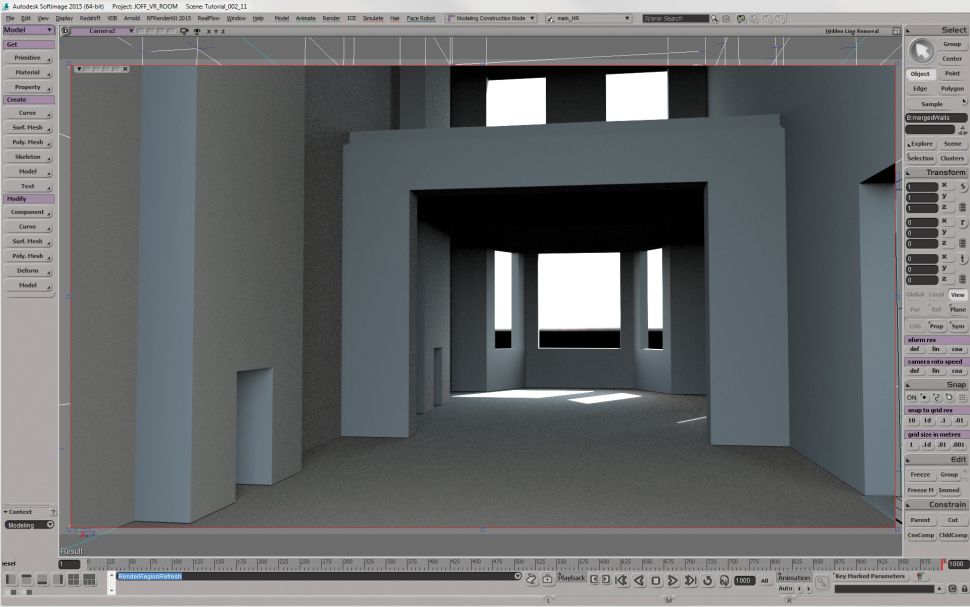
Add a white diffuse material to your walls and set up your lighting. In the example, this scene doesn’t have any additional interior lighting as it is supposed to look ‘off your phone’ real and not ‘shot like a movie’ real. So he started with a HDR sky dome and a small area light for the sun to achieve sharp sun shadows.
5. Set up global illumination
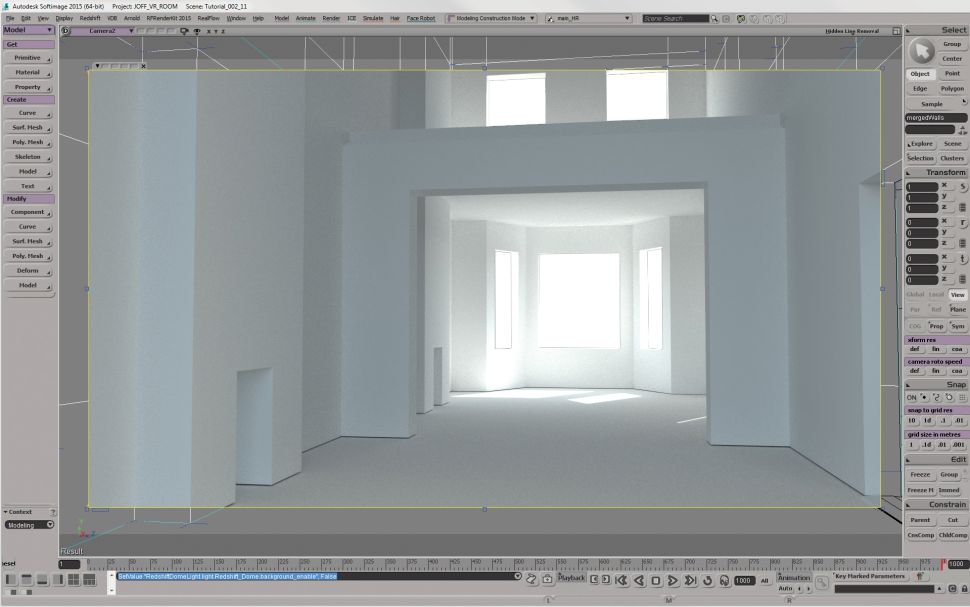
You’re not going to get anywhere without being able to bounce light in the room. In the past, you either had to simulate each area of light falling into the room, or turn on global illumination and sit back for a long wait. Now you can switch on Redshift Brute-Force GI Engine and get good results in a fraction of the time.
6. Model furniture
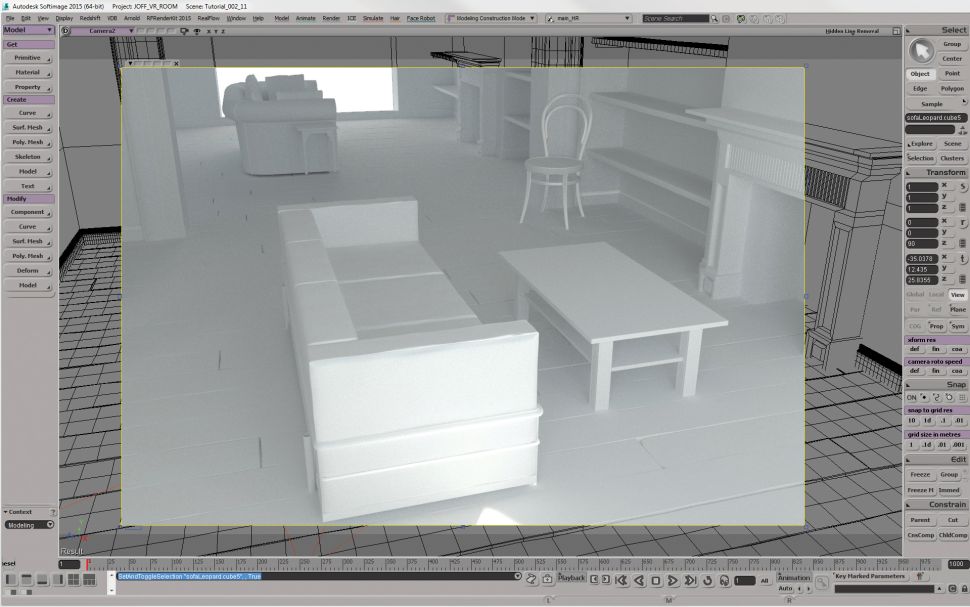
You need some furniture, so head to your web-based CG model shop, or make them by hand. Just create the major components that you know you’re going to need. Don’t go mad with detail and texturing just yet, but if you do build anything properly, make sure there are no problems with polygons flickering away.
7. Set up camera moves
If you want to be walking around the room, set up a simple camera pan and fly-through at head height with a bit of automatic camera shake. Once again, get references; You should walk about the room with a phone camera to get an idea of what a hand-held camera looks like. Don’t guess if you don’t have to.

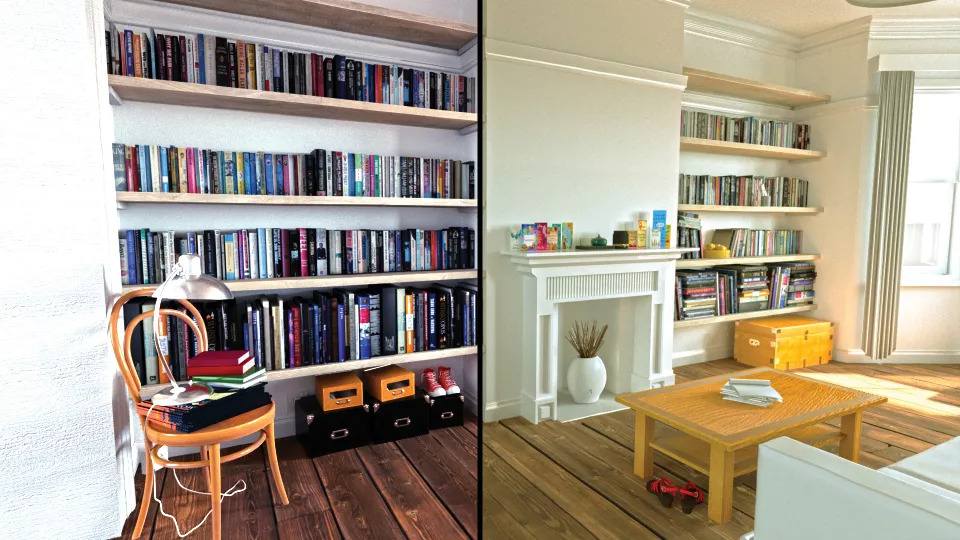
8. Add detail to the architecture
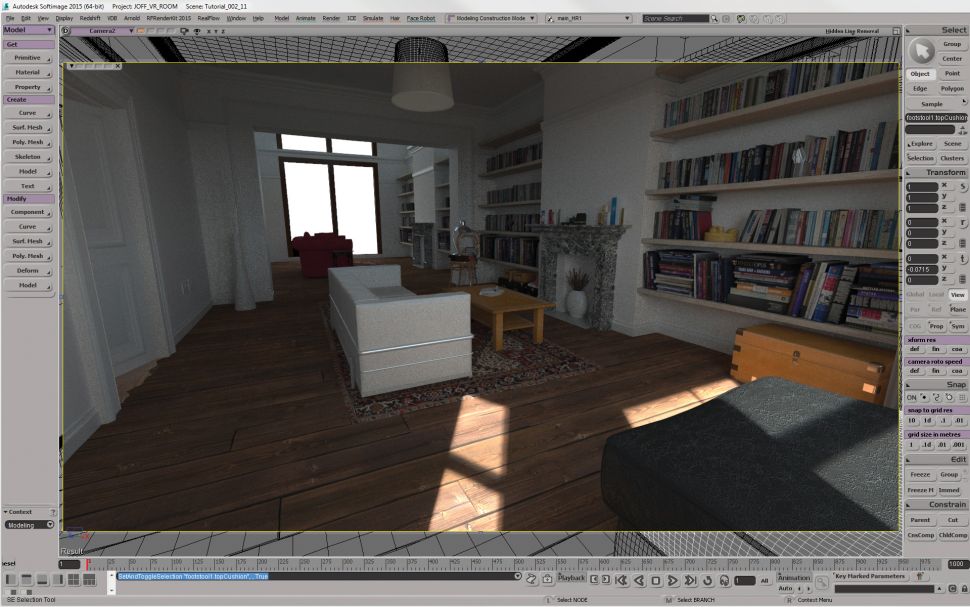
Once you’re happy with the way your camera is moving, you can start adding detail and textures to the architecture where you’re going to see it. Use those references to tell you where to add those unexpected bits of detail that make it real. Kiss your weekend goodbye and keep adding detail. Use your reference to see what should be lying under the table. Texture the spine of every book, add rounded edges to everything. You might not see it, but you’ll know the detail is there. Keep going till you run out of time, money or willpower.
9. Check references and relight
So all is looking good. Check your reference again and make sure the colour balance looks convincing. Think about exposure. If you are shooting on a phone, it will vary the exposure as it looks into the light. Do you want to simulate that here, or in the grade afterwards? Render some low-res tests.
10. Decide on a global illumination method
Redshift’s default GI is a brute force method that (fortunately) only has a couple of main parameters. If your render is noisy, as it likely will be – crank up the number of samples until it becomes smooth. However, this can take a very long time if you have big smooth white walls. Your best bet to avoid waiting ages is to invest in a noise reduction plug-in such as Neat Video.
The other GI option is the number of GI bounces. You may be tempted to think that ‘more is better’, but be warned that a lot of GI bounces can flatten out your image and lose contrast as energy is bounced through the scene. My advice is to make yourself comfortable and keep testing.

The other main GI method is Irradiance point clouds and caching. Switch your primary and secondary GI to this, and the results will look a lot smoother with no grain. This method is great for large smooth areas of colour – a lot of the calculations are pre-processed so it can be faster for grain-free results. The issue with irradiance point clouds is potential blotches in your render and you can sometimes see artefacts on fast-moving camera shots. And yes, you’ll have to render it out to realise you have issues, and then slink back to Brute Force and its longer render times.
11. Start compositing
The aim of this project is to see what could be achieved in a single pass. But with Redshift, you are able to split up the render into its various components, so you can render out passes and then composite, adding subtle grades and effects as you do so.

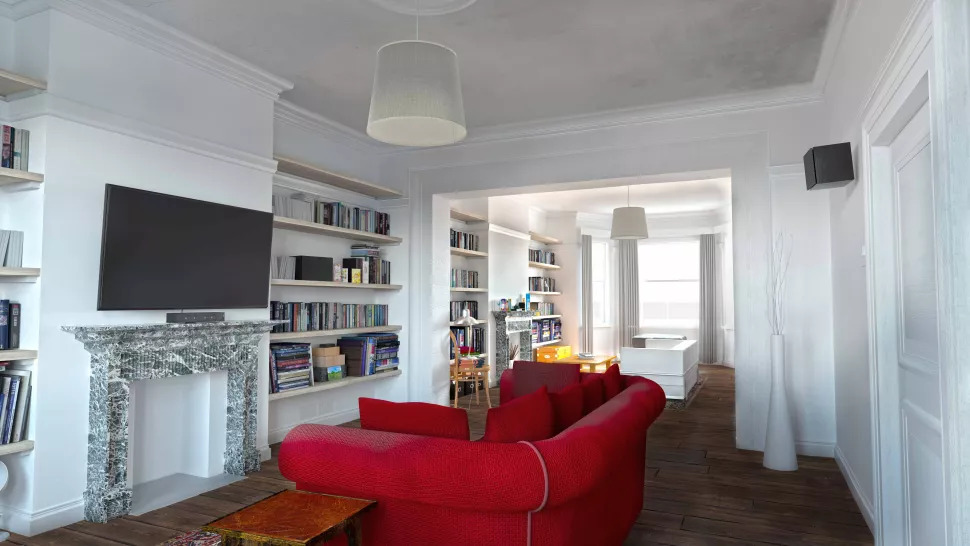
12. Adjust grading
Your final render a photorealistic room should be a thing of beautiful reality, and the last thing to do is adjust the grade and add any effects. You should have thought long and hard about your digital cinematography so changes should be minor, but this is where you can push that big filmic grade, or in our case start to desaturate and get a low-tech look. In this scene, don’t need to add grain, video streaks or the appearance of a rolling shutter because we are trying to replicate a phone camera. Just a few tweaks on the levels and you’re done.
Your final render a photorealistic room should be a thing of beautiful reality, and the last thing to do is adjust the grade and add any effects. You should have thought long and hard about your digital cinematography so changes should be minor, but this is where you can push that big filmic grade, or in our case start to desaturate and get a low-tech look. In this scene, don’t need to add grain, video streaks or the appearance of a rolling shutter because we are trying to replicate a phone camera. Just a few tweaks on the levels and you’re done.
Render a photorealistic room or your scenes with Redshift on iRender
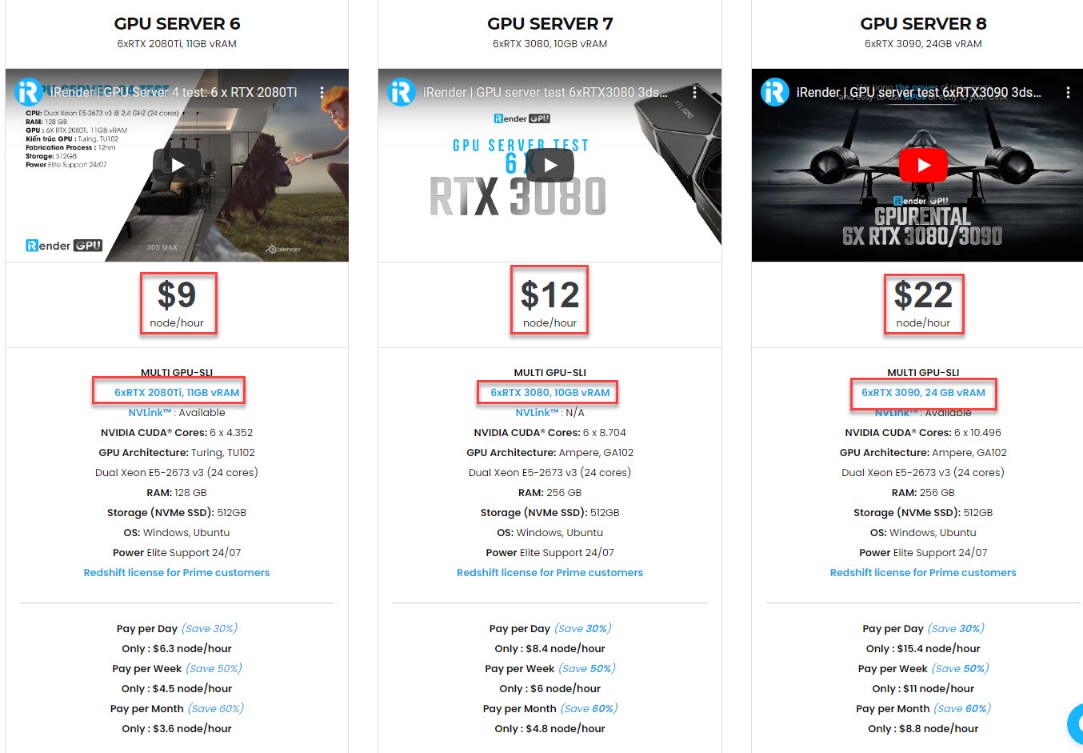
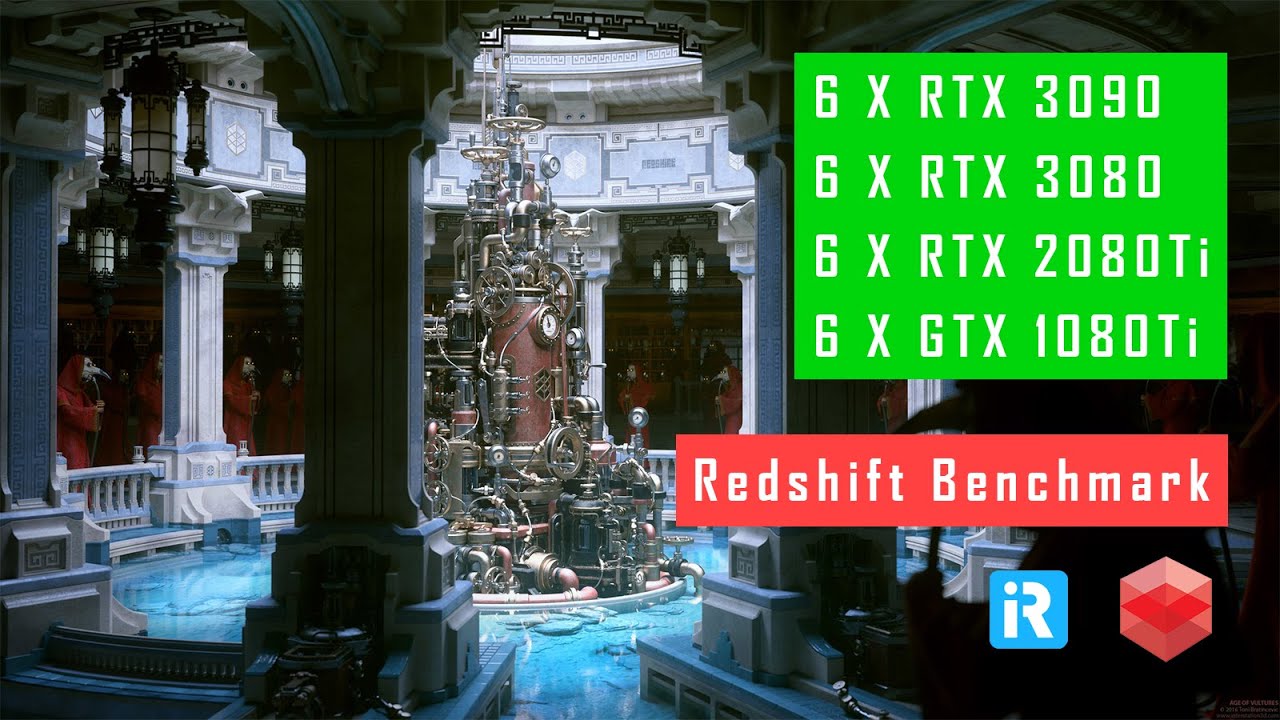
One great suggestion for you if you are looking for a Cloud Rendering Service to boost your project render time is go with us. Currently, iRender provides 3 types of multi-GPU-servers (6x GeForce RTX 2080 Ti / 6x RTX 3080/ 6x RTX 3090) which are the most effective for Redshift rendering in multi GPU cards coming with the following configuration specifications:
The servers’ configuration of iRender not only surpasses the minimum hardware requirements of Redshift, but it also exceeds the recommended requirements that Redshift published:
- Redshift supports multi GPUs on one machine, increasing rendering performance multiple times. This is one of the main reasons we recommend these 4 packges for designers to have flexible choice based on their budget and time.
- This package uses Nvidia GPU cards with a VRAM capacity minimum from 11GB up to 24 GB, which completely exceeds the Redshift recommendation of an Nvidia GPU with CUDA compute capabilities 7.0 and 8GB VRAM capacity or higher.
- A RAM capacity of 128GB (server 5, 6) and 256 GB (server 7,8) is many times higher than recommended.
- The Dual Xeon E5-2673 v3processor has also completely met the CPU requirement from Redshift. Although Redshift mainly depends on GPU performance, some processing stages that occur during post-processing also depend on the performance of CPU, disk or network drive. These include extracting mesh data from your 3D application, loading textures from disk, and preparing scene files for GPU. Depending on the complexity of each scene file, these processing stages can take a considerable amount of time, and as a result, lower-end processors can bottleneck overall rendering performance. Thus, CPU is also considered as one of the criteria that cannot be ignored.
- In terms of operating system, iRender currently provides services with two operating systems: 64-bit Windows 10and 64-bit distribution Ubuntu 18.04.5 LTS with glibc 2.27, ensuring the recommended operating system that Redshift offers.
Moreover, iRender provides the Redshift license to Prime customers. Users who recharge enough points to become Prime customers will be able to use the Redshift license without usage or maintenance costs. You can fully read the manual and benefits of using the Redshift license provided by iRender here.

To sum up, using redshift to render a photorealistic room scene and your projects is fast, using iRender’s 6-card GPU servers is definitely a lot faster. These servers are the ultimate online solution for rendering allowing up to multiple, powerful 6x GeForce RTX 2080 Ti / 6x RTX 3080/ 6x RTX 3090 GPU. These servers are the premier solutions to maximize your advantage when you need it most – to win the project, to meet the impossible deadline, or pivot your visual direction with unparalleled speed. Depending on your budget and your time, let’s pick one server to experience a new level of rendering. Register an account RIGHT HERE to get a free coupon to test our service right away!
iRender – Happy rendering!
Reference source: Creativebloq.com
Related Posts
The latest creative news from Redshift Cloud Rendering, Cinema 4D Cloud Rendering , 3D VFX Plugins & Cloud Rendering.