How to render hair with Ornatrix for Redshift?
Ornatrix is a powerful plugin for generating dynamic hair, fur and feathers, supported by many famous 3D software and renderers, including Redshift. If you use Ornatrix with Redshift, you don’t need to convert hair to a mesh or curves and can feed it directly to Redshift for rendering. This saves time and memory and produces better looking results, especially when used together with Redshift’s own hair shader. In this article, let’s figure out some steps to render hair with Ornatrix for Redshift.
Shading Ornatrix Hair with Redshift
Per-Strand Color
You can create complex hair shaders adding color and texture variations, because the UVs and Curved IDs will be exported automaticaly from Ornatrix to Redshift. You can also use the Hair Random Color utility texture to randomize a color or texture map across all hair strands using the curve ID data provided by Ornatrix.
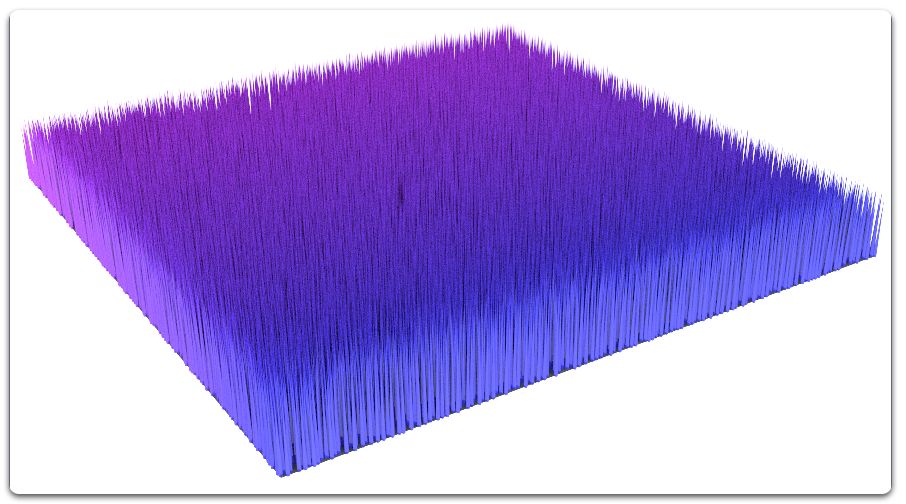
If you just press render without utility, the result will be like this:
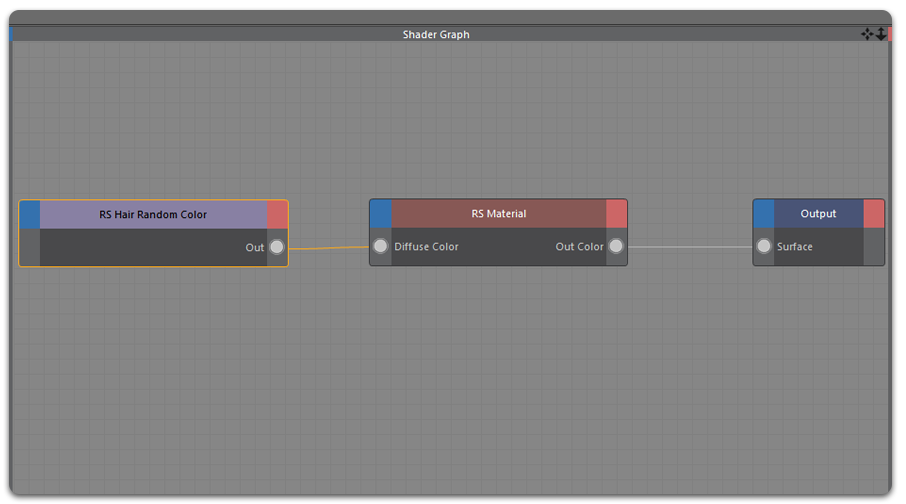
To add color variations to the hair, let’s try connecting the “Hair Random Color” utility texture to the Diffuse Color input of the hair shader:
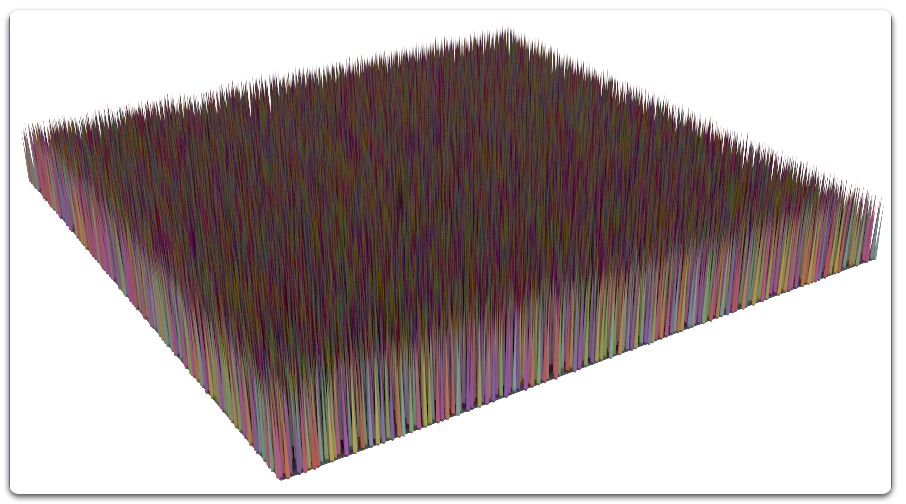
Then you play with the Hue, Saturation and Value amount, you will get this effect:
Hair Position
You can use Hair Position utility to get the positions along the hair strands. This will enable you to texture the hair from root to tip, adding gradients and other effects.
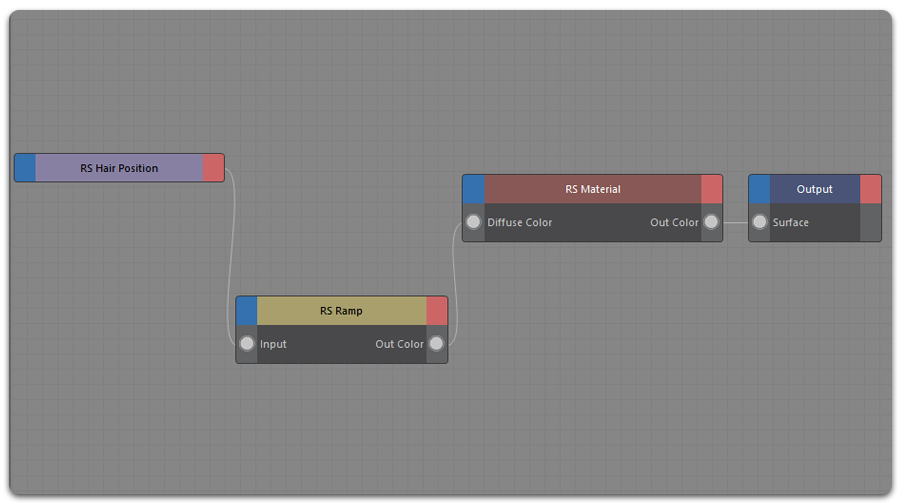
You can see these nodes below where we use Redshift Ramp Texture to add a gradient color along the strands. The Hair Position node should be connected to the Uv Coord input of the Ramp Texture node:
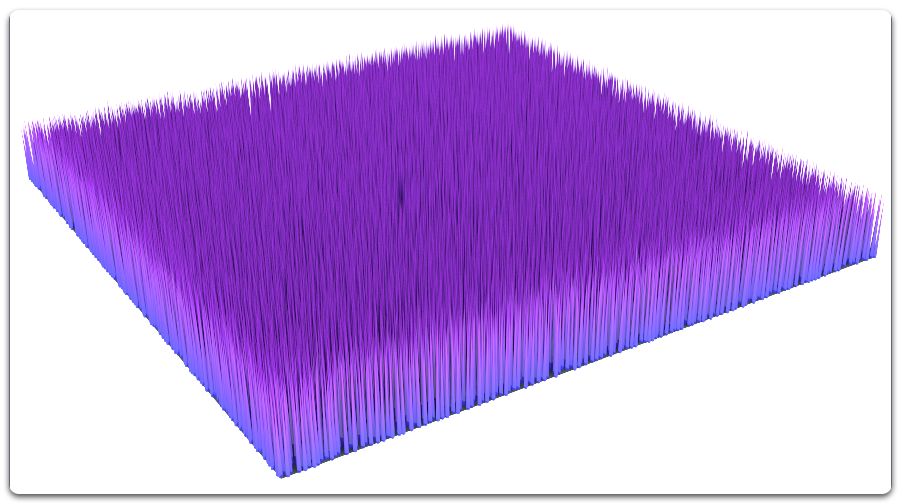
Then you connect the Ramp Texture to the Diffuse Color channel of the hair shader or any other input that you would like to control using the ramp texture, you have this result:
Hair Antialiasing
You can reduce alias, noise and artifacts issues by using the Hair Min pixel width option. It will help you thicken and add some transparency to the hair strands at render time.
Come to Render Settings > Optimization tab > expand the Hair Min pixel width section > check the “Enable” checkbox to activate this option. You should remember to select Redshift as current rendering engine.
Shading Feathers
The Mesh From Strands operator can generate feathers, and you can texture them easily. You can generate the resulting meshes with as many UV sets as you need for texture layering. In the following example we are going to explore how Mesh From Strands and different UV sets can be used for feather texturing.
Generating feather meshes
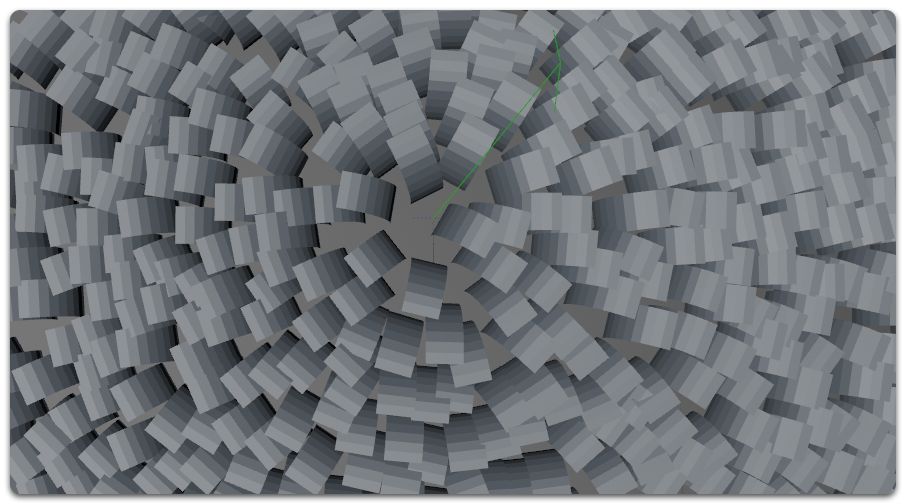
You can add Mesh From Strands at the top level of your hair stack. It will convert your hairs to mesh but every operator under Mesh From Strands still affects the meshes. It’s also possible to add a Change Width to determine the shape of the feathers using the ramp curve. But since we are going to use an alpha map to determine the shape of the feathers, we don’t have to draw a custom shape, just use the Width amount to increase the width of the planes as you desire:
Generating UVs
We need at least two channels of UVs for proper texturing: One UV channel where the feathers inherit the UVs from the distribution mesh, which helps us texture the feathers with the same texture as the distribution mesh. One Per-Strand UV channel to texture the polygon planes from root to tip, which helps us apply the alpha feather texture on a Per-Strand basis.
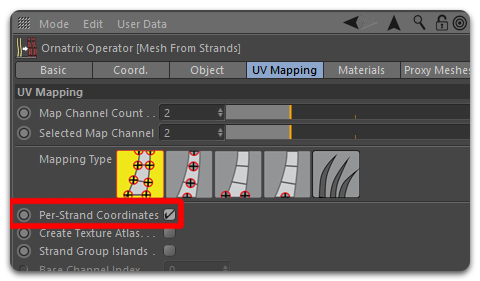
To increase UV channel to two, go back to Mesh From Strands. In the UV Mapping tab, increase the Map Channel Count to 2:
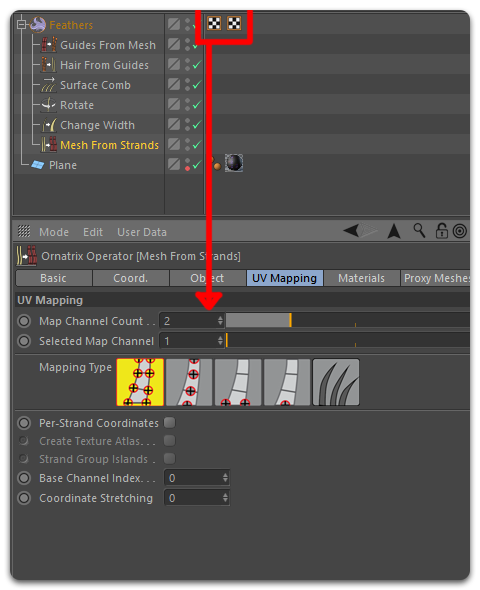
The hair object now has two UVW tags. You use the Selected Map Channel parameter to select between the two channels. The Mapping Type of the first channel is channel to One UV at each vertex by default, allowing the feathers to inherit the UVs from the distribution mesh. If you use Selected Map Channel to select the second channel, leave the Mapping Type of this channel as it is but turn on the Per-Strand Coordinates checkbox.
Linking the textures to the UVs
By now the UVs are ready, we proceed to link each channel to a different texture. You can follow this instructions:
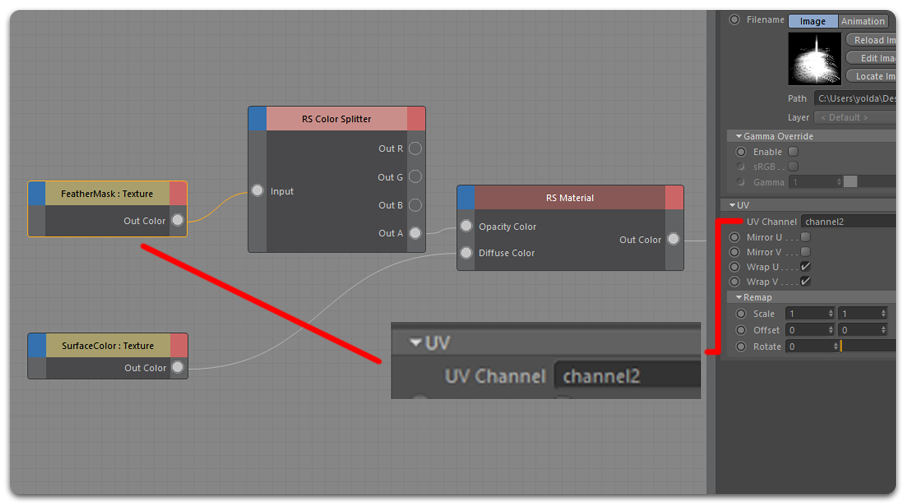
Add a Redshift material to the hair object and open it with the Redshift Shader Graph. We are going to link one texture to each channel: A feather alpha map and a texture color map. Add two texture nodes and load any alpha map for a feather. In this case the alpha from the texture was extracted using a RS Color Splitter. Finally, you go to the UV section of the texture node of the alpha map and write the name of the Per-Strand UV channel created previously, in this case is the channel2:
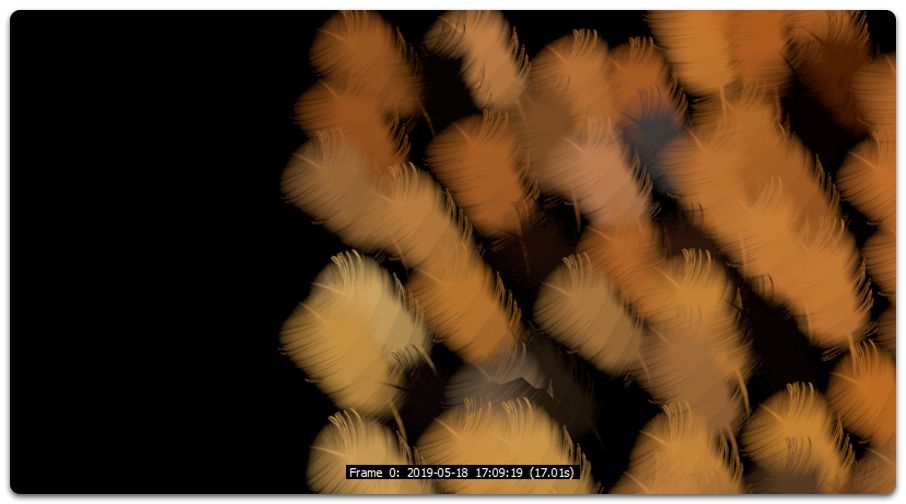
You can do the same when connecting the color texture, but this name you should link it to channel one to get the colors from the distribution mesh. If you launch a render, the result will be like this:
Can you use Ornatrix for Redshift on iRender?
You can definitely use Ornatrix for Redshift on iRender’s remote computers. iRender provides you a high-performance and configurable server system for 3D rendering, AI Training, VR & AR, simulation, etc. We believe that design and creative activities are private and personal that only you artists will know what you want with your animation.
Check out these articles to know why RTX 4090 is still the best graphics card for Redshift rendering: Top GPU for Redshift, Octane and V-Ray in 2023 and Compare RTX 4090 vs RTX 6000 Ada vs RTX A6000 for content creation.
You can create a remote machine, then install Ornatrix and any renderers and 3D software on our remote machine (first time access only), add license, and modify, adjust and render by yourself there.
Let’s see some of Redshift benchmark with on our package RT4090s:


Not only those powerful configuration, iRender also provides you more services. Free transferring tool named iRender drive for macOS or Linux users. For Windows users, we recommend using our all-in-one application iRender GPU to work, and you don’t need to come to our website. Our price is flexible with hourly rental which has pay-as-you-go basis, daily/ weekly/ monthly subscription with discount from 10-20%. Plus, you have 24/7 support service with real human who will support you whenever you encounter an issue.
Especially, if you use Cinema 4D and Redshift, now you can access our remote servers without having to install the software and renderer. We have an option to choose pre-installed Cinema 4D and Redshift, and provide you one combo license free.
Register an account today to experience our service and enjoy a very big promotion 100% bonus for new user’s first top up. Or contact us via WhatsApp: (+84) 916806116 for advice and support.
Thank you & Happy Rendering!
Source and images: ephere.com
Related Posts
The latest creative news from Redshift Cloud Rendering, Cinema 4D Cloud Rendering