How to Retopologize Human Faces Like a Pro with Daz 3D and Blender
You’ve just finished sculpting your latest 3D character and you couldn’t be happier about how it turned out. Maybe it’s a suave-looking human or even an alien creature completely out of this world. Regardless, there is a good chance that all the perfect detail contained within your model’s face amounts to a very high polygon count.
While Daz Studio can generally handle higher poly counts better than other programs, in order to make your model more easily accessible in most dynamic settings, such as video games and animation, retopologizing is crucial. If you have ever wondered how to retopologize human faces like a pro, stick around as we go over how it works in Blender.
Why Is Retopology Necessary?
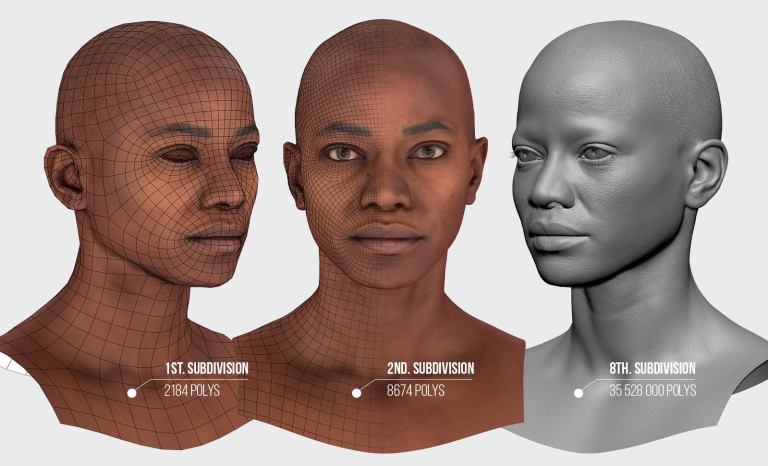
Polygon count is something frequently referenced in 3D modeling and lies at the root of why you may need to retopologize human faces. If you aren’t familiar with the process here is a brief overview.
At any given time while viewing or interacting with a 3D model, your computer is processing numerous calculations which allow a flat image on your computer screen to appear accurately in three dimensions. Depending on the power of the computer you are using, the CPU/GPU is eventually going to reach a bottlenecking point. Typically, how much the computer can handle correlates with how many polygons are being rendered at any given moment.
When it comes to 3D modeling, a polygon is a straight-sided shape with three or more sides defined by three-dimensional points called vertices. A single model, depending on the detail and intricacy of its design could have any number of these polygons. In short, the more polygons present, the more calculation the computer has to make to handle them all. Often, polygons accumulate as we seek to make models that are as detailed and lifelike as possible. Fortunately, there are many ways to work around this. Often, a detailed texture map, normal, map, occlusion map, etc. can make a basic, low-poly mesh look amazingly detailed.
Taking the time to understand and work with hardware limitations can be crucial in some projects. Any simulation like a video game could be made unplayable if the poly count becomes too high. While animation is pre-done and then rendered, it could take hours upon hours of wasted time and energy to render even a few seconds of animation in a detailed scene. Creating a low-poly, yet detailed model isn’t always easy. That is why many artists prefer to model without worrying about poly count first, and then add retopology into their workflow.
How to retopologize human faces like a pro?
Helpful Plugins And Modifiers In Blender
Incorporating retopology into your workflow is possible within Blender. As a free, open-source program, Blender is a great choice for any creator. Check out these modifiers and plugins available within Blender, which together will allow you to retopologize human faces like a pro.
RetopoFlow3 – This plugin was highly anticipated in 2020 and very well received. While Blender is open source and free, RetopoFlow3 is a paid plugin, which you can find here. Don’t let the price point immediately deter you, however, because this plugin is extremely powerful. If you are using an earlier version of Blender, you may be able to use earlier free versions of RetopoFlow. This plugin makes it extremely easy to retopologize a mesh, as it will smartly and accurately create entire loops of contours, poly strips, grid meshes with single strokes, and more. This plugin makes retopologizing as simple as selecting a tool then clicking on the original mesh. The new, cleaner typology will automatically mold and cling to the mesh allowing you to vastly lower polygon count without sacrificing quality and detail.
Built-In Blender Features (2.8)
If you don’t want to go a paid route, that is totally understandable. The good news is there are strategies you can use within Blender to retopologize. While this may take a little more hands-on effort, with practice, using the following modifiers can bring you equal results.
With the high poly model open in Blender 2.8 or higher, and that model made unable to be selected (done via the arrow beside the object in the scene collection on the right), as well as snapping enabled (shift + tab). Make sure that you have it set in the options to snap to Face and enable Project Individual Elements by ticking the box beside it.
Now, if you add a plane in front of the model, when you edit the plane, Blender is going to snap it onto the surface of your high poly model. This is a great way to retopologize using features included in Blender. It will be more time-consuming, but also more hands-on as well!
Shrinkwrap Modifier – you can also enable the shrinkwrap modifier to help you more easily snap the new polygons you create to the surface of the high-res model you are retopologizing. Make sure to add the high poly model as the Target of the modifier, so Blender knows what surface to shrinkwrap to. This is essentially another method to achieve the snapping effect referenced above. Using both at the same time is totally fine as well.
Mirror Object – this modifier may very well be every Blender artist’s very best friend. The mirror modifier is a powerful tool that mirrors everything you do. This way, as you retopologize the face, or anywhere else on the model, you only have to do it once, assuming the model is perfectly symmetrical. This is a must-have for any retopology workflow using a hands-on approach. Just make sure you check Clipping in the modifiers settings so that your planes don’t “crossover” onto the other side of the model, instead they will just connect together.
With these modifiers and settings set, you are ready to start adding geometry over the higher poly model. Take your time and try to mimic the same shapes and contours, but by using as few polygons as possible!
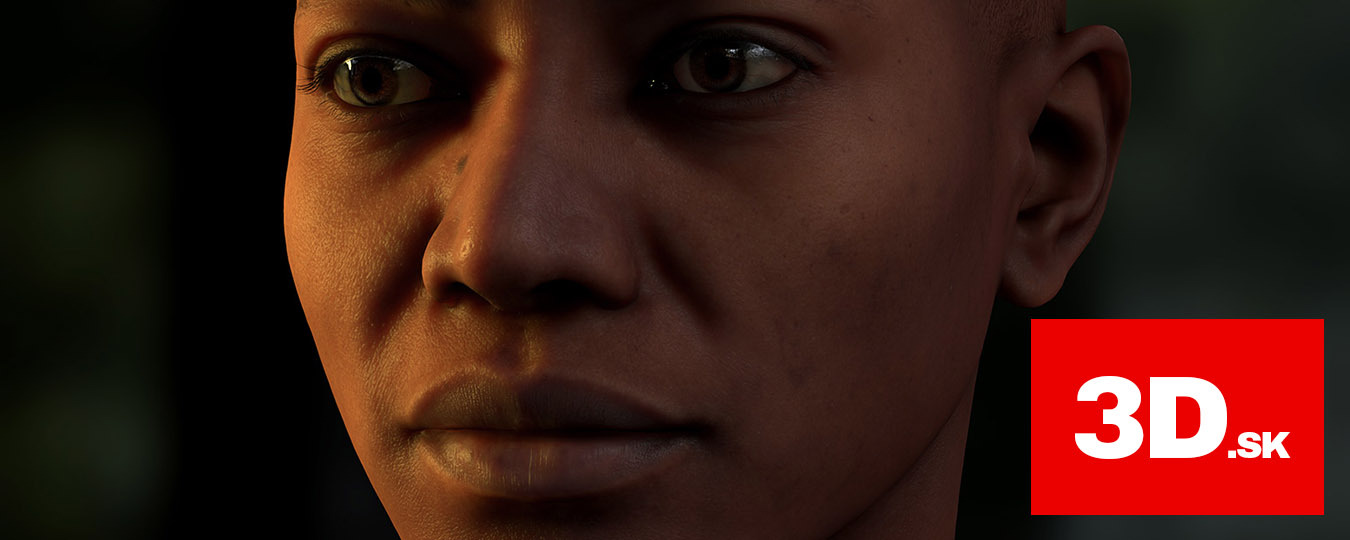
Another solution with 3D.Sk and Daz Studio
If the thought of adding retopology to your pipeline is overwhelming, taking advantage of powerful resources like 3D.sk could be the answer you are looking for. Beside Blender, you won’t find a better resource for pre-made retopologized human faces elsewhere.
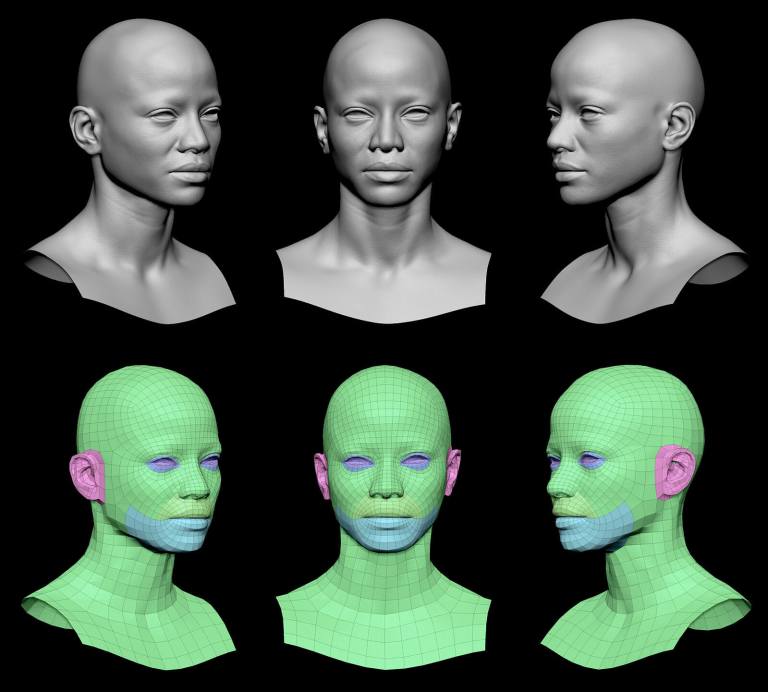
If you aren’t familiar with 3D.sk, they are a massive online resource for 3D artists. They are used regularly by some of the largest animation and video game studios in the world. Their catalog includes assets and tools ranging from reference photos, textures, to photo scanned objects. Their collection of Retopo Head Scans features a variety of male and female heads that feature realistic detail and a professionally retopologized mesh. These head scans are animation or game-ready out of the box, and can be integrated with your own model saving you valuable time and effort.
Daz Studio has partnered with 3D.sk to bring this incredible tool to Daz Community. Don’t hesitate to try out 3D.sk to discover how 3D.sk can help improve your 3D art.
The professional cloud rendering service for Daz 3D and Blender
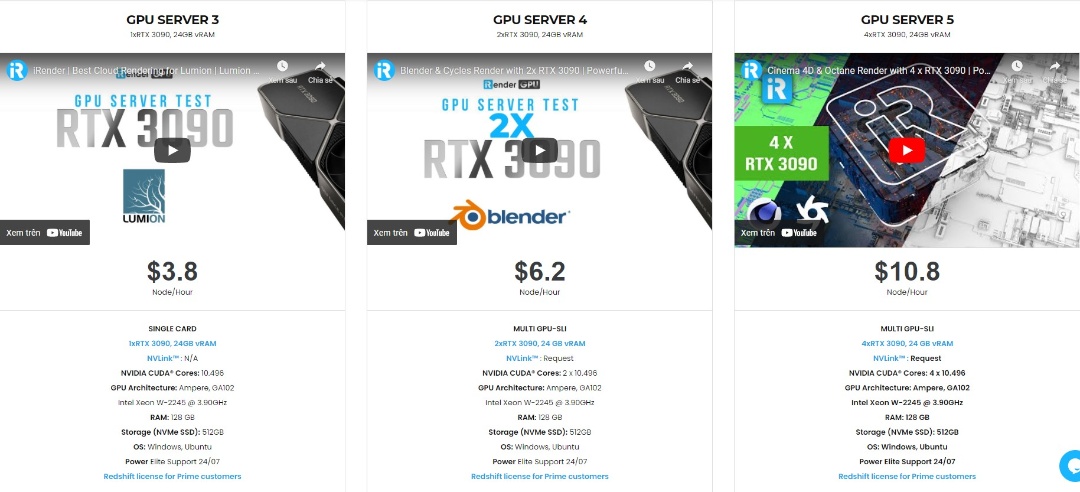
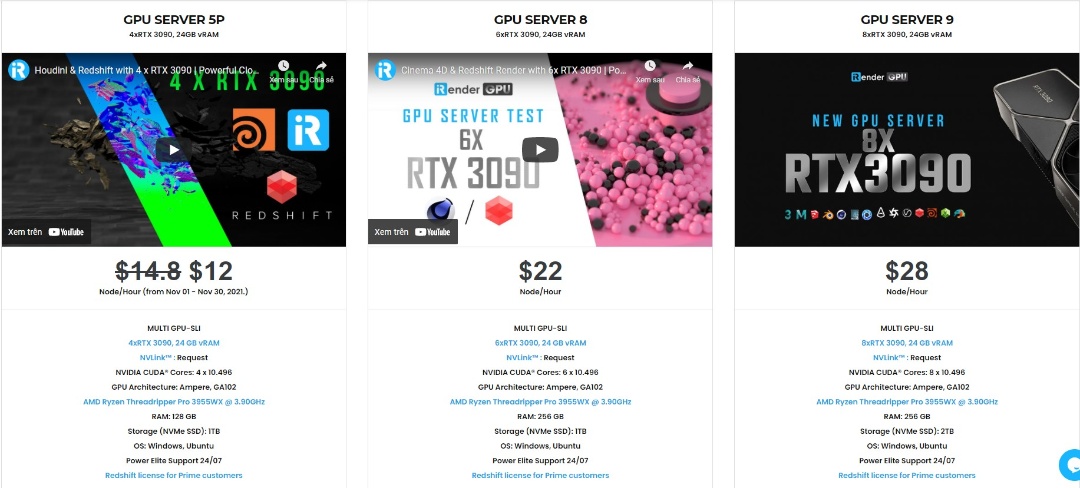
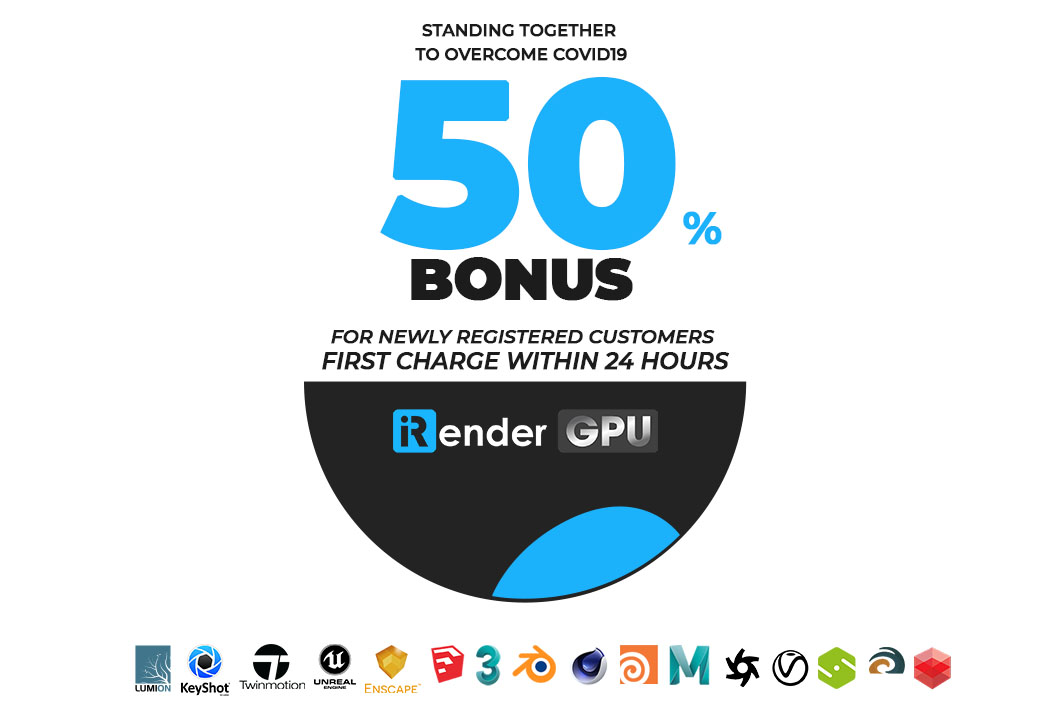
iRender is a GPU-Acceleration Cloud Rendering Service for Multi-GPU Rendering with Powerful Render Nodes: 2/4/6/8x RTX 3090/3080/2080Ti. iRender provides High-performance machines for GPU-based & CPU-based rendering on the Cloud. For Daz 3D and Blender users can leverage the power of single GPU, multi GPUs to speed up your render time. Users can easily choose their machine configuration from recommended system requirements to high-end options.


Why iRender?
Reasonable price (lots of bonus)
You will be charged on a per-minute basis. However, you can always save up to 50% with our Fixed Rental feature. For those who are in need of the server for more than a day, or have extremely large projects, we advise choosing daily/weekly/monthly or even yearly rental packages. The discount is attractive (15% for daily packages, 30% for weekly and monthly packages, 40% for yearly packages).
Real human 24/7 support
Our support is always online 24/7, helping you to handle the problem quickly, effectively, saving you both time and money.
Conclusion
If you have any questions, please do not hesitate to reach us via Whatsapp: +(84) 972755742. Register an ACCOUNT today and get FREE COUPON to experience our service. Or contact us via WhatsApp: +(84) 972755742 for advice and support.
iRender – Happy rendering
Source & pictures: Daz 3D blog
Related Posts
The latest creative news from Daz3d Cloud Rendering, Redshift Cloud Rendering, Nvidia Iray Cloud Rendering , Octane Cloud Rendering, 3D VFX Plugins & Cloud Rendering.