Path Tracing Optimization for Faster Rendering on Octane (part 2)
From the first part, almost all the basics of Path Tracing Optimization for Faster Rendering on Octane are covered including Kernel Settings, Max samples, Diffuse/Specular/ Scattering Depth, CI clamp, and Hot Pixel removal. Now let’s come to the next part of this series, which will continue with other Other Tweaky Settings and Camera Settings in Octane to speed up the rendering time.
Other Tweaky Settings
There are a bunch of other settings that are useful in very specific cases. Usually you’ll want to keep these at default. This section covers only the ones that seem to affect render speed and quality in specific cases. These are all in the Path Tracing Kernel settings unless otherwise noted.
- Ray epsilon: Only mess with this if you have a large scene (scale in km or something) and you’re getting artifacts.
- Filter size: Controls the antialiasing. Good if you have non-photoreal scenes with lots of sharp edges.
- Caustic blur: Used when you have caustics in your scene. Don’t know what caustics is? Don’t touch this setting. Caustics causing fireflies or noise? Up the blur.
- Path term power: Lower this if you’re getting a lot of noise in dark shadowy areas and nothing else seems to clean it up.
- Coherent ratio: Activates “hold my beer” mode. Speeds up reducing noise in still renders, but at the cost of splotchy noise and other fun artifacts. Do not use this for an animation. Maybe useful as a last resort if your still render is just too slow. Definitely try the Denoiser before this.
- Parallel samples / Max tile samples: Hardware-specific. If you have some crazy awesome GPU (or several) with lots of VRAM, try upping these – you might get a speed boost.
- Adaptive sampling: This can speed up your renders, but it requires playing with settings and paying attention to a noise mask. Don’t worry about it if you’re just starting out.
- AI Light: Useful for scenes with lots of lights, especially lots of small ones. It’s great for reducing fireflies, making interiors look good, and other light-related issues.
Presets
Now you’ve got a good group of settings to start every scene with, and you don’t want to have to keep redoing that for every project. No problem, you can save your presets!

We could make a preset called a “good starter set” or something. The only kernel settings that need to be changed are the Kernel (Path Tracing), the Max Samples (128 or 256), and the GI Clamp (16 or 32). You could set the default environment in the Settings>Env tab to be black. Otherwise the defaults are fine. In Cinema 4D, if you want this preset to be the default every time you open the program, you have to make it part of a new.c4d file
Camera Imager Settings (fun with AI)
Now that we understand how to use the kernel settings to draw our pixels in as little time as possible, we can move on to the fun stuff – cheating with Artificial Intelligence! Octane has a truly awesome denoiser, and an upsampler. These three things can shave minutes or hours off your renders and they’ll still look great. That said – it’s not a magic bullet (yet). You still need to understand what the Kernel settings do in order to give these AI tools a nice solid foundation, and there are actually times where these things will make things slower and worse if you don’t know what you’re doing. Help them help you!
Denoiser
Octane’s denoiser does a fantastic job. It allows you to drastically lower your samples, render time, and also clean the image right up like magic.
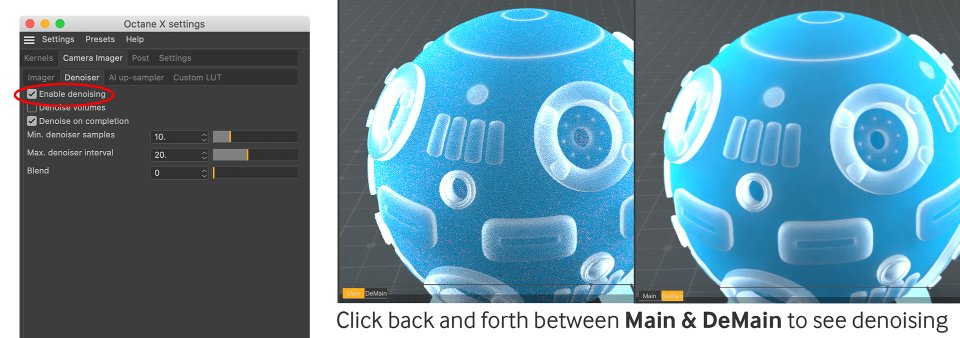
To get started with the Denoiser, go to the Octane settings=> Camera Imager first-level tab, and choose Denoiser second-level tab. Check “Enable Denoising“. There are a few settings here that most of the time you can just leave at default. In the Live Viewer, you’ll see two tabs at the bottom. Main and DeMain (Denoised Main). You can click them to see what it looked like before and after the denoising process.
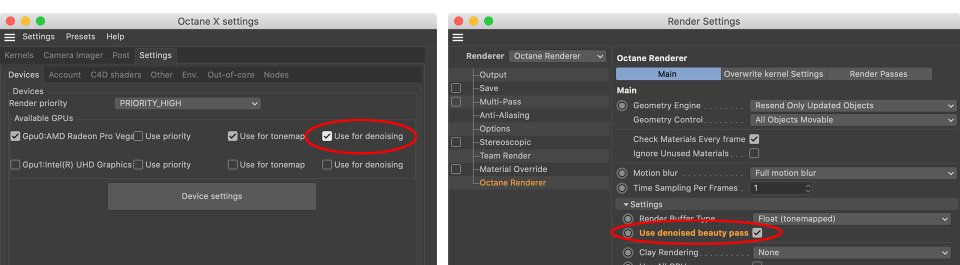
Note that in Octane Settings, Settings first-level tab, in the Devices second-level tab, there’s an option to use your GPU(s) for denoising. This is sometimes off by default. Depending on your hardware, it’d be worth seeing if using the CPU or GPU is faster and/or more stable. In C4D’s Render settings , in the Octane Renderer section, there’s a checkbox for Use denoised beauty pass. If you aren’t using Render passes to composite later, you’re going to want this on, otherwise, your image will be denoised in the Live Viewer, but not in the Picture Viewer when you do your final render. This setting will override the denoiser settings, so even if that’s off in the Octane settings, if you turn Use denoised beauty pass on, you’re going to get a denoised render.
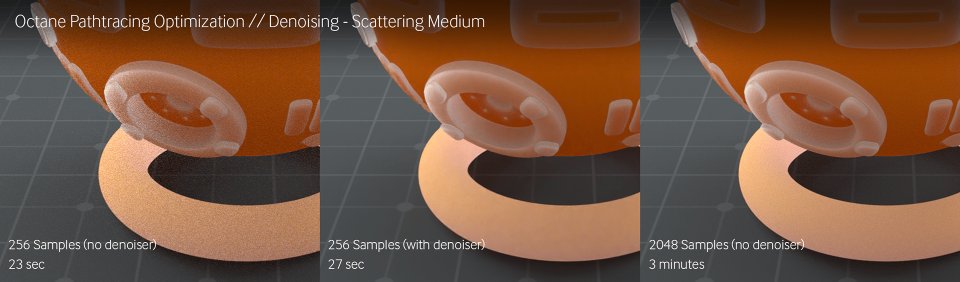
Scattering is pretty GPU-intensive, and using the same settings, you can see that it needs a lot of samples, and therefore time, before it gets smooth on its own. 3 minutes gives a barely acceptable image. With the denoiser, 256 samples is totally fine in 27 seconds.
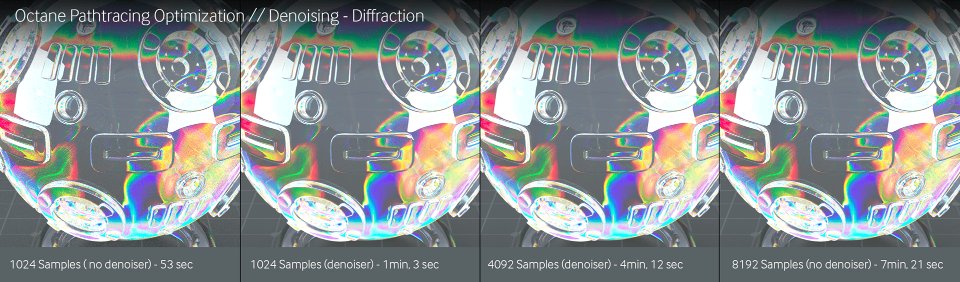
Diffraction is also a very GPU-intensive effect. The denoiser creates usable results in a much faster timeframe, but if you look up close, you can see that the denoised versions blur a bit and start to lose some of the fine detail. This is one of the caveats to the denoiser. It can’t create information out of anything, so for every pixel it builds, it has to look around at its neighbors and copy their homework. The result is that detail can get lost. Whether it’s worth the speed increase is up to you.
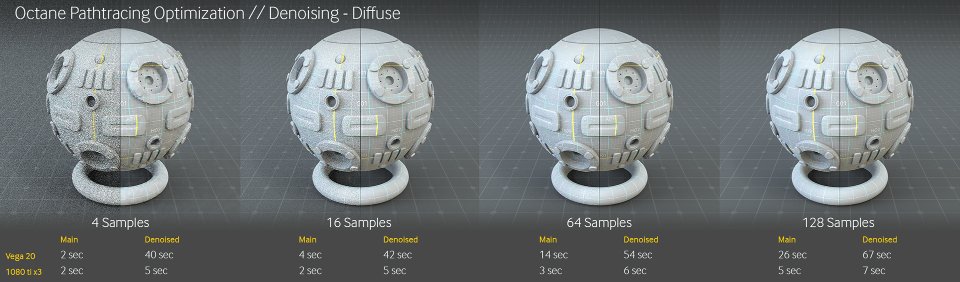
Finally, for some scenes, denoising can actually be slower, especially if those scenes were going to render quickly anyway. Denoising isn’t instant – there’s some overhead that it introduces. In the scene above, you can see that on a Mac running an i7 and Vega 20, denoising actually adds a considerable chunk of time – almost 40 seconds! If you can get a clean render in under 40 seconds on that card, it doesn’t ever make sense to denoise. Even with fast hardware, 3 seconds of overhead when added to a 2 second render with 16 samples still adds up to the same 5 seconds that a 128 sample render with no denoising gets you.
In summary, the Denoiser is a great post-production tool to help bring your render times down and clean up your images faster, but you need to have your foundation set (a.k.a. get your Kernel settings dialed in) to get the most out of it.
AI Upsampler
This is a relatively new tool. It works kind of like Alien Skin Blow Up or Topaz Gigapixel where it renders at a lower resolution (half or quarter), and then upsamples it right at the end. Like Denoising, it needs a good foundation, and works well on certain types of scenes (ones that don’t need to be tack-sharp).
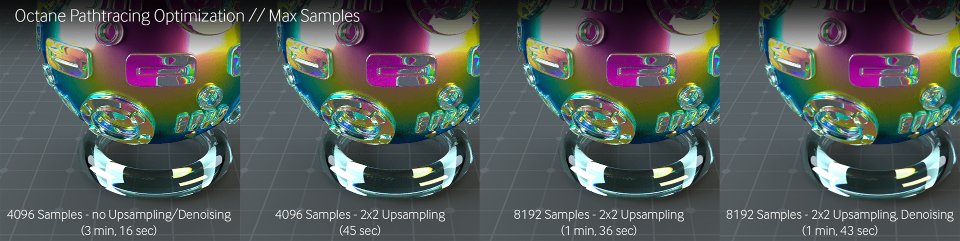
Where the upsampler really shines is in allowing you to use far more samples, and still get faster results. In the example above, it took 4096 samples to get a clean image without the upsampling or denoising. Turning on upsampling allowed for doubling the samples to 8192 while still halving the time, and then adding denoiser on top of that created a result that would hold up well in many situations without adding much more overhead. It’s worth playing with both of these things alone or together just to see if you can shave off time from your renders. Sometimes the results are amazing.
Conclusion
This is a lot of information, but with some practice and knowing where to prioritize your effort, it should help you get you going on a good workflow which will produce faster and better renders!
In conclusion, that wraps this section on HDRI lighting. Hope that with the above basic information, you could have a general overview and a better understanding of HDRI light in Octane for Cinema 4D.
iRender - Best Cloud Rendering for Octane Render
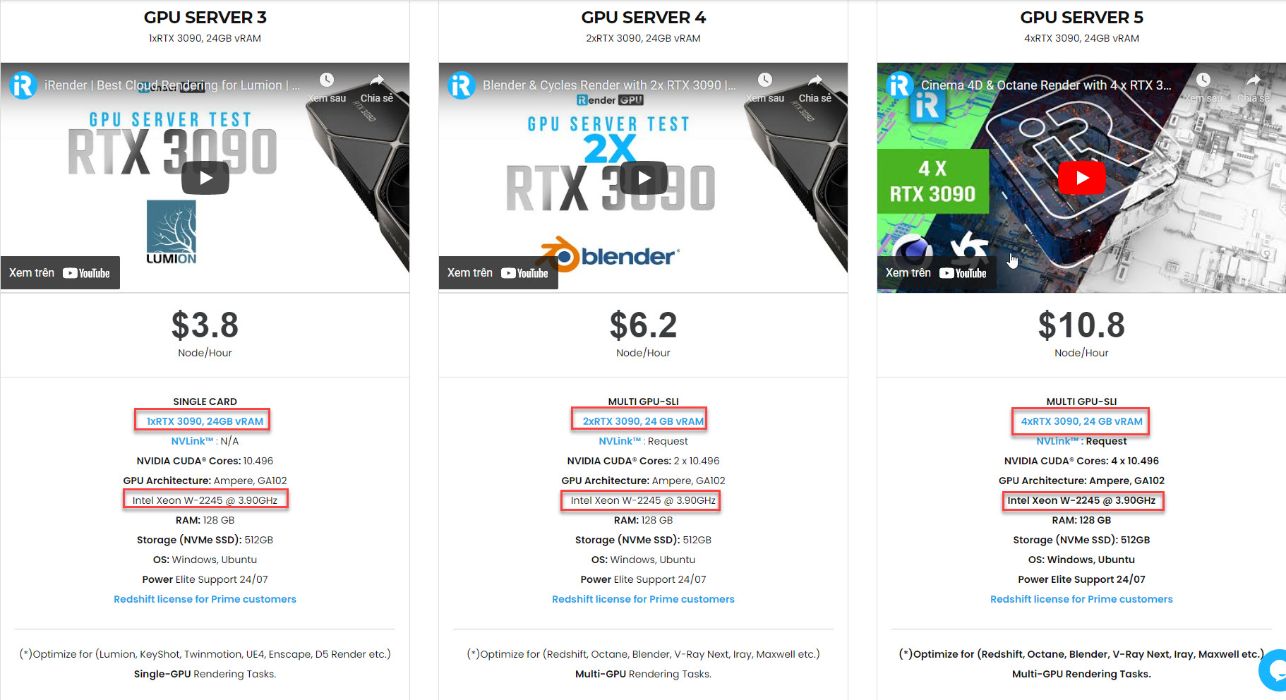
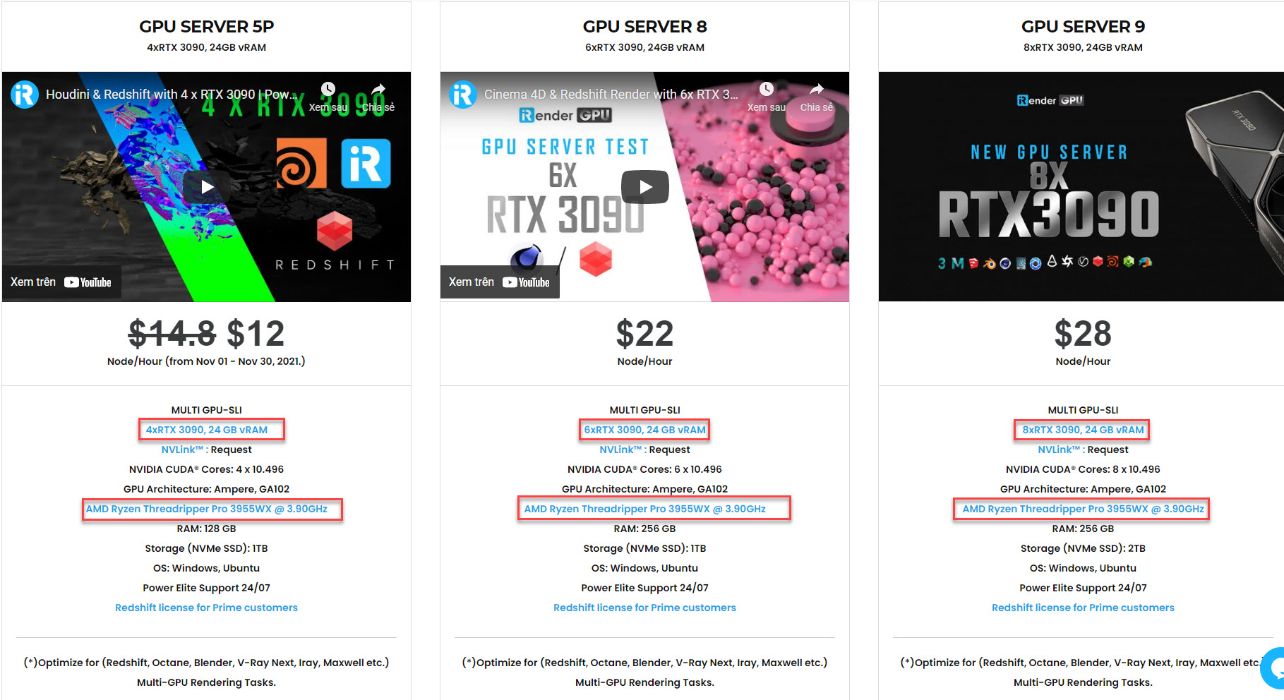
And one interesting information for you if you are having trouble choosing a suitable render farm to speed up your render time with Octane Render. Thanks to our leading technology, and with our diverse and powerful servers including servers with 1/2/4/6/8 x RTX 3090, we help Octane users create high-quality images and videos in the shortest time ever. Moreover, we offer clients the powerful processor Intel Xeon W-2245 @ 3.90GHz/AMD Ryzen Threadripper Pro 3955WX @ 3.90GHz and 512 GB – 1 TB SSD – a great option if your project requires a strong super powerful CPU. With these above powerful servers (1/2/4/6 x RTX 3090) and NVLink combined, iRender brings Octane users unprecedented rendering power, performance, and capability wherever you are!
What you need to do is just 5 simple steps including Creating an iRender account, Recharging money, Transferring your files to the remote server, Selecting a package, and connecting to the server then finally Taking full control of the server and doing whatever you want. Let’s see a rendering test with Octane project at iRender below:


Therefore, do not hesitate to become a member of the iRender community today to get FREE COUPON to stop wasting pointless hours of rendering. Always at the forefront of cutting-edge graphics technology, we do the rendering, the creativity is yours!
iRender – Happy Rendering!
Reference source: Scott Benson on otoy.com
Related Posts
The latest creative news from Octane Cloud Rendering.