Pyro in Houdini: The Potential of Visual Effects
In the process of creating a successful modern film, visual effects, and lighting play a critical element. Visual effects help the film’s realism by creating stunning and realistic environments. There are many different tools for creating visual effects, of which Houdini is the most powerful and prominent software. Houdini allows artists creative space and freedom to create their own effects. In particular, Houdini’s pyro effect offers many possibilities for creating realistic fire, smoke, and explosions, making it an indispensable tool for VFX professionals. It can be said that “Pyro in Houdini: The Potential of Visual Effects”.
In this article today, let’s explore Pyro in Houdini with iRender!
Understanding Pyro in Houdini
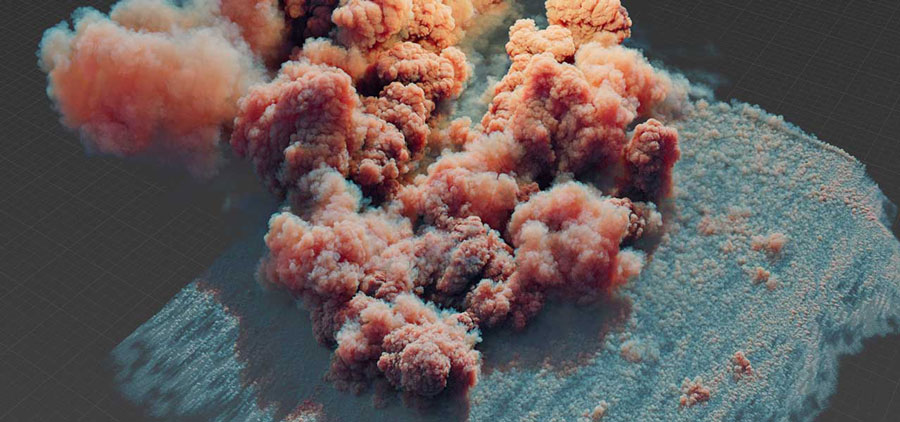
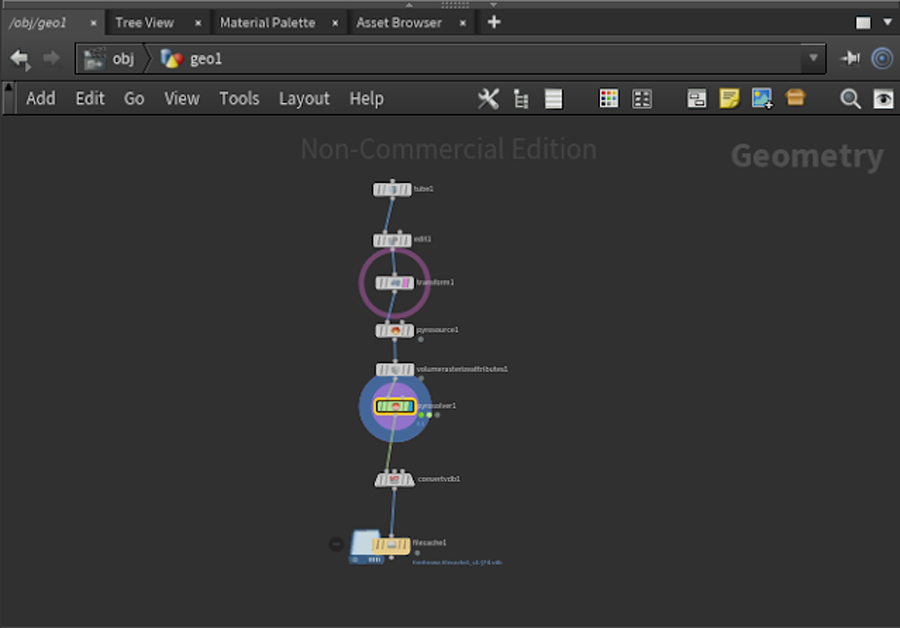
Image Source: Side FX
Pyro, or pyrotechnics, is the method of creating fire and smoke effects in computer graphics. Houdini’s Pyro solver uses complex algorithms to duplicate the behavior of fire and smoke in an extremely realistic manner. It gives artists a robust collection of tools and options to manage every part of the pyro simulation, enabling exact manipulation and creative exploration.
The pyro solver was developed to record the movements of fire, smoke, and explosions, but it may also simulate other fluid-like phenomena such as mist or an avalanche.
Setting Up a Pyro Simulation
To create a pyro effect in Houdini, artists often begin by choosing the source of the fire or smoke. This source can range from a simple point emitter to a complicated geometry-based emitter. Once the source has been identified, more characteristics such as temperature, fuel, and velocity can be assigned to control the behavior of the pyro simulation.
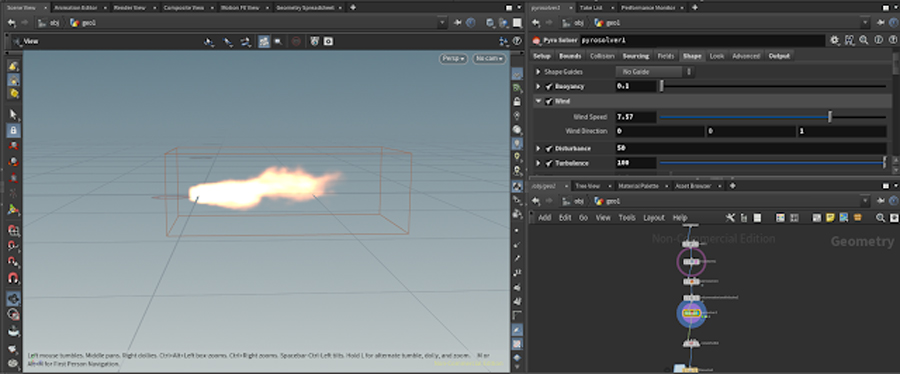
Fine-Tuning Parameters
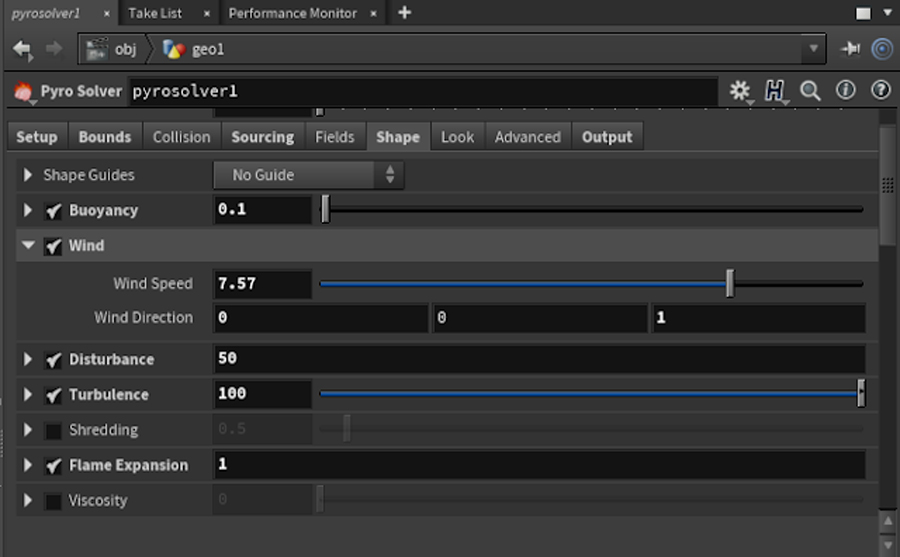
One of the key aspects to achieving realistic pyro effects is fine-tuning the simulation parameters. Houdini is software that provides many dynamically adjustable parameters to help control the speed, scale, and appearance of smoke and fire elements. Smoke and fire are two elements that require strict and flexible control to create the most realistic images. Besides, parameters such as turbulence, buoyancy, and dissipation also play a vital role in the operation of the simulation. We need to learn and carefully understand the Pyro in Houdini to control these elements.
Combining Solvers and Shading
Artists can improve the Pyro effect in Houdini by combining different solvers and shading methods. For example, artists can use PyroFX shelf tools to add additional effects such as sparks, embers, and even liquid fuel to their simulations, increasing the overall complexity and realism of the scene. Furthermore, the application of complicated shading and rendering techniques, such as shading models and solid rendering, allows visually stunning fire and smoke effects.
Control images and iteration in Houdini
Image Source: Flickr
Although Houdini has a powerful toolset for simulating pyro, creating visual effects is equally vital. Pyro art in Houdini is all about imaginative control and repetition. To obtain the required visual impact, it is necessary to study the behavior of fire and smoke in the real world, observe references, and exercise artistic judgment. Iteration is essential for fine-tuning the simulation and striking the ideal balance between realism and artistic vision.
Conclusion
Houdini’s pyro features provide VFX artists with unprecedented flexibility and creative freedom when producing realistic fire and smoke effects. Understanding its fundamental principles enables artists to release the power of pyro in Houdini and bring their creations to life. The art of pyro in Houdini opens up a world of possibilities for visual effects artists, pushing out the limits of what can be produced with computer-generated imagery.
Create your own Houdini project with iRender
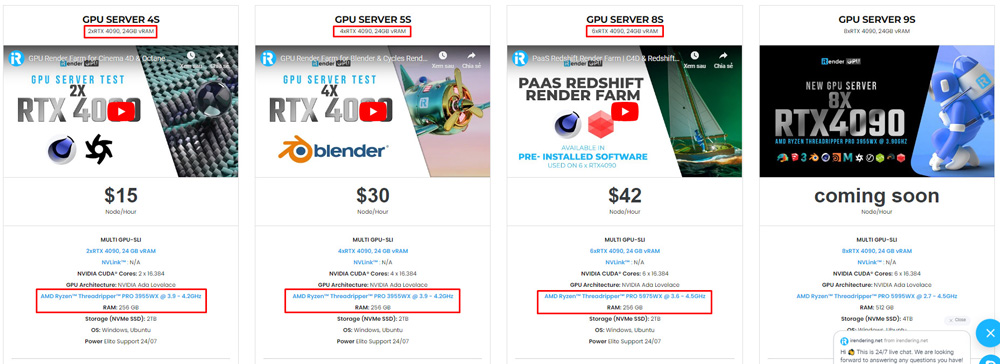
iRender Farm configures many high end machines from 1 to 8 GPUs RTX 4090/ RTX 3090 and powerful CPU like AMD Ryzen™ Threadripper™ PRO 3955WX @ 3.9 – 4.2GHz or AMD Ryzen™ Threadripper™ PRO 5975WX @ 3.6 – 4.5GHz, RAM 256GB, Storage NVMe SSD 2TB. Most importantly, we always update to the latest GPU technology to speed up any 3D, VFX projects.
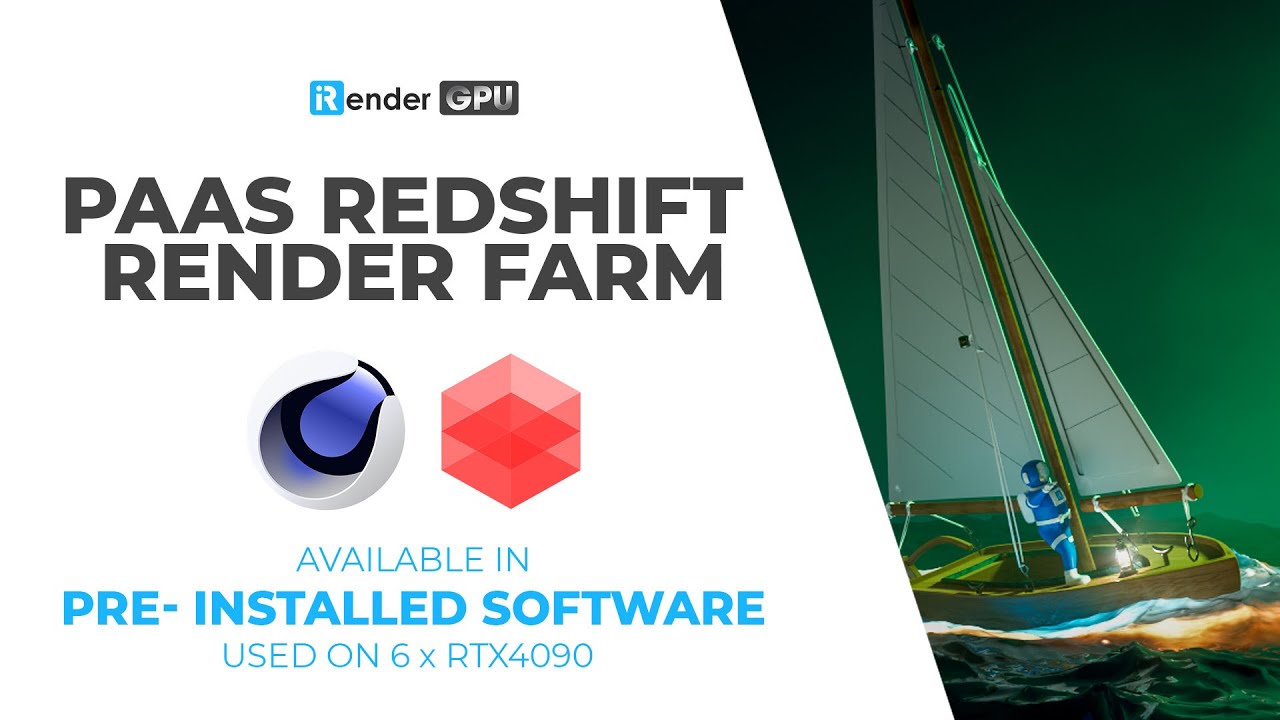
Besides, iRender provides a pre-installed and Free License Redshift – Famous Render Engines for Houdini. As an official partner of Maxon, we provide pre-installed (and licensed) Redshift machines. Each user can use 1 of our Redshift license. You can watch our workflow here:
Video test Houdini rendering speed


Try our RTX 4090 machines and boost your rendering now! If you have any comments about our article, please do not hesitate to reach us at [email protected] or Whatsapp: +(84) 916017116.
iRender – Happy Rendering!
References sources: SideFX and Ultimate Animation Studio
Related Posts
The latest creative news from Redshift Cloud Rendering, Houdini Cloud Rendering , Octane Cloud Rendering, 3D VFX Plugins & Cloud Rendering.