Using Field Force in Cinema 4D
The Field Force object is one of Cinema 4D best recently added features. On the surface, Field Force in Cinema 4D as a concept is simple: it adds dynamically moving objects and elements to the established Fields workflow. This simple change, however, makes the playground that is the Cinema 4D dynamics system a whole lot bigger and tons more fun. Let’s figure out in today article.
What are Field Forces and where to find them?
Field Forces affect objects controlled by Dynamics or any object with a Forces tab. You can also manipulate Cinema 4D Particles and Thinking Particles with Field Forces. You can control the gravity or velocity acting on an object, for example, or direct the movement of particles.
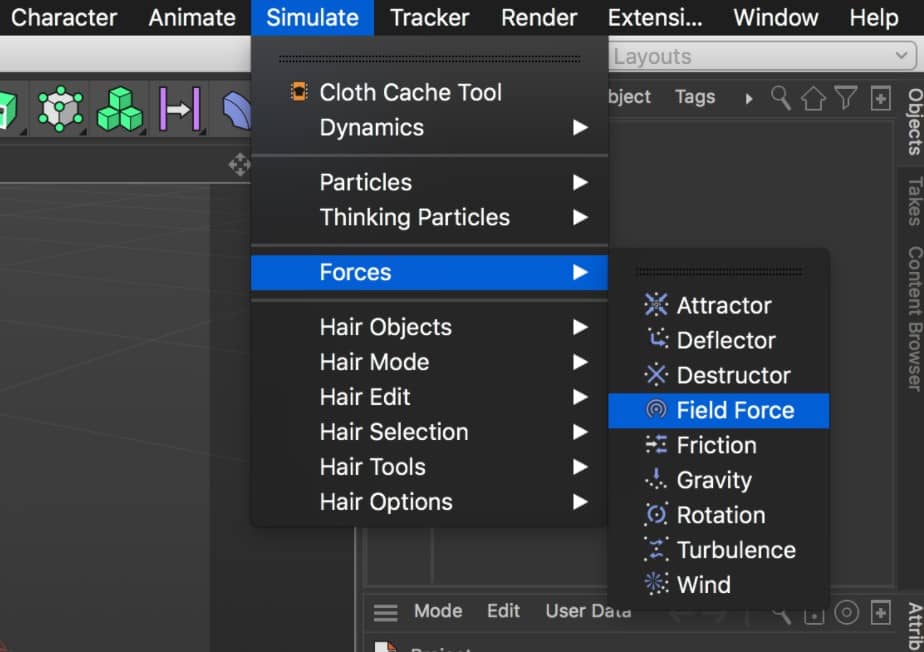
Access the Field Force object via Main Menu > Simulate > Forces > Field Force. You will find all Cinema 4D forces within the Force sub-menu, including the new Field Force object.
How to use Field Force?
In principle, the Field Force is a simple object. You add Field Force and use it via the Object tab. A common mistake, however, is to add Fields to the Falloff tab and wonder why nothing is happening. This tab is used for ‘masking’ the result of the Object tab, which is quite a powerful concept – you can restrict the influence of the Field Force with Fields placed in the Falloff tab.
Pro Tip: If the Field Force object is selected when creating Fields, the Field will place automatically in the Object tab field list. Hold down Shift when adding a Field to create the Field as a child of the Field Force object.
Add a Field in the Object tab. The vectors will display in the Display Box. Hop over to the Display tab to toggle this display, or to change the display properties.
The easiest way to understand the directions your vectors point is to use a Solid Field Layer. Using a Solid Field Layer lets you input a value in the X, Y and Z directions. Doing so displays a visual Vector representation in the form of color-coded lines.
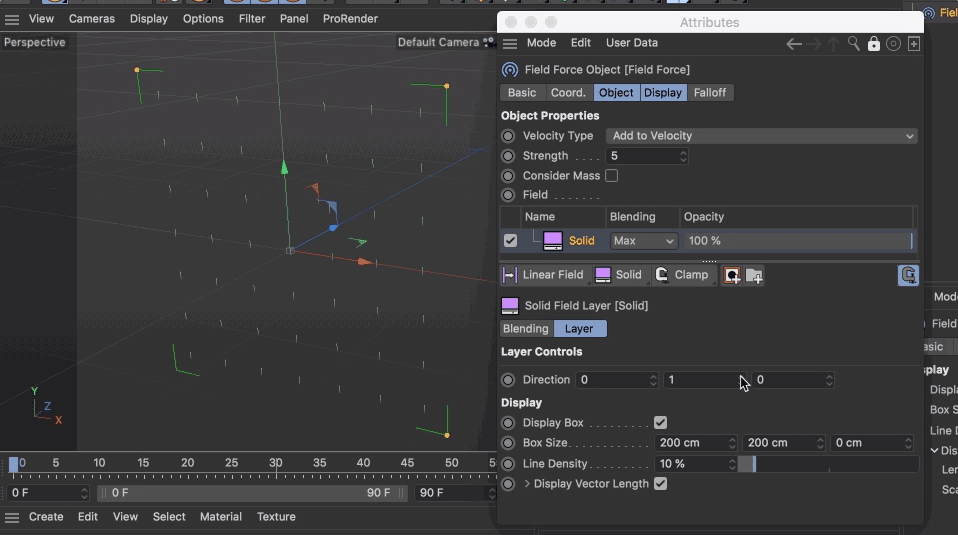
The vectors define the force’s direction. If you want to recreate gravity, for example, add a Solid layer and set the Y direction to a negative value. Try -1. This approach will work if you’re using the Field Force object with the Velocity type set to “Change Direction”. You can go beyond this, however, when using the other modes.
Whether you’re working with dynamic objects or particles, the best way to understand Field Forces is to experiment with different fields to see how they affect vectors.
Here are a few typical results you can expect when using a single Field:
- Spherical Field: simulates an attractor, but you could invert the direction to repel objects.
- Box Field: simulate a deflector if the mode is set to Change Direction.
- Random Field: create turbulence. Play with the noise scale for different results!
- Radial Field: Make objects rotate. Adjusting transition can produce interesting results; creating a vortex, for example.
Mixing Fields
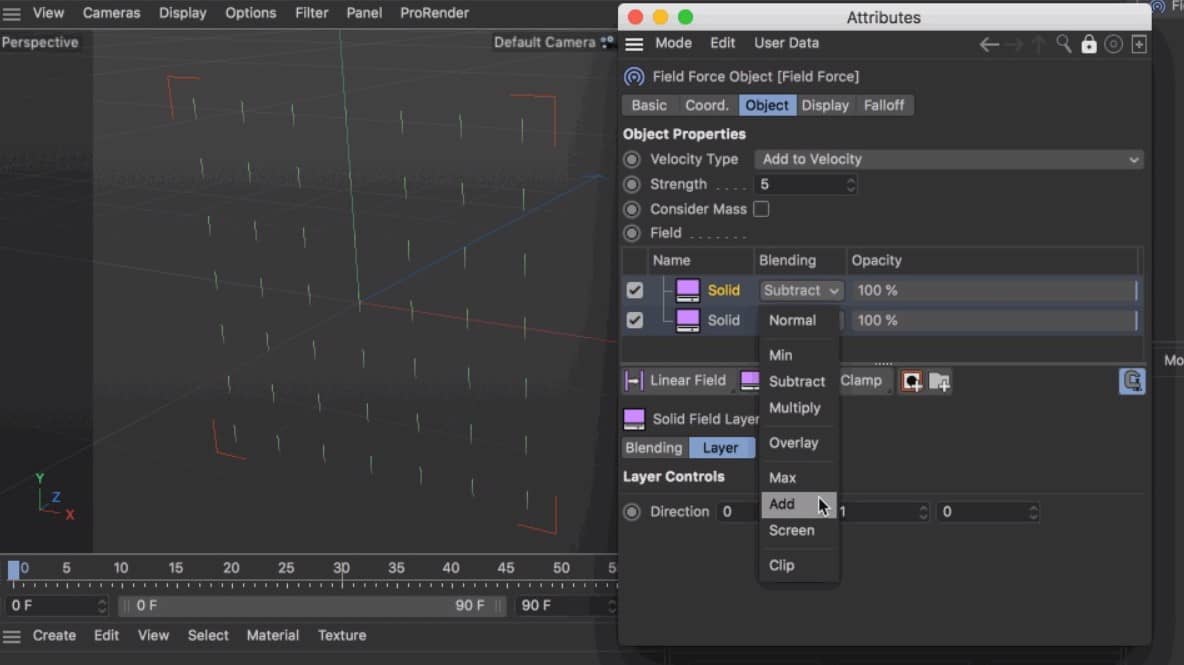
As with the Falloff tab, you can also mix Fields in the Object tab. In the Object tab, however, you’re mixing vector values. The blending modes will therefore be Normal, Add and Subtract.
- Normal will overwrite any layers below.
- Add will add to the vector below.
- Subtract will subtract from the vector below.
Remember we’re dealing with vectors. If we have a solid field pointing in the Y-axis with a value of +1 and we set another solid field in the Y-axis with a value of -1, and we subtract these values, we end up with 1 – (- 1). The result will be a vector of +2, where the vector length has doubled and the velocity is twice as fast.
If we were to add the two values 1+(-1), we would end up with zero, meaning the Field Force will have no effect.
The display box color coding provides a good visualisation of direction (color) and strength (length of the line), so you don’t need to know any vector maths!
Increasing strength
You can increase the strength of an effect using the Object tab Strength property. If you want to influence the effect further, however, you can also add Fields to the Object tab.
When working with a solid layer, the values added in the X, Y and Z axis act as a multiplier to the Strength value. Similarly, with Fields, you can use the Direction tab to influence the vector size, i.e. its strength. Use the Direction tab and adjust the scale value if you want to make such a change.
Restricting the effect of Field Forces
Field Forces offer enormous scope of control. To exclude a Field Force from affecting an object you can use multiple Field Forces and set the mode to Exclude in the Force List of a Forces tab. Alternatively, you can set the mode to Include only specific forces, which offers flexibility in determining how Field Forces affect each object.
You can also use multiple Field Forces and combine Fields in the Falloff tab to mask out the effect of a Field Force.
Gaining more control
When working with forces, you’re dealing with energy. Most of the time, the Field Force object is going to add energy in the form of velocity. To reduce the force’s energy, you can either reduce the strength or set an absolute value.
Another method is to use a Friction object to remove the velocity from dynamic objects or particles. You can define the Friction object influence with Fields and art direct the effect with ease.
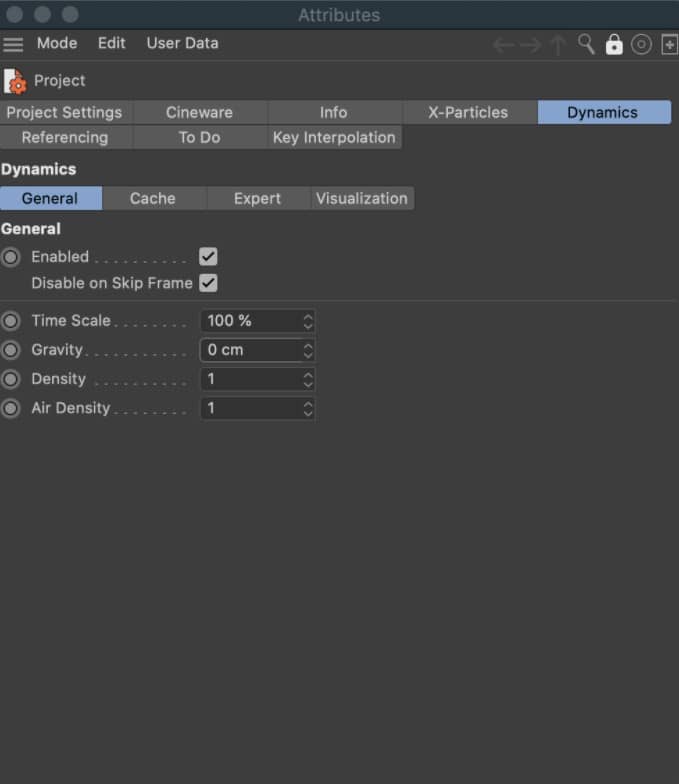
Controlling gravity
When working with dynamic objects, every Cinema 4D scene has a gravity setting applied by default. If you want to control gravity yourself or turn it off completely, press CMD+D (CTRL+D) to open the Project Settings (Edit>Project Settings). Navigate to the Dynamics Tab, find the General sub-tab, and set gravity to 0.
Workflows with Field Force
Field Forces have awesome potential. Below I’ve put together some of what I consider to be their most powerful applications.
Common Field Force workflows
A favourite Field Force workflow of mine is to art direct particle simulations with splines. To do so, draw a spline and position a particle Emitter near it. Tell the Field Force to use the spline for the vector direction. The particles will flow along the spline’s path!
Similarly, you can art direct how a dynamic Voronoi Fracture object shatters by using an object (the driver in the Field Force) moving along a spline.
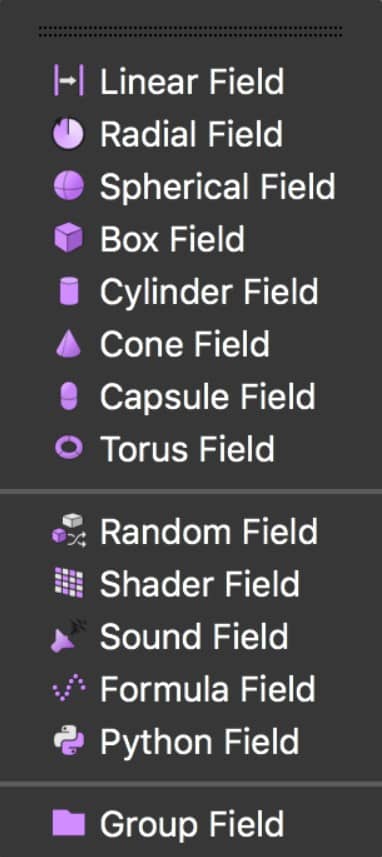
Use the Volume Builder to create Vectors
You can use the Volume Builder to create custom vector shapes in Cinema 4D’s Vector mode.
A typical example might be adding a sphere with a Random Field on top. If you’re mixing a Field like the Random Field in a Volume Builder, initially you’ll see a Box shape and not the sphere below as the Creation Space is set to Box. Change the Creation Space to Objects Below. You’ll now see the sphere, and you’ll notice the vectors are randomized.
If your goal is to have particles flow across the sphere’s surface, change the blending mode to Cross. Doing so will align the vectors to the surface.
Next, add the Volume Builder to a Field Force object as a Volume object. For the smoothest transfer of values, set the Sample Mode to Quadratic.
You can use the setup described above to create a swirling pattern over the sphere’s surface, too. Create a Matrix in Object mode with the Sphere as a source. Set it to Thinking Particles.
You can also achieve some fantastic results using these steps on other objects. Experiment and try out some ideas; see what you can create!
Conlusion
The Field Force object opens up the world of Cinema 4D dynamics. The feature takes things to the next level in terms of what you can create and the ease with how you can achieve it.
The above provides some initial insight into the world of the Field Force object, but there’s only one way to get the most out of it: experiment! Try the above, tweak settings, randomise values, make mistakes, and break things! Doing so will give you a fantastic idea of what this tool is capable of and how to use it effectively in your next big project.
iRender prides itself on providing the right configuration packages for C4D to give you a great experience in rendering. With the benefits iRender gives you as well as the configuration that is very suitable for every C4D version, do not hesitate to use the service at iRender to have a great experience with your rendering time. Register for an account today to experience our service. Or contact us via WhatsApp: (+84) 912 515 500/ email [email protected] for advice and support.


Source: ftrack.com
Related Posts
The latest creative news from Cinema 4D Cloud Rendering , 3D VFX Plugins & Cloud Rendering.