
A Beginner’s Guide to Blender’s Wireframe Modifier
If you are a 3D computer graphics or animation enthusiast and are in search of some 3D modeling software, then you have come to the right place. There are many 3D modeling software programs available, many are good and are doing their jobs quite well, but they all come with a hefty price tag and high subscription fees. There is no need to pay heavy subscription fees when you have a free and powerful 3D creation tool at your fingertips, known as a Blender. Blender is a popular and open-source 3D creation software that can be used in 3D printer designs. It is a robust program that supports the entire pipeline of 3D creation, which includes modeling, shading, rigging, animation, and rendering. There is no need to get any supplementary programs because Blender lets you make games and edit videos.
This article introduces for beginners about Blender’s Wireframe Modifier. If you are a beginner and want to start 3D modeling in Blender, then this article is for you.
1. Blender’s Wireframe Modifier
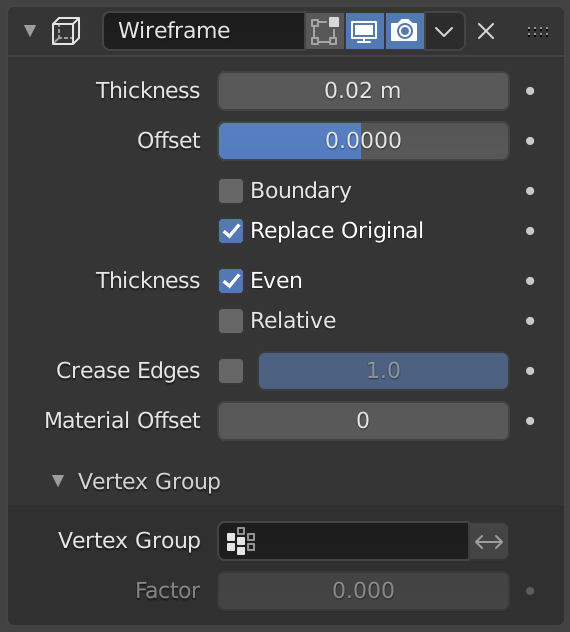
The Blender’s Wireframe modifier transforms a mesh into a wireframe by iterating over its faces, collecting all edges and turning those edges into four-sided polygons. Be aware of the fact that your mesh needs to have faces to be wireframed. You can define the thickness, the material and several other parameters of the generated wireframe dynamically via the given modifier options. In short, Blender’s wireframe modifier allows you to see what your mesh is actually made of — its topology and contour — which is why a wireframe can come in handy.
To do this:
- Go to the Modifier Properties tab and then click Add modifier.
- In this list, locate Wireframe and select it to activate the modifier and attach it to your object.
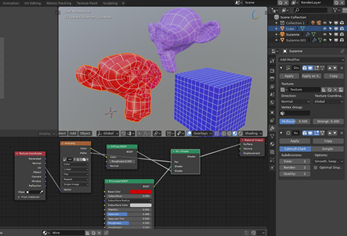
- You will now see that the modifier replaces the mesh of your object with a grid pattern.
This grid is based on the actual geometry of your mesh as well as any modifiers that you have running underneath it, which can include the Subdivision surface modifier if you plan to use one.
Note: When using the Thickness parameter, keep in mind that it’s an algorithmic approximation. While Even Thickness often yields satisfactory results in many cases, skinny faces can cause undesired spikes to protrude from an object. This can be remedied by reducing the angles in the geometry or by turning off Even Thickness.
2. Rendering a Wireframe over the Mesh

You may find yourself also wanting to display the mesh of the wireframe over the actual base mesh of an object. To do this, uncheck the Replace Original option under the Boundary option. If this was to be rendered as is, what you would see is that the wireframe and the object share the same material. This can be changed by using the Material Offset option. After making a separate material in the Material Properties tab, return to the Modifier Properties tab and locate Material Offset under the Crease Edges parameter. Changing the index number will designate the material applied to the wireframe.
If you have multiple materials, setting the index number of the Material Offset to anything other than 0 will set the next material in line in the Material Properties to the wireframe. Upon rendering, you would see the object and wireframe have two distinct materials applied to them. Rendering a wireframe over the mesh can be very useful when posting your work online to showcase your models in a demo reel or portfolio as it shows off the detail of your mesh.
3. Rendering Wireframes in Eevee
Of course, as with all Blender modifiers, the Wireframe Modifier works in both Cycles and Eevee. The issue lies with procedurally generated meshes or larger objects as Eevee doesn’t recognize Vector Displacement and may slow your real-time viewport renderer to a crawl. So, if you desire to apply the effect on a displaced object, the wireframe will not match the contour of it.
There is an easy workaround for this issue:
- Using the UV mapping menu (press U to display) on your object, choose Reset to unwrap the mesh to its shape. When you do, you should see a UV map similar to what is displayed below.
- Saving this UV as an image, you can take it to the Material Properties tab and make a Material node tree beginning with a Texture Coordinate node that connects to an Image Texture node from the UV to the Vector option.
- From here, set up a Diffuse BSDF node and connect it to a Mix Shader node.
- Set your Image Texture to connect to the Diffuse by Color and have its Alpha connect to the factor of the Mix Shader.
- Take the Diffuse and put it into the Shader option of the Mix Shader and place a Principled BSDF Shader into the other Shader option available in the Mix Shader.
Use the example above to properly set up your node tree. Once complete, you should be able to see the mapped UV texture on your object with Eevee.
The Best Cloud Rendering Service For Blender
iRender is a Professional GPU-Acceleration Cloud Rendering Service provider in HPC optimization for rendering tasks, CGI, VFX with over 20.000 customers and being appreciated in many global rankings ( e.g: CGDirector, Lumion Official, Radarrender, InspirationTuts CAD, All3DP). We are proud that we are one of the few render farms that support all software and all versions. Users will remotely connect to our server, install their software only one time and easily do any intensive tasks like using their local computers. Blender users can easily choose their machine configuration from recommended system requirements to high-end options, which suit all your project demands and will speed up your rendering process many times.
High-end hardware configuration
- Single and Multi-GPU servers: 1/2/4/6x RTX 3090/3080/2080Ti. Especially, NVIDIA RTX 3090 – the most powerful graphic card.
- 10/24 GB vRAM capacity, fitting to the heaviest images and scenes. NVLink/SLI requested for bigger vRAM.
- A RAM capacity of 128/256 GB.
- Storage (NVMe SSD): 512GB/1TB.
- Intel Xeon W-2245 or AMD Ryzen Threadripper Pro 3955WX CPU with a high clock speed of 3.90GHz.
Additionally, iRender provide NVLink (Request) will help you increase the amount of VRAM to 48GB. This is a technology co-developed by Nvidia and IBM with the aim of expanding the data bandwidth between the GPU and CPU 5 to 12 times faster than the PCI Express interface. These servers are sure to satisfy Blender artists/ studios with very complex and large scenes.


Let’s see rendering tests with Blender on multi-GPU at iRender:


- Reasonable price
iRender provides high-end configuration at a reasonable price. You can see that iRender’s package always costs much cheaper than packages of other render farms (in performance/price ratio). Moreover, iRender’s clients will enjoy many attractive promotions and discounts. For example, this October, we offer a promotion for new users and discounted prices for many servers, users will take advantage of these to level up their renders.
SPECIAL OFFER for this November: Get 50% BONUS for all newly registered users.

If you have any questions, please do not hesitate to reach us via Whatsapp: +(84) 916017116. Register an ACCOUNT today and get FREE COUPON to experience our service. Or contact us via WhatsApp: +(84) 916017116 for advice and support.
Thank you & Happy Rendering!
Source: renderpool.net
Related Posts
The latest creative news from Blender Cloud Rendering.


