Cinema 4D Tips From 3D Experts
Cinema 4D is the perfect package for all 3D artists who want to achieve breathtaking results fast and hassle-free. Beginners and seasoned professionals alike can take advantage of Cinema 4D’s wide range of tools and features to quickly achieve stunning results. Cinema 4D’s legendary reliability also makes it the perfect application for demanding, fast-paced 3D production.
It’s a vast and capable tool, but that comes with a learning curve and although it’s one of the friendlier applications, you’ll need to put some time in – and study some Cinema 4D tutorials – to master all it offers.
In today’s article, let’s discover how to boost your skills and master Cinema 4D with our collection of Cinema 4D tips from 3D Experts.
1. Consolidate takes

“Takes are a great way of quickly working through look development in one scene file,” says 3D motion designer Jason Poley. “Being able to change a model’s position, materials and visibility on a take-by-take basis to iterate ideas is extremely handy. I’ll often end up with five to seven takes as I work through ideas and looks.
“To consolidate all these takes down once a look’s approved, select the take you want, then select everything in the Object Manager. Right-click and select Remove from All Takes. This moves all the changes in that take to the main take. Delete your other takes to tidy up a move into production.”
2. Organise with layers

Poley adds: “Layers are great for keeping your Object Manager under control in larger scenes. Having a system from the start of a project will help if things get complicated later”.
“Create a layer in the Layer Manager or right-click with objects selected and select Add to New Layer. Drag from the Object Manager to add to layers or hold down ctrl/cmd to add an object and all its children.
“Having the ability to lock, solo or hide different aspects of your scene can make working smoother and faster. The usual layer configuration is: Camera, Lighting, Hero Geo, BG Geo and Sims/Particles,” he explains.
3. Shrink wrap retop

Glen Southern, of digital design studio SouthernGFX, says that one of the main ways to create stunning models these days is to sculpt the initial form in programs like ZBrush or Mudbox and then retopologise the sculpt. “This is the process for creating new geometry that is more animation friendly, more predictable with contiguous edge loops and much lower in polygon count, making it more efficient. You can of course do this in Cinema with tools like the PolyPen,” he explains.
“To make it even better,” he continues, “you can download scripts like the HB Modelling Bundle that make Cinema 4D into a perfect retopology solution, enabling you to draw new geometry right onto your sculpt.”
4. Use sculpt tools when modelling
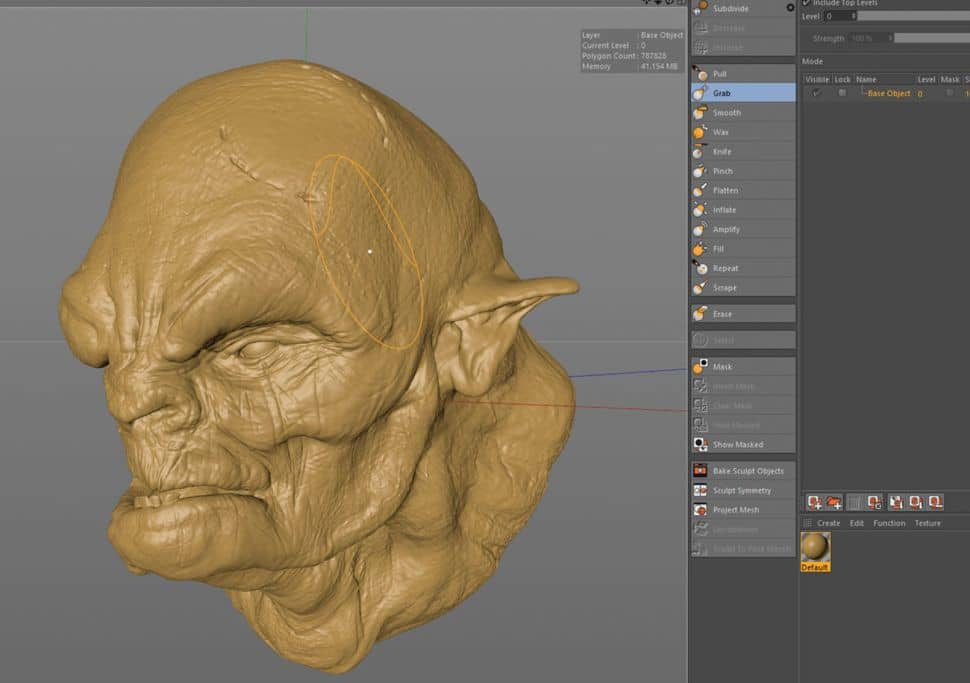
“With Maxon developing a huge range of sculpting features for Cinema it would be silly not to utilise the toolset wherever you can,” says Southern. “When you are modelling and you want to tweak an area with great accuracy, you used to have the Magnet tool and a Soft Selection falloff. Now you simply switch to the Sculpting mode, increase the subdivision levels and use the Grab and Pull tools. This is a dream for organic modellers and can be just as useful for hard-surface work.
“Add to that tools like Inflate, Knife (scoring the surface) and Flatten and you have a pretty comprehensive set of tools to adjust a mesh once you have created the underlying geometry.”
5. UV unwrap everything
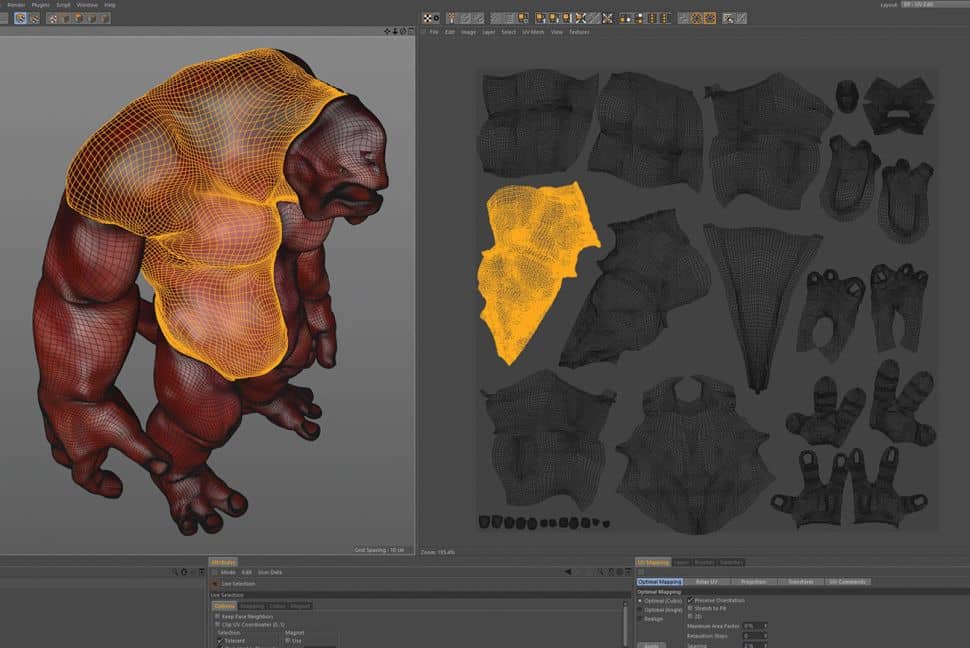
Southern also recommends UV unwrapping a model. “Most people think a UV unwrap is just to allow you to map textures onto your mesh. This is of course true, but there are lots of scenarios where having a good set of UV coordinates helps.
“Normal maps are used in most modern games, and of course you need UVs for those. There may be lots of times where you’ll need to give selection sets to be used in composition further down the line. Having a model separated into good UV sets enables you to more easily select the areas you want, and not just in Cinema 4D. For example, you may need to take a model into ZBrush and polygroup it. If you have UVs you can do this with a single click. The UV tools in BodyPaint are pretty comprehensive and you can even pelt map.
6. Quads, triangles and n-gons
“One of the big problems we have is that we often get asked to work with models that have been made in Cinema 4D, and they just don’t work well subdivided or in VR programs,” says Southern. “It is all too easy to just model something to look good and forget about the underlying technical requirements. Get into the habit of making things out of quads and triangles.
“N-gons (polygons with more than four sides) aren’t as big of a problem as they used to be, but you are still better to clean them out of your models.
“Booleans (meshing two models together) leave bad edges that don’t deform. Get into the habit of retopologising these areas and make them good for the whole pipeline.”
7. Make use of the Polypen tool
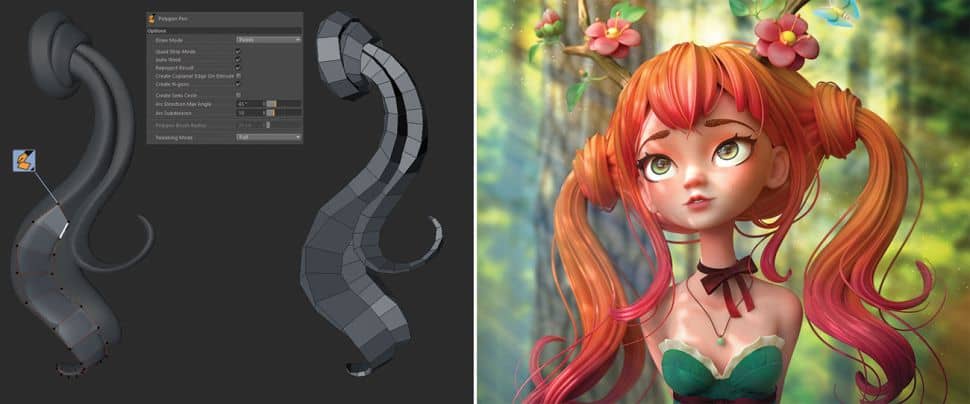
“The PolyPen tool makes it possible to do a quick retopology,” says digital artist Alina Makarenko. “For this, you need to enable additional options: Quad Strip Mode, Auto Weld, Reproject Result and Create N-gons.”
8. Apply Subdivision Surface Weights
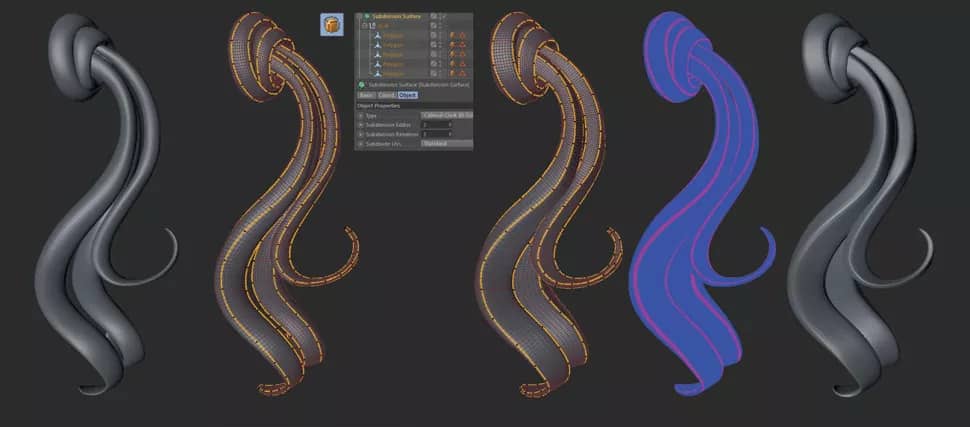
The last Cinema 4D tips: “The Subdivision Surface Weights tag and Subdivision Surface helps create a clean, smoothed shape with a good grid,” explains Makarenko. “To do this, you need to place the final retopo mesh in the Subdivision Surface on the third subdivision editor, Loop Selection the edges and apply Subdivision Surface Weights. Moving left to right easily controlled the width of the chamfer.”
Through some Cinema 4D tips above, iRender hopes you can speed up your workflow with Cinema 4D. Besides that, if you are looking for some solution to shorten render time with Cinema 4D, don’t hesitate to follow iRender services.
iRender prides itself on providing the right configuration packages for C4D to give you a great experience in rendering. With the benefits iRender gives you as well as the configuration that is very suitable for every C4D version, do not hesitate to use the service at iRender to have a great experience with your rendering time. Register for an account today to experience our service. Or contact us via WhatsApp: (+84) 912 515 500/ email [email protected] for advice and support.


Source: creativebloq.com
iRender – Happy Supporting!
Related Posts
The latest creative news from Cinema 4D Cloud Rendering , 3D VFX Plugins & Cloud Rendering.