Exploring Uncommon Tips In After Effects with iRender
Adobe After Effects is a software for generating motion graphics and special effects for video, web content, and presentations. For special effects, animation, and video compositing, After Effects is commonly used in TV and film post-production for special effects, animation, and video compositing.. After Effects projects can be utilized in broadcast television, video, the online, in-store displays, and kiosks. When you first start learning Adobe After Effects, you usually start with the basics. However, after you’ve mastered them, you’ll want to get right to the fun part. If you’re looking to become an AE master, here are some If you’re looking to become an AE master, here are some tips in After Effects you need to know.
1. Math + Multiply the resolution
With After Effects you can multiply the resolution of the cleen 2 composition or move the time line cursor to exactly 14 pixels. This works with any parameter’s numerical value. There can be any type of mathematical operation: divide, multiply, add, and more. After you press ok, the timeline cursor will move exactly 14 frames forward in time. If you type in after the initial value +500, the layer will move 500 pixels forward. This way, you can set it to 4K faster, and you don’t have to know the exact values.
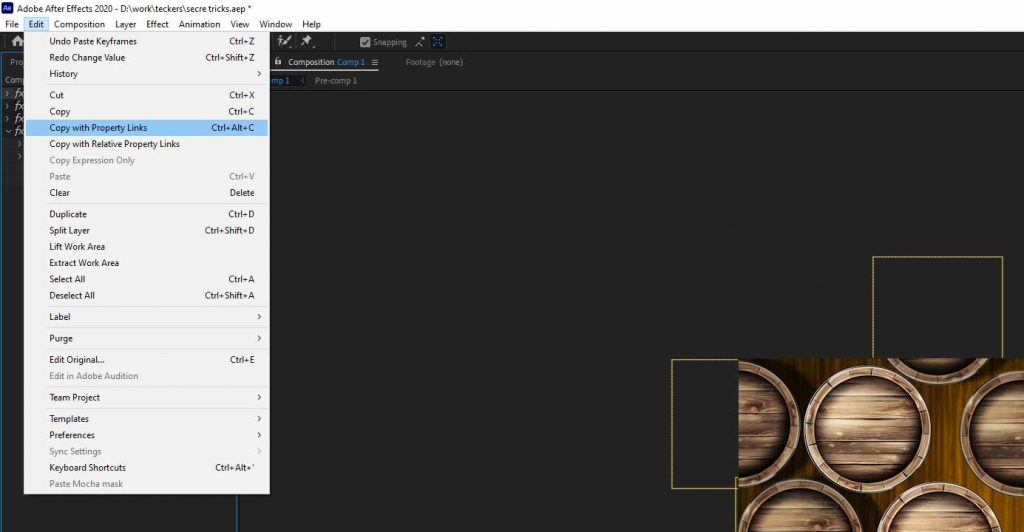
2. Copy With Property Links
Copy with Property Links is one of the many rare tactics that every After Effects user should be aware of. It allows you to edit attributes for many layers at the same time. When working with a large number of comparable layers, this allows you to make quick alterations as needed. Control + Alt + C (for Windows) or Command + Option + C (for Mac) is the shortcut for Copy with Property Links instead of the standard copy shortcut (for macOS). You can also do this by selecting Copy with Property Links from the Edit menu. Use the standard paste shortcut Control + V (for Windows) or Command + V (for Mac) after selecting the layers you want to apply it to (for macOS).
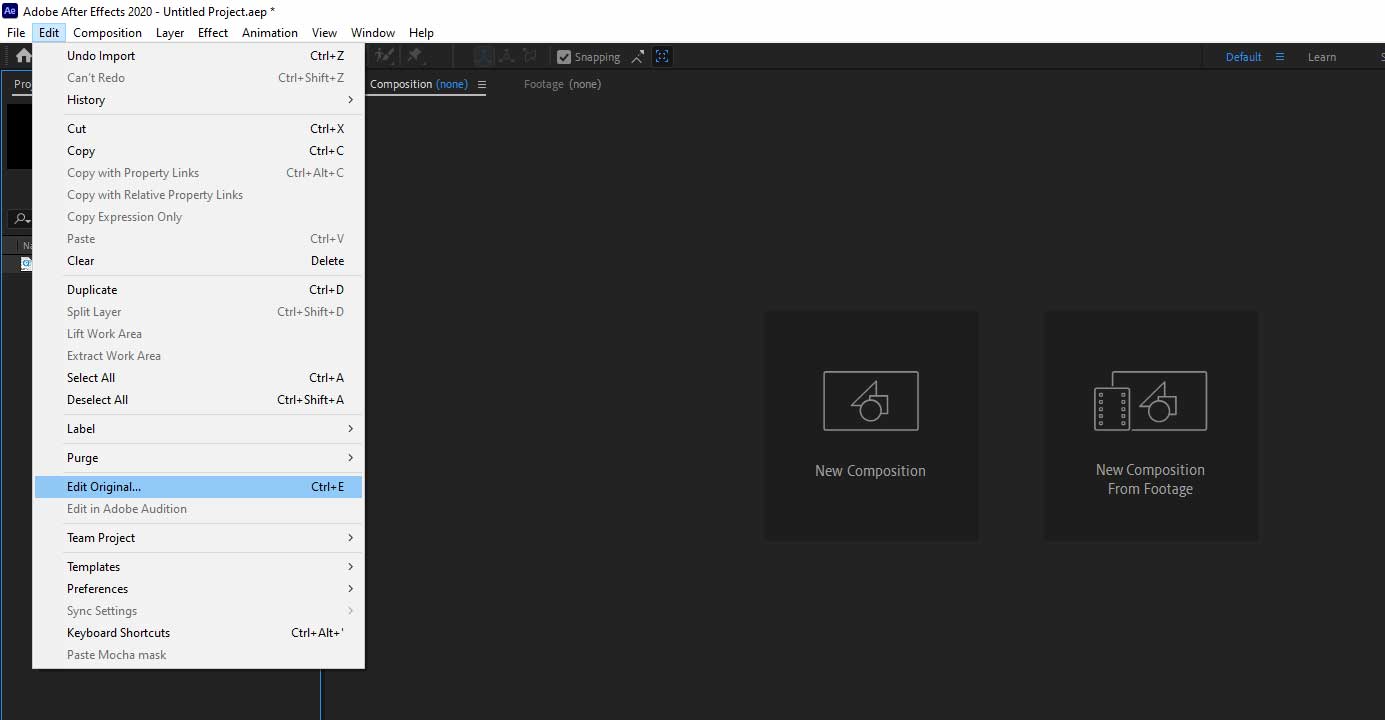
3. Edit Original – Find an AE project easily with a rendered video
This ability shines when you work in a team, and it’s one of the many odd tricks any After Effects user should know. You need to get into an After Effects project that you don’t know where it is, but you do have the rendered video. Import the video that was created in that project into a new After Effects project. After that, pick it, go to Modify, and click Edit Original, or just press Control + E (for Windows) or Command + E (for Mac) to edit it (for macOS). As a result, the project in which the video was made will become available.
Those are a few tips that few people know about when using After Effects. After reading this article, I hope these tips will help you for your project
Why we should choose iRender Cloud Rendering for After Effects
iRender is a GPU-Acceleration Cloud Rendering Service that provides high performance computing with the latest GPUs (GeForce RTX 3090). The core difference between iRender compared to other render farms is our extremely unique solution – IaaS, completely different from the old SAAS solution, which is gradually revealing many limitations. In other words, this is a hardware service, not a software service, modern artists will choose a machine configuration to suit their design needs and requirements of the graphic software, subsequently have full authority to set up and control directly the remote machine through their own personal computer.
The best solution for After Effects plugin is GPU SERVER 3 1x RTX 3090 which definitely will be fond of by CAD users with the detailed configuration below:
Let’s see rendering with After Effects on server 5P 4x RTX 3090 – the latest NVIDIA CARD RTX 3090 with 24GB VRAM will help you reduce your render time very much at iRender:
So, hesitate no more, let’s REGISTER for an account today to get a FREE COUPON to experience our service and reach a new level of cloud rendering. 20% BONUS for all new users, CHECK IT OUT!
Thank you & Happy Rendering!
Source: teckers.com


