
How to Add Textures in Blender
Blender is a free and open-source 3D creation suite. With Blender, you can create 3D visualizations such as still images, 3D animations, VFX shots, and video editing. It is well suited to individuals and small studios who benefit from its unified pipeline and responsive development process. Being a cross-platform application, Blender runs on Linux, macOS, as well as Windows systems. Blender has a wide variety of tools making it suitable for almost any sort of media production. People and studios around the world use it for hobby projects, commercials, and feature films. So in Blog’s Today, we will explore how to add textures in Blender.
What are textures?

Textures in digital art can be used in a lot of different ways. Some artists will use textures that draw attention while others prefer subtle ones. However, there’s a few general ones that are always useful to have at hand:
Paper textures are always a good basic, cause they give your drawing more of a traditional feel. Think about all the variety; recycled paper, watercolour textured paper, a canvas surface,… Wood & folliage are another good basic you might need down the line. Clouds, night/day skies, stars & nebulas. You never know when it might come handy – For example, nebulas are really cool to create background & underwater textures! Patterns; it’s always good to have a collection of patterns at hand for clothes and such, it will save you so much time. For those who might not be familiar with the term “texture” in the digital world, it simply refers to how an object’s surface looks. Beware of confusing texture with “material”, another common term used in Blender when talking about an object’s appearance.
Before we apply any textures, we need to have two things: A texture file saved on your computer and ready to use and an object that we’ll apply the texture to. Any image saved in a format that Blender supports is valid to be used as a texture. To start, there are websites that offer a wide variety of textures for you to use free of charge. Below are 4 steps to add textures in Blender, let’s get started!
Step 1: Creating a New Material
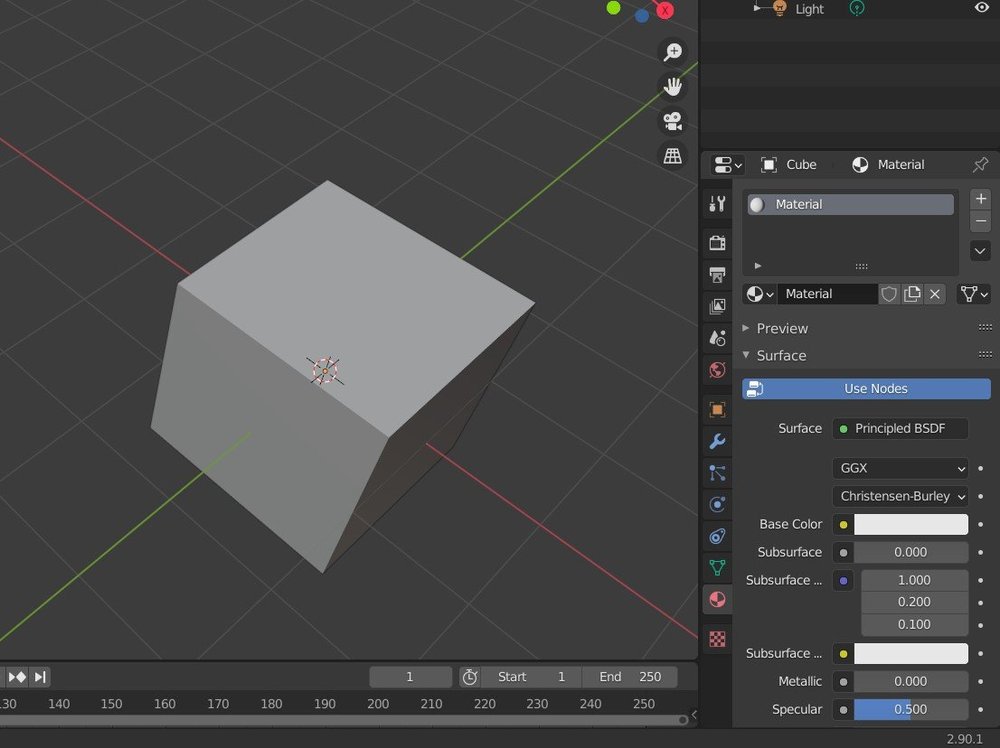
In order to apply a texture to the object, we first need to assign a material to it. To do so, follow the quick steps below:
- Select the default cube with a left-click and go into the “Materials” tab (displayed as a sphere icon) located to the bottom right of the user interface (UI).
- Click on “New” and rename the new material to whatever you want.
Once you’ve assigned and renamed the material, it’s time to import the texture.
Step 2: Importing an Image Texture
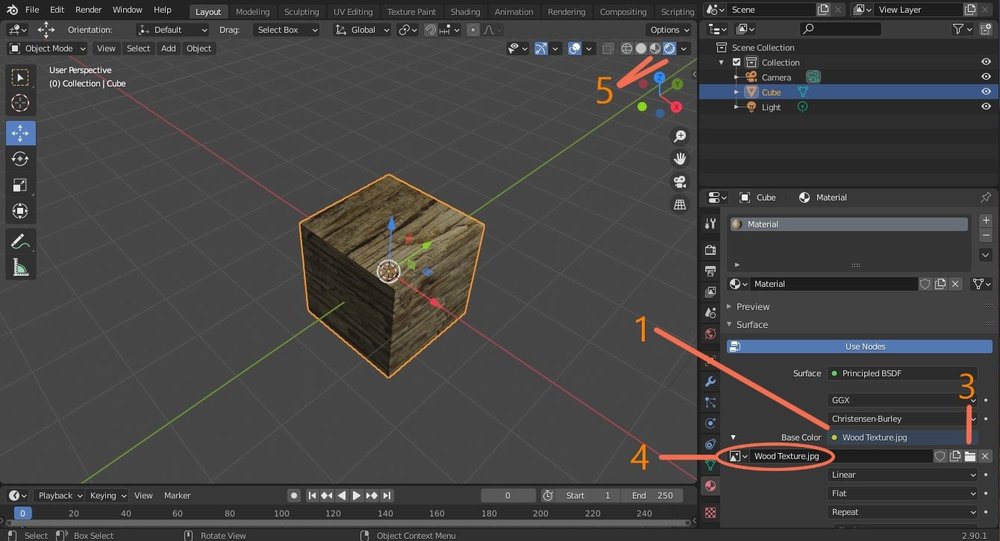
With your cube and texture ready, you can apply the image texture to the default cube with the following steps:
- In the “Materials” tab, under the “Surface” section, search for “Base Color” and click on the small yellow dot to its left.
- From the many new options displayed, click on “Image Texture”.
- Click “Open”. (Note that you could also create a texture from scratch in Blender by clicking “New”.)
- A file explorer in Blender should have opened. Locate the texture file you want to use and import.
After importing the texture file, you might notice that the default cube still looks the same. In order to change how the cube is displayed in the scene, we need to enable texture view on the viewport.
Click one of the four spheres located at the top right of the viewport. (This changes the way it displays the scene). Choose either “Look Dev” or “Rendered” to be able to see the texture.
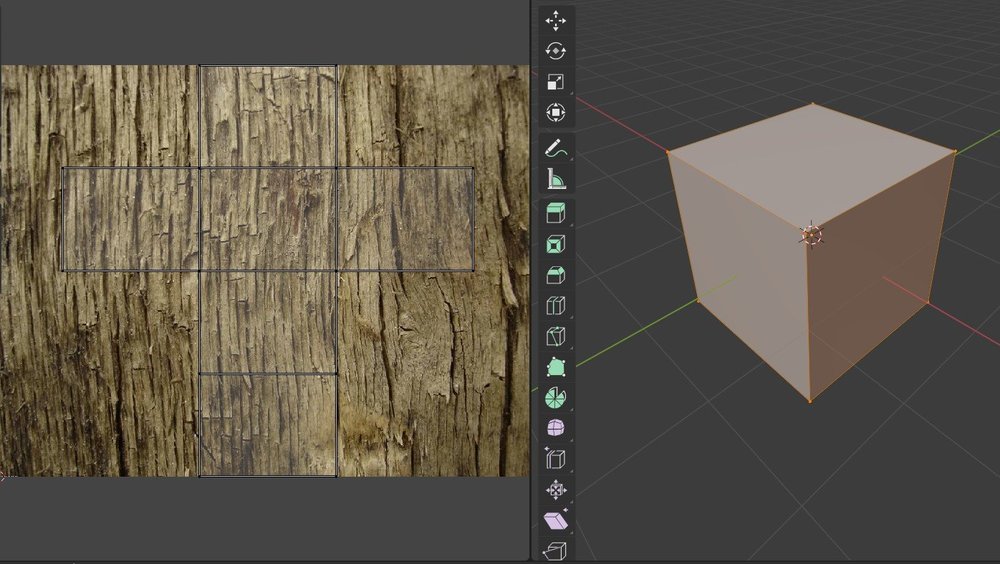
Step 3: Unwrapping an Object
If you want to have more control over the appearance of the texture, you can tell Blender precisely how to map the texture to the faces of the object. This would also be the case in the event that the texture doesn’t display on the object even after setting the viewport to show or render textures. To do this, you’ll have to first unwrap your object. Unwrapping is essentially the process of turning the surface of a 3D object into a flat 2D plane. There are many ways to unwrap texture.
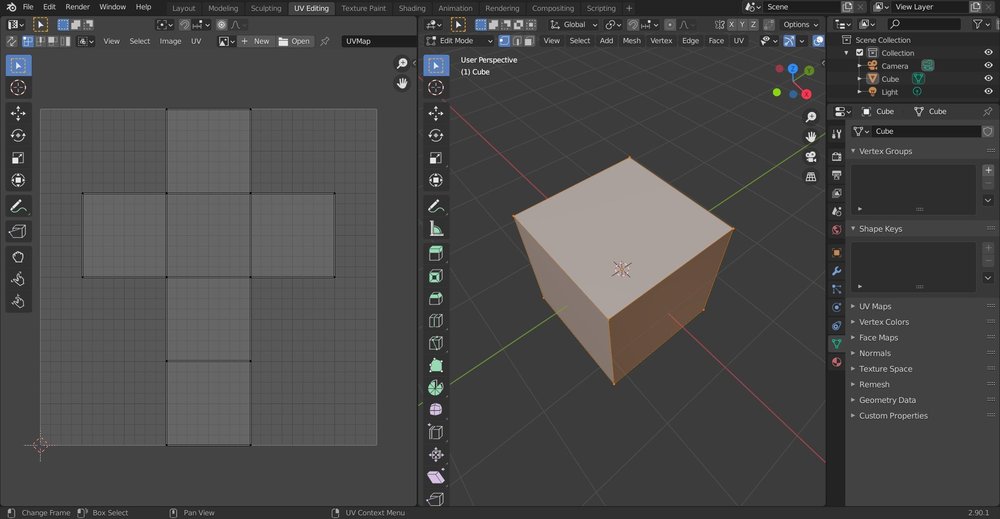
UV Editing is the simplest and easiest way to see your object unwrapped. You can choose to navigate to the top bar and select “UV Editing”. Your view will automatically switch to dual panes, with the unwrapped object on one side, and the object in “Edit Mode” on the other.
Unwrap is the second-fastest way to unwrap an object. You will change the viewport to “Edit Mode”, select the object, and press ‘U’ on your keyboard. And then you select “Unwrap”, which will be the first option to appear. While this process could work for simple objects, it’s not as effective for more complex ones.
Blender’s Smart UV project is one of the best options for models with more complex surfaces. The program will do its best to plot all the surfaces in the most efficient way possible. Still, some manual work might be needed on the object’s UVs for an optimal result. You select the object, go into “Edit Mode”, and press ‘U’. And then select “Smart UV Project”. You’ll see texture image nodes attached to the “Base Color” and from there, you can add mapping nodes and any other ones you may wish to add into the setup.
Step 4: Final Touches
Often, the texture might not display on the object perfectly, especially if it wasn’t made specifically for it. To fix this:
- Make sure the object is selected and is in “Edit Mode”.
- In the top left, click on the editor type box and go into “UV Editor”.
- Select the parts of the unwrapped object you want to move and press ‘G’ on your keyboard to move them, ‘S’ to scale, and so on.
Lastly, you can also edit the texture through the node editor. Go into the “Shader Editor”, making sure the object and material containing the texture are selected. You’ll see the texture image node attached to the “base color”. From there, you can add and adjust mapping nodes as you wish.
The Professional Cloud Rendering Service For Blender
iRender is a Professional GPU-Acceleration Cloud Rendering Service provider in HPC optimization for rendering tasks, CGI, VFX with over 20.000 customers and being appreciated in many global rankings (e.g. CGDirector, Lumion Official, Radarrender, InspirationTuts CAD, All3DP). We are proud that we are one of the few render farms that support all software and all versions. Users will remotely connect to our server, install their software only one time and easily do any intensive tasks like using their local computers. Blender users can easily choose their machine configuration from recommended system requirements to high-end options, which suit all your project demands and will speed up your rendering process many times.
High-end hardware configuration
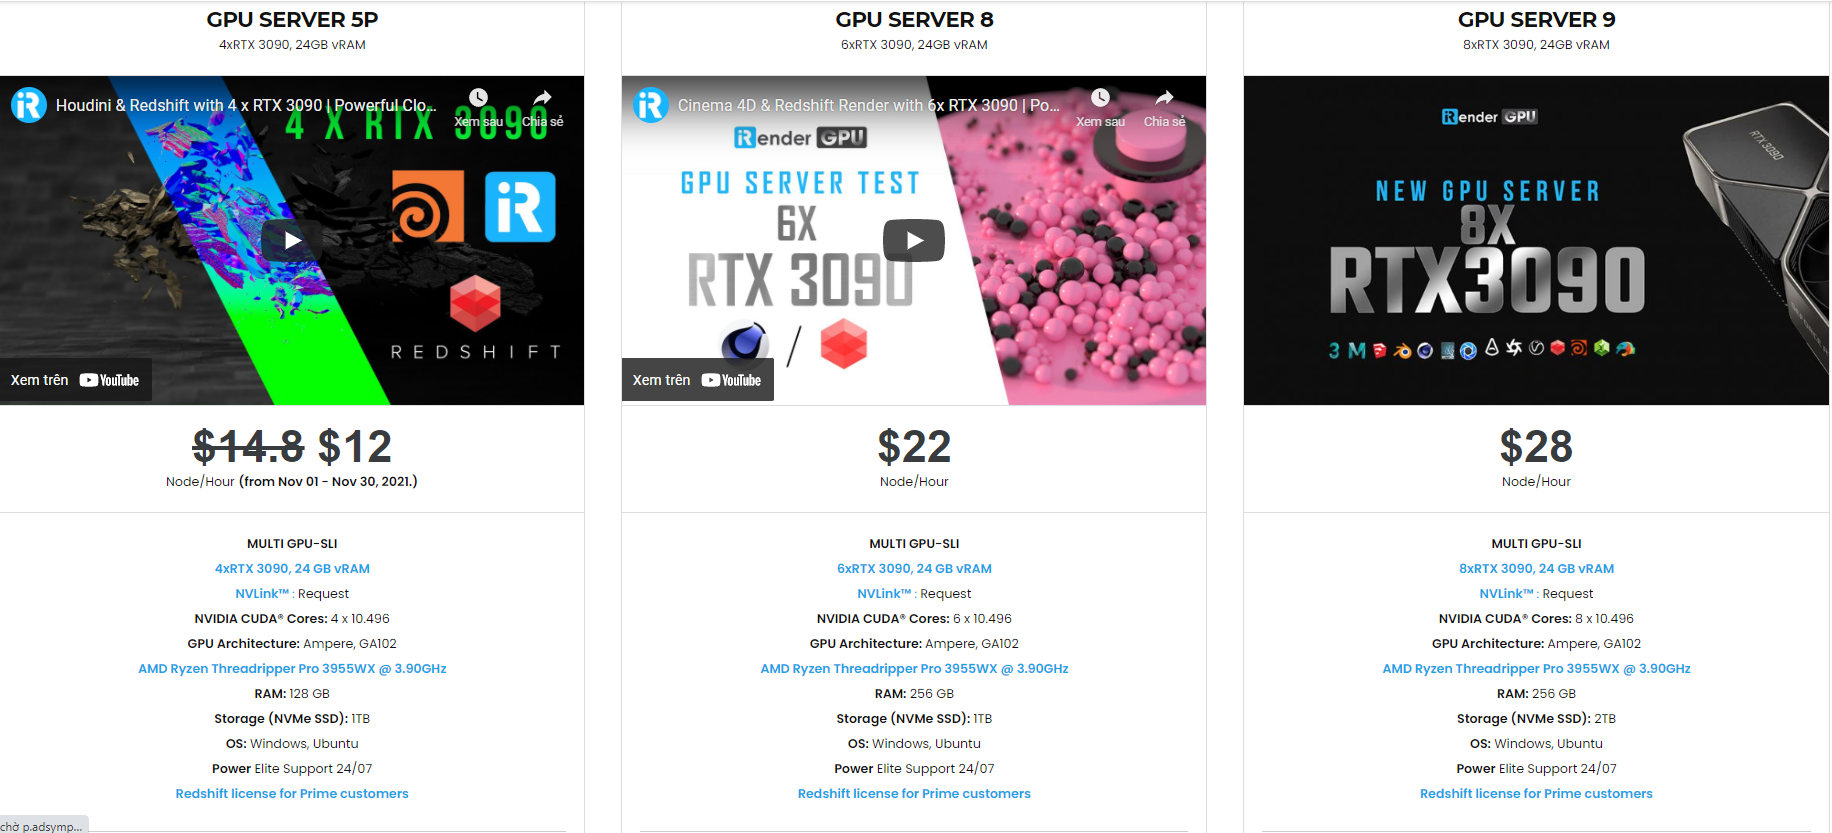
- Single and Multi-GPU servers: 1/2/4/6x RTX 3090/3080/2080Ti. Especially, NVIDIA RTX 3090 – the most powerful graphic card.
- 10/24 GB vRAM capacity, fitting to the heaviest images and scenes. NVLink/SLI requested for bigger vRAM.
- A RAM capacity of 128/256 GB.
- Storage (NVMe SSD): 512GB/1TB.
- Intel Xeon W-2245 or AMD Ryzen Threadripper Pro 3955WX CPU with a high clock speed of 3.90GHz.
- Additionally, iRender provide NVLink (Request) will help you increase the amount of VRAM to 48GB. This is a technology co-developed by Nvidia and IBM with the aim of expanding the data bandwidth between the GPU and CPU 5 to 12 times faster than the PCI Express interface. These servers are sure to satisfy Blender artists/ studios with very complex and large scenes.
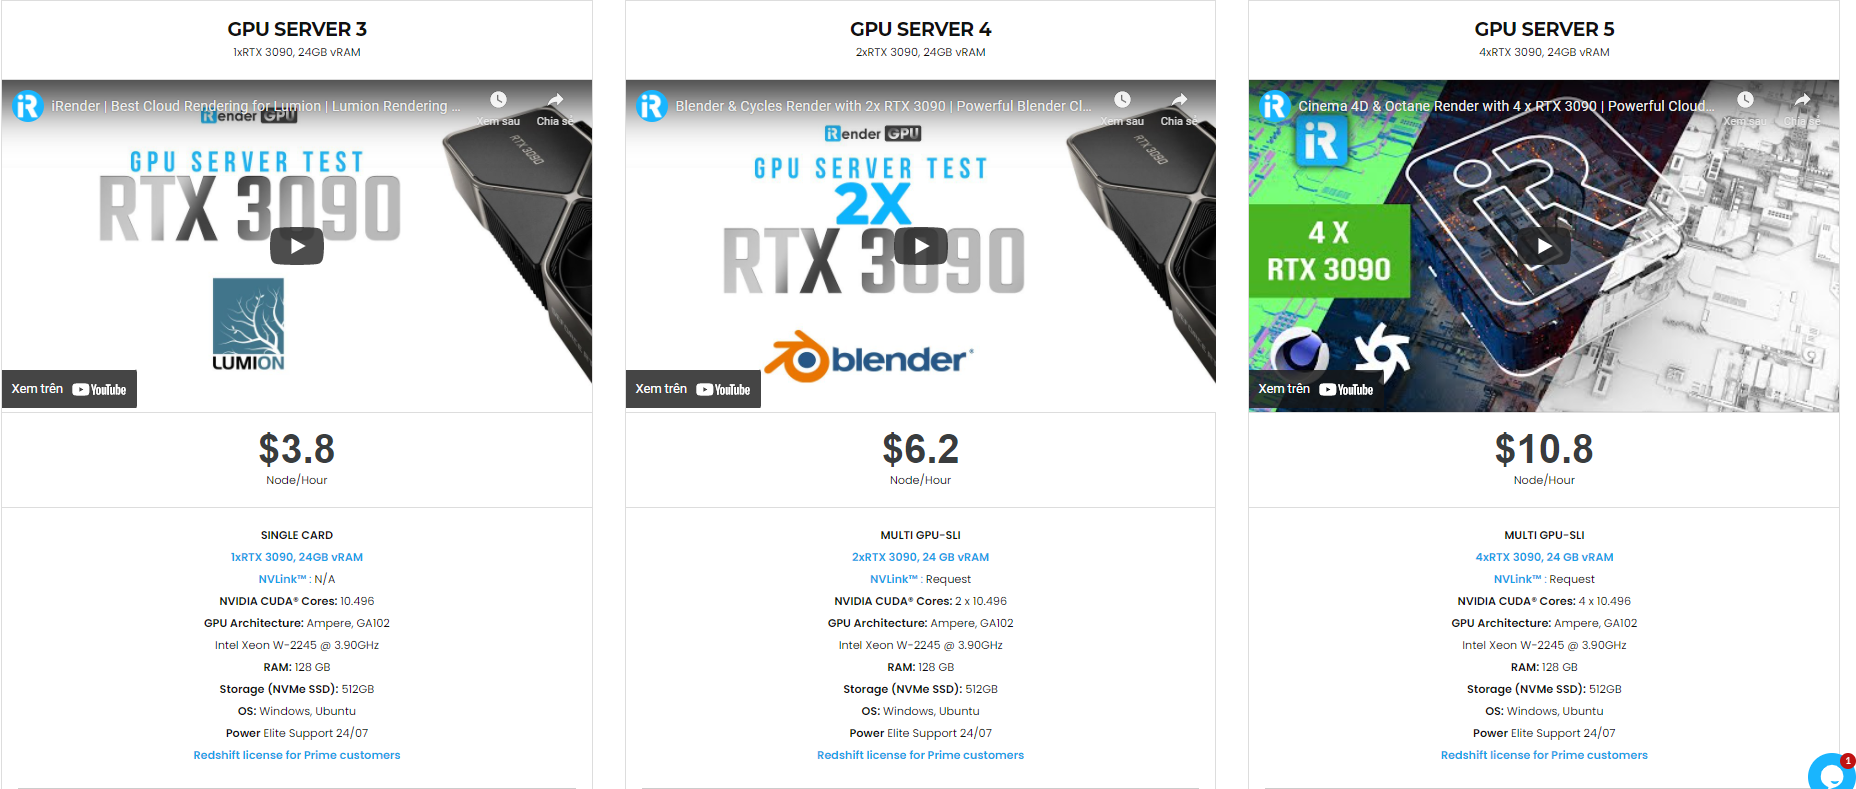
Let’s see rendering tests with Blender on multi-GPU at iRender:


- Reasonable price
iRender provides high-end configuration at a reasonable price. You can see that iRender’s package always costs much cheaper than packages of other render farms (in performance/price ratio). Moreover, iRender’s clients will enjoy many attractive promotions and discounts. For example, this October, we offer a promotion for new users and discounted prices for many servers, users will take advantage of these to level up their renders.
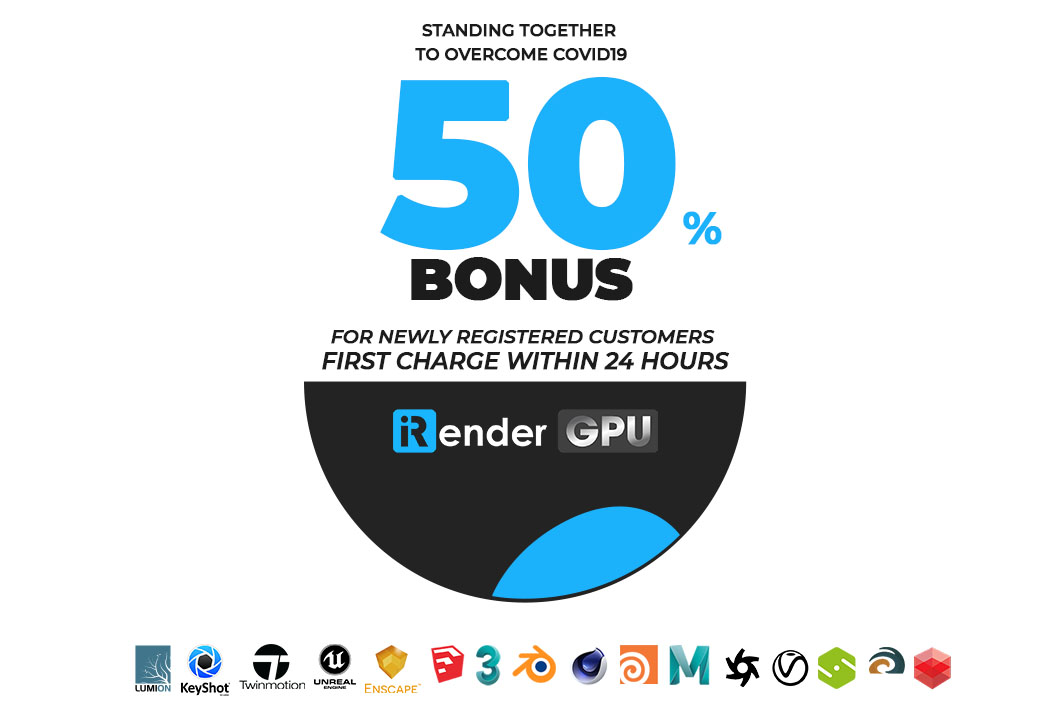
SPECIAL OFFER for this November: Get 50% BONUS for all newly registered users.
If you have any questions, please do not hesitate to reach us via Whatsapp: +(84) 916017116. Register an ACCOUNT today and get FREE COUPON to experience our service. Or contact us via WhatsApp: +(84) 916017116 for advice and support.
Thank you & Happy Rendering!
Source: all3dp.com
Related Posts
The latest creative news from Blender Cloud Rendering.


