How to Make a Border Motion Graphic Using Curves in Blender
Including animation, graphic design, film editing, and post-production, Blender has a seemingly endless list of applications. With the advent of social media, motion graphic design is more common and more sought after than ever before. For example, what if you want to make a simple border animation for a logo or a title card? Though there are many different and more advanced ways to go about it. In Blog’s Today, we will give you a basic idea of how easy it is to put together a border graphic using only curves in Blender.
1. Setting the Border Shape
When opening a new Blender scene, you’re greeted with a cube object, a light, and a camera in the Layout workspace. Pressing the animation tab above the viewport switches you to the Animation workspace that comes with a camera view and a 3D viewport, along with the animation timeline. By removing the camera’s rotation and location (ALT+R and ALT+G, respectively), you can set the camera to face downward toward the center of the scene. Now, you can move the camera up along the Z-axis to zoom in and out. Delete the default cube, and add a Bézier curve from the Add Curve menu (Shift+A). This Curves in Blender becomes the border. Switch to edit mode, and change the curve handle to Vector in the Set Handle Type menu (shortcut V). This allows you to make straight edges to the curved lines.
In the Viewport Overlays menu above the 3D viewport, change the Handles to “none” in the Curve Edit Mode section at the bottom. Also, be sure to turn on snap and check the option for Absolute Grid Snap for maximum control of the size and shape of the border. While still in Edit Mode and in the top view (shortcut 7), move either vertex of the curve (shortcut G) along the X-axis to resize the curve to your desired width. Once achieved, extrude (shortcut E) the vertex down along the Y-axis to your desired border length. Continue this process until you’re satisfied. Once complete, switch back to object mode and center the border. Do your best to move the curve to the center of the scene where the 3D cursor would sit. You can add a basic material and color to the border by pressing New in the Material Properties tab.
2. Setting the Border Thickness
Now, it’s time to add some thickness to the border. Add a second Bézier curve and move it along the Y-axis above the border so that it’s visible but not interfering with the first curve. Rename it if you wish, so as not to confuse the two curves. Next, go into edit mode and change the curve handle to Vector as you did the first curve. Move the left vertex towards the center of the scene, so it aligns with the Y-axis. Back in object mode, select the border and open the Object Data Properties tab. At the very top of the properties, you have the choice of changing the shape to either 2D or 3D. In this case, change the shape to 2D as this will be a 2D animation. Under the Geometry submenu, choose the second curve as the object in the Bevel section. Next, select the second curve and re-enter edit mode. Choosing either the left or right, move the vertex to scale the border’s thickness. The left vertex will scale the edge outward, while the right will scale the edge inward.
3. Animating the Border
Select the camera and zoom out until you can see the border or until you’re satisfied with the camera location. Then, select the border and return to the Object Data Properties tab to use the Bevel Start and End factors to view how the border animation will look. Using the Bevel Start will make the border edge disappear from the origin vertex to the last extruded vertex of the curve, and the Bevel End will do the opposite. Experiment with each to see which motion you prefer.
As for the animation, use the timeline to set keyframes to the Bevel start or End using the keyframe icon to the right of the factor. You can also change the end frame in the timeline to speed up or slow down the animation loop. For example, set the Bevel End factor in the Object Data Properties tab to 0 and set a keyframe on frame 1 in the timeline. Move the scrub cursor to frame 250 and set the Bevel End factor to 1 and add a keyframe. Once complete, press Space to play back the animation to see how it looks.
The Professional Cloud Rendering Service For Blender
iRender is a Professional GPU-Acceleration Cloud Rendering Service provider in HPC optimization for rendering tasks, CGI, VFX with over 20.000 customers and being appreciated in many global rankings (e.g. CGDirector, Lumion Official, Radarrender, InspirationTuts CAD, All3DP). We are proud that we are one of the few render farms that support all software and all versions. Users will remotely connect to our server, install their software only one time and easily do any intensive tasks like using their local computers. Blender users can easily choose their machine configuration from recommended system requirements to high-end options, which suit all your project demands and will speed up your rendering process many times.
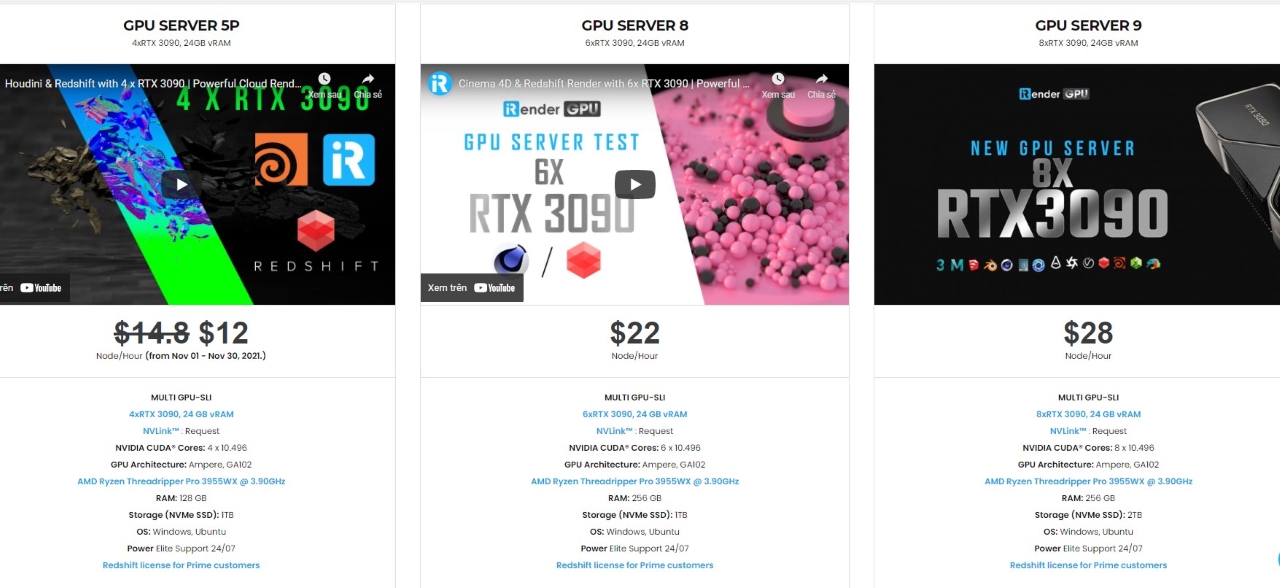
High-end hardware configuration
- Single and Multi-GPU servers: 1/2/4/6/8x RTX 3090/3080/2080Ti. Especially, NVIDIA RTX 3090 – the most powerful graphic card.
- 10/24 GB vRAM capacity, fitting to the heaviest images and scenes. NVLink/SLI requested for bigger vRAM.
- A RAM capacity of 128/256 GB.
- Storage (NVMe SSD): 512GB/1TB.
- Intel Xeon W-2245 or AMD Ryzen Threadripper Pro 3955WX CPU with a high clock speed of 3.90GHz.
- Additionally, iRender provide NVLink (Request) will help you increase the amount of VRAM to 48GB. This is a technology co-developed by Nvidia and IBM with the aim of expanding the data bandwidth between the GPU and CPU 5 to 12 times faster than the PCI Express interface. These servers are sure to satisfy Blender artists/ studios with very complex and large scenes.
Let’s see rendering tests with Blender on multi-GPU at iRender:


- Reasonable price
iRender provides high-end configuration at a reasonable price. You can see that iRender’s package always costs much cheaper than packages of other render farms (in performance/price ratio). Moreover, iRender’s clients will enjoy many attractive promotions and discounts. For example, this October, we offer a promotion for new users and discounted prices for many servers, users will take advantage of these to level up their renders.
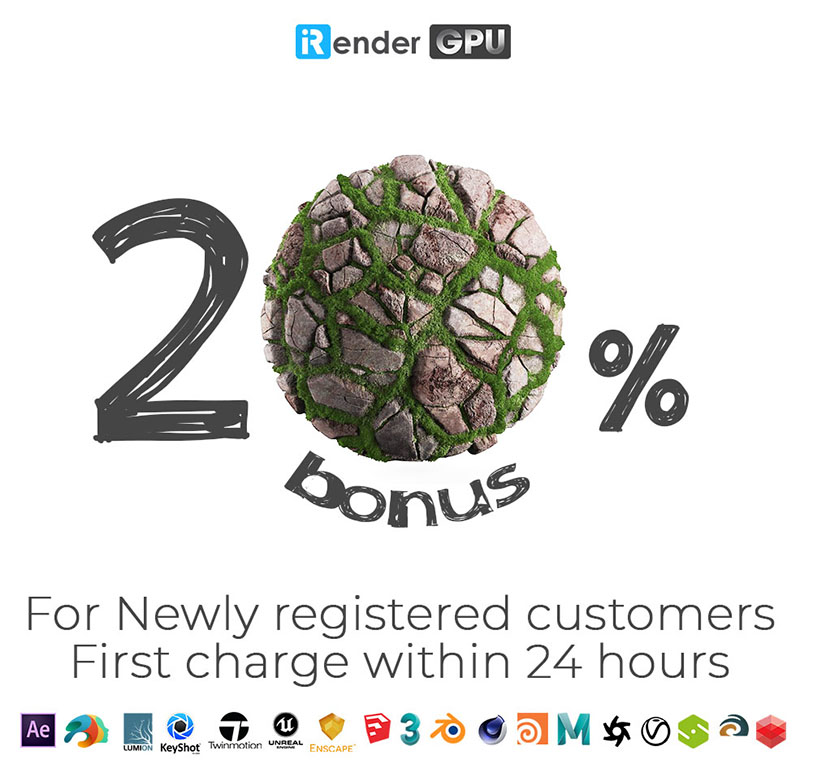
SPECIAL OFFER for this December: Get 20% BONUS for all newly registered users.
If you have any questions, please do not hesitate to reach us via Whatsapp: +(84) 916017116. Register an ACCOUNT today and get FREE COUPON to experience our service. Or contact us via WhatsApp: +(84) 916017116 for advice and support.
Thank you & Happy Rendering!
Source: renderpool.net
Related Posts
The latest creative news from Blender Cloud Rendering, Redshift Cloud Rendering, Houdini Cloud Rendering , Octane Cloud Rendering, 3D VFX Plugins & Cloud Rendering.