Some Houdini tips and tricks for better experience
Houdini is 3D software from SideFX, which utilizes a node-based, procedural approach to provide digital artists with a remarkable level of power, flexibility and control.
With its extensive toolset and capabilities, Houdini can carry out very specific tasks for 3D art. In this article, excerpts from famous 3D studios will share some Houdini tips and tricks so that you can speed up your workflow. Whether you are new to this 3D software, or you want to hone your skills in character creation and rigging, terrain generation and creating a robot with personality, these sharings below will help you to have a better experience.
01. Cut wires mode hotkey
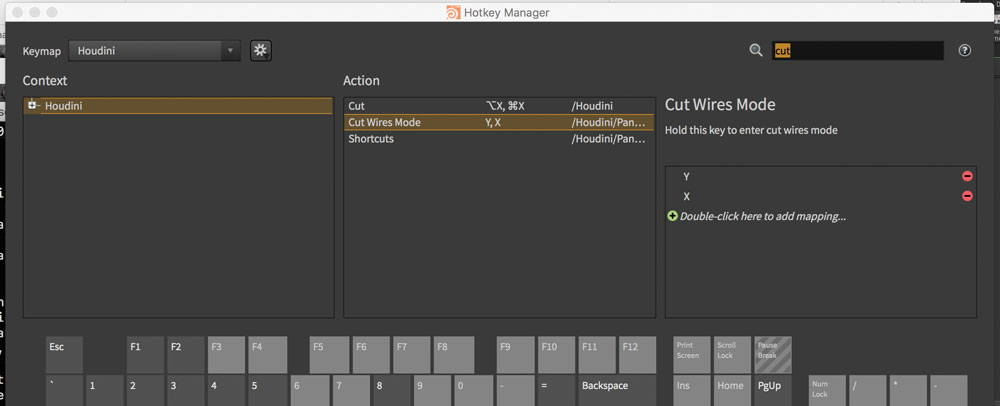
Chris Rydalch, FX technical director of Blue Sky Studio, shares the first tip: cut wires mode hotkey. This hotkey is an excellent time saver when disconnecting nodes. He said that by default, Y is set up as the key, so hold down Y and drag across network wires to disconnect the nodes. You can edit this to another letter of your choice, though.
To do this, you can go to Edit > Hotkeys, then search for Cut Wires Mode. When you click to add X, it will warn you that X is assigned to Visualize Output, so click Remove Other.
If you don’t disconnect nodes often, it’s not really a must. You can go with your frequent flow.
02. Use automatic and manual update modes
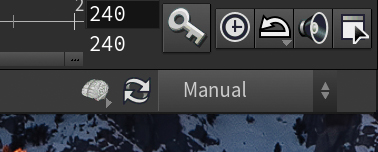
Second Houdini tips and tricks from Rydalch is switching between update (cook) automatically and manually. By default, Houdini is set to update automatically, and it works fine with small and medium scene. However, for big scene contains heavy graphs and simulations, it will be better switch to Manual cook mode. This will let you make changes to parameters and nodes without having to wait for the nodes to cook and the viewport to refresh. Click the Refresh button to see any changes you’ve made.
Also, Rydalch shares that you can add hotkey shortcuts to pick which mode. To do this, go to Edit > Hotkeys and search for Update Mode ‘Always’ and Update Mode ‘Never’, which are the commands for Automatic and Manual modes, respectively.
03. UVs along curves
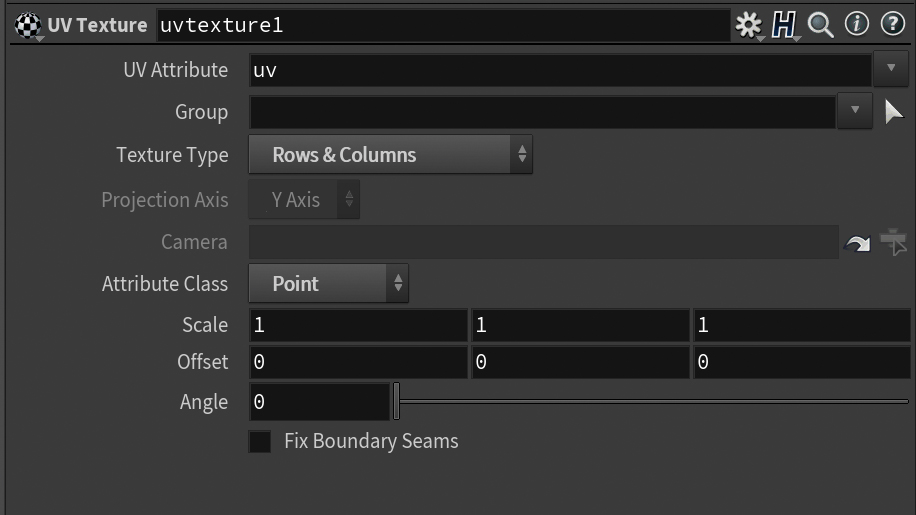
Rydalch’s third Houdini tips and tricks is that, you can easily add UVs along a curve, using the UV Texture SOP (Surface Operator). To do this, you should set the Texture Type to Rows & Columns and the Attribute Class to Point. Now you can access this in a wrangle using [email protected] to get the UV value of a point along a curve. This works with multiple curves, and not just one at a time.
04. Compound bullet shapes
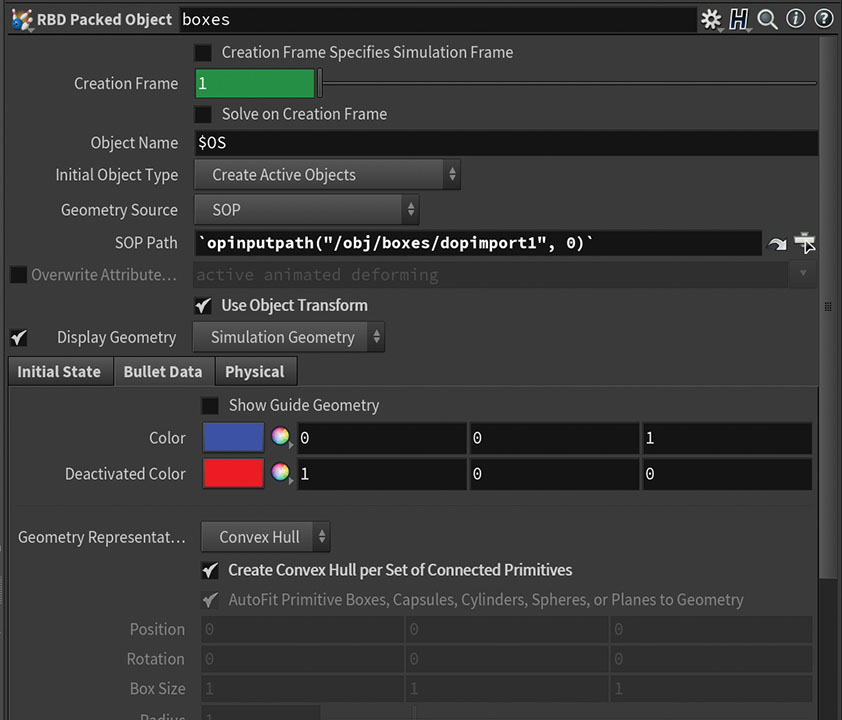
Rydalch explains that Houdini Bullet Solver is very fast, and in most cases, the default collision shapes are good enough. You can generate a special compound collision shape, if you find that the concave collision shape isn’t working. Compound collision shapes are several distinct pieces, but they are permanently glued together and treated as a single shape.
This will work when you toggle on Create Convex Hull per Set of Connected Primitives under Collisions > Bullet Data on an RBD (rigid body dynamics) Object or RBD Fractured Object DOP node. Houdini now look for the s@name primitive attribute, and all primitive shapes that share the same name attribute will be treated as a single shape.
05. Emit particles from fast-moving geometry
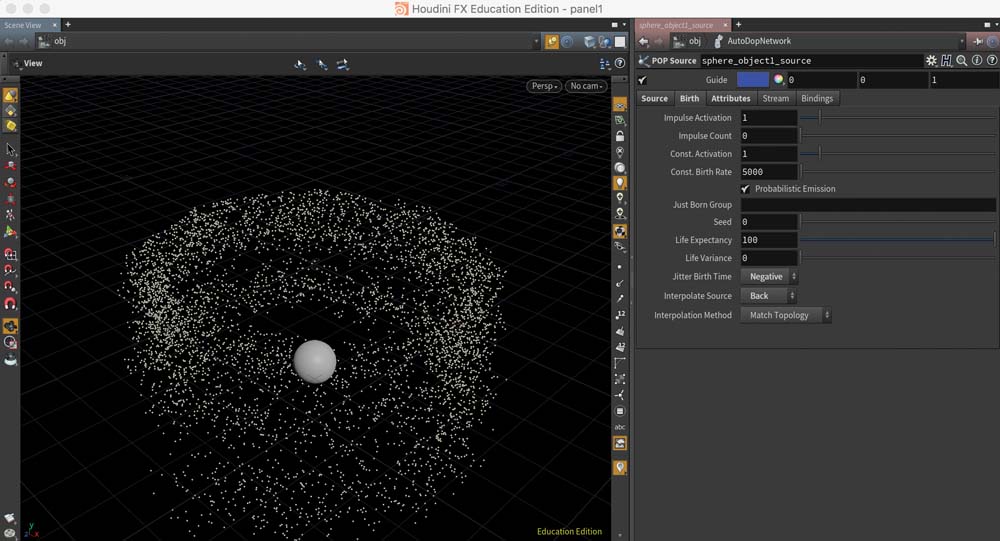
Fifth tip from Rydalch is that you can emit particle from fast-moving geometry, using the POP Source DOP, which has some built-in features under the Birth tab.
By default, Jitter Birth Time is set to Positive. Hoever, Rydalch shares that he gets better results by setting it to Negative and setting Interpolate Source to Back. This will interpolate the source geometry backwards in time, and birth the particles along that trajectory. This requires unchanging topology; your source geometry can be translating and deforming, but you can’t have varying point counts.
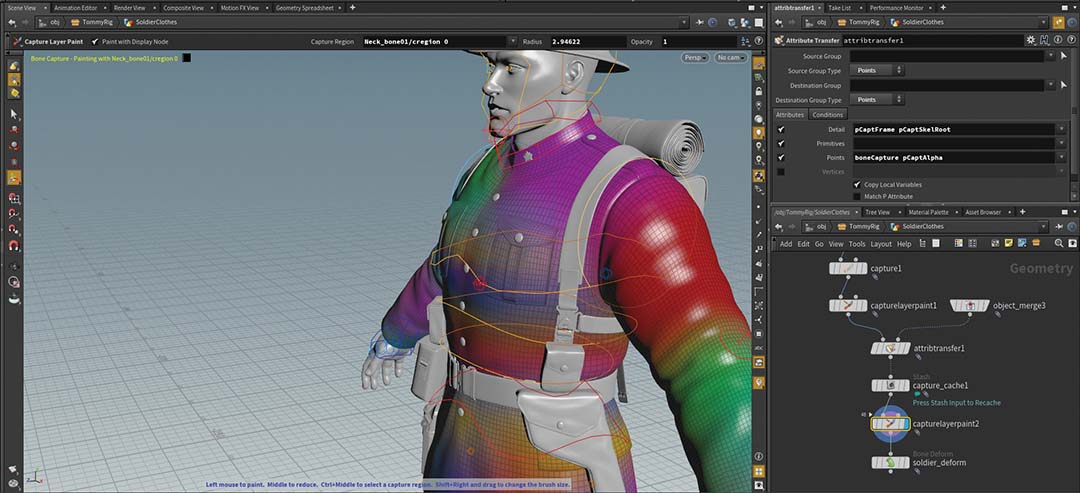
06. Bone capture biharmonic tool

The next tip is Bone Capture Biharmonic, a fantastic tool for a quick character setup. Kalin Stoyanov from Red Ring Entertainment explains that when rigging the amarok werewolf for the Houdini 16 presentation, his studio decided to use this tool and were amazed by how well it handled all the usual suspect spots – elbows and knees. The deformations were extremely smooth and behaved properly. It did not need much more weight painting. His team just did some final touches.
07. Use GATOR
Another tip from Stoyanov is GATOR, a great tool for transferring weights and shapes from one object to another, and makes it really easy to add clothes, shoes and additional objects to an already rigged characte. In Houdini, such a concept exists in the very core of the software and transferring the attributes was easy as it updates on the fly.
08. Use CHOPS
Stoyanov also recommends CHOPS (channel operators). This is the biggest reason for him to choose Houdini, and he even compares it to be the Animation Mixer (XSI) and Animation Tracks (Maya), but better and much more powerful.
09. Work with the erosion node
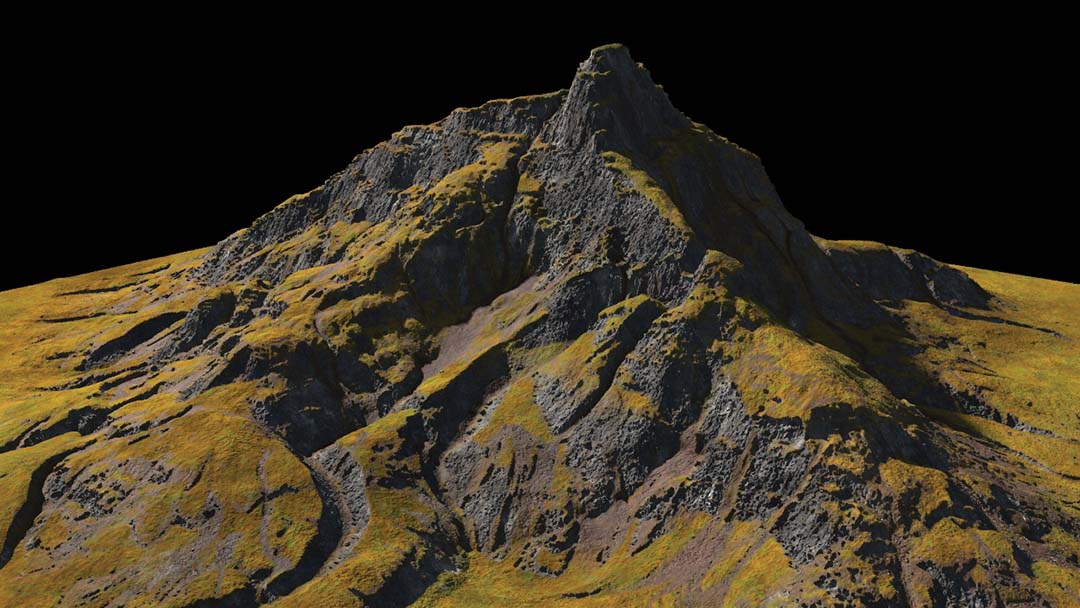
Aron Kamolz, a 3D artist, shares his tip that he always start with a low terrain resolution for the first erosion step when working with the erosion node. Doing this will help you to get strong, succinct details. Then after that, you can increase the terrain erosion, mixing in other details and do another erosion. This way will produce some exponent strong flow/erosion details for basic shaping of your terrain, and then you can add the smaller details on top.
“This workflow applies not only to the erosion node, but is also valid for the whole terrain generation process. Start low res for the bigger, dominant details and gradually increase the resolution while adding smaller details on top” says Kamolz.
10. Use terraces

Another tip from Kamolz is adding some terraces before the erosion process. He explains that it’s because the erosion washes details away. If you use it right you won’t see the terracing anymore after the erosion. Instead, your terrain profits from a bit more variety in details, since the terraces slow down the erosion process and give more space for sediments to settle down.
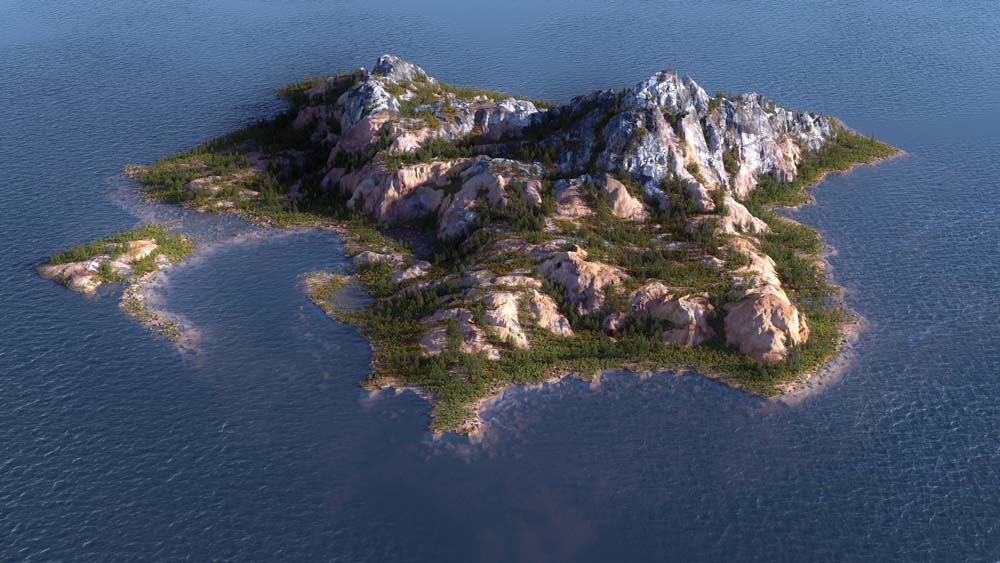
11. Mix-terrain fractals
Kamolz also suggests that you should use and mix different HeightField Noise function, to get a more interesting-looking terrain. If you just simply using only a HeightField node and then carrying out an erosion on top, your terrain will look boring and uninteresting most of the time.
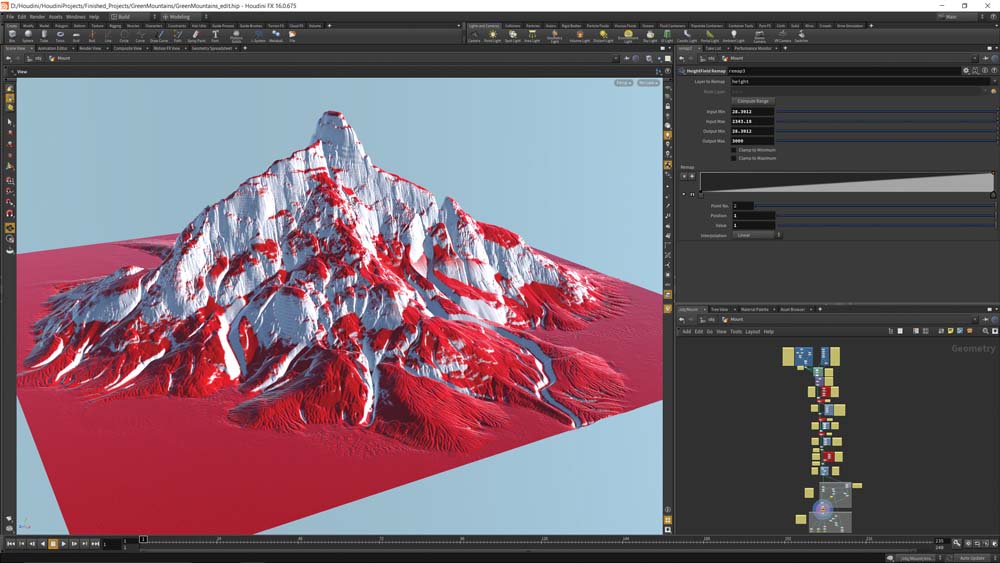
12. Make use of masks
Kamolz’s next tip is utilizing masks when working with height field terrains. If you want interesting-looking terrains, you can combine multiple height fields using several functions like mask to slope or mask to height. Some nodes also can texture your terrain, like the flow mask you get from the erosion node.
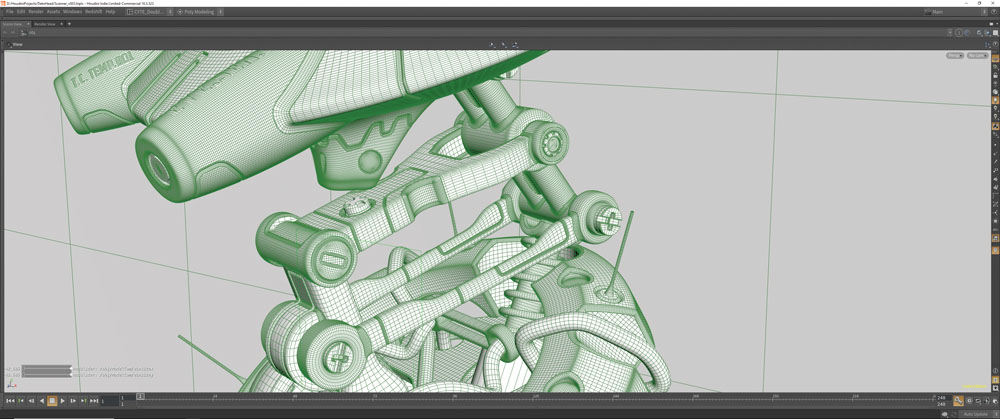
13. Experiment with Houdini's features
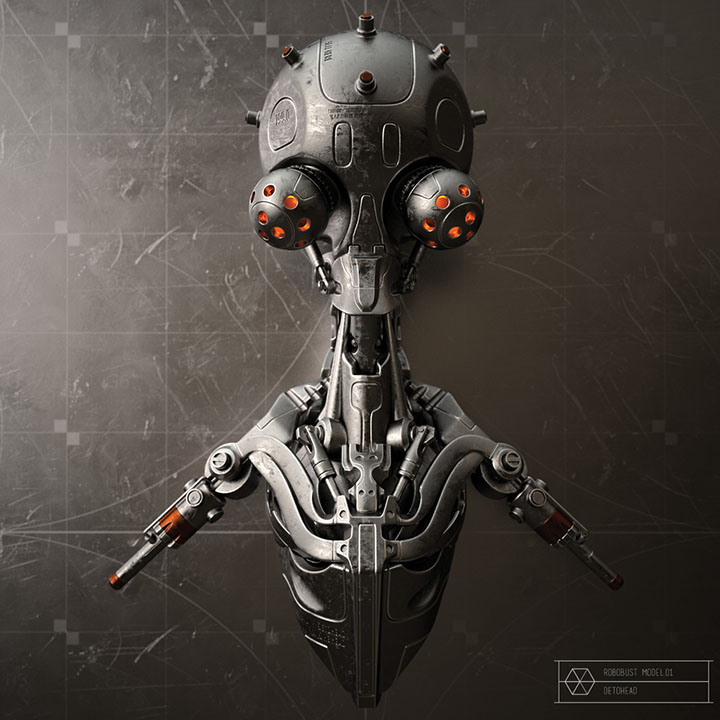
3D freelancer Philipp Von Preuschen shares some of his tips in making mechanical modelling in Houdini. In order to get used to the concepts that Houdini is based on, he started by modelling a few robot busts.
“One thing I discovered in Houdini is that it can make a big difference which part of a model gets split into its own Houdini object. Each Houdini object has its own SRT in the scene context. One could, for example, model a piston and then rotate it within its Houdini object, but the piston could also be rotated by the Houdini object that it is located in. Each method has its own pros and cons, and by experimenting and figuring out what to use I found it key when it came to successful mechanical modelling in Houdini” says Von Preuschen.
14. Utilise plugins
Von Preuschen also shares his modelling plugin for Houdini: Direct Modeling HDA by Alexey Vanzhula, which he describes a great one. This plugin provides a functionality that is similar to Modo’s MeshFusion. It’s great for efficient hard-surface modelling.
15. Add Texture
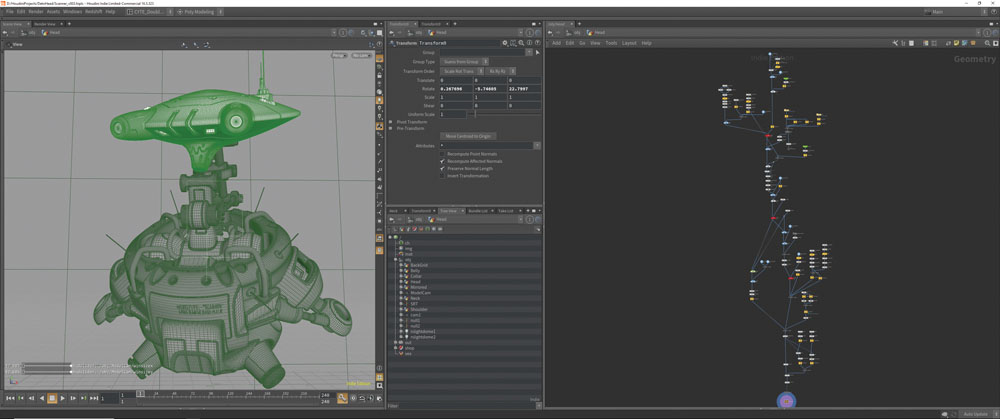
The final tip from Von Preuschen is that he didn’t assign any UVs to his creation, and he used Redshift to render the robots. Its triplanar projection is a superb way to texture almost anything super fast. The other killer texturing aid is the curvature shader, as it makes it easy to give metal some edgewear.
Conclusion
Above are some Houdini tips and tricks from 3D artists who work with Houdini, from professional to freelancer. iRender believe that Houdini might appear to be hard to use, but will be a very “sharp weapon” if you understand the workflow and explore some tips often.
iRender provide to you high performance and configurable server system for 3D rendering, AI Training, VR & AR, simulation, etc. We believe that design and creative activities are private and personal that only you artists will know what you want with your animation. That’s the reason why we provide remote servers so that you can install any software you need, and do whatever you like with your project.
You will only need to install your software for the first time, and next time you connect to the computer everything is ready for use.
For Houdini and its third render engines (like Reshift, V-Ray, Octane, Arnold, etc.), iRender recommend our 4 types of multi-GPU-servers, which are single RTX3090, dual RTX3090, 4x, 6x or 8x RTX3090. You can refer to this article for more information of the configurations and performance (Powerful Cloud Render Farm for Houdini)
Register an account today to experience our service. Or contact us via WhatsApp: (+84) 916806116 for advice and support.
Thank you & Happy Rendering!
Source: creativebloq.com
*Note: All images and video in this article are from creativebloq.com
Related Posts
The latest creative news from Redshift Cloud Rendering, Houdini Cloud Rendering , Octane Cloud Rendering, 3D VFX Plugins & Cloud Rendering.