How to map a 2D or 3D texture to a material in Maya
It is common practice to map textures to different material attributes when creating materials. Color maps, transparency maps, specular maps, and bump maps are a few types of texture maps that are frequently used.
A 2D or 3D texture can be mapped to your material in Maya. Based on the UV texture coordinates of the object, textures map to geometry. In this article, we’ll look at how to assign a file texture to a material as a color map and a bump map.
Using the Attribute Editor or Property Editor
- Using the Hypershade, choose your material in Maya. Click icon next to the attribute, such as Color in the material Attribute Editor or Property Editor, that you want to link a texture to. The window for creating a render node appears.
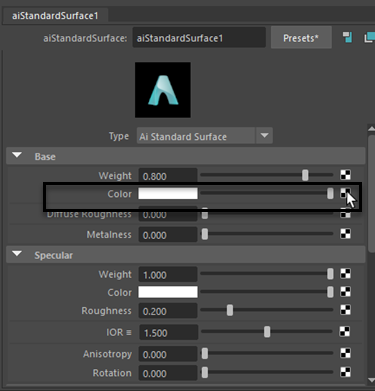
Image Source: knowledge.autodesk.com
2. From the Create Render Node window, choose File.
3. By selecting the browse icon next to the Image Name attribute in the File node Attribute Editor, you can map to the image file.
A texture is indicated by an icon next to an attribute if it is mapped to a texture.
Image Source: knowledge.autodesk.com
Tips: Using the Create Render Node window, you can select any 2D or 3D texture (such as Checker or Fractal) to map to an attribute in addition to file textures. If you want to choose a mapping method for a 2D texture, use the menu options Create texture (create normally), Create as projection, or Create as stencil. The default mapping method (Create texture) is applied if you don’t choose one.
To map a texture to a material in the Hypershade work area
To add a color map to your material in Maya
- Press Tab and type your node’s type, which is File in this case. The mapping method for each 2D texture is displayed next to its name for all of them (for example, file [Stencil]).
You can also drag and drop the texture into the work area from the Create tab.
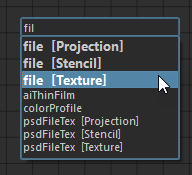
Image Source: knowledge.autodesk.com
2. By selecting the browse icon next to the Image Name attribute in the File node Property Editor, you can map to the image file.
A texture is indicated by an icon next to an attribute if it is mapped to a texture.
Image Source: knowledge.autodesk.com
To connect the Out Color attribute of the file node with the color attribute of your material, use the middle mouse or left mouse-drag.

Image Source: knowledge.autodesk.com
To give your material a bump map:
- To create a bump 2D node, press Tab.
- To map your normal map to the File texture, press Tab, create a File node, and then click the browse icon next to the Image Name attribute.
- To connect file outAlpha and bump2d.bumpValue, as well as bump2d.outNormal and the material’s Normal Camera attribute, use the middle or left mouse buttons to drag a line.
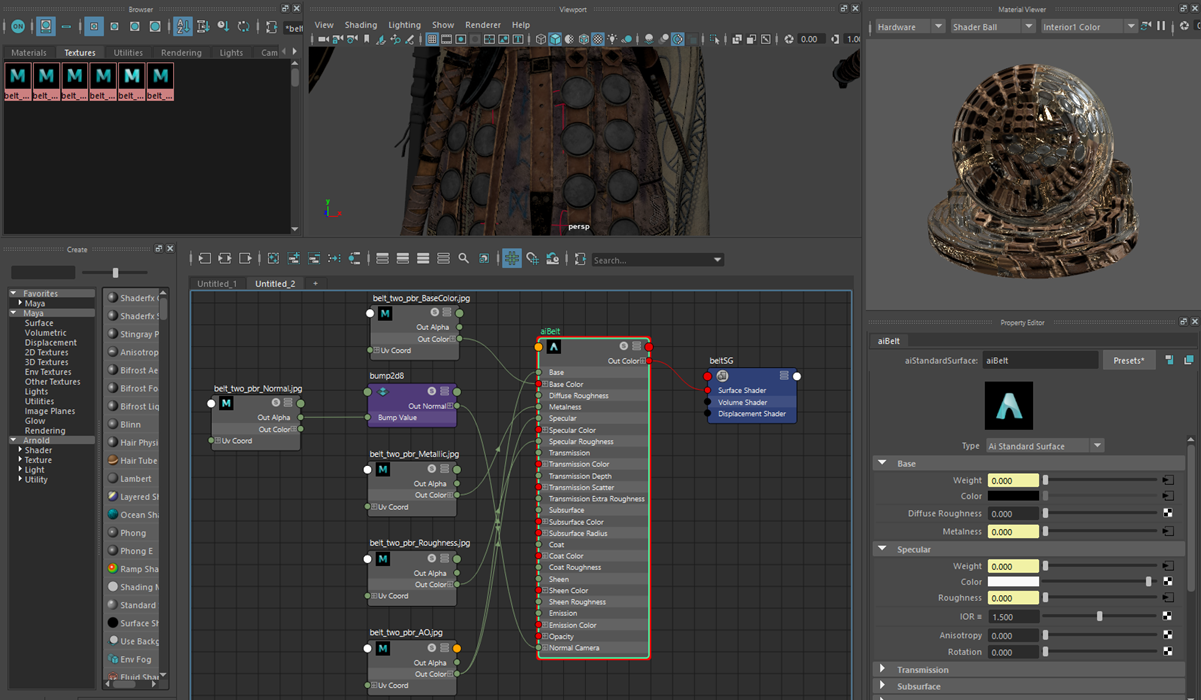
Image Source: knowledge.autodesk.com
Some tips
You can drag and drop a newly created texture into the work area to add the texture map to your graph by clicking on the Textures tab of the Hypershade Browser.
The same rules apply to connecting other kinds of texture maps. Additionally, you can only connect the R, G, or B channel of outColor to a material’s attribute rather than file.outColor.
In this illustration, the Metalness attribute of the material is connected to the R channel’s outColor attribute of the file texture.
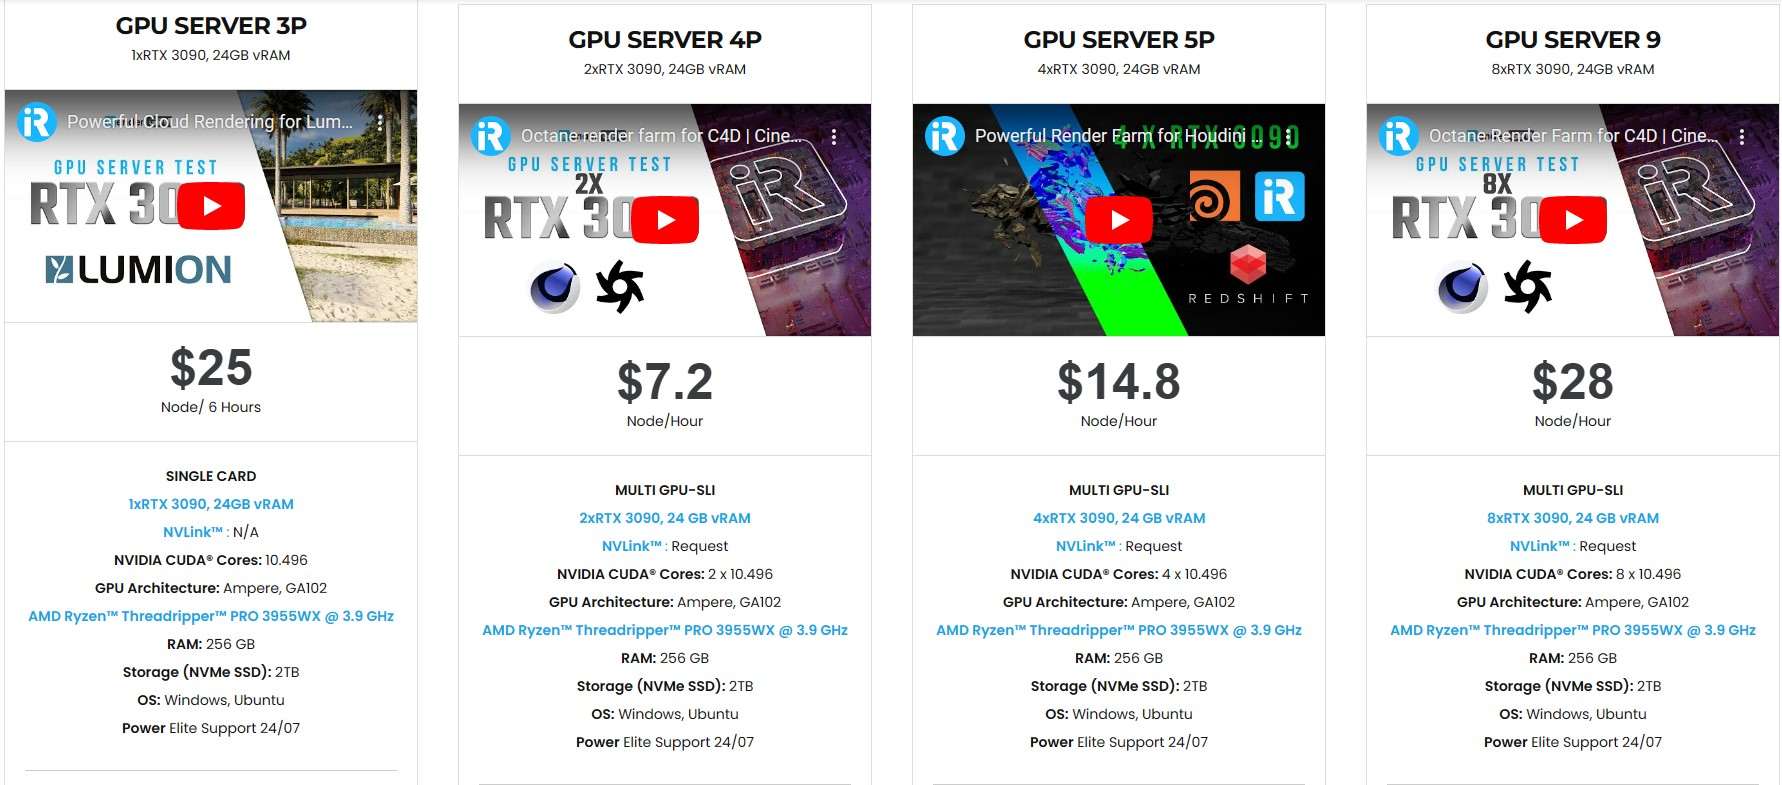
iRender - Cloud Render Service for Maya
Maya often come with third render engines like Redshift, Octane, V-Ray, Arnold, etc.. Whether or not you use any of those render engine, you still can find a suitable package at iRender.
We provide high-configuration dedicated servers (physical computers/machines) specifically optimized for GPU rendering. Using our service, you will have complete control over the server(s) you rent through the Remote Desktop application. Therefore, you can customize your creative working environment as you wish. In short, iRender’s server is like your computer in the cloud accessible on any device instantly. You will use its full power for everything. iRender provides useful features to help you switch among the server’s configurations without having to reinstall anything. You can even run multiple servers simultaneously to speed up the renders, not having to re-install anything, either.

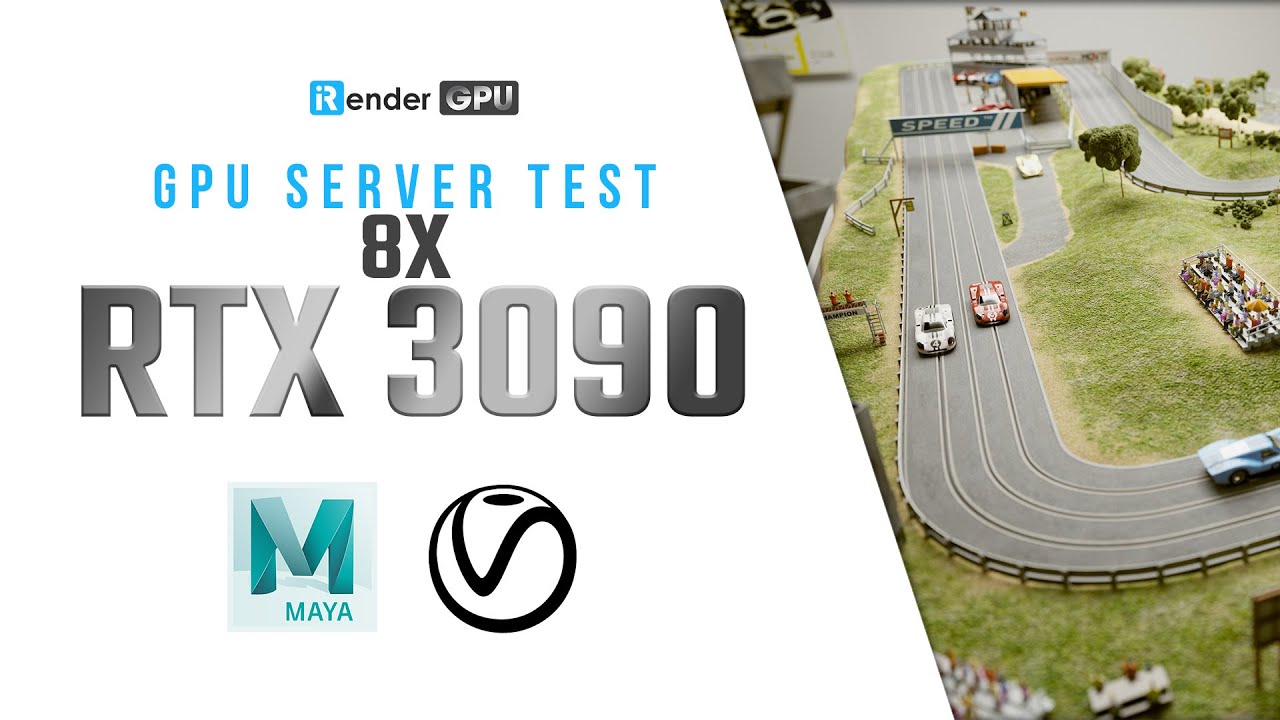
Maya benchmark with Redshift on our package 8 x RTX3090s:


Not only providing those powerful configurations, you also have 24/7 support service via live chat with real human who will support you whenever you encounter an issue.
Register an account today to experience our service or reach out to us for advice and support.
Thank you & Happy Rendering!
Source: knowledge.autodesk.com
Related Posts
The latest creative news from 3ds Max Cloud Rendering, Maya Cloud Rendering , Redshift Cloud Rendering.