Professional Cloud Rendering Service for Houdini & Arnold Multi-GPU
Arnold is an advanced Monte Carlo ray tracing renderer built for the demands of feature-length animation and visual effects movies. This is a beginners tutorial that introduces HtoA, a plug-in which allows you to use the Arnold renderer directly in Houdini. In this tutorial, we will cover how to build a simple photographic lighting studio setup that can be used for lighting and rendering all manner of objects. We will go through the steps of lighting, shading and rendering a toy robot model using the Arnold renderer. We will use Arnold’s own proprietary lights to achieve a physically accurate, photo-realistic lighting setup.
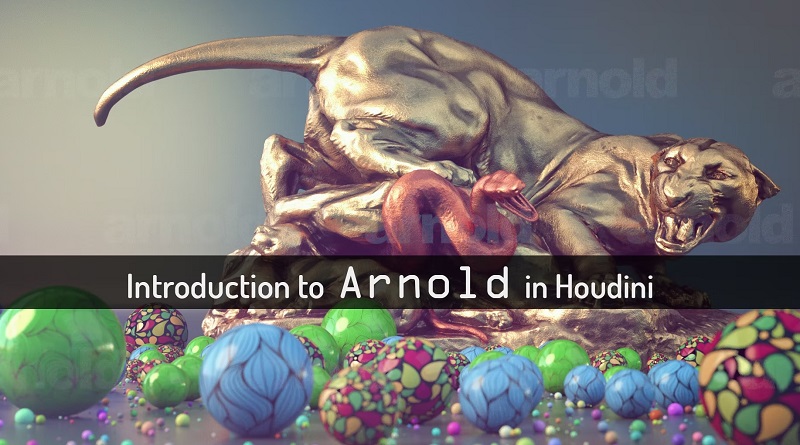
We will also look at some of Arnold’s camera lens options to produce realistic, physically accurate depth of field. Lastly we will look at how to optimize render settings and eliminate any noise that may appear in the render. The estimated time it will take to complete this tutorial should be no more than 30 minutes.
In this article, we’re show you the one of professional cloud rendering service for Houdini & Arnold Multi-GPU. Let’s get started!
System Requirement
Before starting, let’s check out the system requirement. For the hardware, Arnold GPU users can easily choose their machine configuration with the minimum system requirements as below:
– Processor needs to support the SSE4.1 instruction set.
– Video card: NVIDIA card of the Turing, Volta, Pascal, and Maxwell architectures. Generally, any GPU based on the Maxwell architecture or newer (Pascal, Volta, Turing, Ampere…) will work with Arnold if paired with new enough NVIDIA drivers. You can see the full list of supported GPUs.
But, for best performance, Arnold recommends using Ampere RTX. If you’d like to jump aboard the Arnold GPU train, here are some important things to bear in mind:
- Arnold GPU (currently) uses only Camera AA sampling.
- Best performance will be seen after using the ‘Pre-populate GPU Cache’ utility.
- NVIDIA GeForce/Quadro driver 419.67+ required.
- There is no AMD Radeon support with Arnold GPU.
- To “match noise” vs. CPU render, use (at least): Camera (AA): 3~4, Max Camera (AA): 30~50, Adaptive Threshold: 0.015~0.02
- All textures need to fit into VRAM. Note that textures are loaded on-demand.
Recommended Graphic Card
This article introduces HtoA, a plug-in that allows you to use the Arnold renderer directly in Houdini. So which graphic card is the most powerful? In the previous part, we know that Arnold recommends using Ampere RTX. Whether users are working from a workstation, laptop, data center or cloud rendering, NVIDIA provides a comprehensive set of options to meet the growing needs of every artist or studio.
Autodesk built Arnold GPU on the NVIDIA OptiX framework to take advantage of NVIDIA RTX’s RT Cores for dedicated ray tracing and Tensor Cores for AI denoising. NVIDIA RTX delivers real-time and interactive rendering, along with massive speed-ups in performance for batch and final-frame rendering. Arnold 6 is optimized for modern GPUs like Geforce RTX 3090, 3080 and 3070. You can run a benchmark to test the GPU speed in GPU rendering using Arnold for Maya. Compare your results with the chart below:
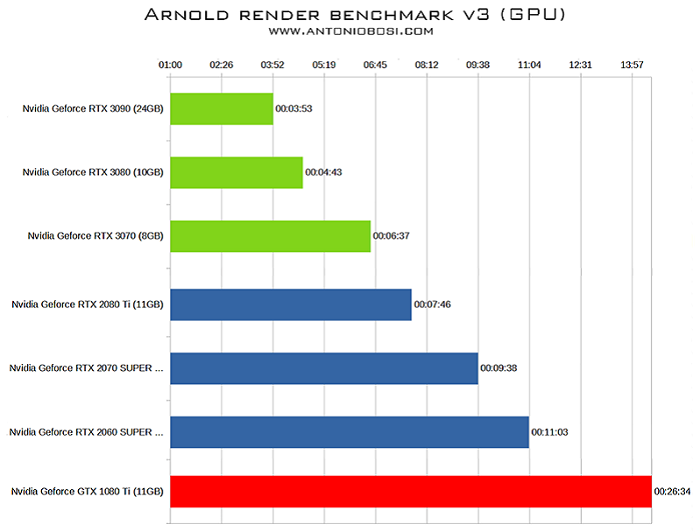
When comparing these new cards to each other there are many trade-offs to consider. The RTX 3090 is about 21 % faster for rendering in Arnold than the 3080, which is not bad, but considering it also costs more than twice as much that isn’t fantastic either. However, the 24GB of VRAM on the RTX 3090 is more than double what the 3080 offers (10GB) and the 3090 is also the only 30 Series card announced so far which supports NVLink. That means it will be much better suited to working with large scenes and detailed geometry.
Conclusion: NVIDIA’s Ampere-based graphics cards provide a huge performance advantage over the last-gen Turing and Pascals, especially the champion RTX 3090 (3m53s). That’s something users planning to upgrade would hope to see, so it’s nice to see such a notable uptick.
*Note: Arnold GPU supports up to eight GPUs. You can have a mix of RTX cards and use them all. What you can’t do is mix RTX and non-RTX cards. In that case, you won’t be able to render on all of them at the same time (just all of the RTXs at the same time).
Build a photographic lighting studio setup
Start scene
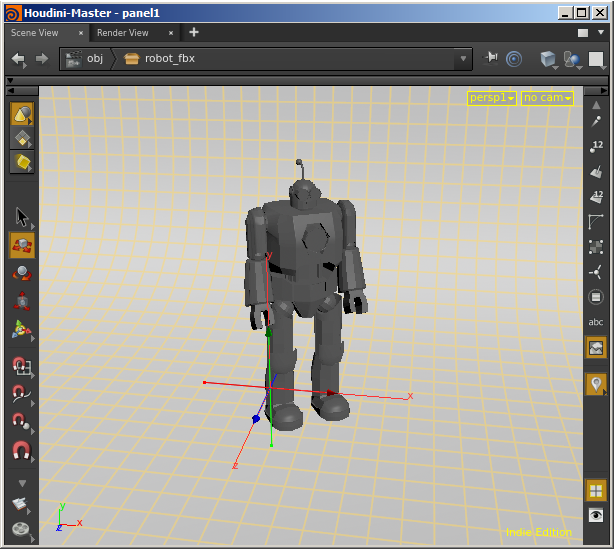
- Start off by opening this start scene. In the scene, you should see the robot model and a simple studio backdrop model.
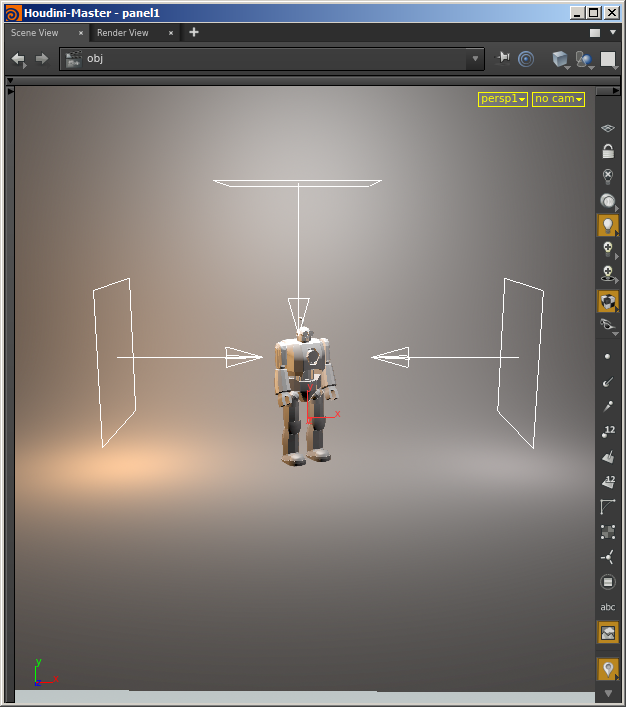
- Now we want to light our studio scene. Start off by creating three Arnold lights. This can be done by clicking on the light icon on the Arnold shelf. Change the light type to Quad.

- Position and scale one light on either side and another in the center, above the robot. Rotate them so that they are pointing inwards towards the robot as indicated in the screengrab below.
Light settings
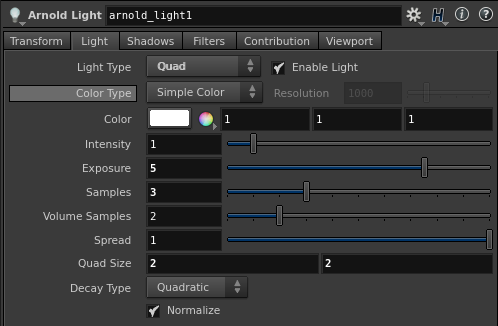
- The scene may appear dark when it is rendered. We, therefore, need to increase the exposure of the lights. Under the Arnold attributes, increase the Exposure to around 5 for each light.
Light Samples
- You may notice some noise in the shadows from the Area lights. This is because the light’s samples are set to 1 by default. To reduce the noise, try increasing the light samples to 3. This setting can be found in the Arnold attributes within each light. Light samples control the quality of the noise in the soft shadows and direct specular highlight. The higher the number of samples, the lower the noise, and the longer it takes to render.
Shadings
- Assign a Standard Surface shader to the robot. To turn it into a brushed metal material we will change the following settings. Increase the Metalness to around 1 and change the Base Color to a mid-grey color and reduce the Specular Weight to 0. The Specular Roughness controls the glossiness of the specular reflections. The lower the value, the sharper the reflection. Increase it to around 0.5.
Camera Depth of Field
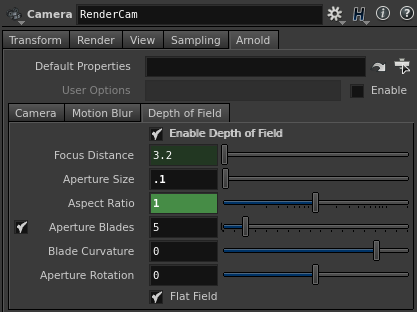
- We can use Houdini’s native camera to render the scene using depth of field. Create a camera and rename it to ‘RenderCam’.
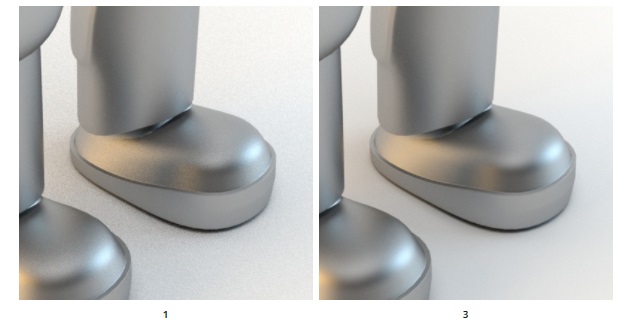
- Select Enable Depth of Field. You won’t notice any difference in the render unless you increase the Aperture Size. When you increase the ‘Aperture Size’ you should see that the robot’s head is in the camera focus. Try a low value, such 0.1 (this value is scene scale dependent).
Rendering
- Rendering the scene using the default Camera (AA) setting of 3 is good enough for test renderings. However, for a final render, you will need to increase this to at least 5 or more depending on the amount of depth of field you have set in the scene.
- There may be some noticeable glossy specular noise on the surface of the robot due to poor sampling of the indirect specular component of the robot’s shader. Increasing the global Specular value to 3 helps resolve this noise and to create a cleaner looking render.

Take your render performance to the next level with the AMD Ryzen Threadripper PRO 3955WX. Built using the 7nm Zen Core Architecture with the sWRX8 socket, this processor is designed to deliver exceptional performance for professionals such as artists, architects, engineers, and data scientists. Featuring 16 cores and 32 threads with a 3.9 GHz base clock frequency, 4.3 GHz boost frequency, and 64MB of L3 cache, this processor significantly reduces rendering times for 8K videos, high-resolution photos, and 3D models. A faster CPU will allow you to extract mesh data, load textures, and prepare scene data more quickly.
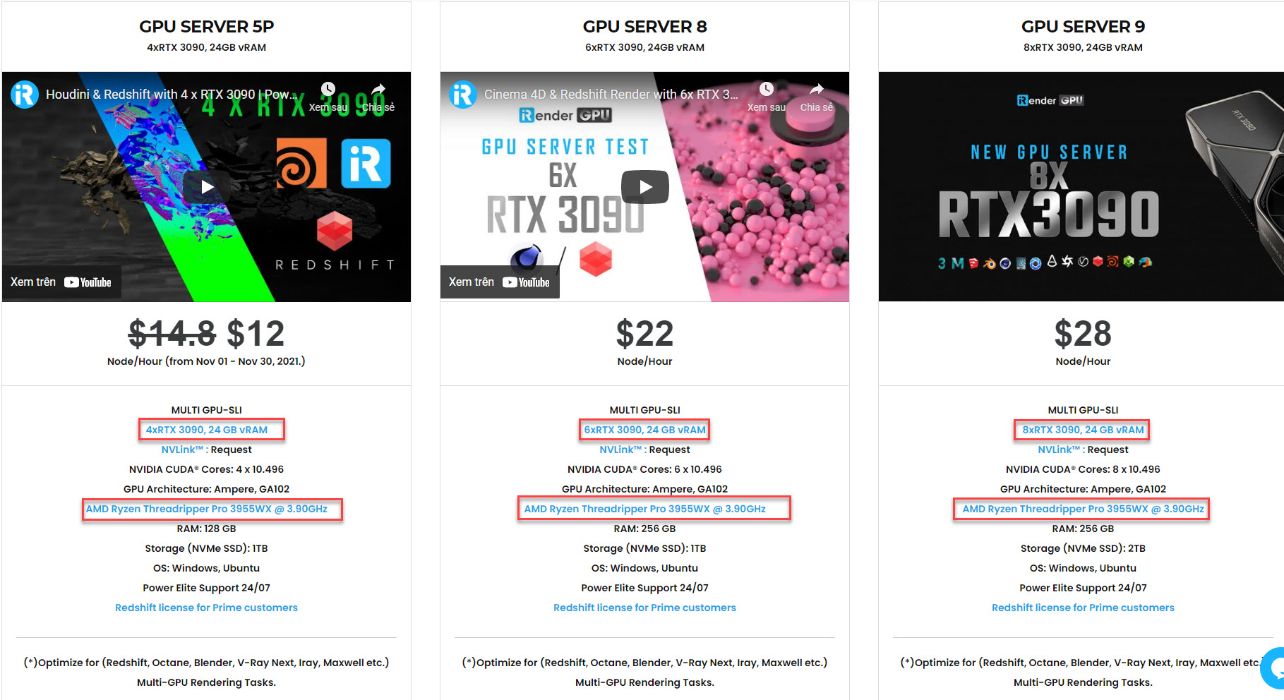
Moreover, It will also pool the memory if you have NVlink. We also provide you on-demand NVLink helps you increase the amount of VRAM to 24 x 2 = 48 GB which is powerful enough for very large projects/cache.
You can NVLink two cards, so your memory limit is determined by the third card. For example, if you have three cards with 24GB, the scene and textures have to fit in 24GB. The two NVLink cards combine for 48GB, but the third card is still 24GB, so the limit is still 24GB. Three cards are still faster than two, so it’s a tradeoff for Houdini & Arnold.
This is all about professional cloud rendering service for Houdini & Arnold. iRender hopes this article will useful for you and you will choose the best cloud rendering service for Houdini & Arnold.
For further queries, please feel free to contact Ms. Jenny: [email protected]. Sign up for an iRender account now to stop wasting pointless hours of rendering. We do the rendering, the creativity is yours!
iRender – Happy Rendering!
Source: arnoldrenderer.com
Related Posts
The latest creative news from Houdini Cloud Rendering , Cinema 4D Cloud Rendering , Redshift Cloud Rendering, Octane Cloud Rendering, 3D VFX Plugins & Cloud Rendering.