Set Up GPU Rendering with V-Ray for Houdini
V-Ray for Houdini, which is a rendering plugin. V-Ray offers a number of materials, textures, lights, utility nodes, volumetrics and render elements specifically designed for а smooth workflow.
V-Ray for Houdini includes two render engines: V-Ray and V-Ray GPU.
V-Ray is implemented in Houdini as a set of custom nodes, most notably the V-Ray Renderer node for Production rendering, and the V-Ray IPR node for Interactive rendering. V-Ray renderings display in the V-Ray Virtual Frame Buffer (VFB), which has a multitude of V-Ray specific tools for saving and comparing renderings, adding lens effects, and viewing render elements.
Overview V-Ray for Houdini
Both V-Ray and V-Ray GPU engines support Production and IPR Rendering modes. The Production Rendering mode utilizes all V-Ray’s features and is intended to be used to create a clean production ready render.
The IPR is a fast active renderer that can update the rendering as you make changes to the scene. The IPR Renderer allows for rendering in the Viewport. With Viewport rendering, the scene is rendered interactively and if changes are made, the rendered result is updated.
The IPR renderer always runs in Progressive mode, a progressive image sampling mode that refines the details over time. The Production rendering mode allows you to switch on/off the Progressive Rendering mode. Switching off the Progressive image sampler automatically activates the Bucket image sampler, which takes a variable number of samples per pixel depending on the difference in the intensity of the pixel.
Starting V-Ray Render
Make sure a camera is set. You can set several cameras in a scene and then switch between them.
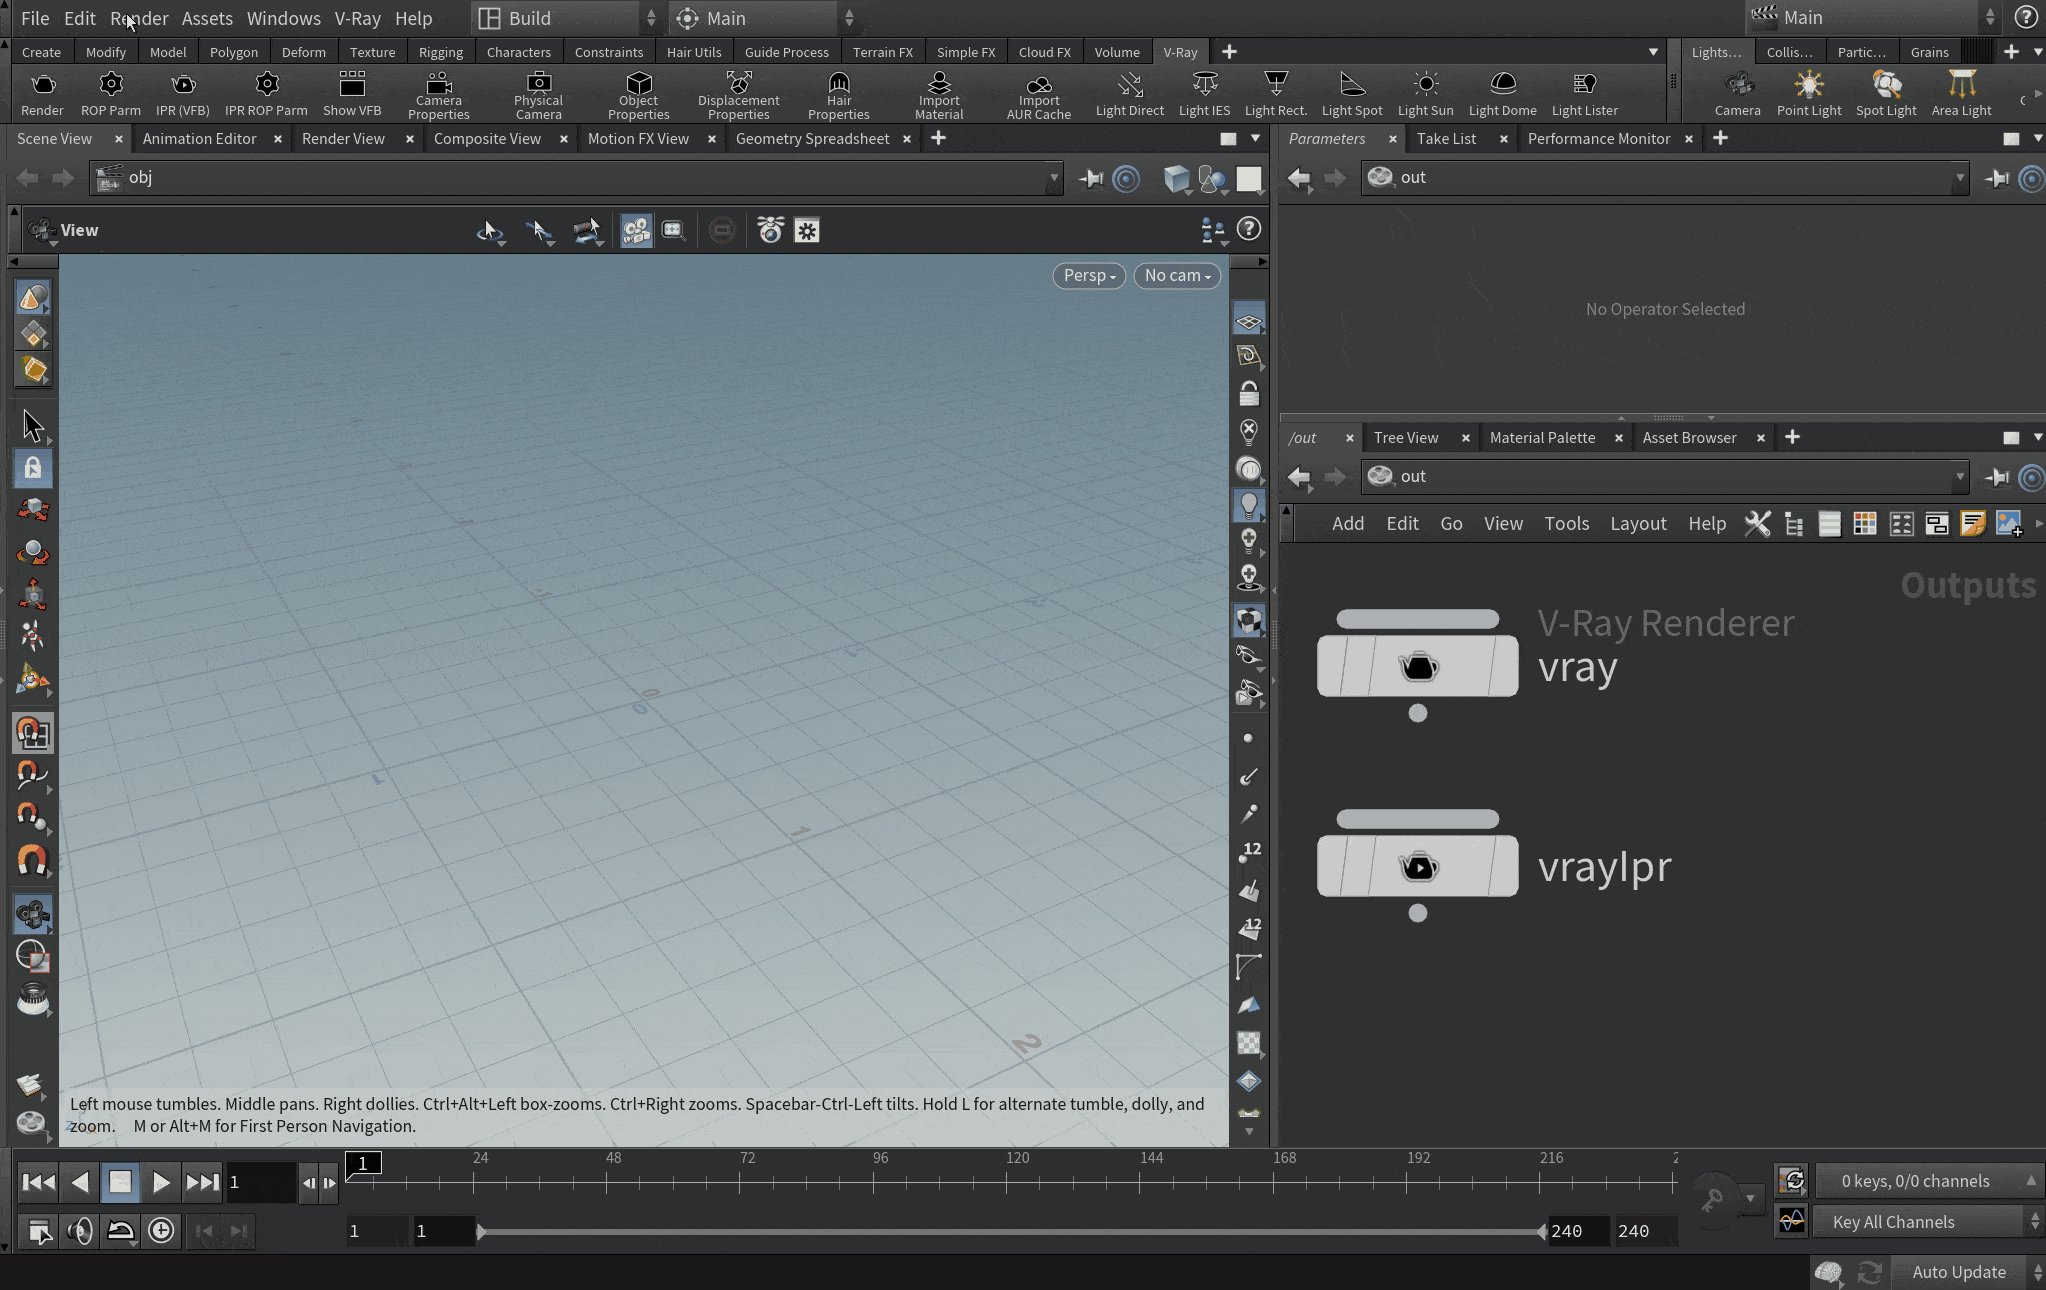
Create a V-Ray Renderer node in the out Network using one of the following ways:
- ||out Network|| > V-Ray Renderer
- Go to Render menu > Create Render Node > V-Ray

Start the rendering process in one of the following ways:
- In the V-Ray Shelf, click on the Render button. This initiates a render process in the VFB.
- Go to V-Ray menu > Render > V-Ray ROP
- In the V-Ray Shelf, click on the Show VFB button. Then in the VFB, click the Render button.
- Go to V-Ray Renderer node settings and press the Render to Disk button.
Note: If vray/vray_ipr nodes are not created in the out Network, pressing the Render button or Show VFB button on the V-Ray Shelf automatically creates them both. If necessary, the render settings can be configured.
Viewport Rendering
Make sure vray and vray_ipr nodes are created in the out Network. Create a camera in the Scene View.
Select the Render Region button.
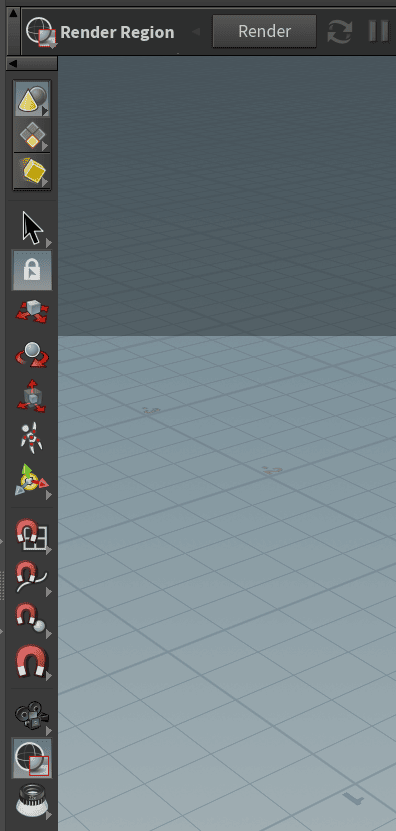
Select a region in the Scene View that will automatically start rendering using V-Ray IPR.
Configuring V-Ray Render Settings
You can configure the render settings within the V-Ray Renderer node. To navigate to the specific tabs, do one of the following:
- ||out Network|| > V-Ray Renderer node
- Go to Render menu > Edit Render Node
- Go to V-Ray menu > Render Settings
- In the V-Ray Shelf, click the ROP Parm button.
Supported Hardware and Drivers
GPU rendering allows V-Ray to perform the raytracing calculations on the GPUs installed in the system, rather than the CPU. Since GPUs are specifically designed for massively parallel calculations, they can speed up the rendering process by an order of magnitude.
To enable GPU rendering, select the CUDA or RTX option in the Export tab of the V-Ray Renderer settings.
V-Ray GPU is based on the NVIDIA CUDA platform.
Below is a list of tests we have performed and the results:
- NVIDIA: NVIDIA GPUs use CUDA, since it runs faster and has more supported features. The CUDA engine is supported only in 64-bit builds of V-Ray for Maxwell-, Pascal-, Turing-, or Volta-based NVIDIA cards.
- NVIDIA RTX: Choosing RTX GPU mode works with RTX cards.
- Hybrid Rendering (running CUDA on GPU and CPU): V-Ray GPU rendering can be performed on CPUs and NVIDIA GPUs at the same time. Using the GPU Devices tool you can enable your CPUs as CUDA devices and allow the CUDA code to combine your CPUs and GPUs to utilize all available resources.
Rendering on multiple GPUs is supported and by default V-Ray GPU uses all available CUDA devices. See the sections below for information on how to choose devices to run V-Ray GPU on.
If V-Ray GPU cannot find a supported GPU device on the system, it silently falls back to CPU code. To see if the V-Ray render server is really rendering on the GPU, check out its console output.
Note: When rendering, the console provides information about your current driver version. If the version is not compatible with V-Ray GPU, you will find a message with the recommended version.
Тo use NVLINK on supported hardware, NVLINK devices must be set to TCC mode. This is recommended for Pascal, Volta and Turning-based Quadro models. For GeForce RTX cards, a SLI setup is sufficient. Also note that to prevent performance loss, not all data is shared between devices.
Choosing Which Devices to Use for Rendering
You may not want to use all available CUDA devices for rendering, especially if you have multiple GPUs and you want to leave one of them free for working on the user interface or you may want to combine your CPU and GPU together (see Hybrid Rendering section below). To do this, you can use the GPU Devices menu in the Export tab of the V-Ray Renderer node.

After changing this option, you need to restart the V-Ray render server (if it is running) for the changes to take effect. If the V-Ray for Houdini server is running as a Windows service, you may need to stop it from the Services applet in the Control Panel.
Hybrid Rendering with CPUs and the CUDA Engine
V-Ray GPU can perform hybrid rendering with the CUDA engine utilizing both the CPU and NVIDIA GPUs. V-Ray can now execute the CUDA source on the CPU, as though the CPU was another CUDA device. To enable the hybrid rendering mode, simply enable the C++/CPU device from the list of CUDA devices.
The hybrid rendering mode does not require any special drivers. Furthermore, you can use the CPU as a CUDA device even if you don’t have an NVIDIA GPU and/or NVIDIA drivers installed. Meaning, this mode can be used on computers that don’t even have GPUs. The hybrid render engine running on a CPU supports the same features as the regular V-Ray GPU CUDA engine.
Conclusion

We hope that these tips will absolutely decrease the time it takes for you to create incredible Houdini simulations.
At iRender, we have developed multiple RTX 3090 workstations specifically optimized and configured for GPU rendering workflows, from single- GPU 1x RTX 3090 to Multi-GPU 2/4/6/8 x RTX 3090, you can choose one server that is suitable for your demand and your software to get started. You are guaranteed to experience maximum performance for your budget. Users will remotely connect to our server, install their software only one time and easily do any intensive tasks like using their local computers. We offer clients the powerful processor Intel Xeon W-2245 @ 3.90GHz / AMD Ryzen Threadripper Pro 3955WX @ 3.90GHz and up to 1 TB SSD to load your scene quickly.
Register an account today for FREE TESTING COUPON to experience our service. Or contact us via WhatsApp: (+84) 912 785 500 for advice and support.
Thank you & Happy Rendering!
Reference source: ftrack.com
Related Posts
The latest creative news from Redshift Cloud Rendering, 3ds Max Cloud Rendering , V-Ray Cloud Rendering , 3D VFX Plugins & Cloud Rendering.