
Getting started with Octane Standalone with iRender (part 1)
In this article, iRender will introduce how to install Octane Standalone edition and provide some general information so that you can work with it.
1. Octane Standalone installation
1.1. Requirements
-
-
-
- Standalone Edition– You will need V3 license. If you haven’t purchased it, please contact Otoy.
- Hardware– You will need Nvidia graphics card that supports CUDA 7.5 with the latest drivers.
-
-
1.2. Installation
Step 1) The first thing you need to do is to download and install the OctaneRender Standalone Edition.
Step 2) After downloading the software, you run the installer follow the guide to install it. Then, you open the OctaneRender Standalone edition and enter your Otoy account credentials.
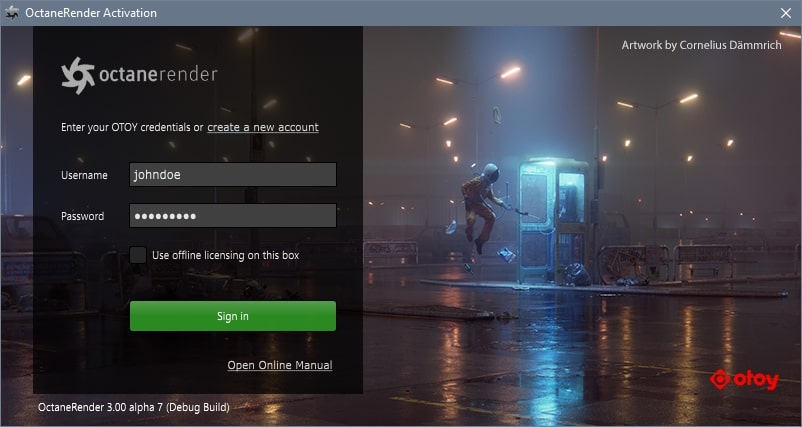
Now, the licensing system from Otoy will check for a valid license key using your ID and password. After finding your license, they will redirect you to the OctaneRender interface. Now you can start using Octane Standalone.
2. Getting started with Octane Standalone edition with iRender
2.1. Interface Overview
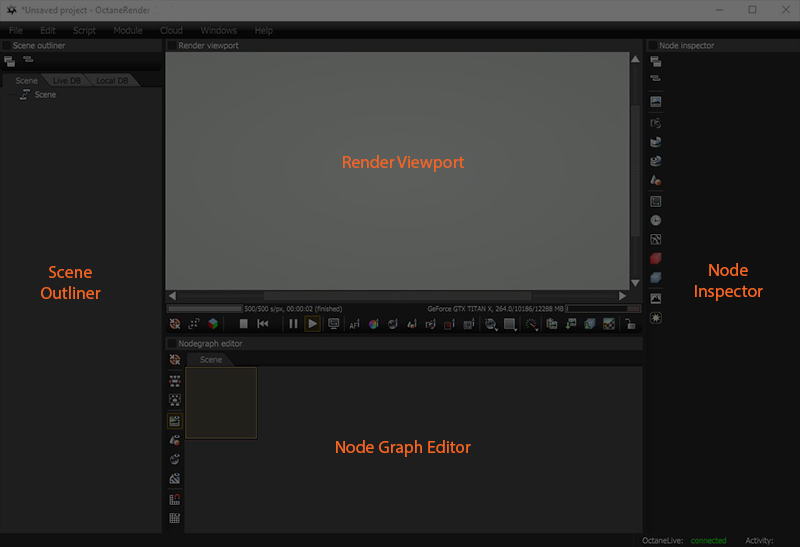
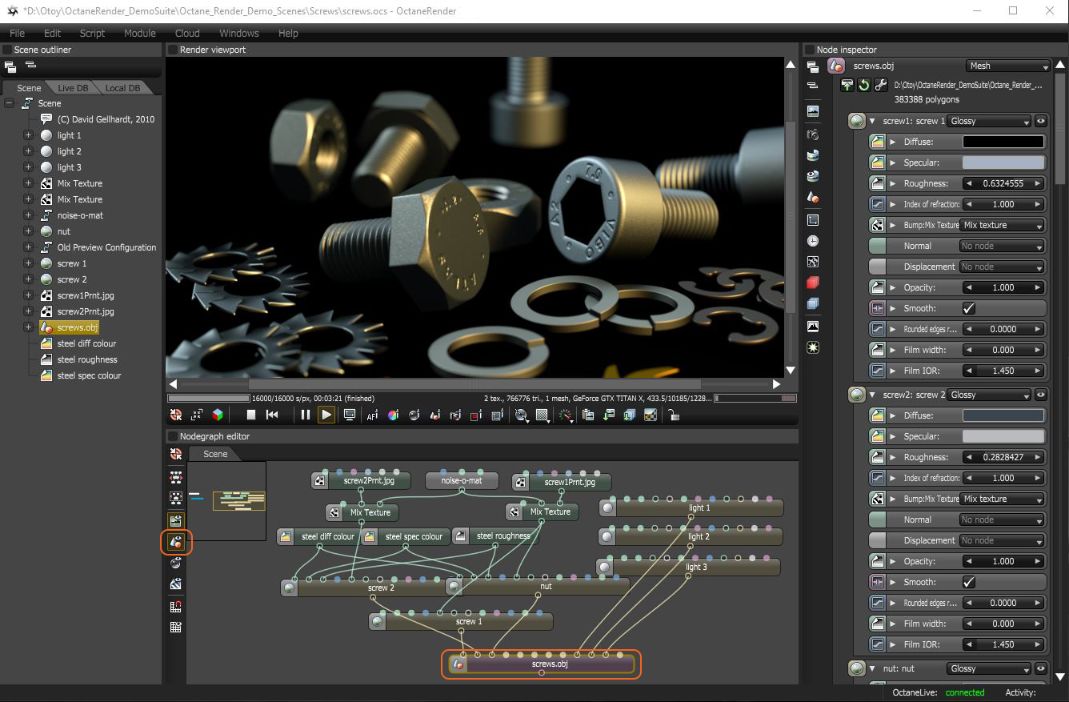
You can see in the picture below that Octane Standalone has 4 primary regions in the interface. We will explain how each of them function.
-
-
-
- Render Viewport: The render viewport is the grey area which will continually update a scene render. You can navigate the scene in real-time, and adjust materials, lights and camera there.
- Node Inspector: The Node Inspector is the region on the right side of the picture. If you select specific nodes in the Node Graph Editor, it will display parameters related to those nodes.
- Node Graph Editor: Node Graph Editor is the region below the Render Viewport. If you work in Octane, you will know that they represent elements in nodes. And to manage these nodes and display them in a flow chart we have Node Graph Editor.
- Scene Outliner: The Scene Outliner is the region on the left side of the picture. Like the name of it, you will find an overview of all the elements in the scene displayed like an outline You can also access the local and online material databases using tabs there.
-
-
2.2. Loading Scenes and Geometry on Octane Stanalone
Before staring with Octane Standalone, you should download this demo scenes.
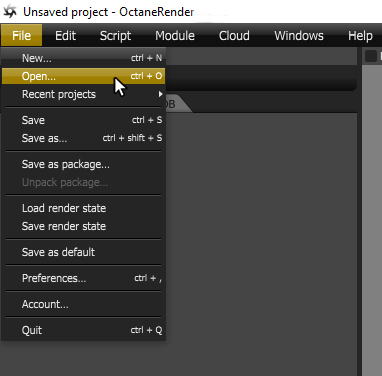
You can load scene using File – Open (pic below), and can open two formats .ocs and .orbx.
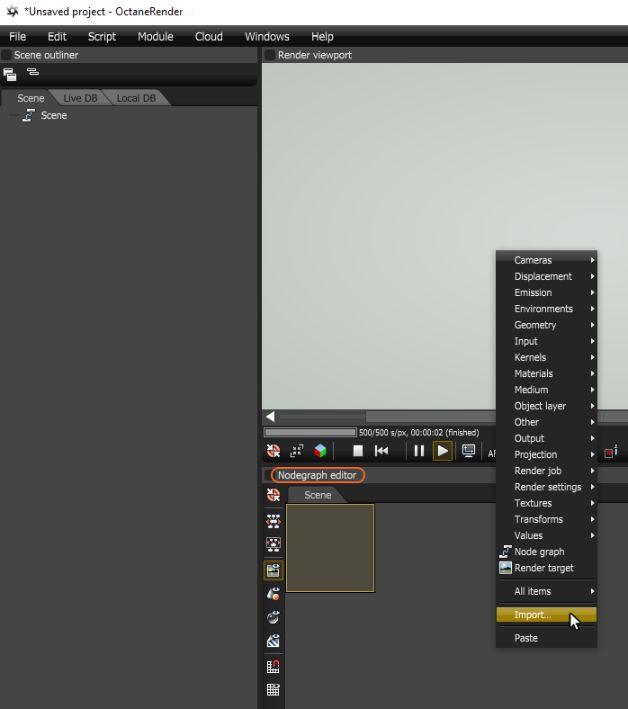
If you want to load Geometry, you can simply right-click in the Node Graph Editor > Import (pic below). You can load four formats which are .abc (Alembic) and .obj as well as .ocs and .orbx.
2.3. Navigating Scenes in Octane Standalone
In the following parts we will use the Screws scene in the Octane Standalone demo suite for example.
You can activate a rendering by selecting a Geometry node (in this example it is the screws.obj in the bottom) and toggling on the Render Geometry Nodes button on the left side-bar of the Node Graph Editor.
Navigating in the Viewport
-
-
-
- Orbit: Left Mouse Button
- Zoom: Middle Mouse Button
- Pan: Right Mouse Button
-
-
Navigating in the Node Graph Editor
-
-
-
- No orbit function since this window is not 3D
- Zoom: Scroll Wheel
- Pan: Middle or Right Mouse Button
-
-
You can see that at the bottom of the Render Viewport, there are a lot of buttons. Sometimes when you work and navigate a scene, an area may lose focus. To solve it, the Camera Focus Picker (AF button) can be used to sample the area and bring it back to focus.
In part 1 we only guide you on how to install Octane Standalone and some overview about the interface, how to load scene and how to navigate scenes. In the next part, we will focus on how to use Node Graph Editor and Node Inspector, work with Cameras and Resolution, and how to save a render in Octane Standalone. Stay tuned!
If you work with Octane Standalone, or any versions of Octane, don’t hesitate to use iRender’s remote servers. We can serve any projects with any Octane versions. To efficiently make use of our servers, you should refer to this article OctaneRender and iRender Cloud Rendering: A Perfect Match.
Join iRender now to render your Octane project faster, and enjoy 20% bonus.
Thank you and happy rendering!
Source and image: help.otoy.com
Related Posts
The latest creative news from Blender Cloud Rendering, Octane Cloud Rendering, V-Ray Cloud Rendering , 3D VFX Plugins & Cloud Rendering.


