Getting started with Octane Standalone with iRender (part 2)
In the first part we have introduce you how to install Octane Standalone and some part of its interface. Now we will focus on the rest of it, how to use Node Graph Editor and Node Inspector, work with Cameras and Resolution, and how to save a render in Octane Standalone.
2.4. Using the Node Graph Editor
There are four button on the left side-bar of Node Graph Editor (in the red rectangle in the picture below). You can use them to control what is rendering in the viewport. Each button will toggle rendering of different nodes when you select them. Specifically:
-
-
-
 : Toggles rendering of Render Target Nodes
 : Toggles rendering of Geometry Nodes
 : Toggles rendering of Material Nodes
 : Toggles rendering of Texture Nodes
-
-
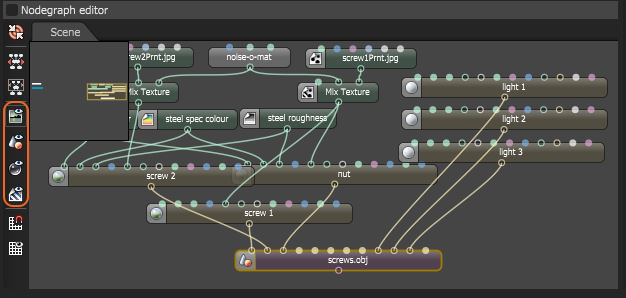
Working with Nodes in the Node Graph Editor
You can add more nodes to Node Graph Editor by right-clicking in the Scene workspace and choosing the appropriate node from the list like Cameras, Displacement, Emissions, etc.

You can also link nodes together. For example, you want to link Light node (light 3) with the Geometry node (screws.obj), just drag from output pin on the light node to the appropriate input pin on geometry node. Dragging the connection off of a pin will help you to disconnect nodes.

2.5. Using the Node Inspector
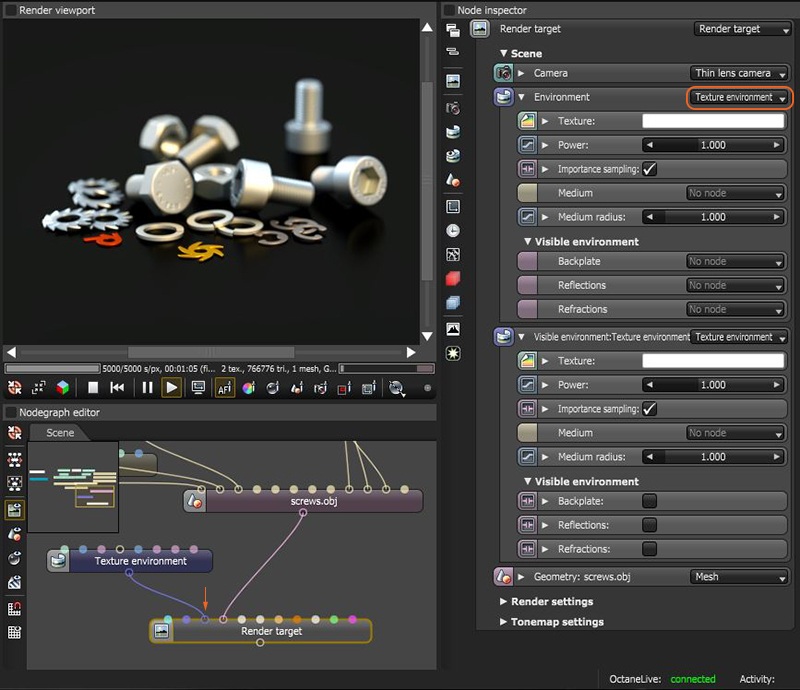
You can access and see node parameters from the Node Inspector. For example, you select Diffuse material node in the scene and can see all the parameters displayed in the Node Inspector on the left.

In the Node Inspector you can also see the internal list of parameters of a specific node. However, there’s an interesting feature that you can connect inputs from another node to override the internal parameters of one node. For example, the picture below shows that You can replace the internal Environment parameters of the Render target node by a Texture Environment node. This way will add more visual organization to parameters by leveraging the Node Graph Editor.
On the left side-bar of the Node Inspector, you can see some node parameters buttons. You can access some of them there without adding their corresponding nodes to the Nodegraph Editor. For example:
-
-
-
 : Allows for the editing of parameters found in a Render Target Node
 : Allows for the editing of parameters found in a Camera Node
 : Allows for the editing of parameters found in an Environment Node
-
-
Note: When you add an actual Render Target, Camera, and/or Environment node to the scene, these default parameters will be overwritten and these buttons will access those specific nodes in the Nodegraph Editor.
2.6. Working with Cameras and Resolution
In a scene there’s always a default camera. In the Navigating Scenes section, we have introduced how to control camera position and orientation with three mouse button.
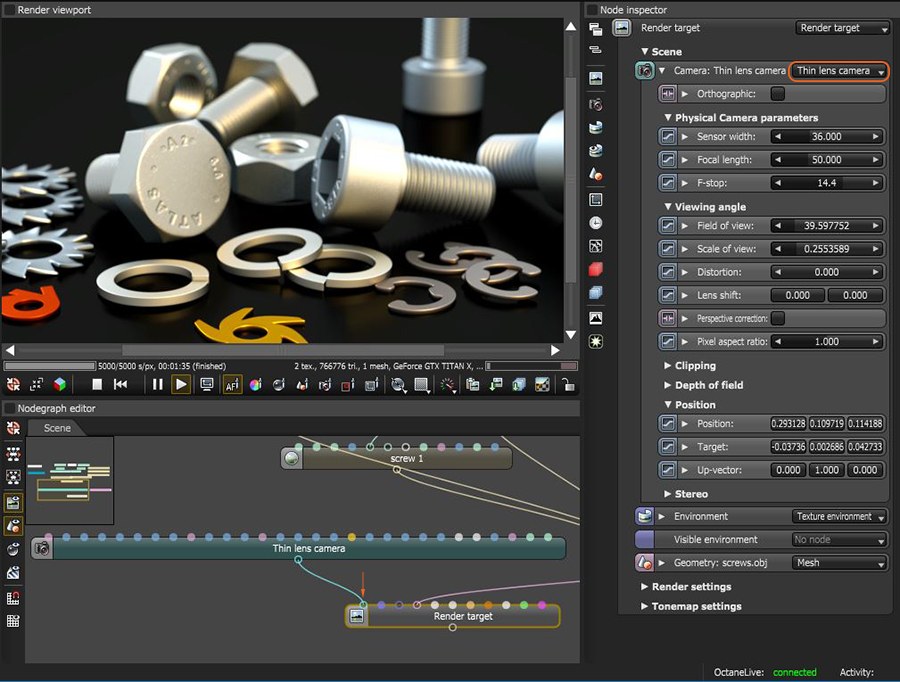
You can add three types of camera nodes to the Nodegraph Editor, which are: Baking Camera, Panoramic Camera, Thin Lens Camera. In the picture below is a Thin Lens Camera node connected to the Camera input pin on a Render Target node. Nodegraph Editor can display multiple camera nodes, which means that you can render a scene from multiple camera locations.
Controlling Render Resolution
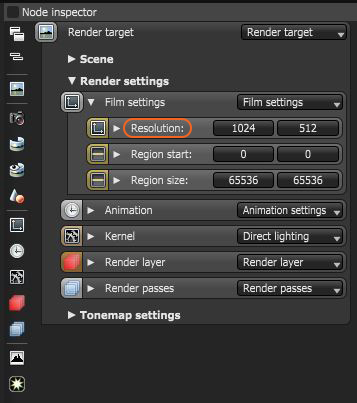
When you select Render Target node > Render Settings > Film settings, you will see Resolution and can modify it there.
2.7. Saving a Render for Octane Standalone
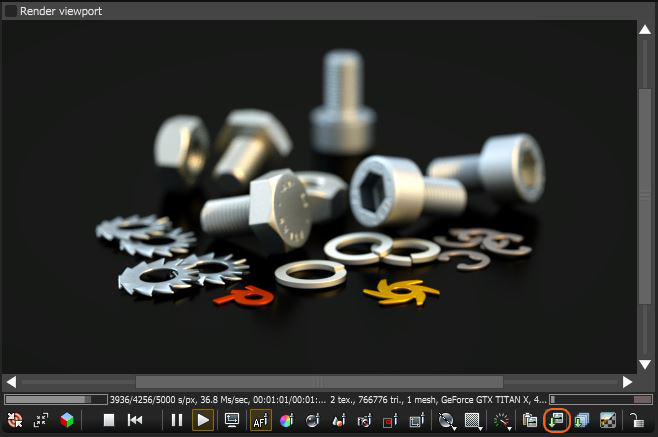
There are two ways to save a render. The first one is you right-click in the Render Viewport > Save as > choose the desired format (PNG, EXR).

The second one is you just click on the Save Current Render button in the bottom right of the Render Viewport window.
3. iRender - The best render farm for Octane Standalone
iRender has instructed you to install Octane Standalone, and introduced 4 main regions including how to use them. We hope that it shows a general idea for you about Octane Standalone. If you use OTOY Octane’s product, don’t hesitate to consider iRender. We have many servers to speed up your rendering time, from dual RTX3090s for Octane Studio, to multi RTX3090s for Octane Enterprise and Octane Standalone.
To efficiently make use of our servers, you should refer to this article OctaneRender and iRender Cloud Rendering: A Perfect Match.
Join iRender now to render your Octane project faster, and enjoy 20% bonus.
Thank you and happy rendering!
Source and image: help.otoy.com
Related Posts
The latest creative news from Blender Cloud Rendering, Octane Cloud Rendering, V-Ray Cloud Rendering , 3D VFX Plugins & Cloud Rendering.