General understanding of ACES workflow in Maya
Since version 2022, Maya has used ACES as its default config, without further action required. ACEScg is also the default rendering space in Maya 2022 and the default view transform is the ACES Output Transform for sRGB. Therefore in this article, let’s have a general understanding of ACES workflow in Maya.
What is ACES?
The Academy Color Encoding System (ACES) is a color management and image sharing system developed by the Academy of Motion Picture Arts and Sciences. With ACES, you can work with color, coding, and transformation. ACES also enables you to work consistently if you have to transfer working material between different departments, or to create archival materials with a high dynamic range and wide color gamut, thanks to its ability to store all the data of digital images in the same mathematical space.


Some of the ACES features include:
-
-
-
- Wide range of color and light, exposure.
- Predictable image display on a wide range of display devices.
- Preserving the full range of highlights, shadows, and colors.
- Simplifying the matching of images from different cameras.
- More accurate color display with no incorrect color values.
- Work in Linear color space.
- No over highlight and clamp, on bright areas of the image, etc.
-
-
ACES Workflow
ACES consists of several components:
Input Device Transform (IDT) – Color conversion from input material. You can call it Input Transform.
Reference Rendering Transform (RRT) – Color transformation from scene-referred to display-referred space, using an S-shaped tone curve, image preparation for output.
Output Device Transform (ODT) – Transforms to an output device, a transformation such as Rec. 709, DCI-P3, Rec.2020. In practice, the RRT and ODT are combined and called an Output Transform.
ACES Output Transform Choices
Using ACES system, you can provide Output Transforms for a wide assortment of displays and projectors. You’ll want to choose the appropriate Output Transform for your situation based on the following factors:
Your device (monitor or projector) and how it is calibrated. This could range from a simple sRGB monitor to an HDR monitor calibrated to Rec.2100-PQ, to a digital projector calibrated to DCI-P3. Each type of device will use different viewing environment, according to ACES system documentation. For example, monitors such as sRGB or Rec.709 will use a dim environment (rather than a dark environment).
Your creative white point. The native white point of ACES is D60 and this is the most-used white point of cinema-oriented projects. However, ACES also provides transforms that adapt to D65, which is commonly used for video-oriented projects. Ideally, the display device would be calibrated to match the creative white point, but this is not always possible. In those cases, the ACES system provides Output Transforms labeled “D60 sim.” to simulate the D60 white point on a device calibrated to another white point (such as D65 or DCI).
ACES Color Spaces
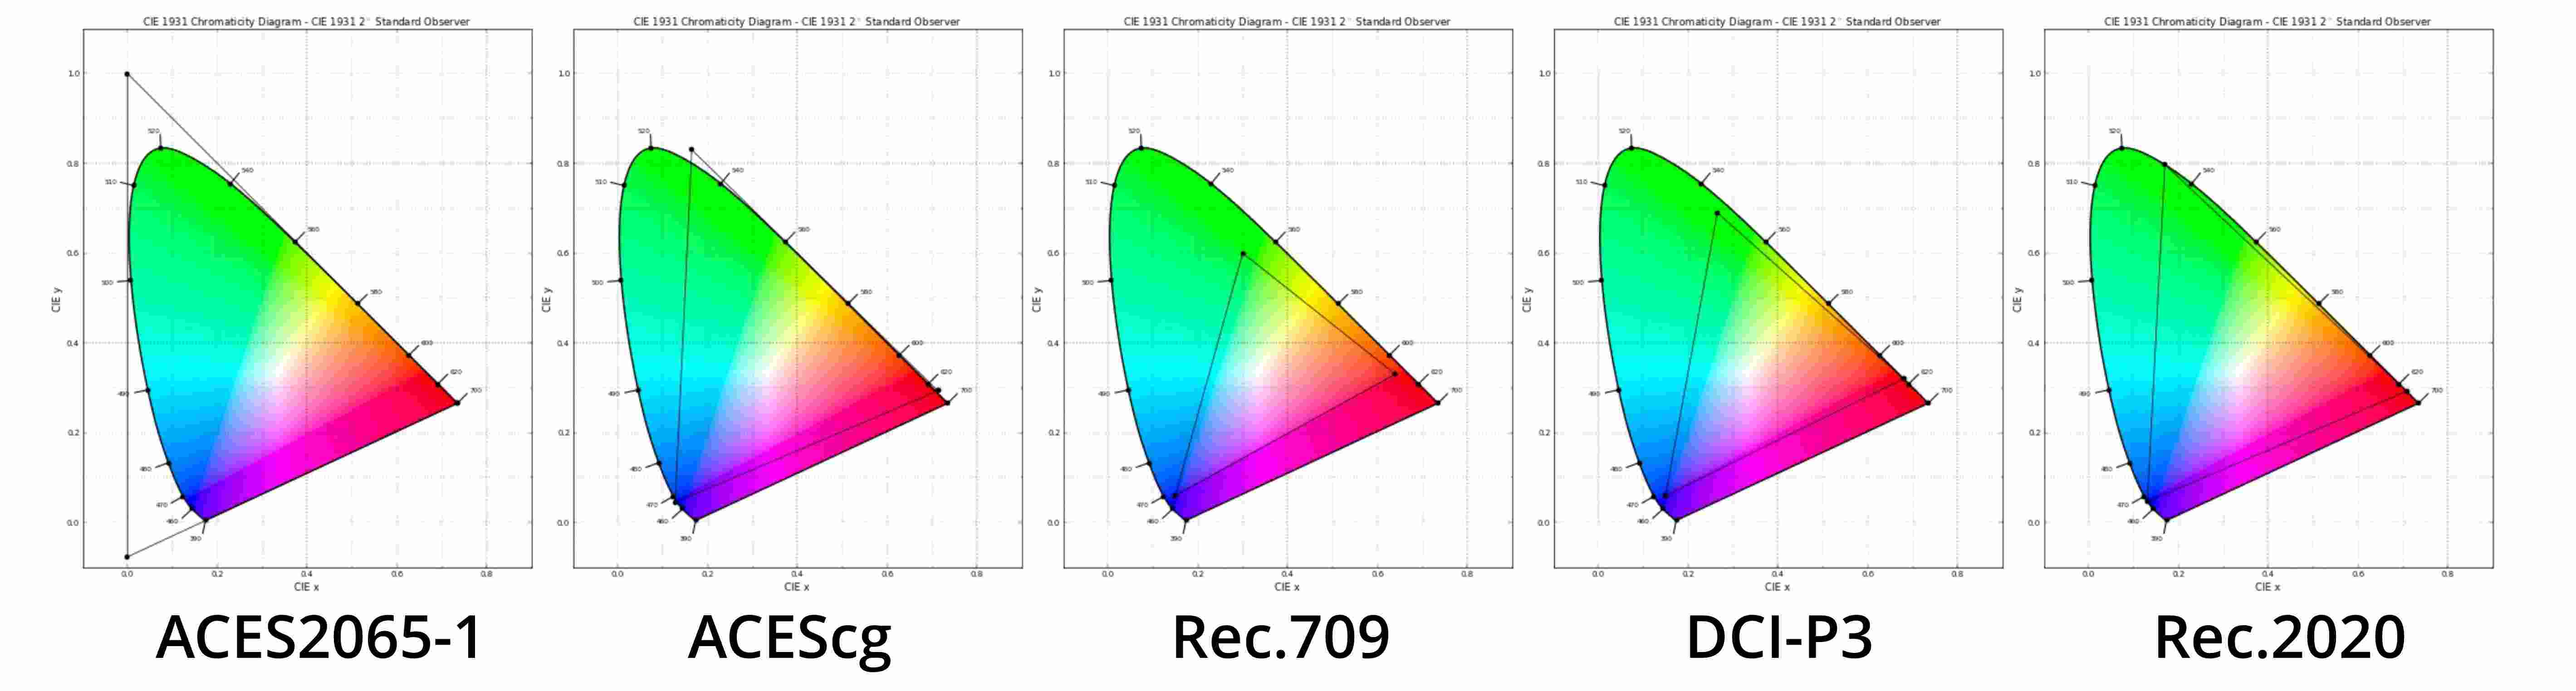
ACES contains different color spaces, we will look at the main ones:
ACES 2065- 1 – This is a wide-range Linear, color space, with a larger coverage than the human eye, so it is used for archival copies and transfer of material between departments. ACEScc and ACEScct – Logarithmic color spaces intended for color correction. ACEScg – This is a Linear space for working with CG/VFX. This is the space you need to use as the main color space for working with color set-up and light in your rendered images.
For simplicity, the default OCIO config file in Maya contains only the most important transforms and color spaces. The instructions below are written using the open-source ACES config that is widely used in workflows with other applications, and which contains a larger set of transforms. However most of these extra transforms are rarely used in practice, so it is recommended to use the default Maya transform if you are just starting out.
Workflow
Download
-
-
-
- First, download the OpenColorIO (OCIO) configuration package for core ACES transforms: https://github.com/colour-science/OpenColorIO-Configs
-
-
Set OCIO Config Path
This can be done in two ways:
-
-
-
- Next, add the path to the downloaded ACES configuration in Maya (most 3D graphics packages already contain a predefined configuration package), but in this case, we will use the downloaded version.
- Install the OCIO variable with the path to the config.ocio file. This can vary according to your system (you can install OCIO as the default color configuration for all apps). This can be in the Maya.env or in the user Preferences (similar to the OS variable but only for Maya). For example:
OCIO = C:\OCIO\aces_1.2\config.ocio
-
-
-
-
-
- Or you can set the path to the config.ocio file in the Maya Preferences for working with projects.
-
-
We will consider the second option:
-
-
-
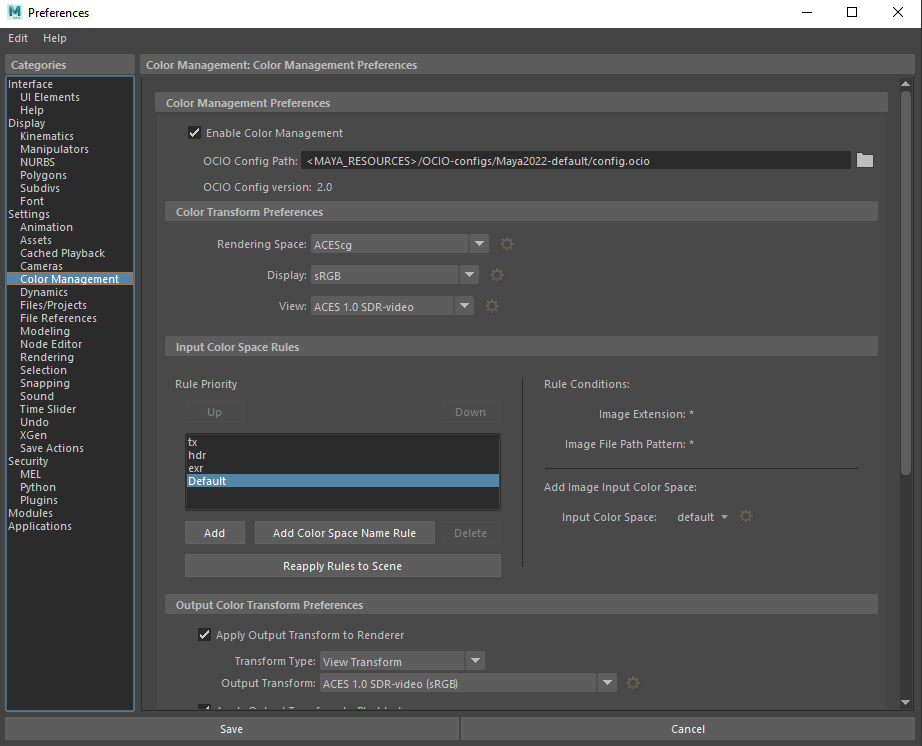
- Start Maya and create a New Project. Open the Preferences window (Windows -> Settings/Preferences -> Preferences). Go to the Color Management
-
-
Color Management Preferences
-
-
-
- Set the path to config.ocio at OCIO Config Path
- Enable Use OCIO Configuration
-
-
Set Transform Preferences
-
-
-
- Rendering Space ACES – ACEScg.
- Set the View Transform option based on the discussion above in section ACES Output Transform Choices. For example: “sRGB (ACES)”.
-
-
Define Color Space Rules
Now, to configure the default color space assigned to textures, you should go to the Input Color Space Rules in Preferences. If your workflow involves putting a color space name (from the config) somewhere in the file path, use the Add Color Space Name Rule button. Or you can define other rules based on the file extension or some other aspect of the naming.
The main color spaces for conversion will be:
-
-
-
- Scene-linear Rec.709-sRGB– for Linear images that use the Rec.709 or sRGB primaries/gamut (which are the same).
- RAW– for images that do not require conversion (scalar masks, Displacement, Roughness).
- sRGB– recommended color space for sRGB image textures 8-16 bit (JPEG, PNG).
- ACEScg– Color space for images that are already converted to ACEScg.
-
-
When converting images to sRGB, they will appear darker than the original. Don’t worry as it is normal and gives you the opportunity to work with higher light values without losing contrast.
For all other images, not converted to ACEScg, you will need to individually set up the color space for the Image and File nodes.
If you create a project with ACEScg as the rendering space, remember to set the Color Space so that all images get correctly converted to ACEScg. Images in other color spaces will look wrong without conversion.
iRender - The most powerful rendering service for Maya
iRender provides you a high-performance and configurable server system for 3D rendering, AI Training, VR & AR, simulation, etc. We believe that design and creative activities are private and personal that only you artists will know what you want with your animation.
You can create a machine then install Maya with these tools on our remote machine (first time access only), add license, and render with any render engines, like Redshift, V-Ray, Arnold, etc.
We suggest our multi RTX4090s or RTX3090s for Maya. Especially Redshift, V-Ray can utilize multiple GPUs system really good. Arnold latest version is also upgraded to be able to support multiple GPUs more.
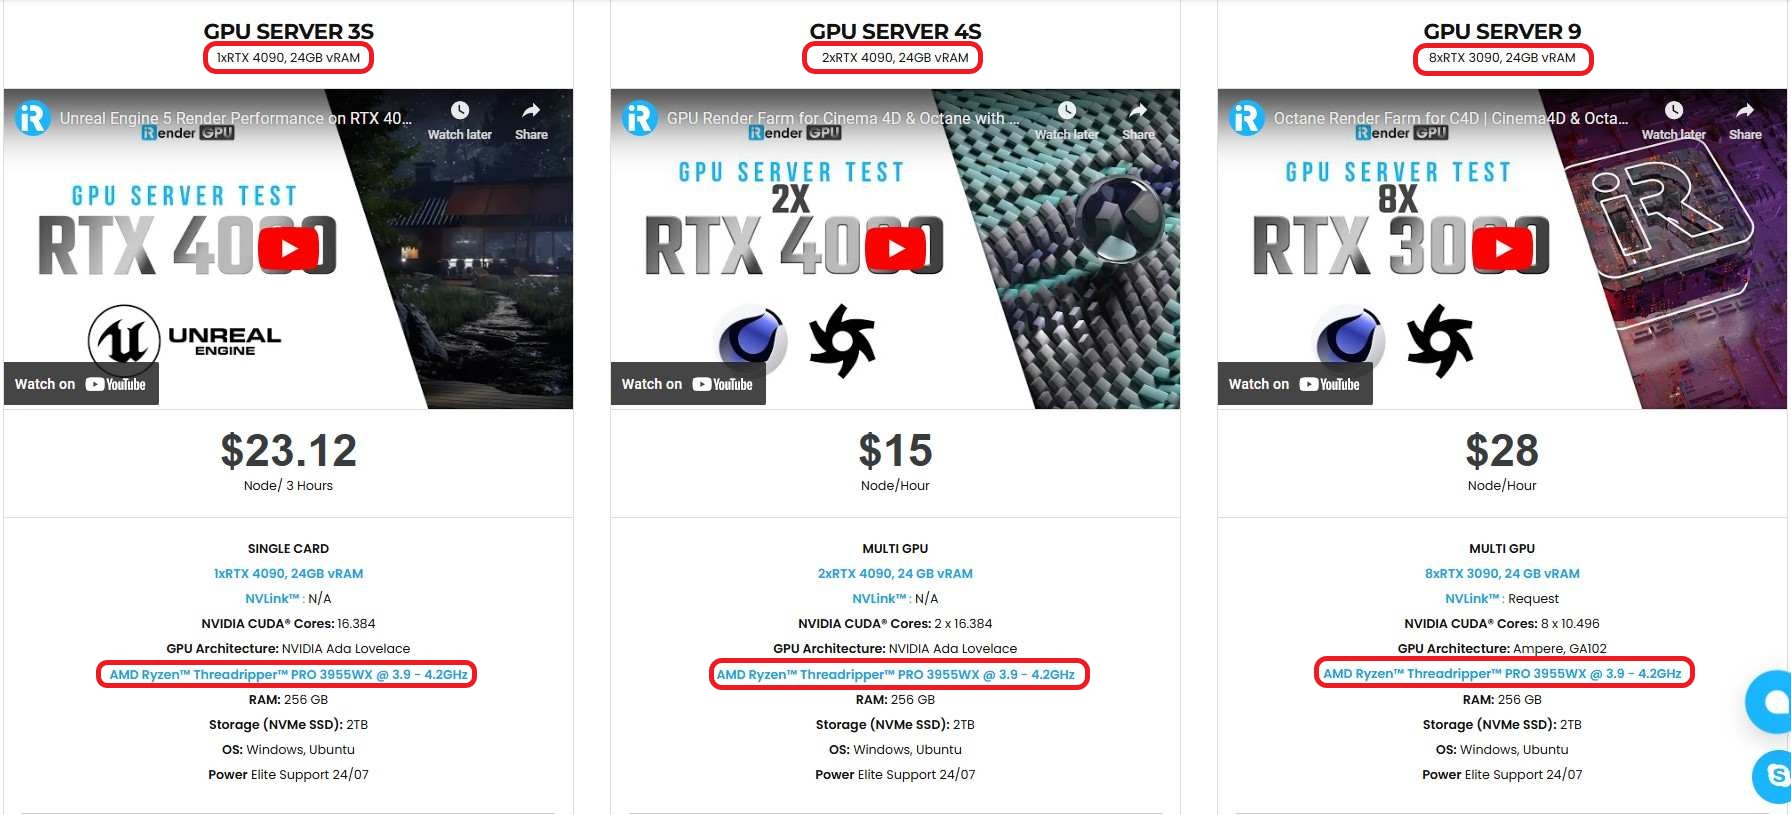
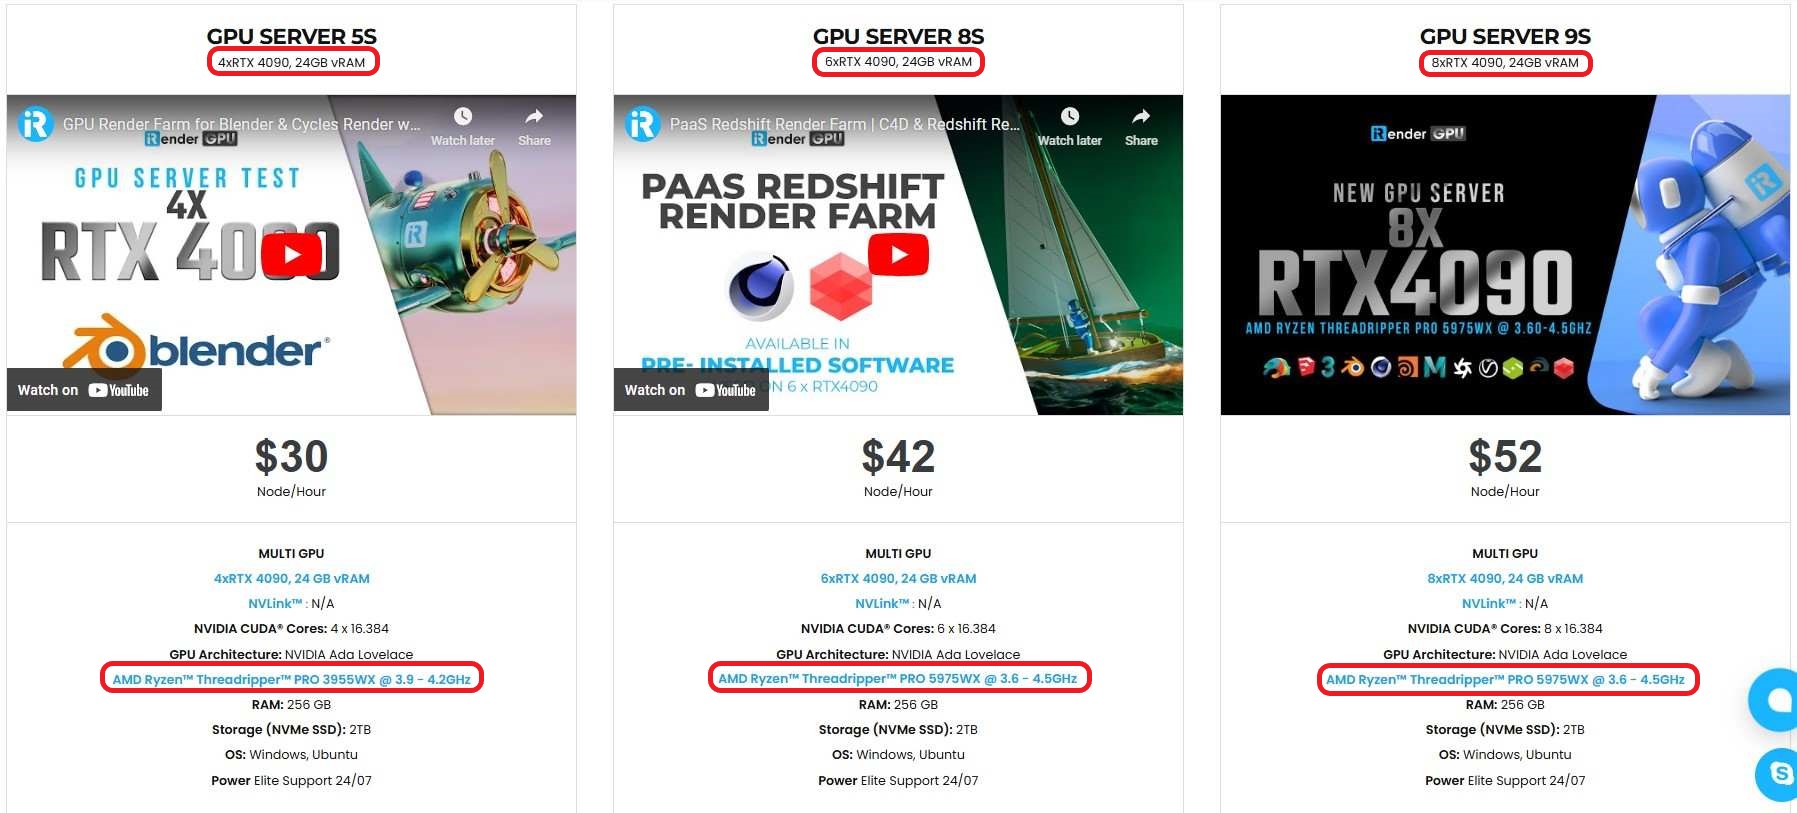
Let’s see some tests on our servers for Maya with Redshift, V-Ray and Arnold:


iRender also provides you more services. We have a useful and free transferring tool named iRender drive for macOS or Linux users. For Windows users, we recommend using our all-in-one application iRender GPU to work, and you don’t need to come to our website. Our price is flexible with hourly rental which has a pay-as-you-go basis, daily/ weekly/ monthly subscription with discount from 10-20%. Plus, you have 24/7 support service via livechat with real humans who will support you whenever you encounter an issue.
Especially, if you use Maya with Redshift, now you can access our remote servers use our Redshift license for free. For Maya, kindly install and use your license.
Register an account today to experience our service and enjoy a very big promotion 100% bonus for new user. Or contact us via WhatsApp: (+84) 916806116 for advice and support.
Thank you & Happy Rendering!
Source: Doug Walker and Slava Sych from autodesk.com
Related Posts
The latest creative news from Redshift Cloud Rendering, Maya Cloud Rendering