
Get Started with Octane for Blender
Since 2019, Otoy has offered a free, fully functional renderer for Daz Studio, Unreal Engine, and Blender. The Octane render engine, the fastest and most feature-rich renderer in the world, now seamlessly integrates with Blender. In this article, you will discover how to get started with a free edition of Octane for Blender.
How to get Octane Render Prime for Blender?
- Create a new account at OTOY Account on the Otoy website if you don’t already have one.
- Visit this page to sign up for OctaneServer Prime (Free Trier) and click the red “Try now” button.
- Octane Render Prime for Blender and OctaneServer Prime will be downloaded and installed. When downloading files, your browser will warn you that the files are unsafe and that you should skip them and let the browser save them to your hard drive instead. Non-signed installers will be blocked by Windows and macOS; you must nevertheless enable them to run.
- Start OctaneServer Prime and log in with the account information you gave in step one. Enable it. The application is operating covertly in the Windows system tray if you can’t find it.
- Launch the version of Blender installed at position #2.
Please be aware that although though Blender Octane Edition is a different program, all previously installed settings and add-ons for Blender 2.92 will be imported.
App launch - initial configuration
You would need Octane Server Prime with an activated license running in the background in order to use Blender Octane Edition. You must first configure several things and save them as Startup Files.
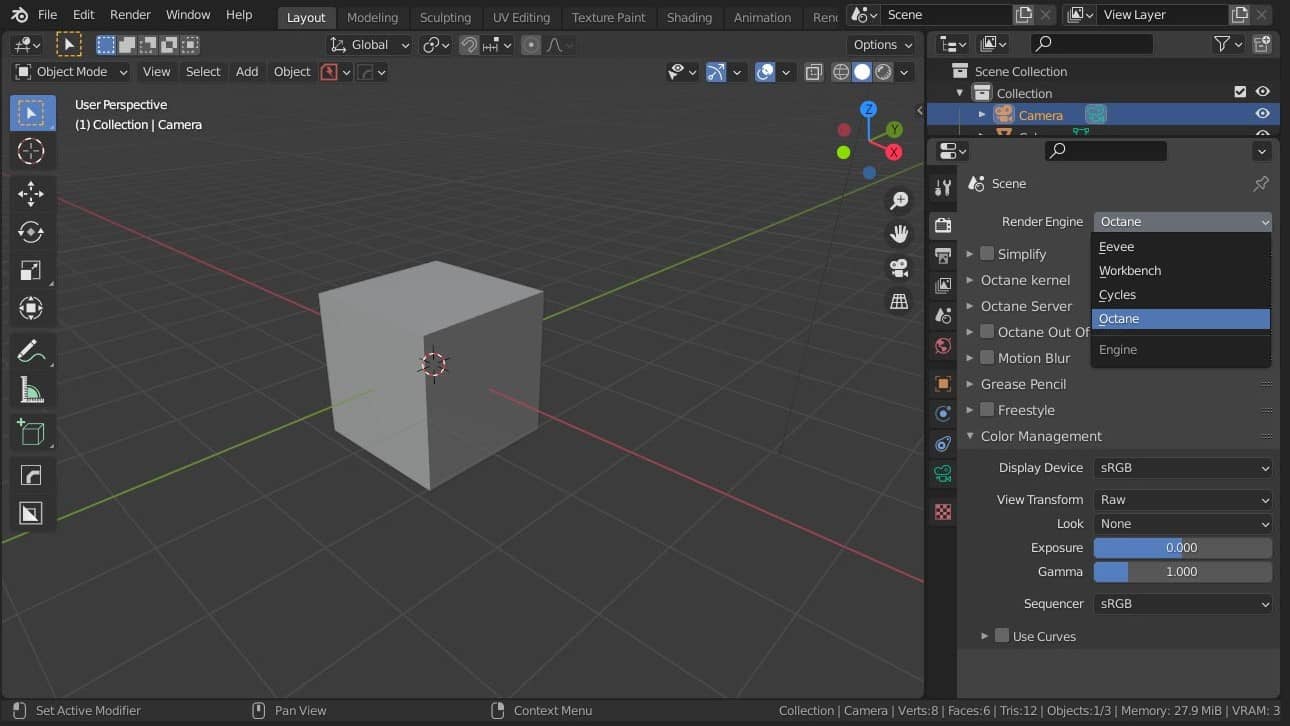
- Change the rendering engine to Octane in Blender’s Render Properties tab.
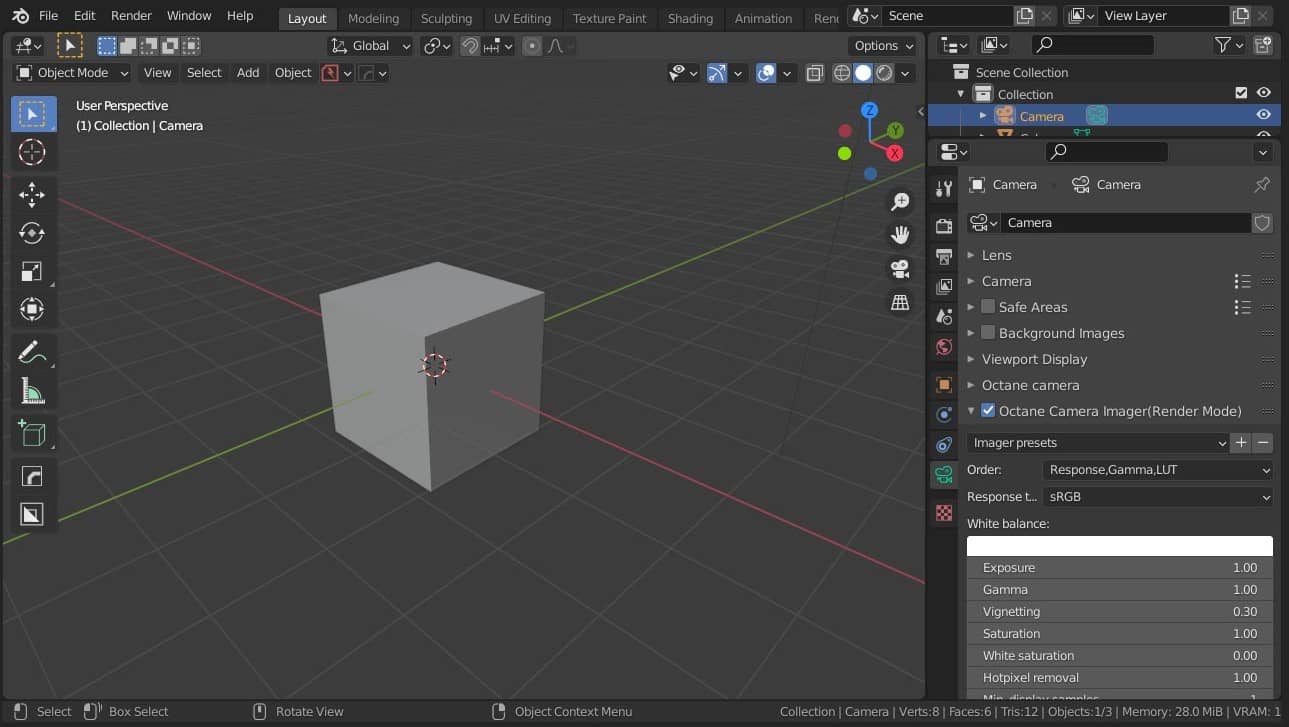
2. Let’s now address the gamma viewport issue. Choose Camera, then turn on Octane Camera Imager. Pick sRGB as the answer type. Set it to RAW under Render Properties > Color Management > View Transform. Gamma must be set to 1.00.
3. You’re all set to go. Save preferences so you won’t have to go through those procedures again when you launch Blender Octane Edition in the future. Go to File > Defaults > Save Startup File to save the startup file.
The Octane Render preview can now be activated by switching to Viewport Shading. Rendering is somewhat dull because the default cube has no materials added and uses Daylight Environment lighting. Let’s configure texture illumination using an HDRI map.
Set up HDRI Map
- Select Texture Environment under World Properties > Environment > Octane Environment.
- Click on the yellow dot to the left of the Texture space below to reveal possibilities. Choose Image Tex and set 32-Bit float as the value. Open the HDRI map and change the Gamma value to 1.0
- You must set Projection to Spherical Projection and Sphere Transformation to 3D Transform in order to be able to rotate and scale HDRI Environment. Use X-axis rotation to rotate (when YXZ is selected)
- Octane Nodes are set up for hdri when you switch Blender’s context to Shader Editor and World (Shift + F3). For backplate, reflection, and refraction textures, the Texture Environment node includes three different inserts that can be utilized as needed.

Octane and Shadow Catcher
It’s simple to set up Shadow Catcher in Octane.
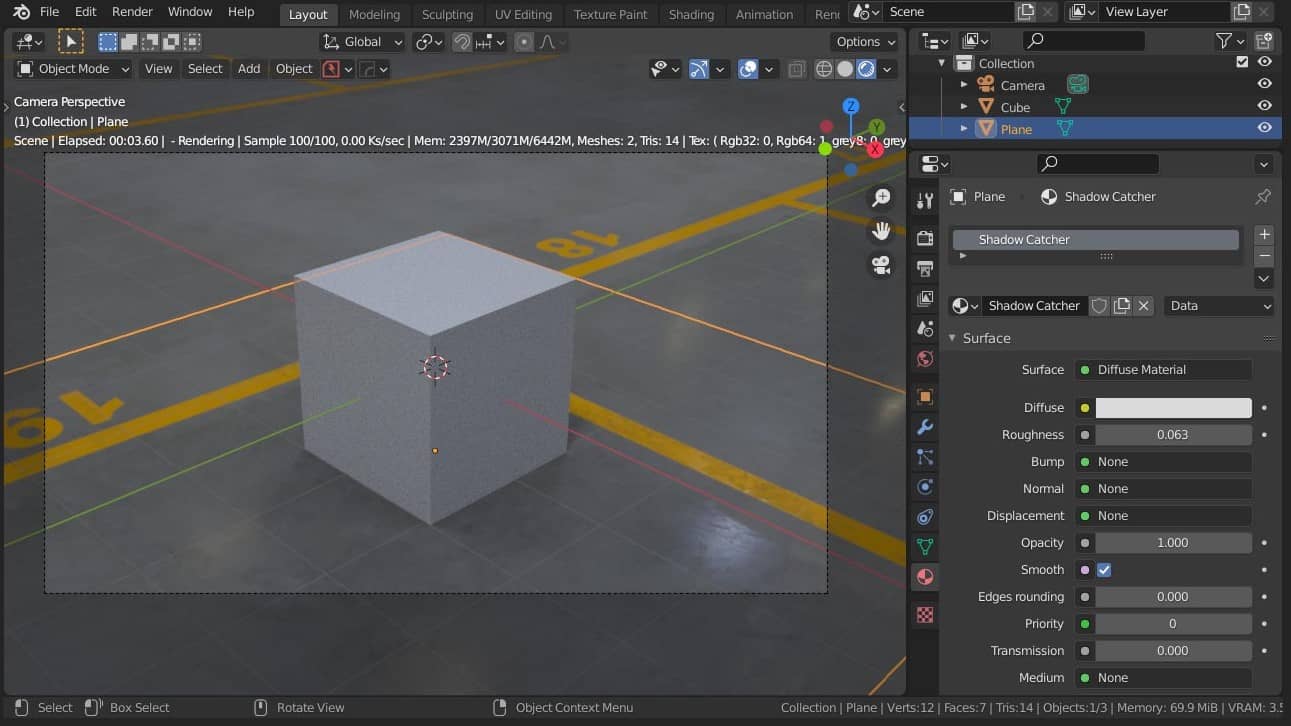
- Add a plane underneath the cube and scale it up to capture all shadows.
- If you like to do it in the node editor, just add Diffuse Material from Octane Shaders when adding a new material and choosing Diffuse Material for the Surface.
- Mark the “Material Properties” “Shadow Catcher” option.
This article will not discuss the topic of generating Octane Materials because it is rather extensive. The official documentation website for Otoy has all the information you require. It works great with Blender and you can test out some amazing materials right from Octane DB.
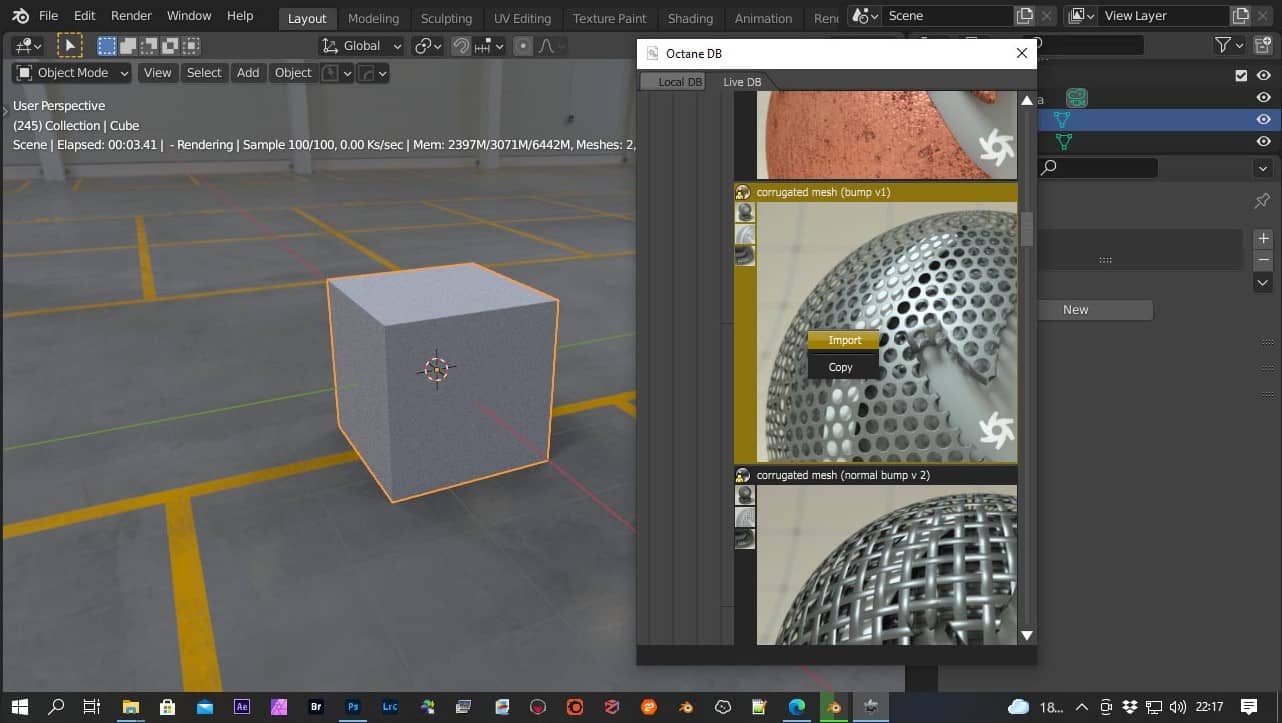
Octane DB
The Window > Octane DB option in Blender’s upper menu will enable the Octane materials database. Before you begin to peruse the online resources, please give it some time to load. Geometry must first be selected before applying material. Then, right-click the material and select Import.
Conclusion

Hopefully the above information will help you get started easier with Octane for Blender.
iRender provides Powerful Cloud Rendering service for Octane– a Professional GPU – Acceleration Cloud Rendering for Octane for Blender projects. At iRender, we have developed multiple RTX 3090 workstations specifically optimized and configured for GPU rendering workflows, from single- GPU 1x RTX 3090 to Multi-GPU 2/4/6/8 x RTX 3090, you can choose one server that is suitable for your demand and your software to get started.
You are guaranteed to experience maximum performance for your budget. Users will remotely connect to our server, install their software only one time and easily do any intensive tasks like using their local computers. We offer clients the powerful processor Intel Xeon W-2245 @ 3.90GHz / AMD Ryzen Threadripper Pro 3955WX @ 3.90GHz and up to 2 TB SSD to load your scene quickly.
Register an account today for FREE TESTING COUPON to experience our service. Or contact us via WhatsApp: (+84) 912 785 500 for advice and support.
Thank you & Happy Rendering!
Reference source: Hdrmaps.com
Related Posts
The latest creative news from Blender Cloud Rendering, Octane Cloud Rendering, V-Ray Cloud Rendering , 3D VFX Plugins & Cloud Rendering.


