Basic render settings for Maya
In Maya, batch rendering and render sequence rendering are the two main rendering methods. Let’s learn the fundamental basic render settings for Maya with iRender in this article.
Basic Render Settings
Configuring the Render Settings is the first step in either method.
1. To access the “Render Settings” dialog box, either click the icon in the workspace’s upper right corner, or choose Render Render Settings from the “Rendering” menu set.
2. You can choose what and how to render your project by using the two options at the top.
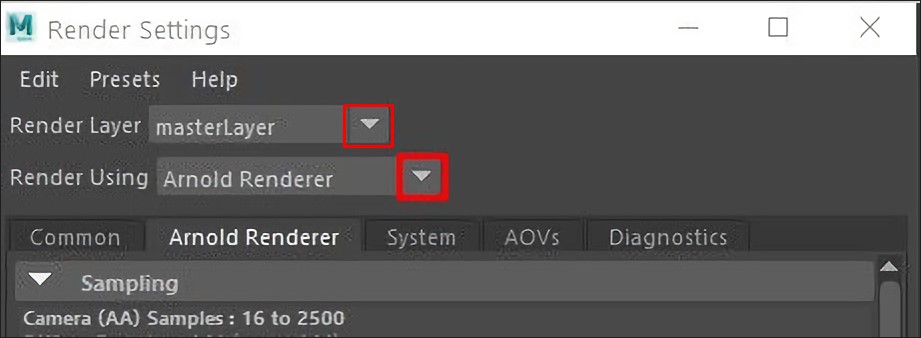
“masterLayer” should always be selected as the render layer.
You can select the renderer you want to use to export your project using Render Using. It is “Maya Software” by default. Leave it set to the default if you are unsure of the renderer you are using.
3. The first section under the “Common” tab, immediately below the previous settings, is “Color Management.” The Apply Output Transform to Renderer box should be left unchecked to guarantee that your output corresponds to your previews.
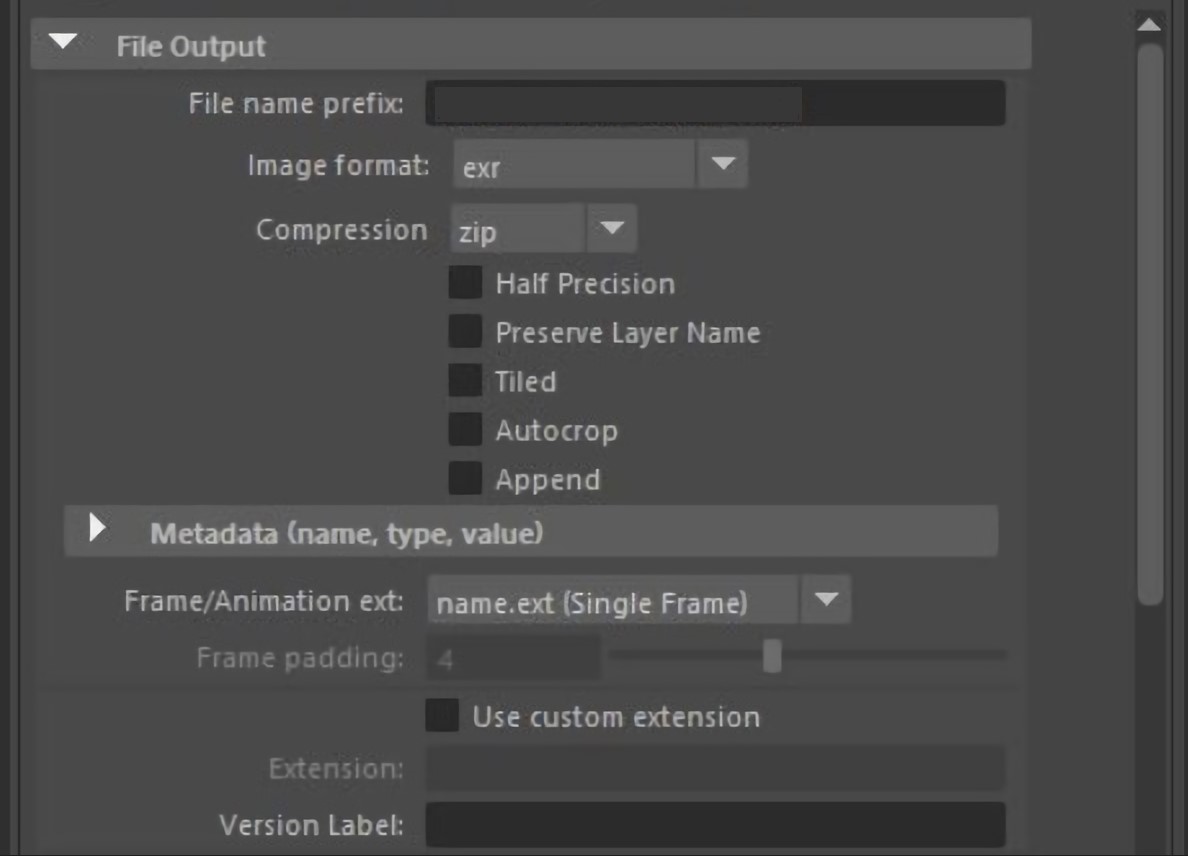
4. You can control the output naming conventions by using the “File Output” section.
Your file’s name is referred to as the “file name prefix,” and it needs to clearly identify your project.
Your render will export as files in image format. Tiff is a good option because it has a lot of data but is still manageably big.
Your filenames will all use the Frame/Animation ext naming convention. The files can be properly interpolated in After Effects with the “name #.ext” option.
The number of digits the frame number will be expressed as is known as frame padding. It ought to be set to the number of digits that your animation’s final frame contains. An animation with 400 frames would be set to “3,” whereas one with 4000 frames would be set to “4”.
5. “Frame Range” enables you to choose which parts of your project to render. Start frame should be set to “1.000” and End frame should be the last frame in your project if you want to render the entire project.
Note: It’s advantageous to have different computers render different frames in this manner.
The rendering increment between frames is referred to as the By frame. Every frame will be rendered with a value of “1.000,” while “3.000” will render every third frame, and so on.
6. Verify that the camera you animated is listed as a renderable camera under “Renderable Cameras” rather than “pesp,” which would repeatedly render the perspective view.
While depth channel (Z depth) and alpha channel (Mask) are useful for advanced composting, they can typically be left in their default settings.
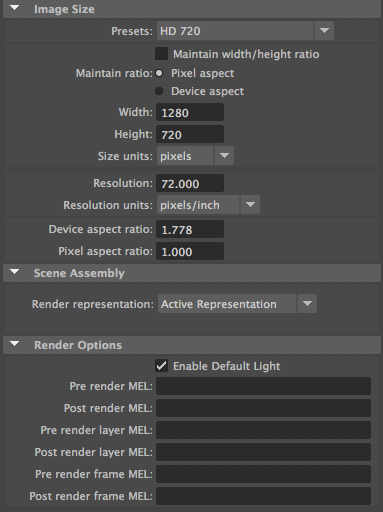
7. “Image Size” enables you to change the project’s output resolution. For the majority of projects, selecting “HD 720” or “HD 1080” from the Presets menu is the right choice. The presets option automatically modifies the other section’s settings.
8. Leave “Scene Assembly” and “Render Options,” which are shown to the right, at their default settings.
Batch Render
You can continue working in Maya or elsewhere on the computer while a batch render exports your project in the background.
To begin rendering, choose Render -> Batch Render from the “Rendering” menu set.
The lower right status bar in Maya will display the render’s current status.
The “images” folder in your project directory will by default contain the exported images.
And, it should be noted that files created by a batch render using the Arnold Renderer will have a watermark; to avoid this, render using the Render Sequence Process described in the next section.
Render Sequence
Similar to the Render View, Render Sequence will let you preview your frames as they render and use Arnold to produce watermark-free results.
1. To configure additional render settings, choose Render > Render Sequence from the “Rendering” menu set.
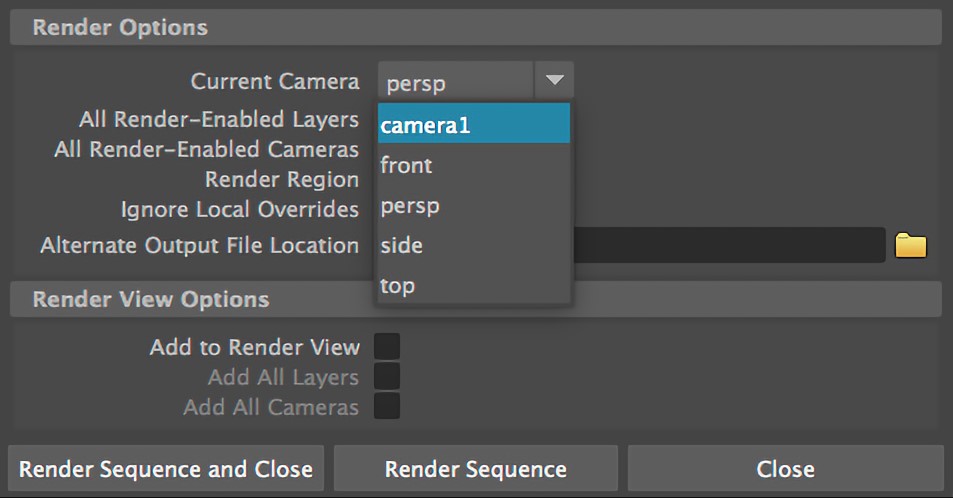
2. Verify that Current Camera is set to your animated camera because it may not always read the rendering settings you set in “Render Settings.”
3. You should leave the remaining selections in their pre-checked state.
4. To start the rendering process, select “Render Sequence and Close.” Your frames will be rendered and displayed in a Render View window. When finished, your frames will by default be located in the “images” folder of your project directory.
iRender - Cloud Render Service for Maya
Maya often come with third render engines like Redshift, Octane, V-Ray, Arnold, etc.. Whether or not you use any of those render engine, you still can find a suitable package at iRender.
We provide high-configuration dedicated servers (physical computers/machines) specifically optimized for GPU rendering. Using our service, you will have complete control over the server(s) you rent through the Remote Desktop application. Therefore, you can customize your creative working environment as you wish. In short, iRender’s server is like your computer in the cloud accessible on any device instantly. You will use its full power for everything. iRender provides useful features to help you switch among the server’s configurations without having to reinstall anything. You can even run multiple servers simultaneously to speed up the renders, not having to re-install anything, either.
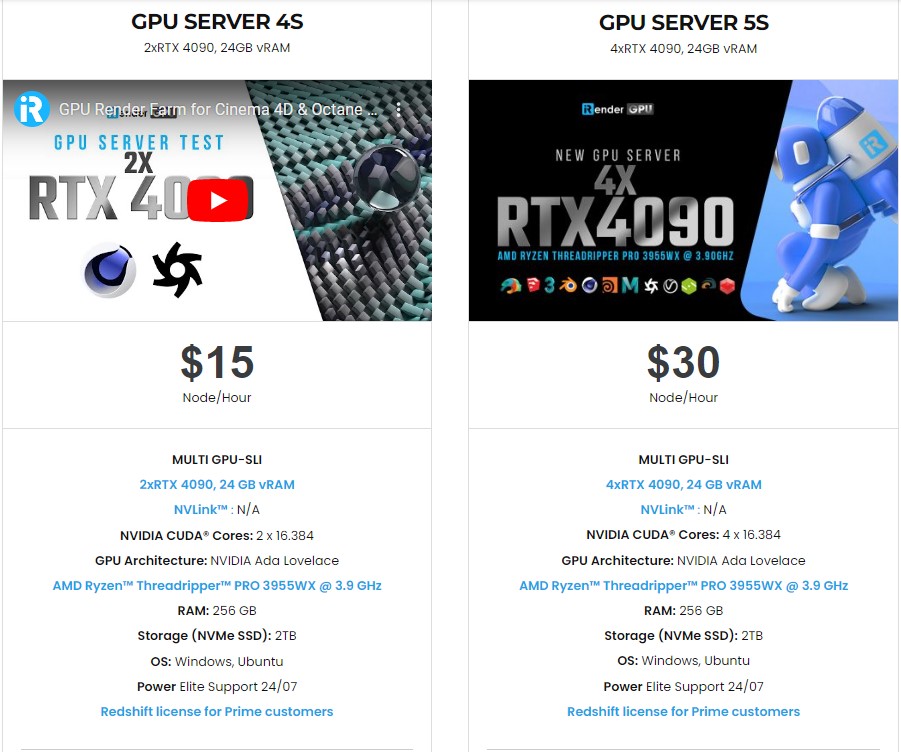
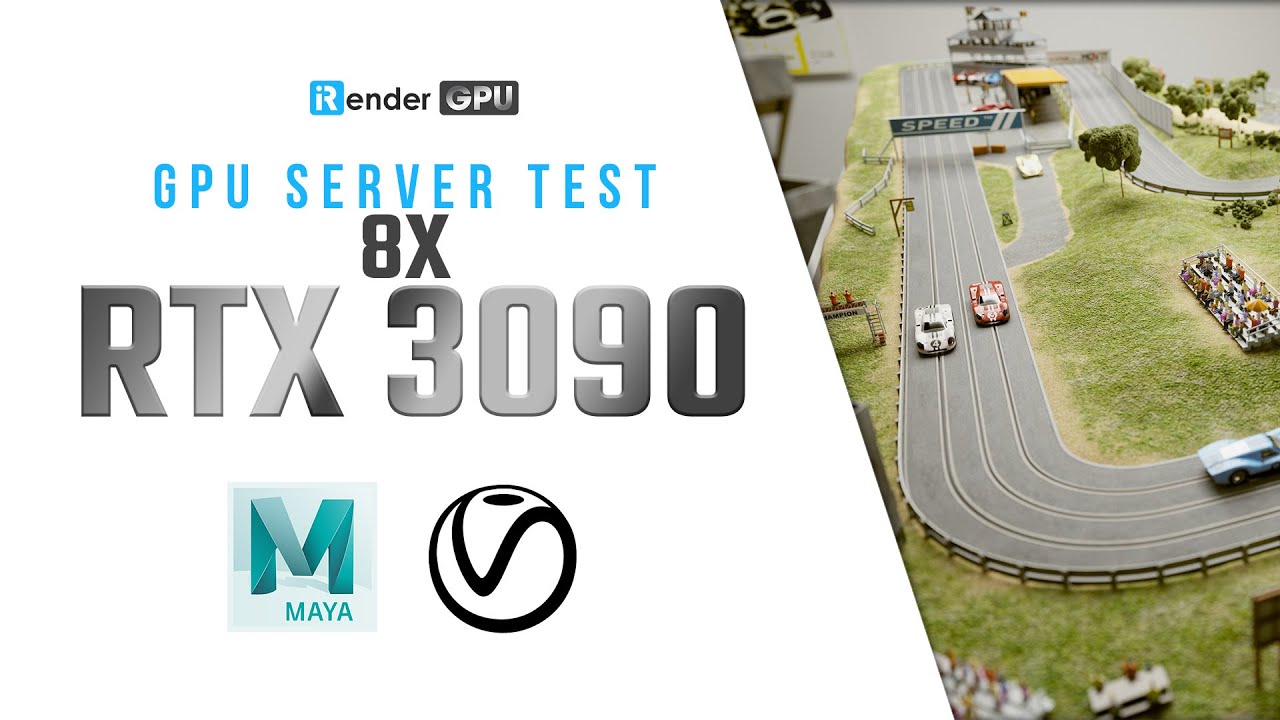
Maya render test with Redshift on our package 8 x RTX3090s:

Not only providing those powerful configurations, you also have 24/7 support service via live chat with real human who will support you whenever you encounter an issue.
Hopes for the optimize 3ds Max scene will helpful for you. Don’t forget, to register an account today to experience our service, or reach out to us for advice and support.
Thank you & Happy Rendering!
Source: knowledge.autodesk.com
Related Posts
The latest creative news from 3ds Max Cloud Rendering, Maya Cloud Rendering , Redshift Cloud Rendering.